How To
Summary
In InfoSphere Information Server 11.7.1.1 Service Pack 2, support for usage of OpenID Connect is added to a limited set of Information Server web applications.
After the Service Pack is installed, OpenID Connect must be installed and configured. OpenID Connect is only supported in WebSphere Application Server Network Deployment installations.
Objective
Setup and use OpenID Connect in some Information Server web applications.
Environment
Information Server 11.7.1.1 with Service Pack 2, and OpenID Connect.
Steps
1) Install OpenID Connect
- You can get the latest OpenID Connect fix pack from technote.
- In Configuring an OpenID Connect Relying Party, see step 12 for instructions to install the OpenID Connect application.
2) Configure OpenID Connect provider’s client
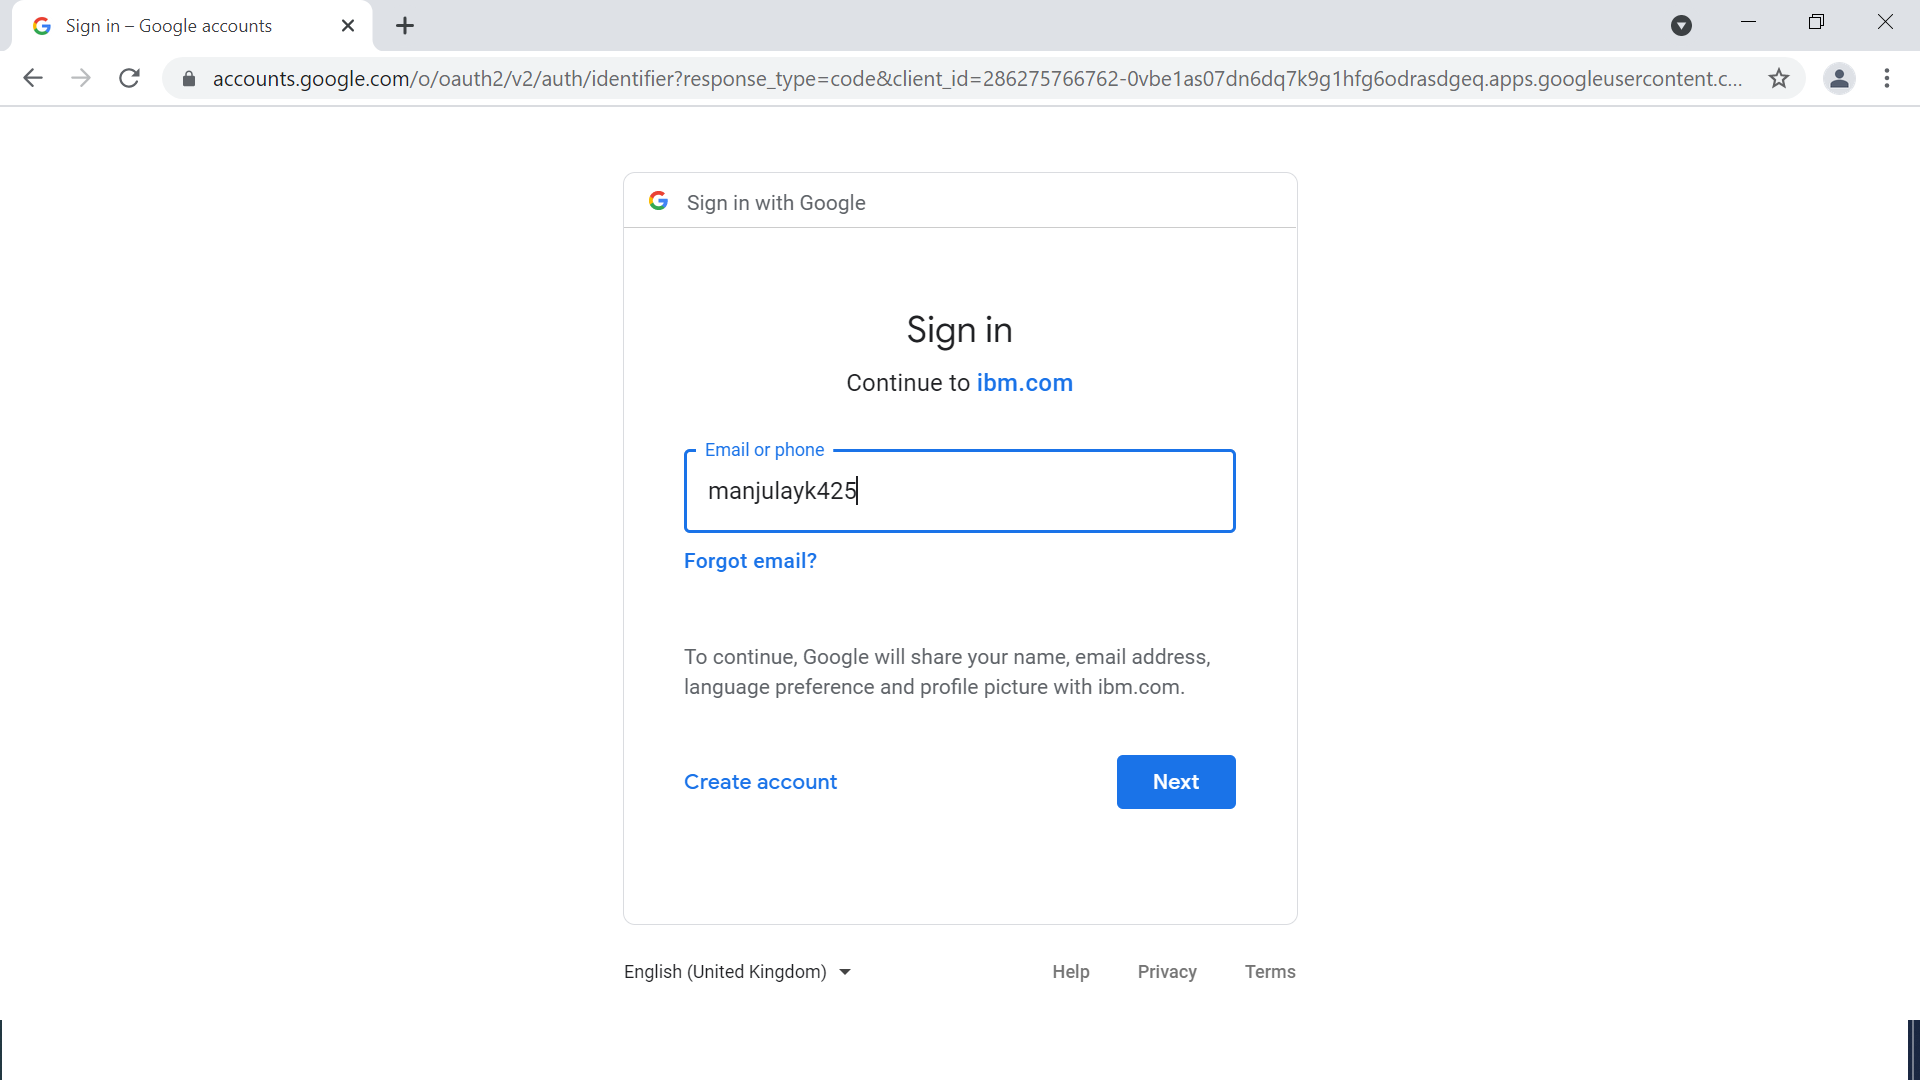
How can I set up my Google™ API Console project so that I can use the Google OP with the WebSphere OIDC TAI?
3) Configure OpenID Connect in WebSphere administration console
Open the WebSphere administration console.
3.1) Set TAI Custom properties
- Click Security > Global security > Web and SIP security > Trust association.
- Click Interceptors.
- Click New to add an interceptor.
- Enter the interceptor class name: com.ibm.ws.security.oidc.client.RelyingParty.

- Add custom properties for your environment. The following custom properties are required.
See OpenID Connect Relying Party custom properties for details of each property:
provider_1.identifier: Value for this property can be any string. For example, if it is specified as "rp" then append the same string at the end of the redirect URL in OpenID Connect provider’s client configuration, that is, https://<IS_HOST>:<port>/oidcclient/rp
provider_1.discoveryEndpointUrl: This value can be obtained from OpenID Connect provider’s client configuration. By default, it is https://accounts.google.com/.well-known/openid-configuration
provider_1.clientId: This value can be obtained from OpenID Connect provider’s client configuration.
provider_1.clientSecret: This value can be obtained from OpenID Connect provider’s client configuration.
provider_1.filter: This value is fixed. All Information Server web applications that support usage of OpenID Connect are listed here, that is, Launchpad, Operations Console, IMAM, and IA:
request-url^=oidcclient|snoop|/ibm/iis/launchpad/index.jsp|/ibm/iis/ds/console/login.jsp|/ibm/iis/imam/console/loginForm.jsp|/ibm/iis/dq/da/login.jsp
provider_1.useRealm: Specify ASBRealm as the value. This realm uses Information Server internal user repository stored in XMETA database. - Click Apply and save this configuration.
3.2) Set Custom properties
- Depending on your WebSphere installation, click
for Clustered installation:
Security > Security domains > IBM_Information_Server_sd > Custom properties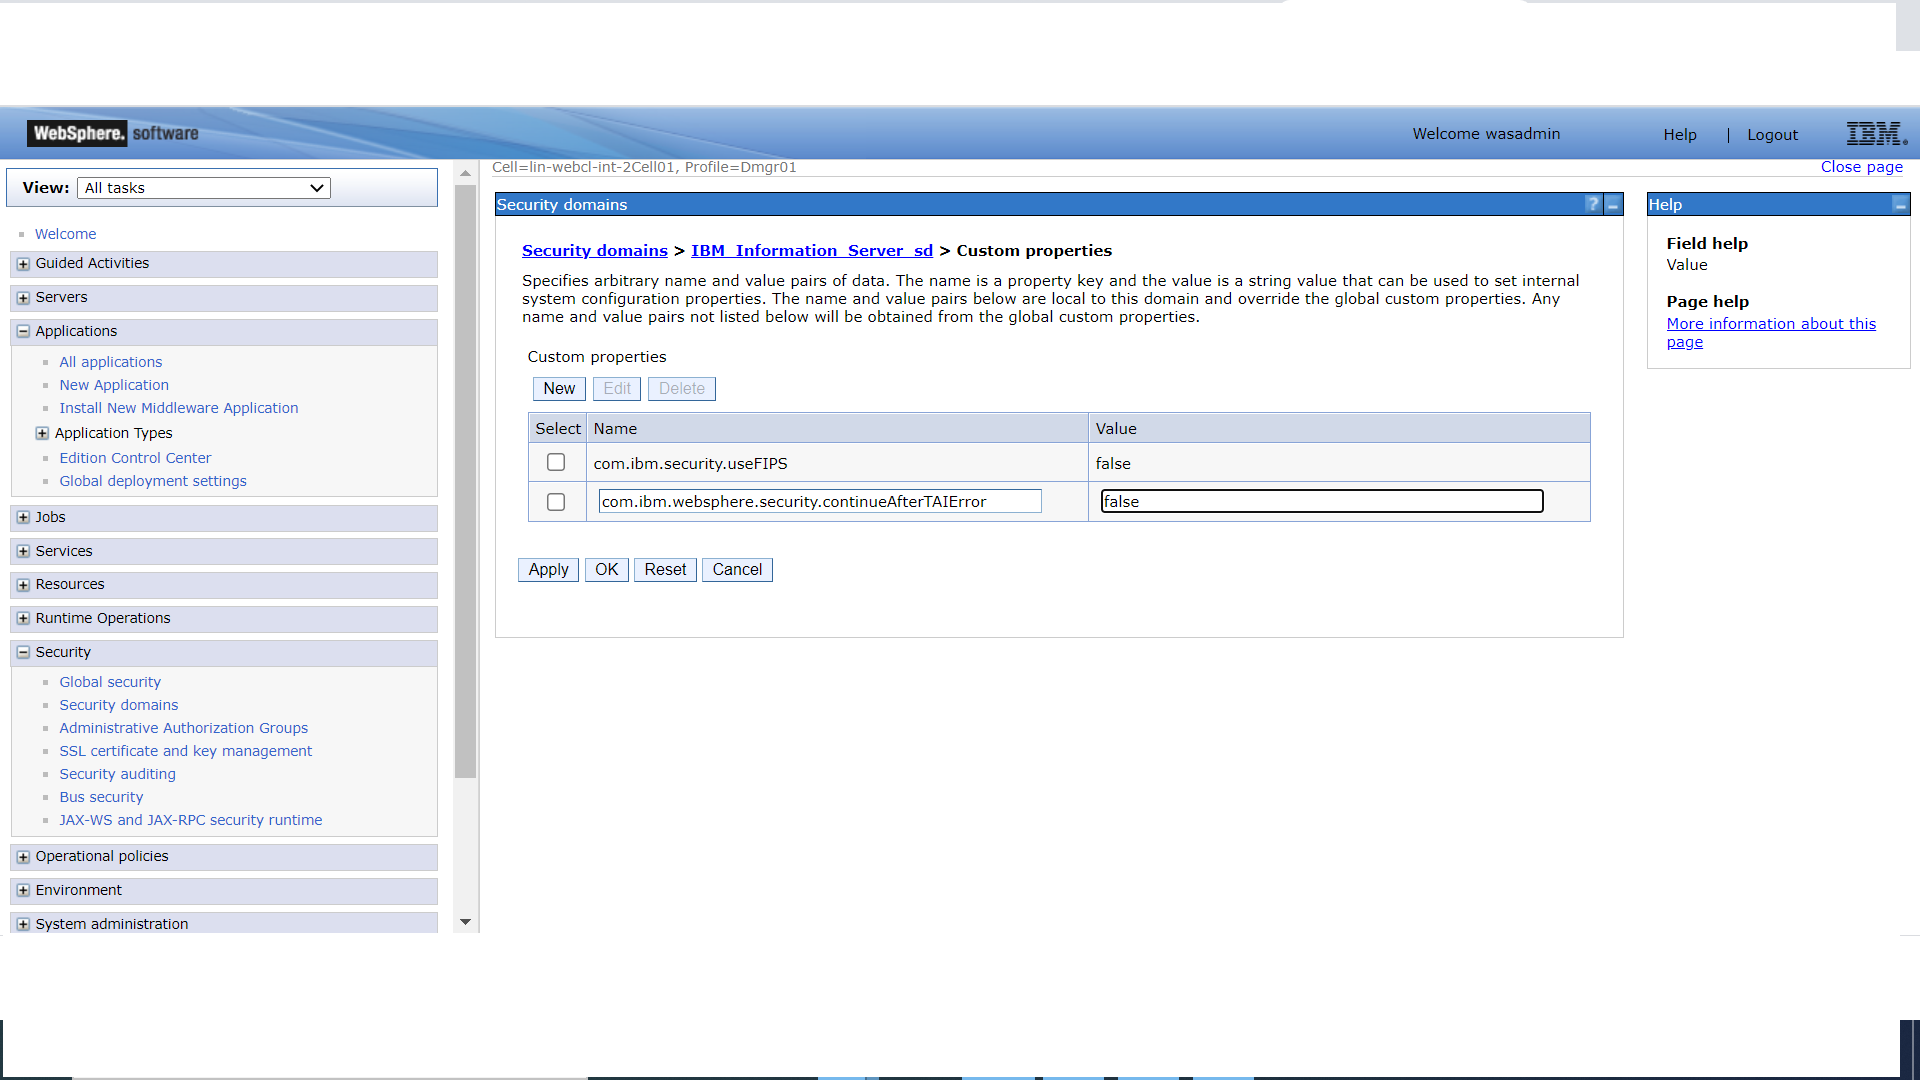
for Stand-alone installation:
Security > Global security > Custom properties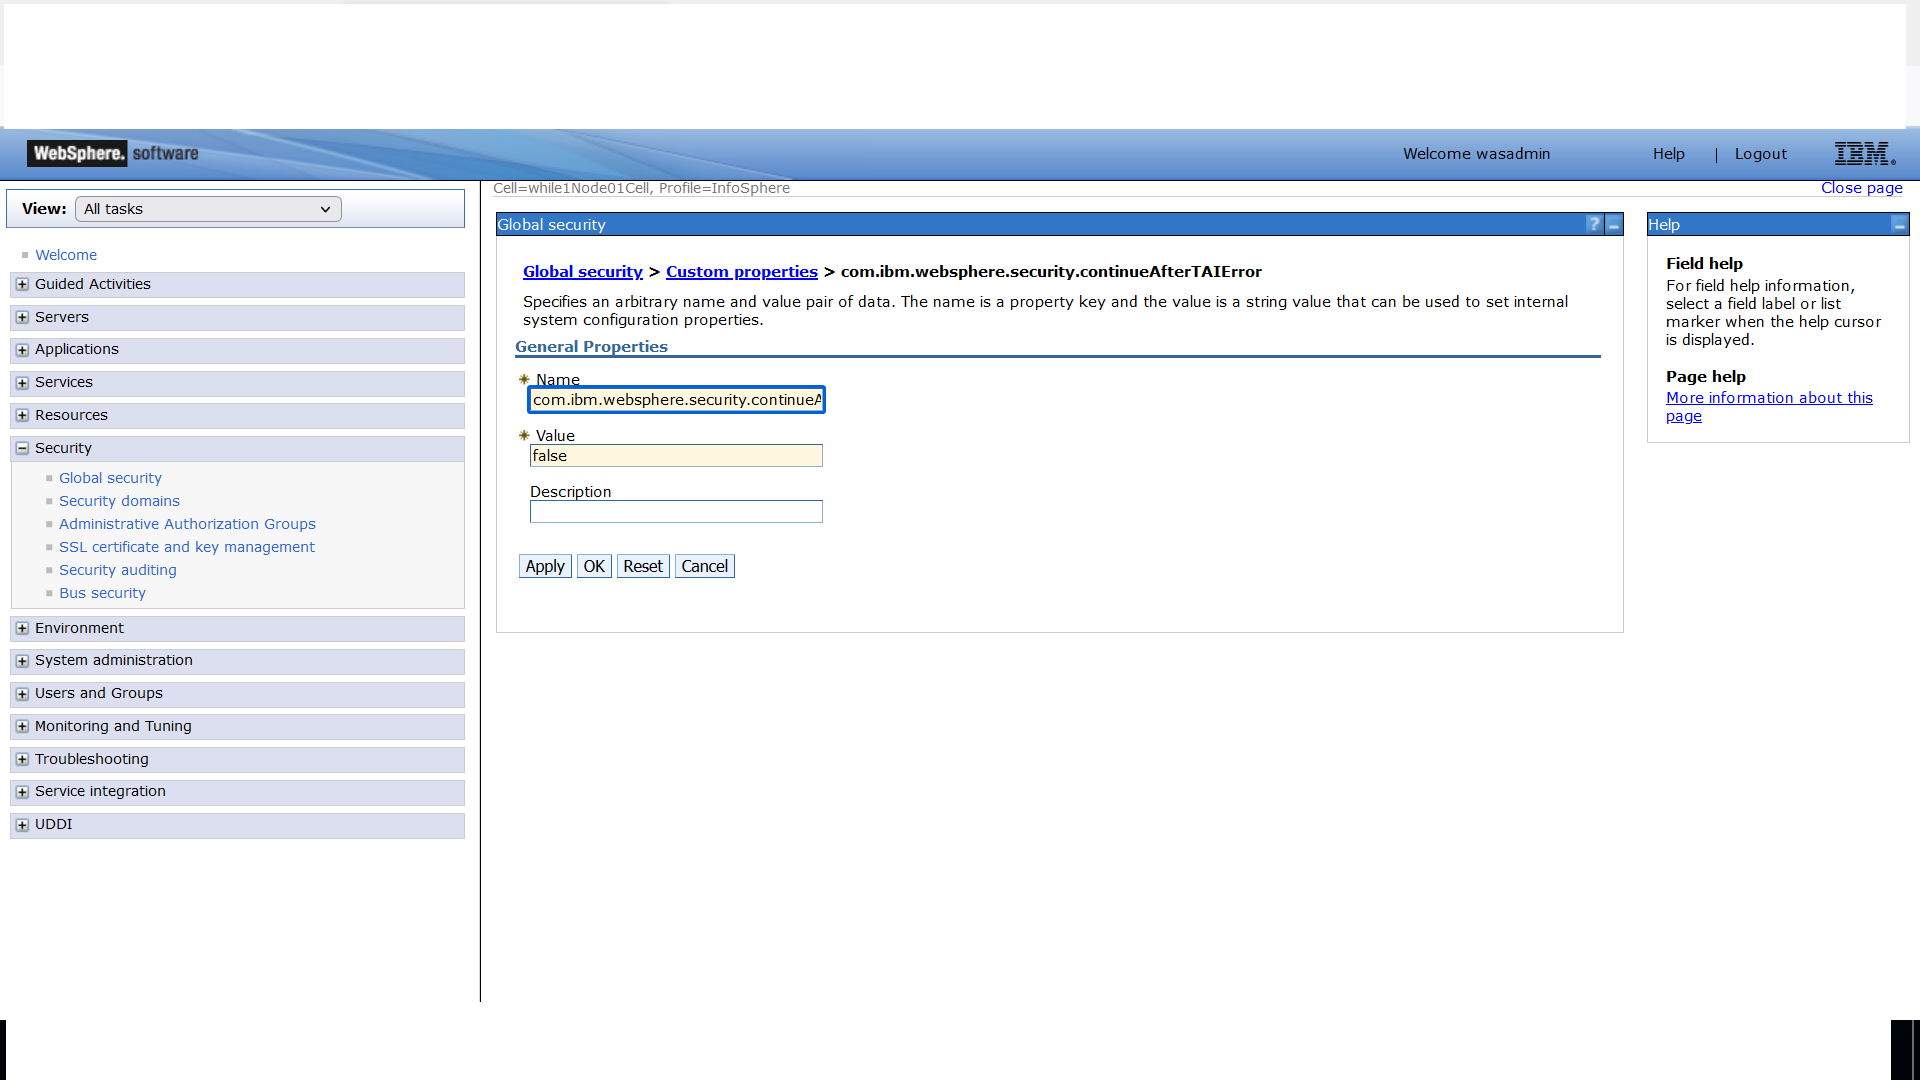
- Set property com.ibm.websphere.security.continueAfterTAIError to false.
- Click Apply and save this configuration.
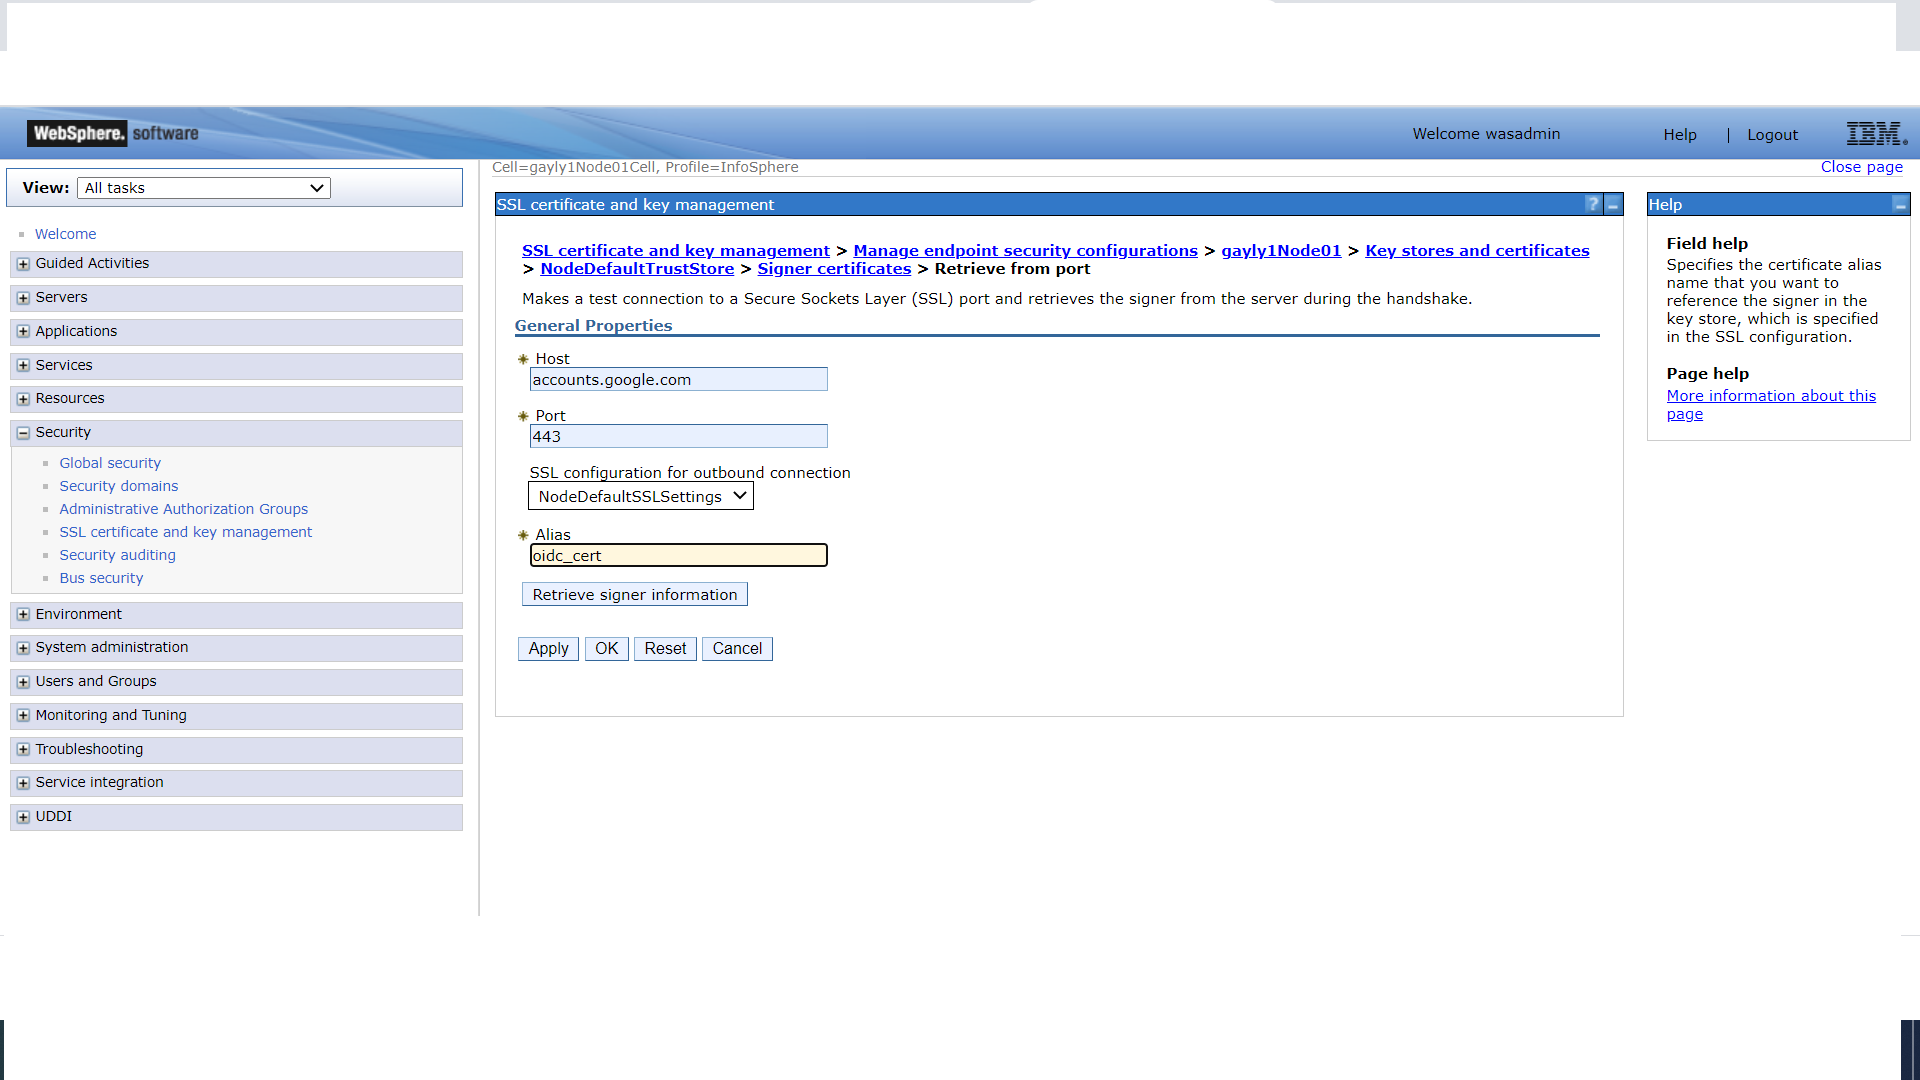
3.3) Import the OpenID Connect provider's SSL signer certificate to the WebSphere Application Server's truststore
- Expand Security and click SSL certificate and key management.
Under Configuration settings, click Manage endpoint security configurations. - Select the appropriate outbound configuration to get to the cell management scope.
- Under Related Items, click Key stores and certificates and if WebSphere is
Clustered: click the CellDefaultTrustStore keystore
Stand-alone: click the NodeDefaultTrustStore keystore - Under Additional Properties, click Signer certificates and Retrieve From Port.
- Provide values for the following as indicated:
Host - OpenID Connect provider's host name
Port - OpenID Connect provider's port
Alias - oidc_cert - Click Retrieve Signer Information.
- Verify that the certificate information is for a certificate that you can trust.
- Click Apply and Save.
4) Configure OpenID Connect in Information Server
Log in to your services tier machine and run the following commands to set OpenID Connect related properties
a. <IS_HOME>/ASBSServer/bin/iisAdmin.sh -set -key com.ibm.iis.isf.security.OpenId -value true
b. <IS_HOME>/ASBSServer/bin/iisAdmin.sh -set -key com.ibm.iis.isf.security.AllowedRefererDomainNames -value <hostDomain>
where hostDomain is the OpenID Connect host domain name. For example, google.com.
a. <IS_HOME>/ASBSServer/bin/iisAdmin.sh -set -key com.ibm.iis.isf.security.OpenId -value true
b. <IS_HOME>/ASBSServer/bin/iisAdmin.sh -set -key com.ibm.iis.isf.security.AllowedRefererDomainNames -value <hostDomain>
where hostDomain is the OpenID Connect host domain name. For example, google.com.
5) Restart WebSphere
Restart WebSphere for all of the above changes to take effect.
6) Information Server applications supported with OpenID Connect
- The following applications are directly supported and intercepted by using the corresponding URLs:
- IIS launchpad – https://<Services tier host>:<port>/ibm/iis/launchpad/index.jsp
- Operation console – https://<Services tier host>:<port>/ibm/iis/ds/console
- Information Analyzer – https://<Services tier host>:<port>/ibm/iis/dq/da
- IMAM - https://<Services tier host>:<port>/ibm/iis/imam/console
- For all other applications available in the Information Server launchpad, the following steps are done:
a. Open the launchpad.
https://<Services tier host>:<port>/ibm/iis/launchpad/index.jsp.
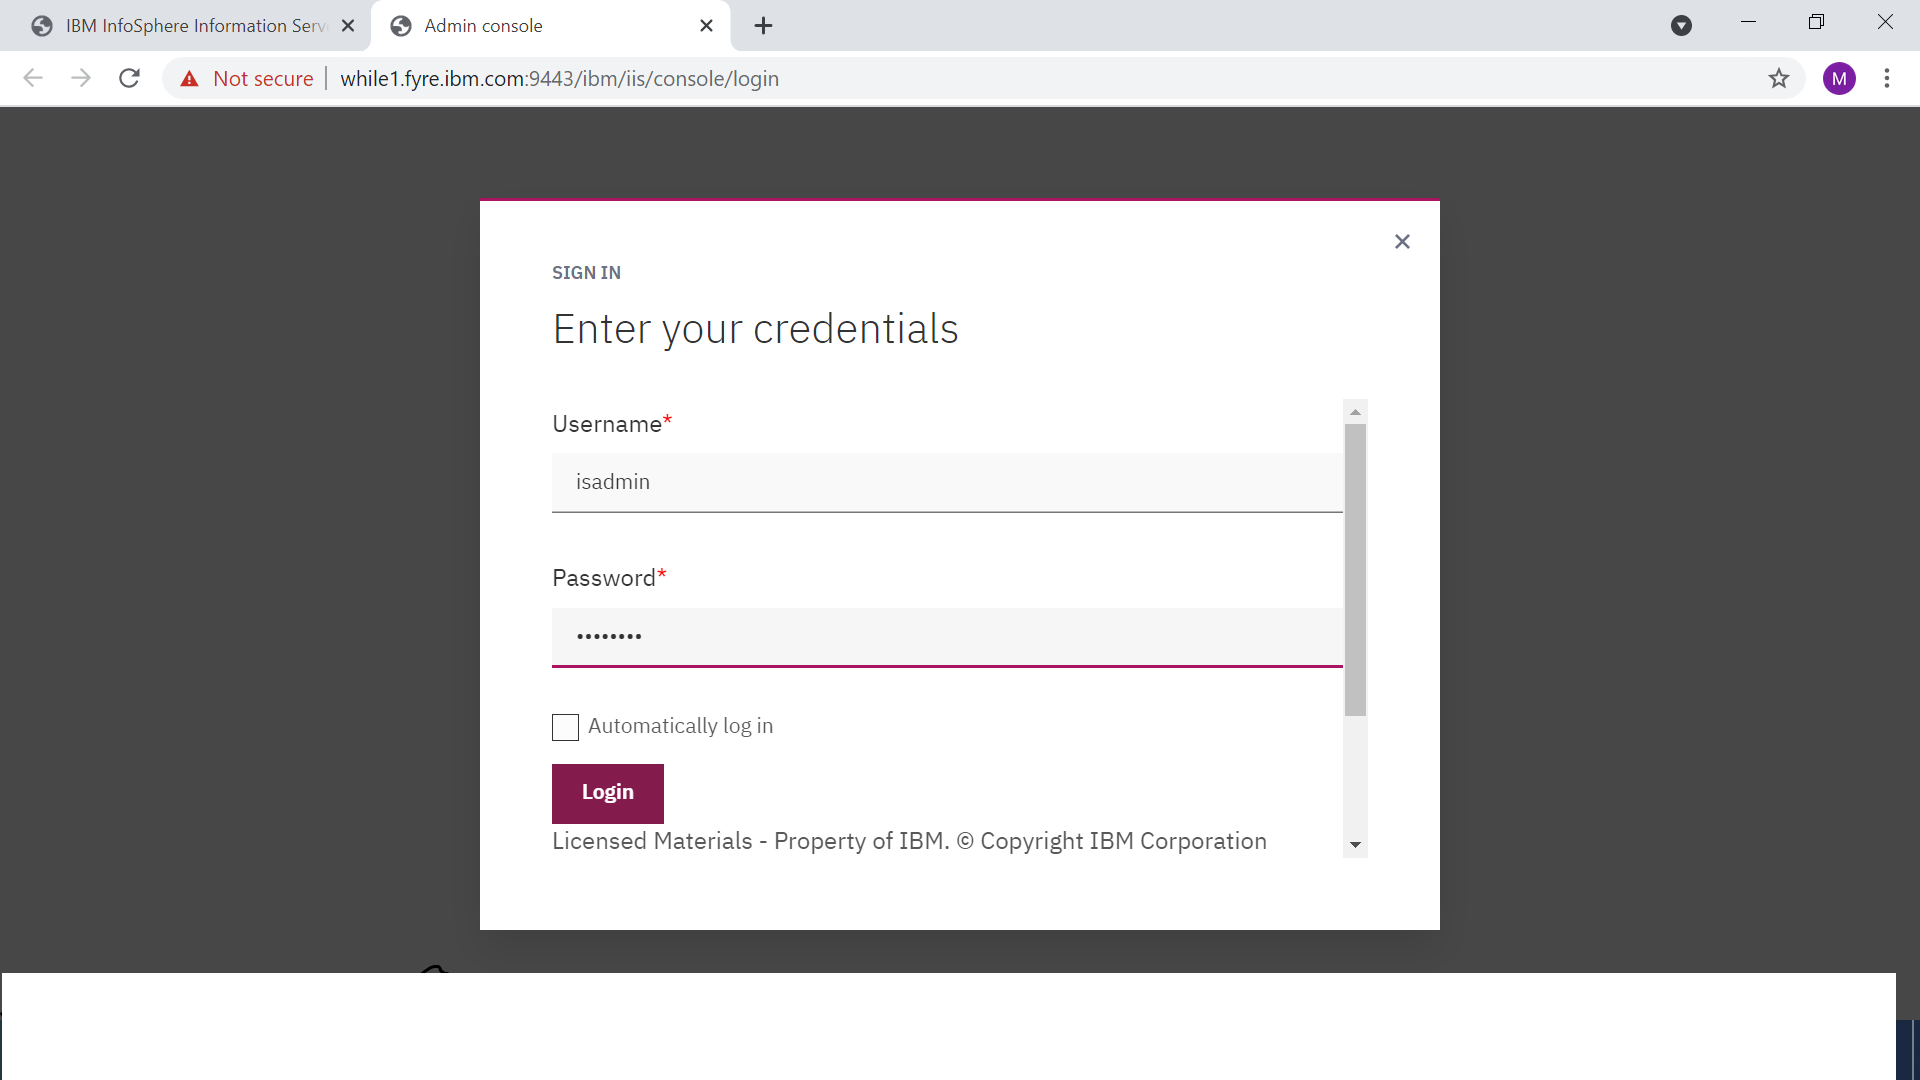
b. The request is intercepted; provide the OpenID credentials.
If OpenID authentication was completed elsewhere, this step is skipped.
c. If the credentials are valid, the request is redirected to the launchpad.
d. In the launchpad, click any application to go to the login page of that application for second factor authentication.
For example,
a. Open the launchpad
a. Open the launchpad
b. Provide OpenID credentials.
c. In the launchpad, open an application. For Administration console, the login page is displayed for second factor authentication:
Document Location
Worldwide
[{"Type":"MASTER","Line of Business":{"code":"LOB10","label":"Data and AI"},"Business Unit":{"code":"BU059","label":"IBM Software w\/o TPS"},"Product":{"code":"SSZJPZ","label":"IBM InfoSphere Information Server"},"ARM Category":[{"code":"a8m500000008XFHAA2","label":"Information Server Administration"}],"ARM Case Number":"","Platform":[{"code":"PF025","label":"Platform Independent"}],"Version":"All Versions"}]
Was this topic helpful?
Document Information
Modified date:
07 July 2021
UID
ibm16466263