How To
Summary
This document provided guidance to include timestamp details in IBM Maximo Application Suite - Manage application logs
Steps
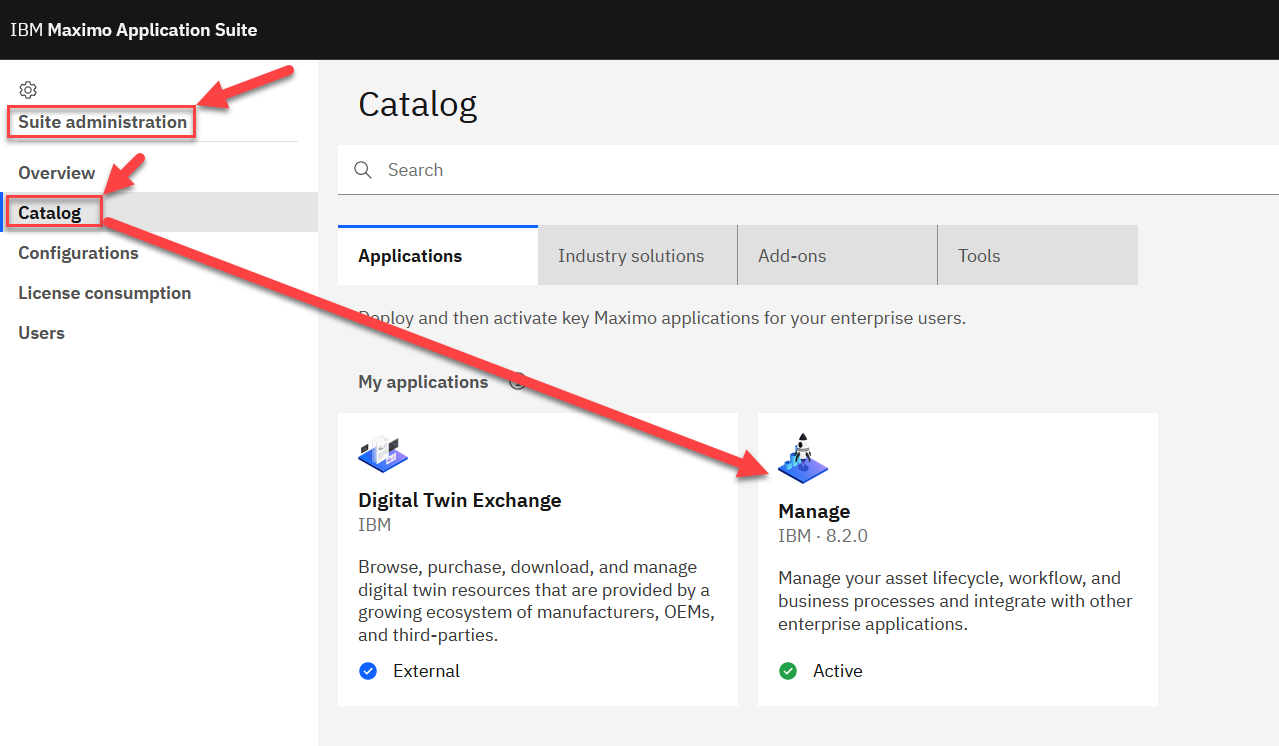
1. In IBM Maximo Application Suite go to Suite administration UI page and select Manage application from the Catalog section
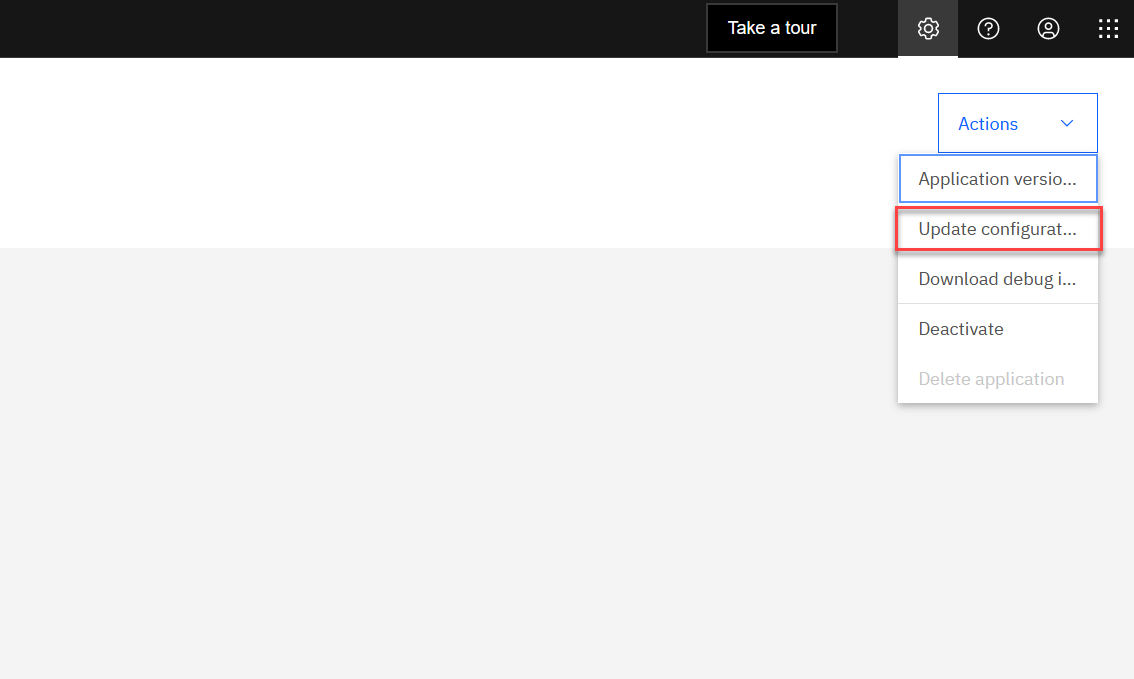
2. From the upper right Actions button, select Update configuration
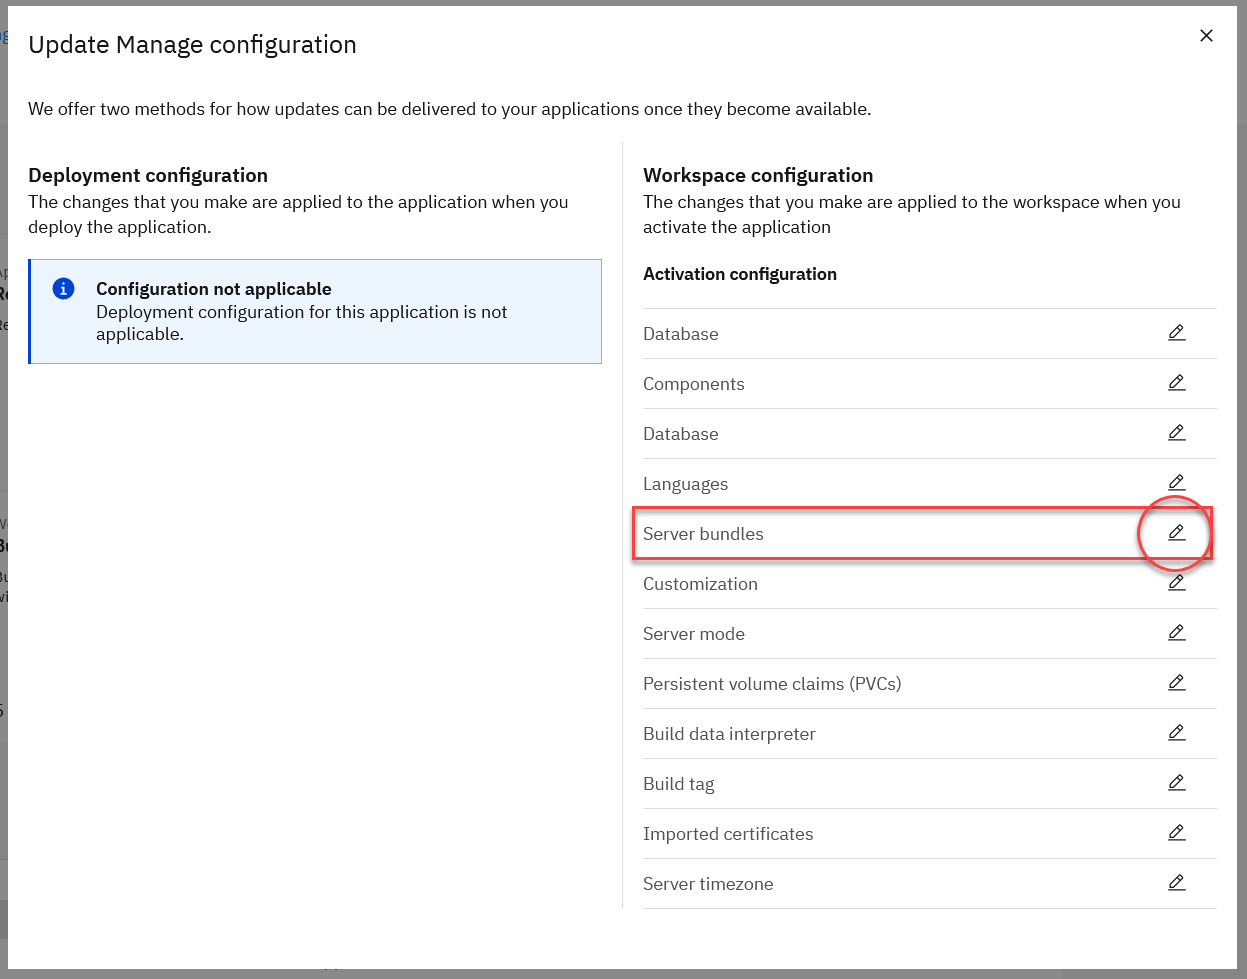
3. Click the edit button for Server bundles
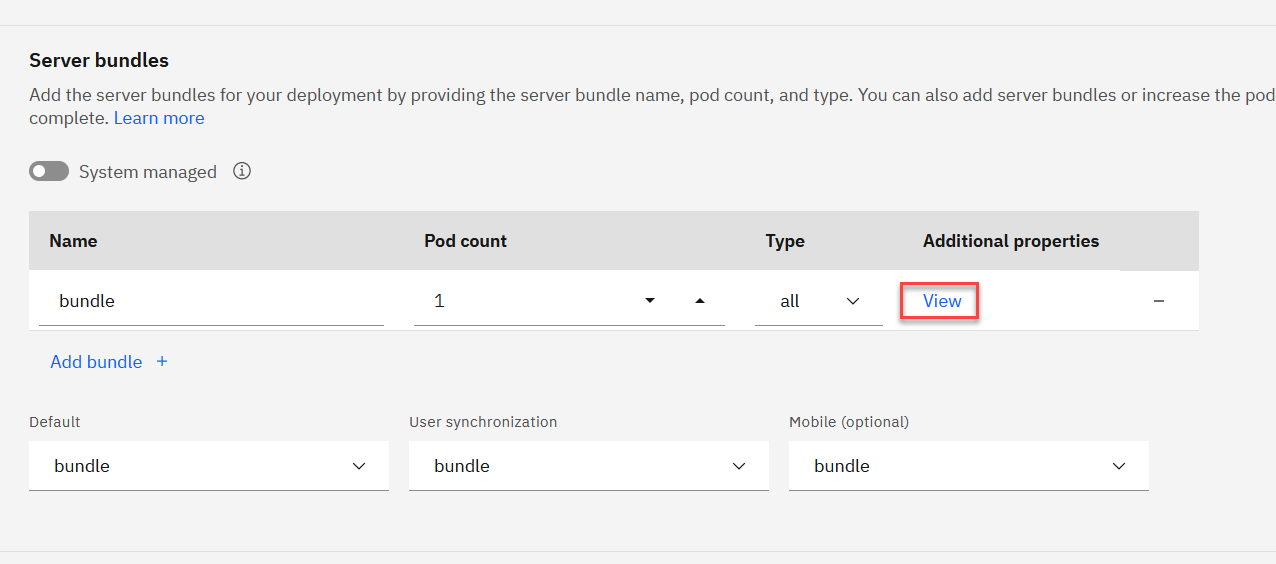
4. Under Additional properties click View
5. Under Additional server config add the following XML snippet
<?xml version="1.0" encoding="UTF-8"?>
<server description="new server">
    <logging consoleFormat="simple"/>
</server>

6. Click Save, Apply changes and Activate
After the changes are applied the server bundles pods will be re-created and the log traces now include the timestamp details as well as a threadId.
E.g:
[3/11/22 13:23:47:467 GMT] 0000003a SystemOut O 11 Mar 2022 13:23:47:467 [INFO] [MXServer] [] BMXAA6348I - The APPSETUP service is starting.
Document Location
Worldwide
[{"Type":"MASTER","Line of Business":{"code":"LOB59","label":"Sustainability Software"},"Business Unit":{"code":"BU059","label":"IBM Software w\/o TPS"},"Product":{"code":"SSRHPA","label":"IBM Maximo Application Suite"},"ARM Category":[{"code":"a8m3p000000F80hAAC","label":"Maximo Application Suite->MAS Applications->Administration"}],"ARM Case Number":"","Platform":[{"code":"PF025","label":"Platform Independent"}],"Version":"All Versions"}]
Was this topic helpful?
Document Information
Modified date:
15 April 2022
UID
ibm16572719