Technical Blog Post
Abstract
Setting up AS2, part 2 (The AS2 Partner)
Body
Before we can start setting up an AS2 Partner you need to know some information about trading with them. Actually the same information you need from them, they will need from you.
Exchange the following information with your trading partner:
1, AS2 Identifier - basically, names by which partners know each other (the one we created for the Organization is called BLOG_AS2_ORG_IDENTIFIER)
2, AS2 Certificate - for encryption and signing the data (the one we created for the Organization is called BLOG_AS2_certificate)
3, AS2 endpoint - comprised of ip address, port and a uri. This is where you will send your AS2 data and MDN's. Each Sterling B2B Integrator has a out of the box HTTP Server Adapter that is pre-configured to load with an endpoint for AS2. The canned endpoint is: http://ip_address_of_SI:baseport+33/as2. So if you SI instance is loaded on a box that has the ip address of 11.22.33.44 and you access the dashboard from port 5566, your canned endpoint would be http://11.22.33.44:5599/as2.
4, What type of MDN's do they want to receive. There are 3 types: Synchronous (they want the MDN's in the same connection that the data was sent in), Asynchronous (They want the MDN's to come back in a different connection) or No MDN's.
NOTE: There are other parameters that we will come across that you may need to change for your trading partner, however, for the purpose of this blog we will go with the defaults that SI will present to us when creating a AS2 Partner.
So, for the purpose of this blog, we have received from our Partner;
1, Their AS2 Identifier: Some_Company
2, Their AS2 Certificate: Some_Company_AS2_Certificate
3, Their endpoint: http://localhost:63233/as2
4, Synchronous MDN's
You have sent to your partner:
1, Your AS2 Identifier: BLOG_AS2_ORG_IDENTIFIER
2, Your AS2 Certificate: BLOG_AS2_ORG_certificate
3, Your endpoint: (we'll just use the example from above) http://11.22.33.44:5599/as2
4, You agreed with Synchronous MDN's
Let's 'check in' the partners AS2 certificate in the Trusted Store.
Go to Trading Partner>Digital Certificates>Trusted
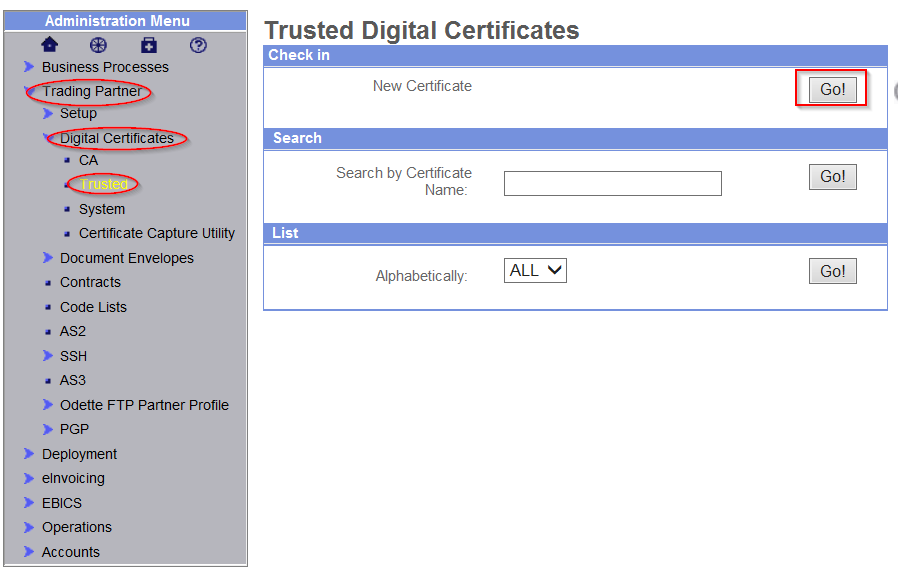
Click [Go!] under 'Check in - New Certificate'
Browse to the location where you stored your partners certificate

Click [Next]
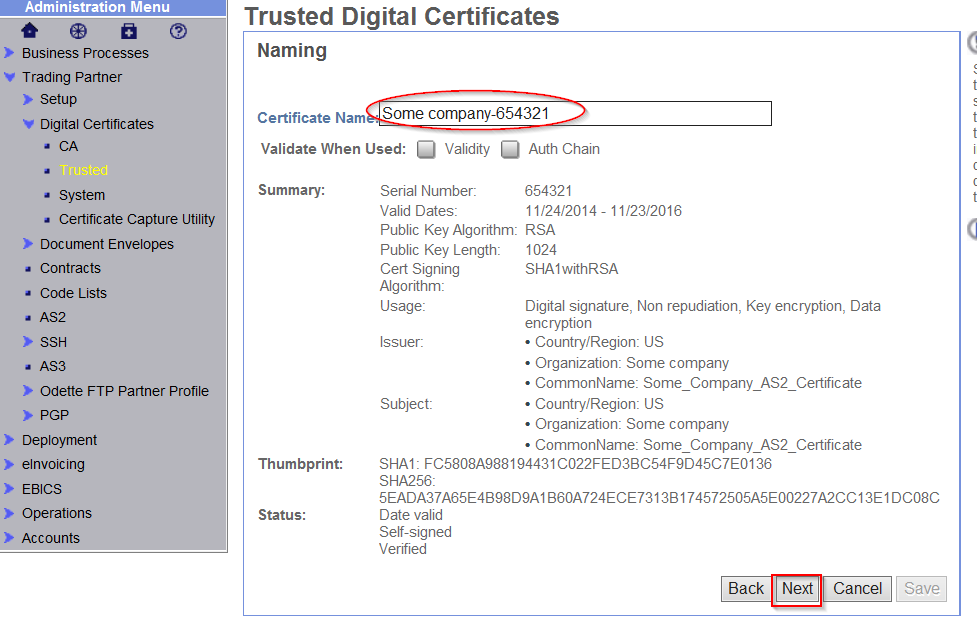
Note what the Certificate Name is called by default, or you can change it to suit your needs.
Click [Next] and [Finish]
Your partners AS2 Certificate has been added
To verify this you can go to Trading Partner>Digital Certificates>Trusted
Click [Go!] next to List - ALL
You should see the certificate listed in alphabetical order:

Creating a AS2 Partner:
Go to Trading Partner>AS2
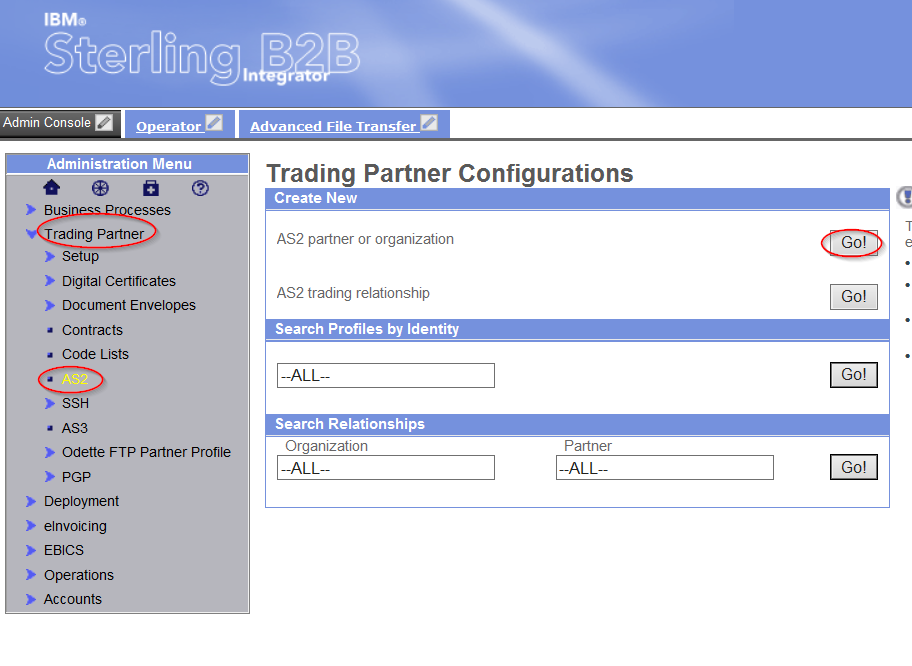
Click [Go!] under Create New - AS2 partner or organization

By default Partner is checked, Click [Next]
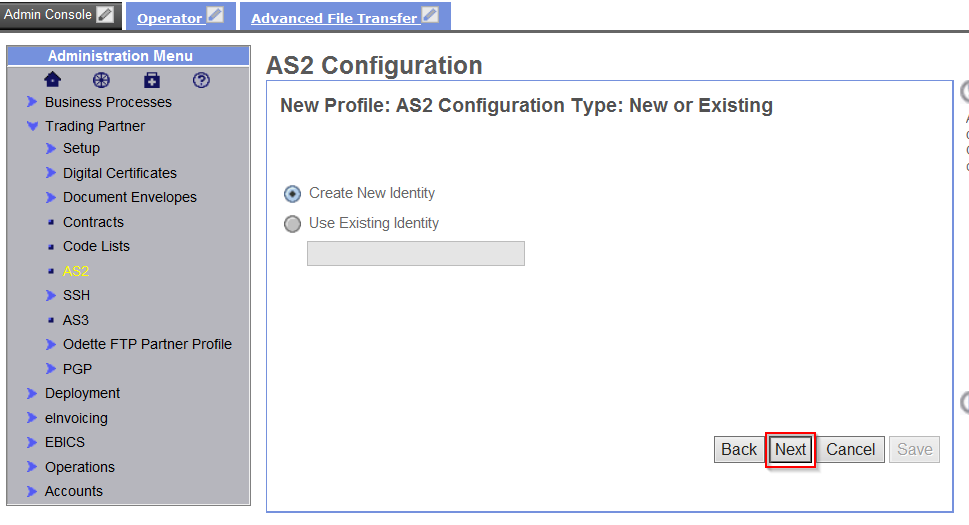
By default Create New Identity is checked, Click [Next]

Identity Name - Give your AS2 Partner profile an Identity Name. It's an internal name used by SI.
AS2 Identifier - Use the AS2 Identifier your part sent to you. In our case it is Some_Company
Click [Next]

Profile Name - Enter a name
HTTP Client Adapter - defaults to the out of the box service. You can use it or a custom one.
End Point - Use the end point that your partner give you. In our example it's http://localhost:63233/as2
Response Timeout (sec) - This timeout is used during the initial connection to your partners side. It may need to be increased if set too low.
SSL - defaults to None. If you are to set up SSL with a partner this is where you would do it...FYI. In our example we are using the default of None.
Click [Next]
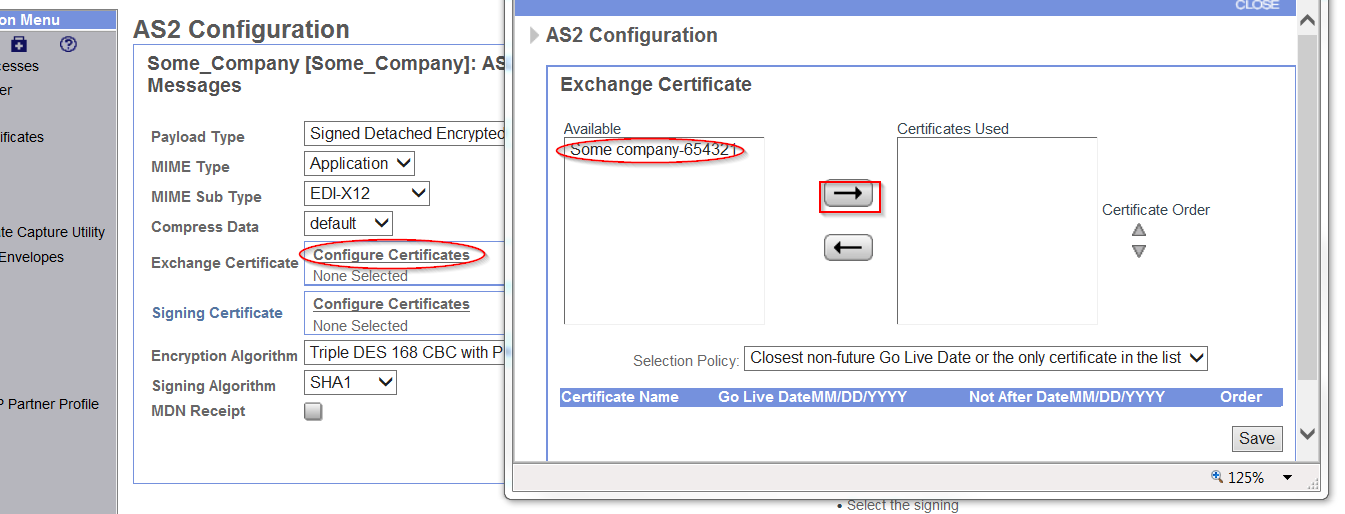
Now we need to point to the certificate that you recently checked in from your partner.
Click 'Configure Certificates' next to Exchange Certificate.
This will open a pop up window that displays all your Trusted Certificates.
Highlight the certificate you want to use under the Available side and click the right arrow -> to move it to the Certificates Used side.
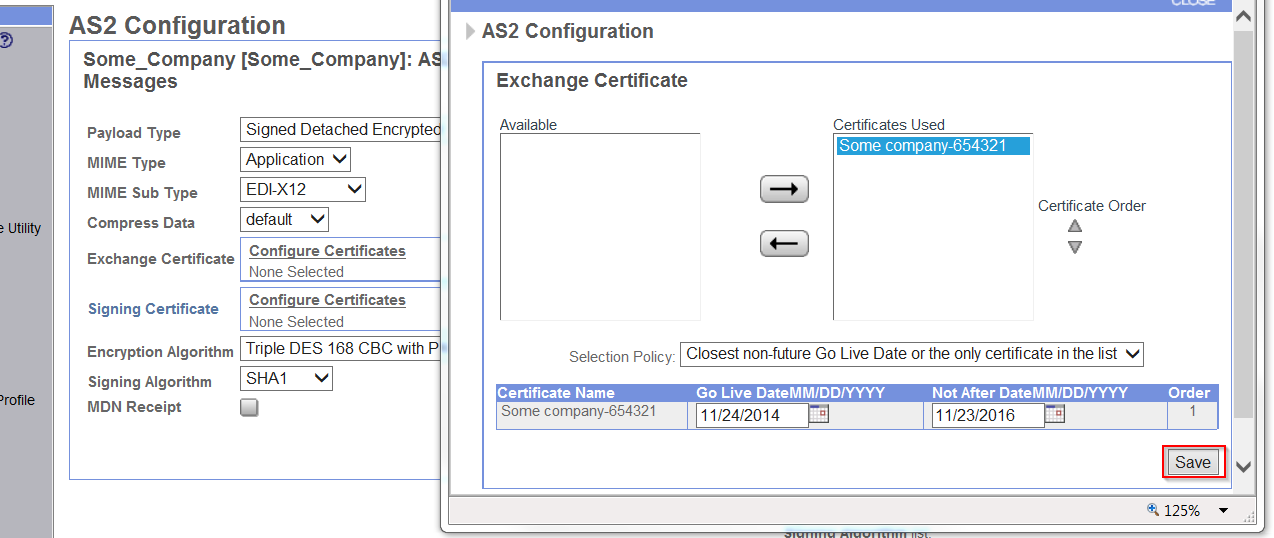
Click [Save]
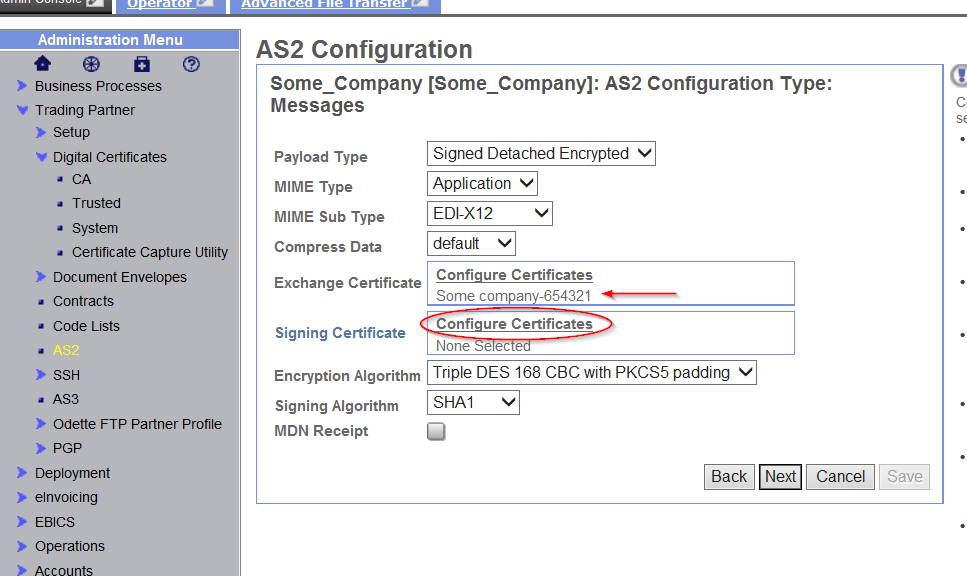
Repeat the above steps for the Signing Certificate as well.
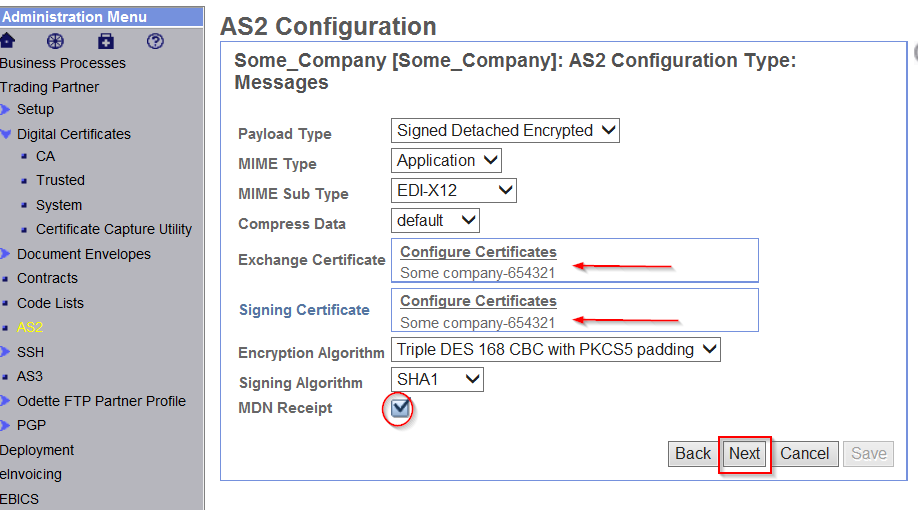
Check MDN Receipt if you are planning on passing MDN's to your partner. In our example, we are.
Click [Next]

Delivery Mode - Referring to the MDN defaults to Synchronous.
Click [Next] and [Finish]
The AS2 Partner has been created!
You can verify by going to
Trading Partner>AS2
Click [Go!] next to Search Profiles by Identity - ALL
You should see some thing similar to the following:
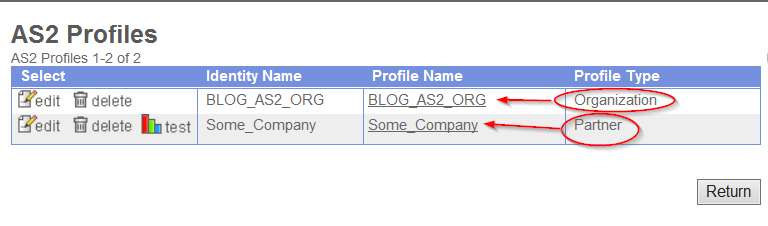
As you can see from above. The AS2 Partner profile we just created is listed, as well as the AS2 Organization we created in part 1 of this little series.
Next time, in part 3, we will finish the tutorial by tying the AS2 Organization and AS2 Partner profiles together with a AS2 Relationship. For that entry, click here AS2 Part 3
UID
ibm11121541