How To
Summary
This process outlines how an administrator can reboot to rescue mode to recover a root password on a QRadar appliance. Access to the CLI is required by using an, IMM, iDRAC, vSphere, or remote terminal.
Objective
Administrators are able to reset root password independently.
Environment
All QRadar appliances where root user access is required.
Steps
When it is required that the root password is reset, it is necessary to access the CLI interface. The best way to access the CLI is by using a remote terminal such as an IMM, XCC, vSphere or another remote terminal device.
Before you begin
You need to configure users on your Admin interface for an IMM, XCC interface, or another remote terminal. Administrators when they use an IMM or XCC interface need to change the default username and password. For more information on configuring your IMM or XCC see,
You need to configure users on your Admin interface for an IMM, XCC interface, or another remote terminal. Administrators when they use an IMM or XCC interface need to change the default username and password. For more information on configuring your IMM or XCC see,
- QRadar: Changing the IMM networking configuration
- QRadar: How to change the IMM or XCC default username and\or password
- QRadar: Changing the admin account password from the UI or CLI
Procedure
- Access the host from a remote terminal such as an IMM, iDRAC, vSphere, or another remote terminal.
- Reboot or reset the system. The system enters the reboot process.
- At the first GRUB menu, press an arrow key to stop the 5 second countdown.
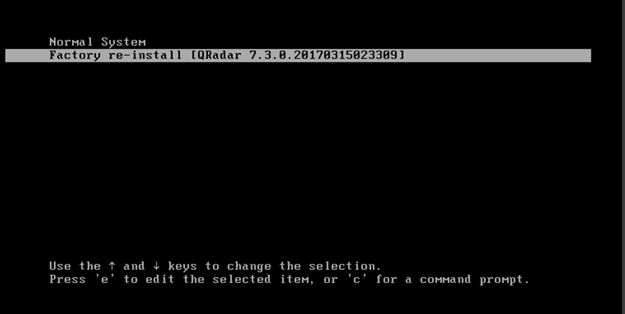
- Use the Up & Down Arrow keys to select the Factory re-install [QRadar 7.3.0.<version>] option. Your grub menu might be a different version such as 7.5.0.<version>.
- Press the e key to edit the entry.
- The next screen with loopback is displayed.
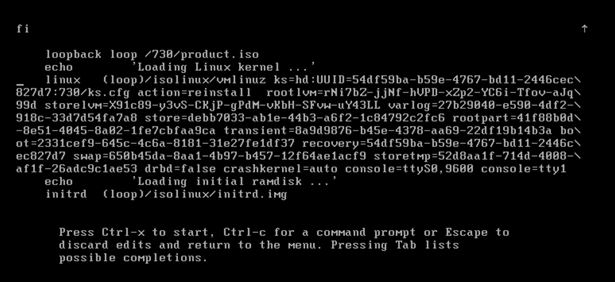
- Scroll down to find the line that starts with linux (loop)/isolinux/vmlinuz
Note: Directories and UUIDs vary between systems. - Edit the line and insert the string rd.break between vmlinuz and ks=
It looks similar to: linux (loop)/isolinux/vmlinuz rd.break ks=...
Note: This change is temporary.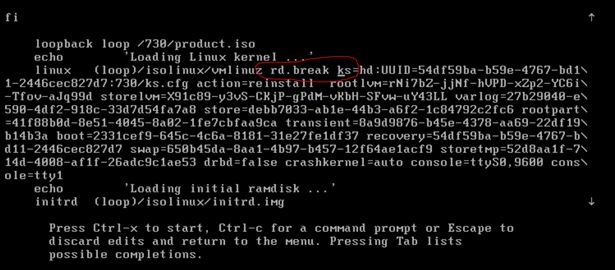
- Press <Ctrl-x> to boot. The system runs and drop to a command prompt.
- The system boots to a rescue prompt that looks like:
switch_root:/# - At the prompt type the command:
# lvm vgscan
- Type the lvm vgchange command to activate the volumes:
# lvm vgchange -ay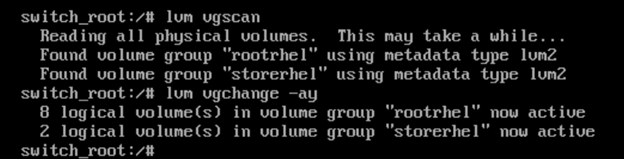
- Review the mounted volumes by using the command:
# ls /dev/mapper/ls /dev/mapper control docker-253:9-1006846904-5d22f8f9af7e543bf431d0d769b505f98d28a71cdfb030dbc579926f864defb7 docker-253:9-1006846904-82811142f3d23b528cddf5096bf91bbb901b0ca8e3bad31cae6f1a40813dc9b9 docker-253:9-1006846904-b15c9e66e7b1795bc04884f37052d3ede1014e9eb960a565664368773501358a docker-253:9-1006846904-bb6b529c6eb5e002057bf19f1084945128ddee6040e4e51d4ec9df1e37d81daa docker-253:9-1006846904-c59a0c2b32121a8341811fce76aaf6cbb960cb96bf3413406b7eaeee91e7159f docker-253:9-1006846904-pool rootrhel-home rootrhel-opt rootrhel-root rootrhel-storetmp rootrhel-tmp rootrhel-var rootrhel-varlog rootrhel-varlogaudit storerhel-store storerhel-transient - Create a /tmp/root/ directory by using the command:
# mkdir -pv /tmp/root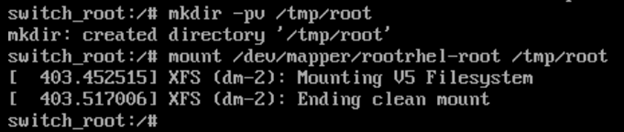
- Mount /dev/mapper/rootrhel-root to the /tmp/root directory that was created in step 4:
# mount /dev/mapper/rootrhel-root /tmp/root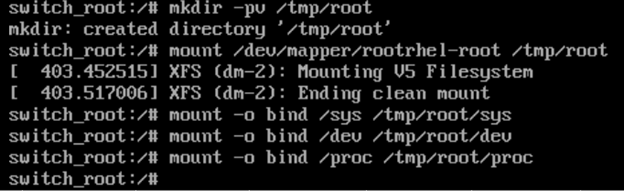
- Mount the /sys directory to /tmp/root/sys by using the command:
# mount -o bind /sys /tmp/root/sys - Mount the /dev/ directory to /tmp/root/dev by using the command:
# mount -o bind /dev /tmp/root/dev - Mount /proc directory to /tmp/root/proc by using the command:
# mount -o bind /proc /tmp/root/proc - Type the command chroot /tmp/root:
# chroot /tmp/root
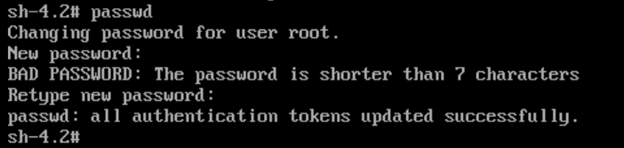
- Type the passwd command to change the root user password:
# passwd - Change the password for root:
- Use the command mount -a -v to mount all remaining file systems:
# mount -a -v - Type exit to get to a boot prompt:
# exit - Type Reboot to restart your system:
# reboot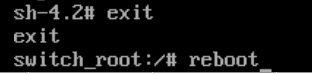
Results
The root password is reset for this system. Store the password according to your organizations password policy.
Additional Information
Related Information
Document Location
Worldwide
[{"Type":"MASTER","Line of Business":{"code":"LOB24","label":"Security Software"},"Business Unit":{"code":"BU059","label":"IBM Software w\/o TPS"},"Product":{"code":"SSBQAC","label":"IBM Security QRadar SIEM"},"ARM Category":[{"code":"a8m0z000000cwtNAAQ","label":"Deployment"}],"ARM Case Number":"TS009375143","Platform":[{"code":"PF016","label":"Linux"}],"Version":"All Versions"}]
Was this topic helpful?
Document Information
Modified date:
29 November 2022
UID
ibm16587126