General Page
This document provides the procedures to configure an Omnibus Objectserver-based HA configuration. Objectserver-based HA requires the Jazz for Service Management 1.1.3.12 (DASH 3.1.3.12) and Omnibus WebGUI 8.1.0.24 minimum versions.
Required Objectserver configuration for both the primary AND fail-over (if configuring a fail-over WebGUI HA database):
Using the Omnibus Objectserver administration client ([Omnibus home]/bin/nco_config):
- Create an Objectserver group named "WebHA", which has two roles “CatalogUser” and “DatabaseAdmin”
- Create a non-root user in the ObjectServer and assign the user to the WebHA group.
- Create a database in ObjectServer named "dashdb".
Open ObjectServer GUI ->Right click database section ->Create Database.
Required WebGUI configuration:
Log in to WebGUI and launch the WebSphere Application Server admin console.
Create the stored credentials alias for the JDBC connection:
From left Navigation: Click Security ->Global Security -> Expand ‘Java Authentication and Authorization Service ‘-> Click J2C authentication data
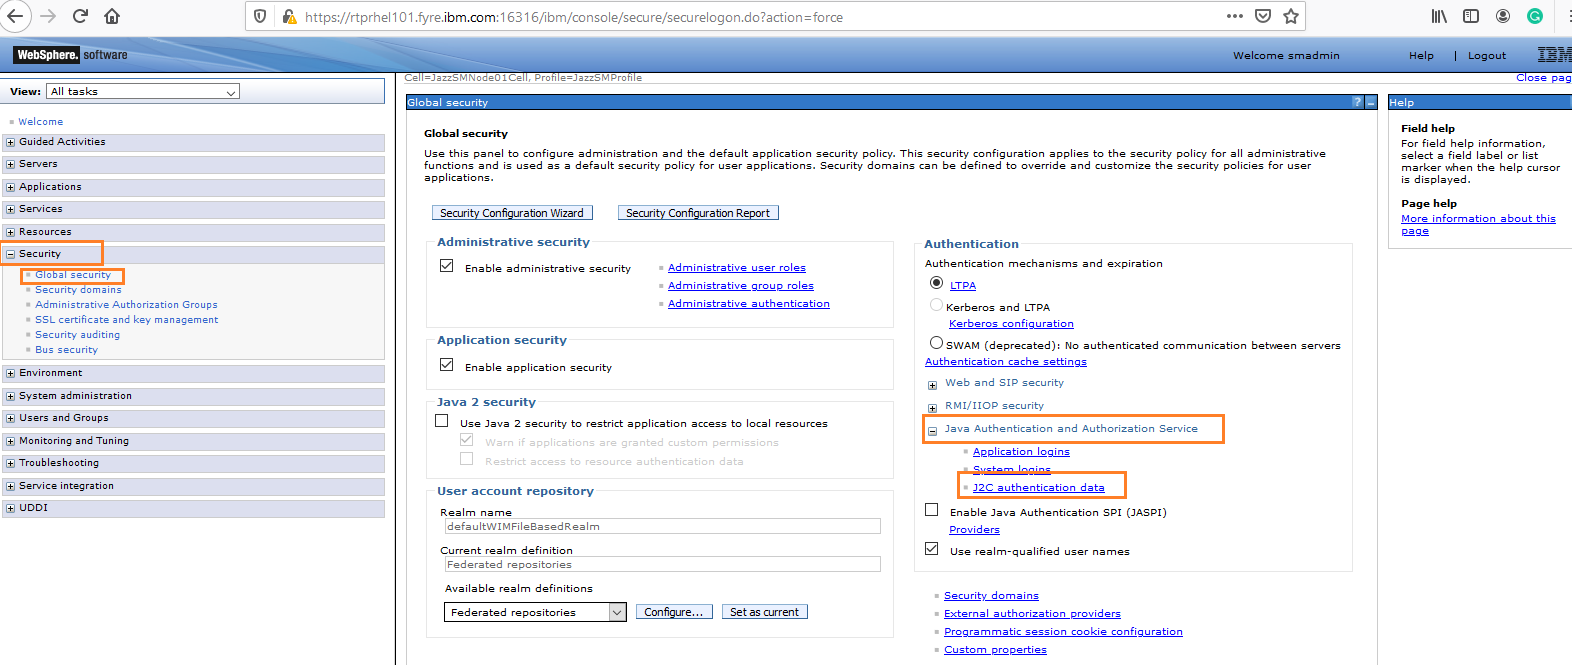
Create an alias to specify the Objectserver credentials to be used for the "tipds" data source. Specify the user created in Objectserver that was added to the WebHA group in Objectserver. Click Apply and Save button.
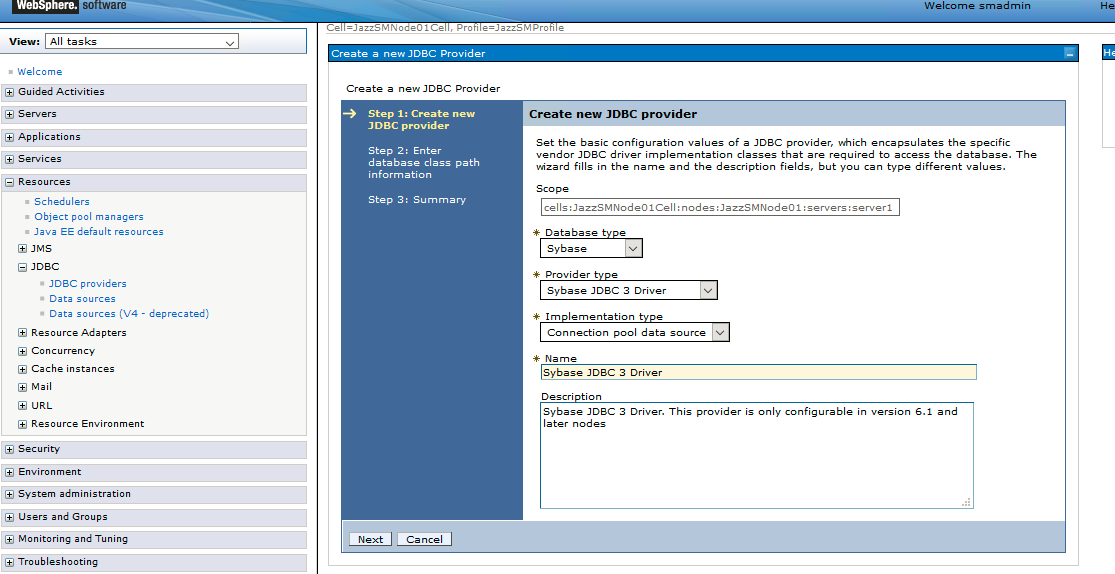
Create a Sybase JDBC provider for ObjectServer:
Click Resources ->JDBC->JDBC Provider ->Select Scope: Node=JazzSMNode01, Server= server1-> Click New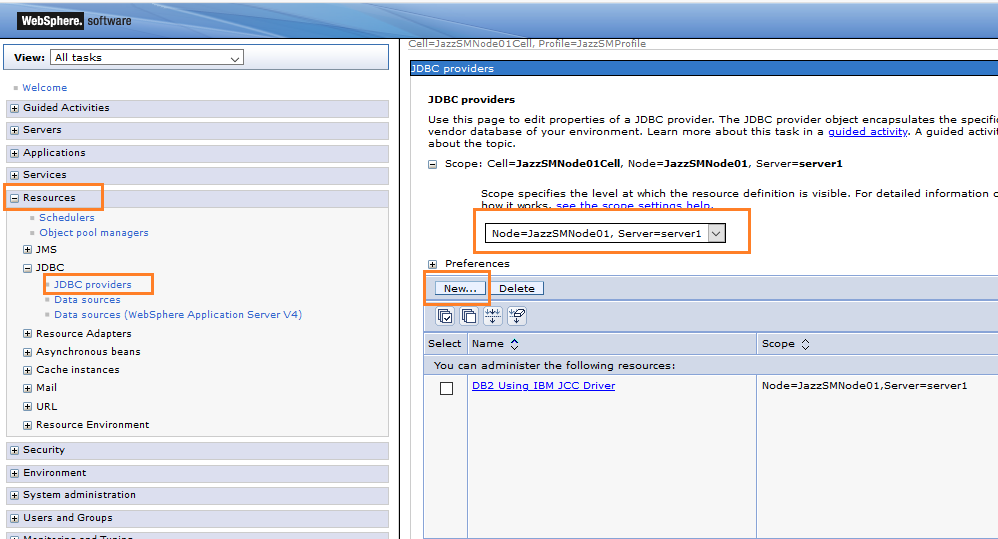
Follow the screens to complete the JDBC provider configuration

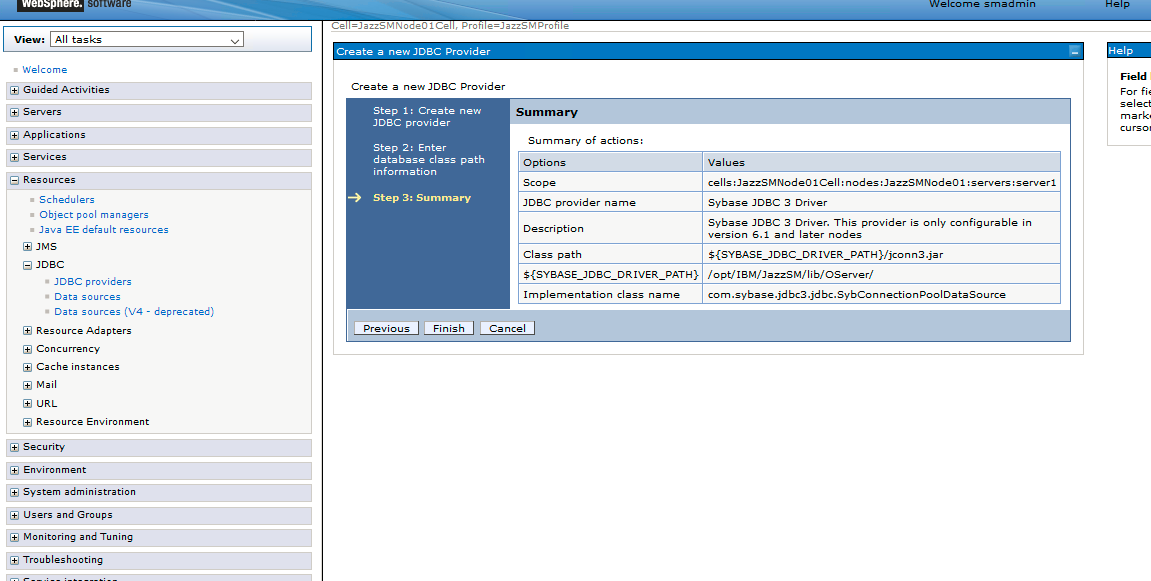
Click Finish.
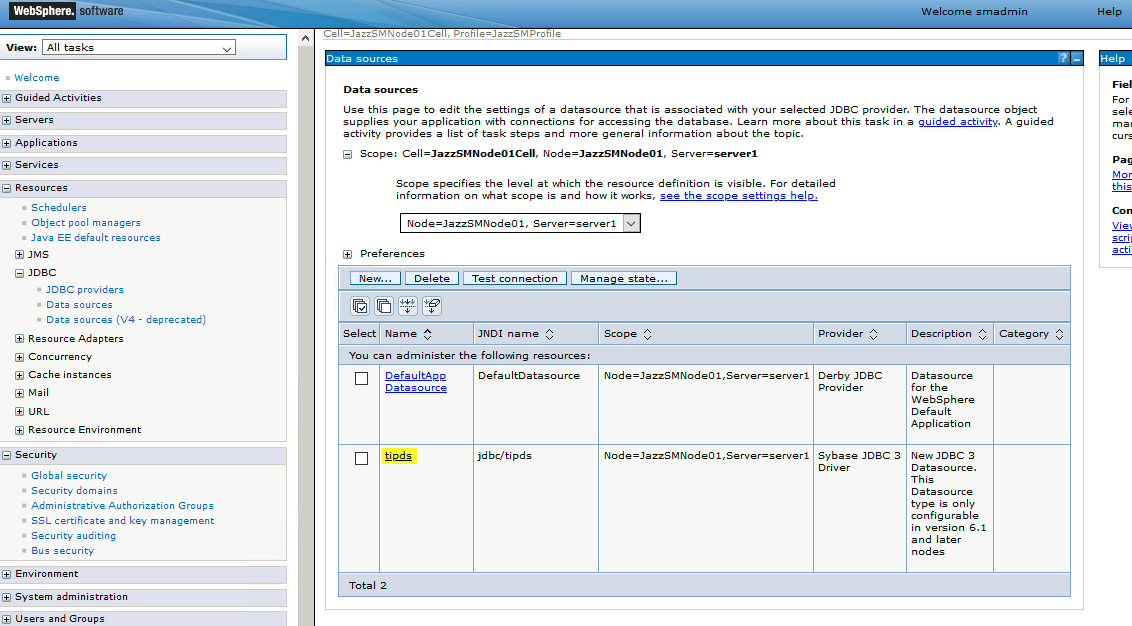
Create the "tipds" JDBC data source:
Click data sources -> Select Scope: Node=JazzSMNode01, Server= server1-> New
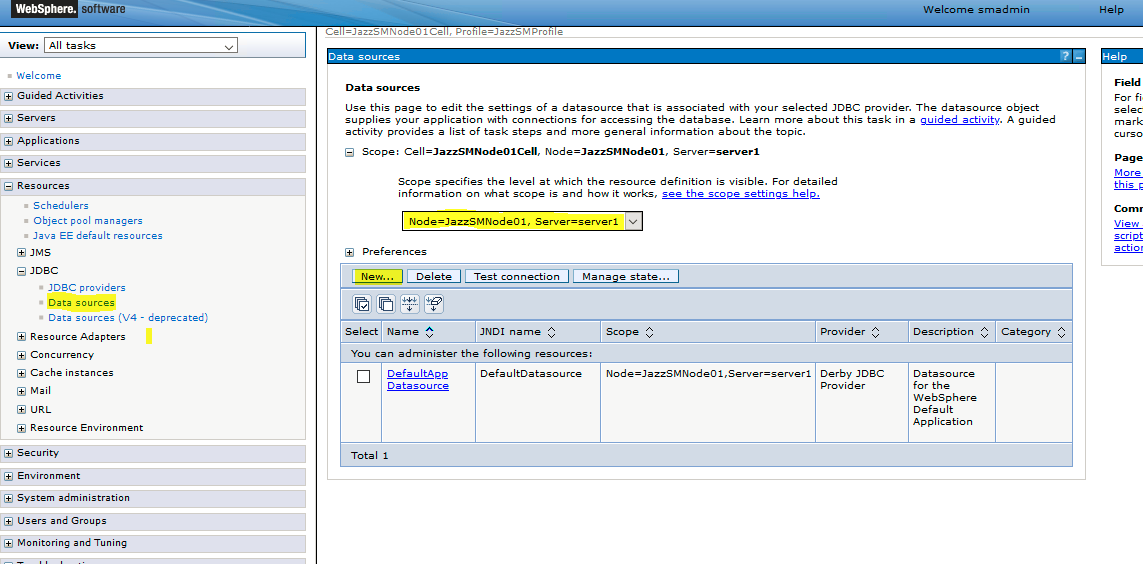
Provide data source Name as ‘tipds’ and JNDI name as "jdbc/tipds" and click Next button

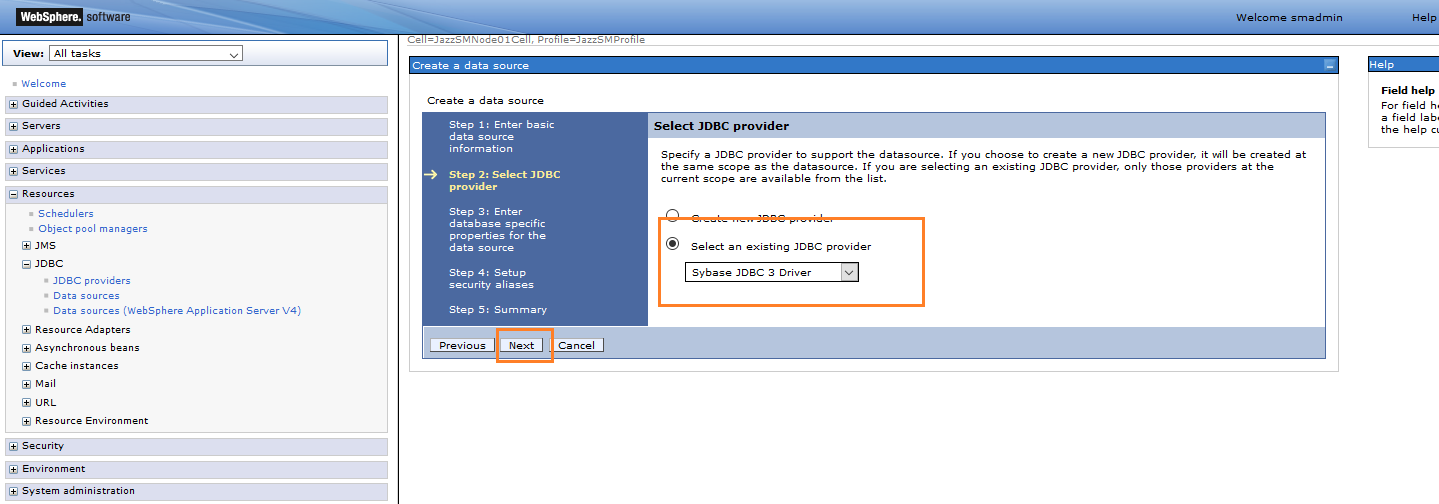
Select an existing JDBC Provider from drop-down as ‘Sybase JDBC 3 Driver’ -> click Next button
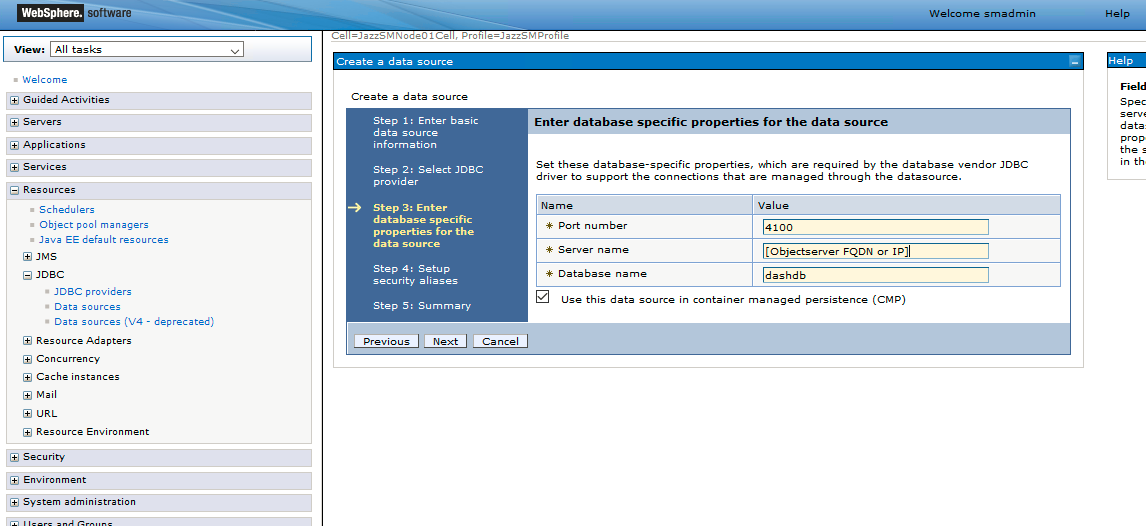
Provide Port Number and Server Name of primary ObjectServer on which the "dashdb" database was created. Specify "dashdb" for Database Name and click next button
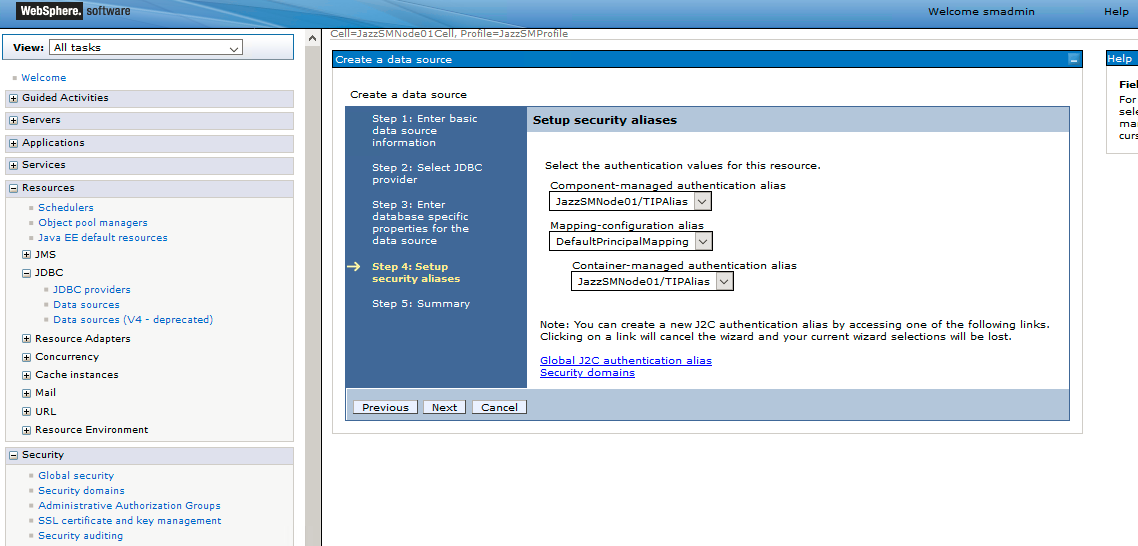
Setup security aliases -> click next button
Check the summary and click finish button

Test Connection -> Select data source -> Click test connection button
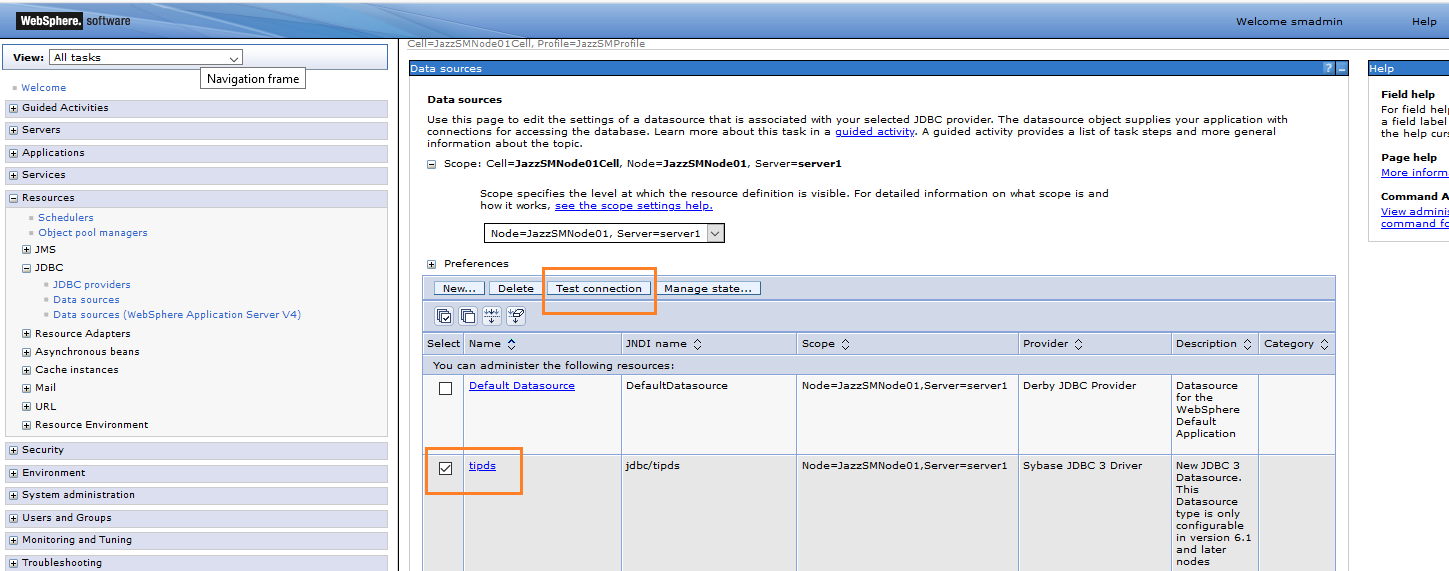
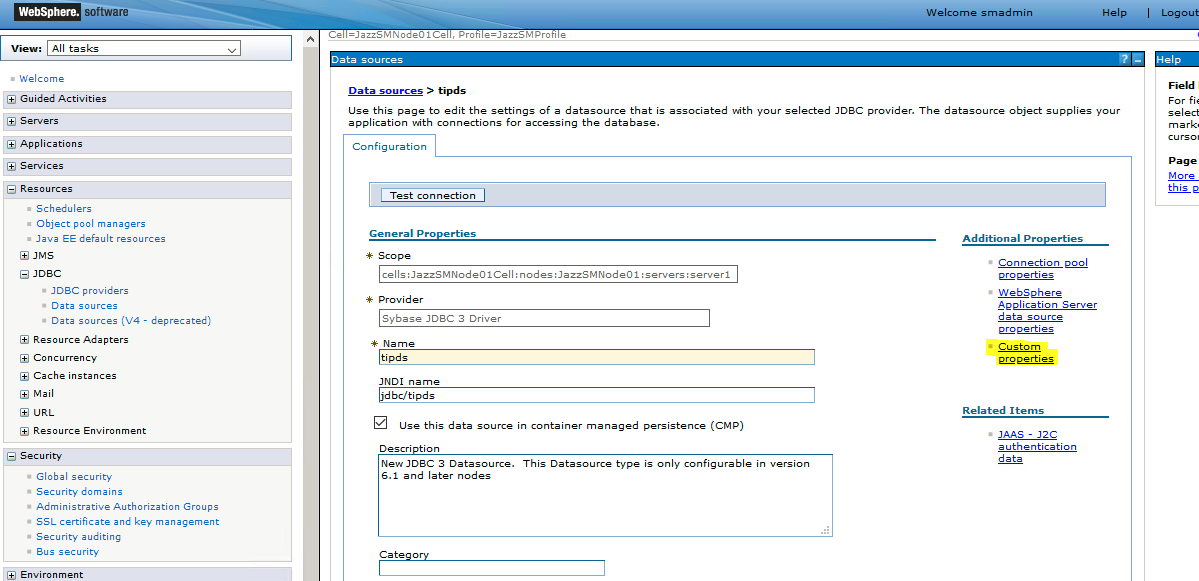
Click on the "tipds" data source.
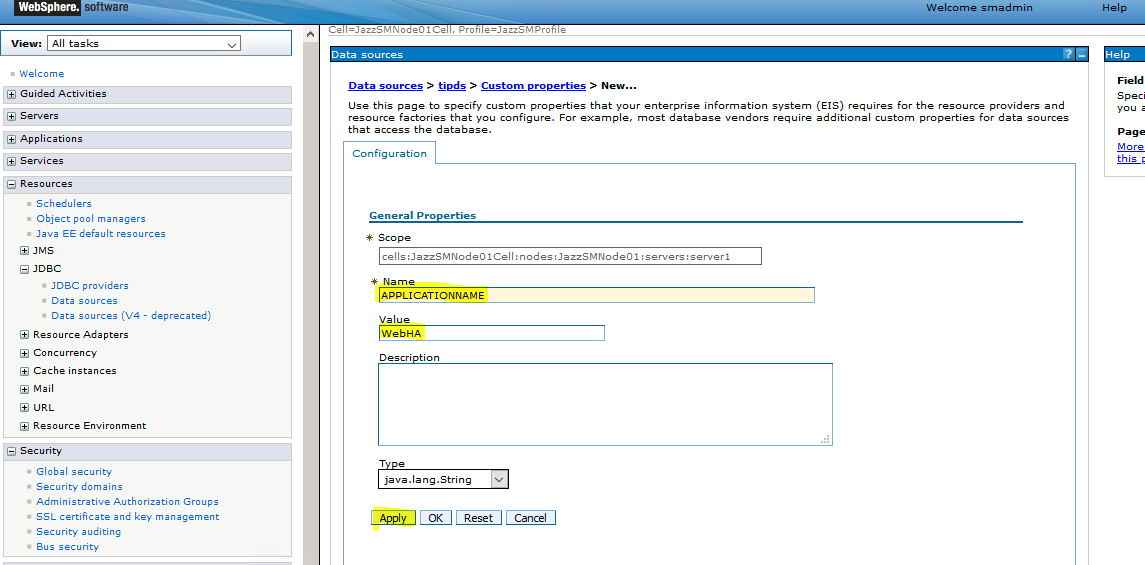
Click "Custom properties".
Click "New..." and create a property called APPLICATIONNAME, and set its value to "WebHA", then click "Apply" and then the "Save..." link that appears at the top of the page.
Add signer certificates for the other WebGUI cluster members to establish server-to-server trust. Use the instructions in the following technical note:
Update the WebGUI HA properties in the [WebGUI Home]/etc/server.init file as described in the following WebGUI Knowledge Center document:
Restart the WebGUI server process.
Repeat the same steps to create the JDBC provider and "tipds" data source on all WebGUI servers.
Steps to configure fail-over to a secondary Objectserver HA database.
Install two ObjectServers AGG_P(Primary) and AGG_B(Backup). Use the instructions in the following link for guidance:
Set up a gateway as follows:
Download the attached "AGG_GATE.tblrep.def.txt", and append its contents into the following file:
"[NCHOME]/omnibus/etc/AGG_GATE.tblrep.def"
Download the attached "AGG_GATE.map.txt", and append its contents into the following file:
"[NCHOME]/omnibus/etc/AGG_GATE.map file"
Verify the "[NCHOME]/omibus/etc/AGG_GATE.props" file contains the correct Objectserver instance names.
Download the attached "webha.sql" and execute it on both AGG_P and AGG_B to create the dashdb database.
Examples
Unix:
$NCHOME/omnibus/bin/nco_sql -server ObjectServer_name -username <username> -password <password> < webha.sql
Windows:
%NCHOME%\omnibus\bin\isql -S ObjectServer_name -U <username> -P <password> -i webha.sql
Start AGG_P and AGG_B:
$NCHOME/omnibus/bin/nco_objserv -name AGG_P
$NCHOME/omnibus/bin/nco_objserv -name AGG_B
Start the gateway as listed here:
NCHOME/omnibus/bin/nco_g_objserv_bi -propsfile NCHOME/omnibus/etc/AGG_GATE.props (or)
nco_g_objserv_bi -name AGG_GATE -objectserveraserver NCOMS_AGG_P -objectserverbserver NCOMS_AGG_B
Add fail-over properties to the "tipds" data source.
In the WebSphere Administration console, navigate to:
Resources > JDBC > Data sources > tipds > Custom properties
Click "New"
Set:
Name: REQUEST_HA_SESSION
Value: true
Click "Apply", and then the "Save..." link that appears at the top of the page.
Click "New"
Set:
Name: SECONDARY_SERVER_HOSTPORT
Value: [Set to the secondary objectserver host]:[port eg: 4100]
Click "Apply", and then the "Save..." link that appears at the top of the page.
Restart the WebGUI server.
[{"Line of Business":{"code":"LOB45","label":"Automation"},"Business Unit":{"code":"BU059","label":"IBM Software w\/o TPS"},"Product":{"code":"SSEKCU","label":"Jazz for Service Management"},"ARM Category":[{"code":"a8m500000008bsvAAA","label":"DASH"}],"ARM Case Number":"","Platform":[{"code":"PF002","label":"AIX"},{"code":"PF016","label":"Linux"},{"code":"PF033","label":"Windows"}],"Version":"3.1.3"}]
Was this topic helpful?
Document Information
Modified date:
15 April 2024
UID
ibm16373944