Troubleshooting
Problem
Ethernet fault tolerant setup under Microsoft Windows 2000 (Intel chipset)for Servers and IntelliStation.
Resolving The Problem
| IBM (Intel) fault tolerance setup for Microsoft Windows 2000 |
|---|
This document details the fault tolerant setup and testing of the IBM Netfinity 10/100 ethernet adapter (Intel chipset) under Microsoft Windows 2000. While it is possible to install the IBM Network Interface Cards (NICs) as part of the regular operating system install, this document assumes that the operating system is already installed and up and running. This was done to keep the procedure as simple as possible.
The install will require one diskette and one program. The IBM 10/100 Ethernet adapter diskette (Intel chipset) is a common driver diskette that includes the drivers for Windows 2000. The program is zipped and contains the PROset software that sets up the teaming and load balancing.
| Fault tolerant group setup instructions |
|---|
- With the system powered off, install the ethernet adapters. Try to install the adapters in the same type of slot, i.e. both 64-bit, both hot swap, etc.
- Power up the system and boot up to the operating system. Windows 2000 should detect the NICs at boot.
- Right-click Network Neighborhood, and select Properties. Select the Adapters tab of Network Properties and select the Add button. The Add Network Adapter dialog box will appear.
- Place the driver diskette in the diskette drive and select Have Disk. After scanning the diskette, the Select OEM Option box will appear. The IBM NIC driver should already be highlighted. Click OK to load the driver. The Network Properties will now display the NICs.
- Remove the driver diskette. Unzip the PROset files. Open or browse the folder that you unzipped the PROset software. In the PROset folder, open the SETUP subdirectory and locate and execute SETUP.EXE. A dialog box will open explaining that you are about to install the PROset Software. Click Yes to continue. After the install completes, you will be prompted to reboot the system. Reboot the system.
- After the system reboots, you should see a small icon on the taskbar for the Intel PROset utility. You can access the PROset utility by double-clicking that icon, opening the PROset icon in the control panel, or by opening the adapter properties in My Network Places. Open PROset. The Intel PROset II main window will appear.

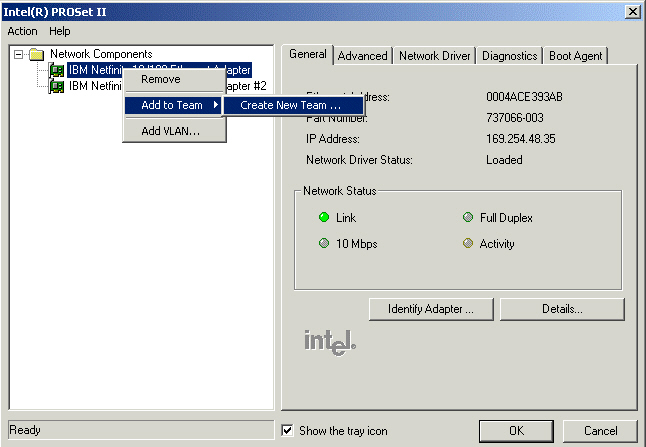
- To create a fault-tolerant pair, right-click one of the adapters in the list. A context menu will appear. Select Add to Team, then select Create New Team.
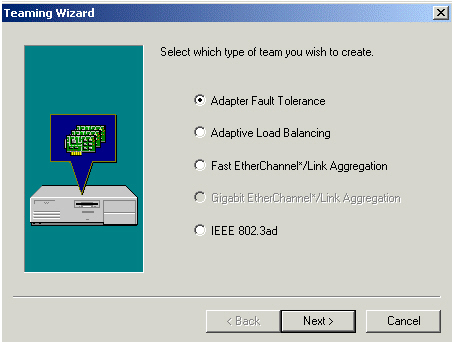
- A Teaming Wizard dialog box opens. Select the type of team you wish to create. For the sake of simplicity, select Adapter Fault Tolerance, then click Next.
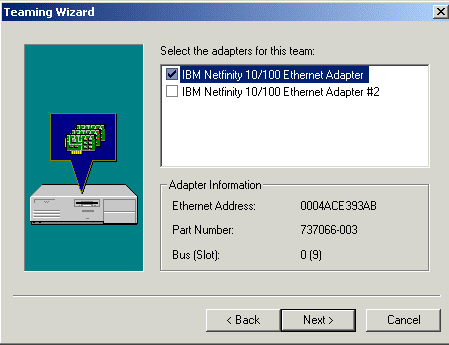
- The Teaming Wizard then displays the adapters that are available for teaming. The first NIC is selected by default.
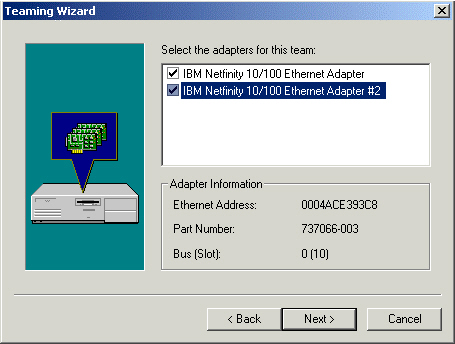
- Select the second NIC for the pair, then click Next.
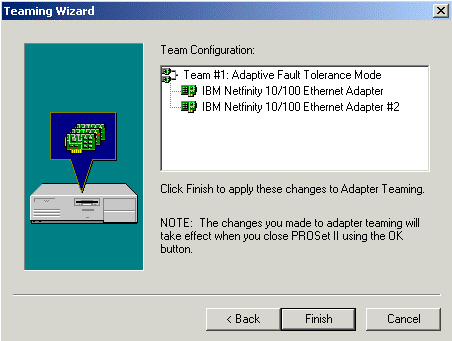
- The group has been created. The Teaming Wizard displays the team number, mode and displays the adapters belonging to the team. Click Finish to continue.
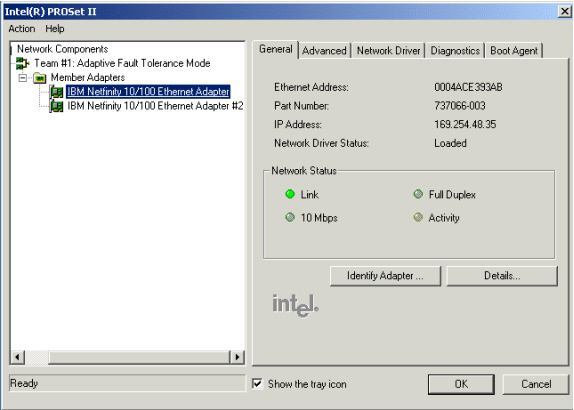
- PROset now displays the team that was just created under Network Components. Each of the tabs displayed will allow you to adjust or view settings on the adapters in the team. The "General" tab displays the MAC address, IP address and driver status. It also has simulated LEDs to show network status. Finally, there is an Identify Adapter button that allows you to blink the physical LEDs on the adapters to aid in locating a particular adapter.
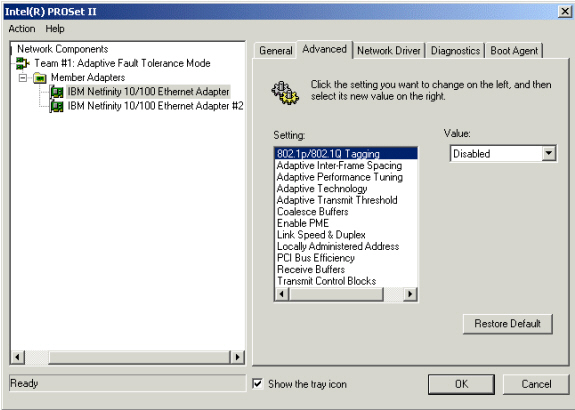
- The "Advanced" tab displays the driver values that can be adjusted on the adapter.
- The "Network Driver" tab displays driver Information such as name, version, and traffic statistics.

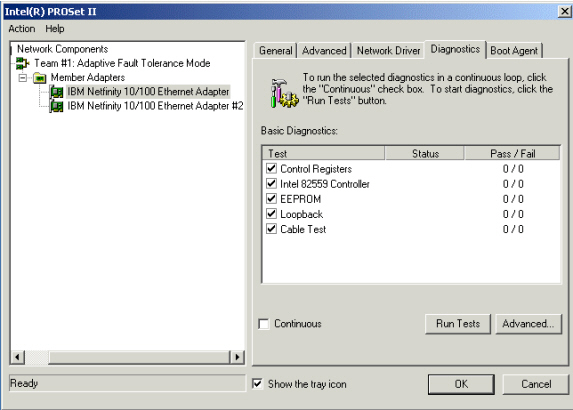
- The "Diagnostics" tab allows you to run single pass or loop tests on the adapter. The loopback test requires a loopback connector to work.
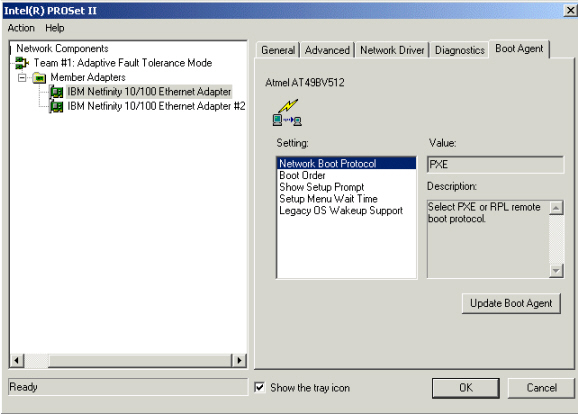
- The "Boot Agent" tab displays the settings for booting the system from the network.
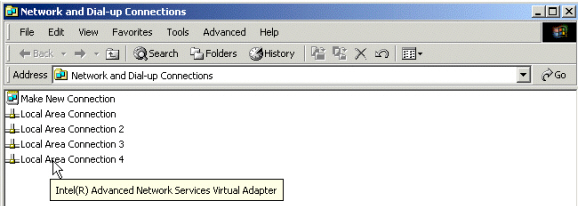
- Close PROset, and right-click My Network Places and select properties. A list of network connections is displayed. There is a new connection listed for the fault-tolerant pair that was just created. It is labeled as an Intel Advanced Network Services Virtual Adapter.
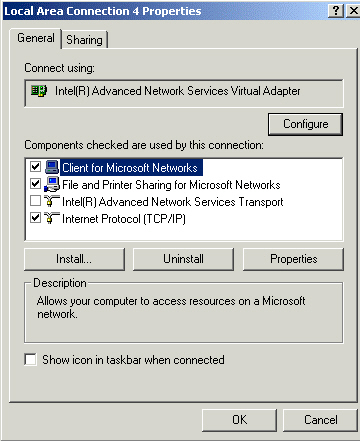
- Right-click the virtual adapter to set network settings.
- Setup is complete. Click OK to close the window. Proceed to Testing the fault tolerant group.
| Testing the fault tolerant group |
|---|
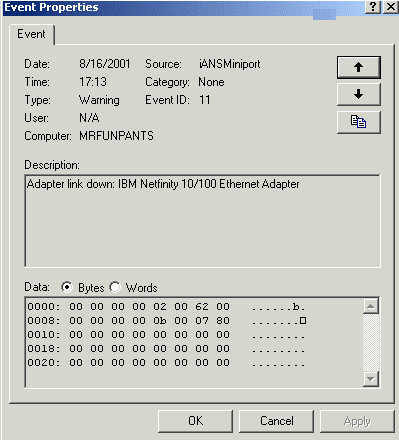
- To test the fault tolerant group after setup, open up the Windows 2000 system event viewer, then unplug the cable going to the Primary adapter. You may have to refresh event viewer to see the error. The first error is an "Event ID 11 - adapter link down".
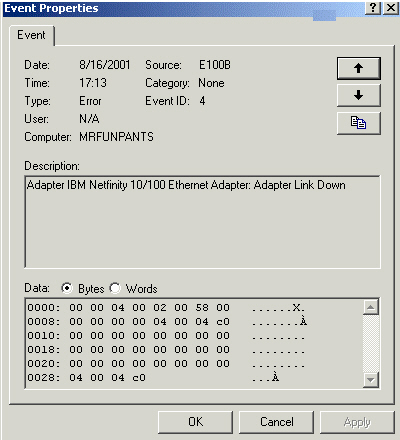
- Next, You will get the message "Event ID 4 - adapter link down".
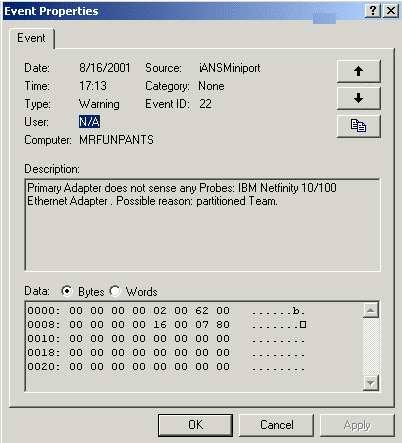
- The next message will be "Event ID 22 - adapter does not sense any probes". The system sees there is a problem with the primary NIC, so it initializes the secondary adapter.
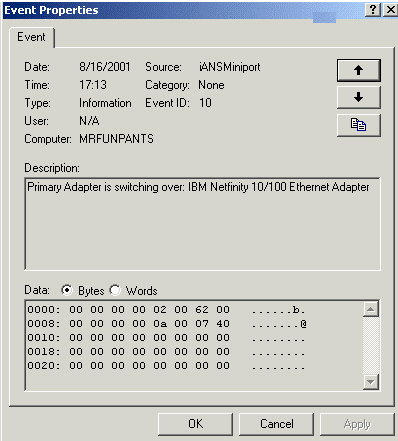
- Then you will see the message "Event ID 10 - primary adapter is switching over to the secondary adapter".
- Next come the messages "Event ID 21 and Event ID 15 - secondary adapter is now active".


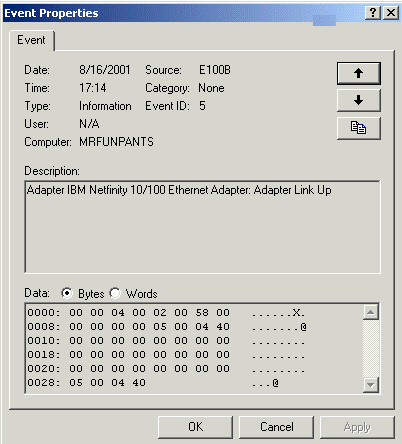
- Now plug the cable back into the primary adapter. This results in "Event ID 5 - adapter link up". The primary adapter detects network connectivity.
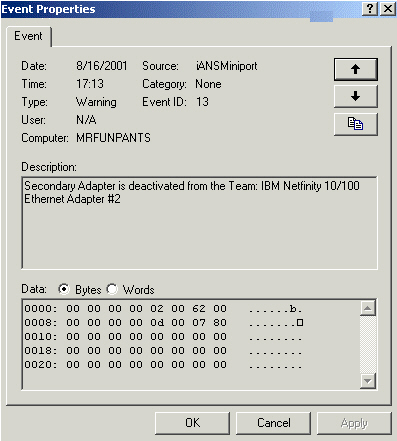
- You will then get the message "Event ID 13 - secondary adapter is deactivated from the team".
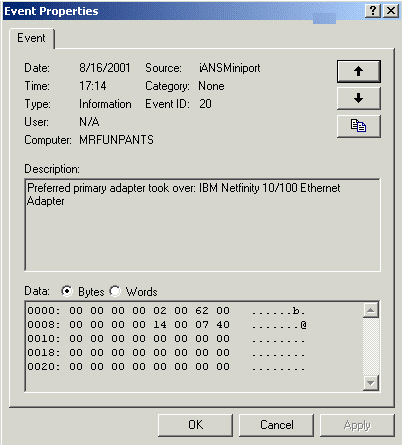
- Finally, the message "Event ID 20" means that adapter #1 switches back to the preferred primary.
- Testing is complete. Click OK to close the window.
Document Location
Worldwide
Was this topic helpful?
Document Information
Modified date:
28 January 2019
UID
ibm1MIGR-40983