How To
Summary
On Linux platforms, you can setup a new installation of Information Server 11.7.0.2.
Objective
Setup a new installation of Information Server 11.7.0.2 on Linux.
Environment
Linux platform
Steps
The following sections describe the steps needed in various install scenarios:
- Common steps to be done for Sections 2 and 3
- Instructions for is-suite installation of IBM InfoSphere Information Server, Version 11.7.0.2 with Enterprise Search
- Instructions for is-suite installation of IBM InfoSphere Information Server, Version 11.7.0.2 without Enterprise Search
- Instructions for manually installing Enterprise Search (ISES) 11.7.0.2 (Applicable when Information Server 11.7.0.2 was previously installed without Enterprise Search)
1) Common steps for Information Server -suite installs
1.1) Download from Passport Advantage the Information Server 11.7.0.2 is-suite image to the Information Server host.
i.e., is-suite.is_11_7_0_2.linux64.QA13.180724.tar.gz
1.2) Extract the image
tar -xvf is-suite.is_11_7_0_2.linux64.QA13.180724.tar.gz
1.3) If you are installing Information Server Enterprise Search (ISES) 11.7.0.2, download from Passport Advantage the Docker image to the ISES host.
i.e., ugdockerrepo_11.7.0.2_20.tar.gz
2) Instructions for is-suite installation of IBM InfoSphere Information Server, Version 11.7.0.2 with Enterprise Search
Check that all System requirements have been met. See "Preparing the Information Server Enterprise Search node" for details of the steps needed to setup the ISES host. You can use this pre-installation checklist while setting up the ISES host.
Installation of Information Server Enterprise Search (ISES) will place the following packages on your system. If you have any of these packages on the system prior to the install, they must be at exactly the same level as indicated below, or the install will fail:
Version of RPM Packages
You should address "Various issues related to upgrading IBM InfoSphere Information Server to version 11.7.0.2" prior to starting the install.
2.1) Install in GUI mode
2.1.1) Login to the Information Sever host and change directory to the folder where is-suite is extracted. To start the install, run the following command
<is-suite downloaded path>/.setup
- This will launch the Installer in GUI mode.
Provide information as required in each panel as shown below.
2.1.2) Click Login.
2.1.3) Getting started – Click Next.
2.1.4) Click Next.
2.1.5) Early system requirement – Click Next if all requirements are passed.
2.1.6) Select the Installation directory (the installer will automatically display the default install directory). Click Next.
2.1.7) Select New Installation and Click Next.
2.1.8) Select the Tiers you want to install and Click Next.
2.1.9) Select the products you want to install and Click Next.
2.1.10) Accept the license and Click Next.
2.1.11) Click Next, unless you are installing a High Availability installation.
2.1.12) If you want the Installer to install DB2 that is bundled with Information Server, click the first radio button else click the second radio button to use an existing repository.
Click Next.
2.1.13) Provide the DB2 installation directory and Click Next.
2.1.14) Provide the DB2 Instance user name and Click Next.
2.1.15) Provide the DB2 Fence user name and Click Next.
2.1.16) Provide the XMETA user name and password. Click Next.
2.1.17) Provide the XMETASR user name and password and Click Next.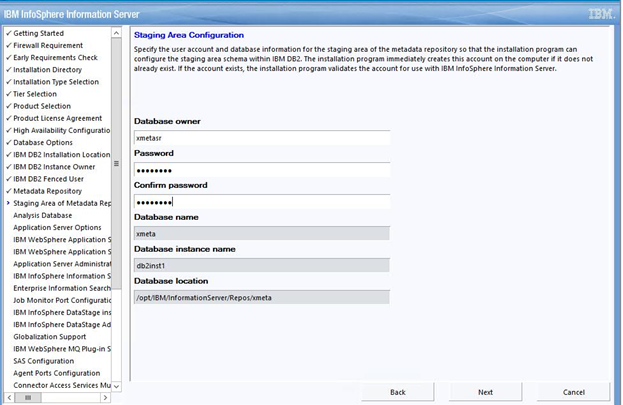
2.1.18) Provide the IAUSER user name and password. Click Next.
2.1.19) Select the WebSphere Application Server Installation type. For WebSphere Network Deployment, you may choose to have it installed, or use an existing installation. Click Next.
2.1.20) Provide the WAS ND Installation Directory and Click Next.
2.1.21) Examine the ports that will be used by WebSphere and customize as needed. Click Next.
2.1.22) Provide the WAS user name and password. Click Next.
2.1.23) Provide the IIS user name and password. Click Next.
2.1.24) Provide the information needed to install ISES on the ISES Master Host. Click Next.
2.1.25) Select the TCP/IP ports. Click Next.
2.1.26) Select the ITAG for Engine tier instance and Click Next.
2.1.27) Provide the DataStage Administrator user name and password. Click Next.
2.1.28) Select Install globalization support and Click Next.
2.1.29) Click Next. 
2.1.30) Click Next. 
2.1.31) Specify the Agent port and Click Next.
2.1.32) Click Next.
2.1.33) If any of the specified ports are in use, you may accept the currently specified range or modify the specified range. Click Next.
2.1.34) Provide the SRDUSER user name and password. Click Next.
2.1.35) Select the default dstage1 project and Click Next.
2.1.36) Provide Operation Database Configuration user name and password, or skip the step and you can configure them subsequently. Click Next.
2.1.37) Select the DataStage Edition options as appropriate and Click Next. 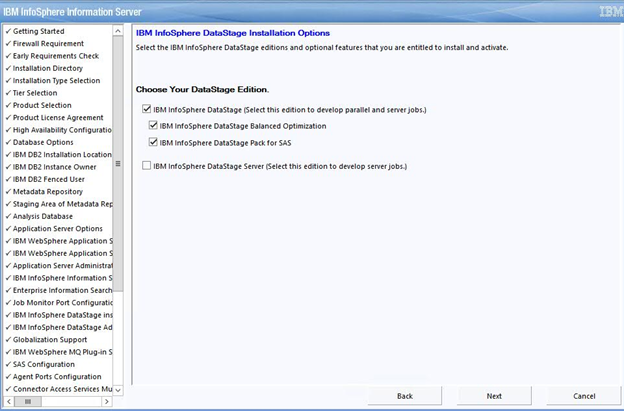
2.1.38) Ensure that all system requirements are passed and Click Next. 
2.1.39) Check the Preinstallation Summary and Click Install to start the install.
2.1.40) Click Finish to complete the install. 
2.1.41) Click “Add Exception”.
2.1.42) Click “Confirm Security Exception”.
2.1.43) You will see the Enterprise Search (ISES) Launchpad.
2.2) Install in Console(silent) mode Information Server 11.7.0.2 with Enterprise Search
2.2.1) Login to the Information Server host. Change directory to <is-suite downloaded build path >/is-suite
For example, cd /opt/Builds/is-suite
2.2.2) Prepare the response file.
It is a best practice to first generate a response file, and then use it while installing.
The response file can be generated by running the Suite installer in GUI mode, and clicking the "Cancel" button in the "Preinstallation Summary" screen.
Edit the response file, providing password values and changing any values that are specific for the computer that you are installing the software on.
2.2.3) Run the Installer.
./setup -rsp /opt/Builds/response.txt -verbose
3) Instructions for is-suite Installation of IBM InfoSphere Information Server, Version 11.7.0.2 without Enterprise Search
3.1) Install in GUI mode
3.1.1) Login to the Information Sever host and change directory to the folder where is-suite is extracted. To start the install run the following command
<is-suite downloaded path>/.setup
- This will launch the Installer in GUI mode.
Provide information as required in each panel as shown below:
3.1.2) Click Login.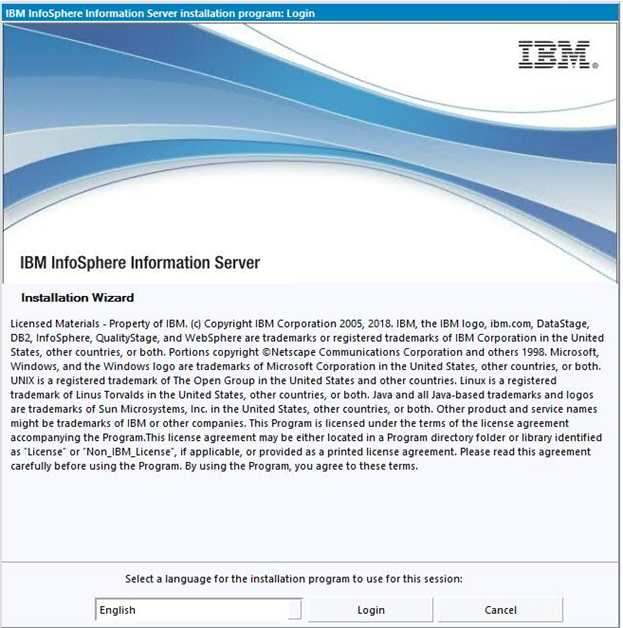
3.1.3) Getting started – Click Next.
3.1.4) Click Next.
3.1.5) Early system requirement – Click Next if all requirements are passed.
3.1.6) Select the Installation directory; the installer will automatically display the default install directory. Click Next.
3.1.7) Select New Installation and Click Next.
3.1.8) Select the Tiers you want to install and Click Next.
3.1.9) Select the products you want to install and Click Next.
3.1.10) Accept the license and Click Next.
3.1.11) Click Next unless you are installing a High Availability installation.
3.1.12) If you want the Installer to install DB2 that is bundled with Information Server, click the first radio button else click the second radio button to use an existing repository.
Click Next. 
3.1.13) Provide the DB2 installation directory and Click Next.
3.1.14) Provide the DB2 Instance user name and Click Next.
3.1.15) Provide the DB2 Fence user name and Click Next.
3.1.16) Provide the XMETA user name and password. Click Next.
3.1.17) Provide the XMETASR user name and password. Click Next.
3.1.18) Provide the IAUSER user name and password. Click Next.
3.1.19) Select the WebSphere Application Server Installation type. For WebSphere Network Deployment, you may choose to have it installed, or use an existing installation. Click Next.
3.1.20) Provide the WAS ND Installation Directory and Click Next.
3.1.21) Examine the ports that will be used by WebSphere and customize as needed. Click Next. 
3.1.22) Provide the WAS user name and password. Click Next.
3.1.23) Provide the IIS user name and password. Click Next.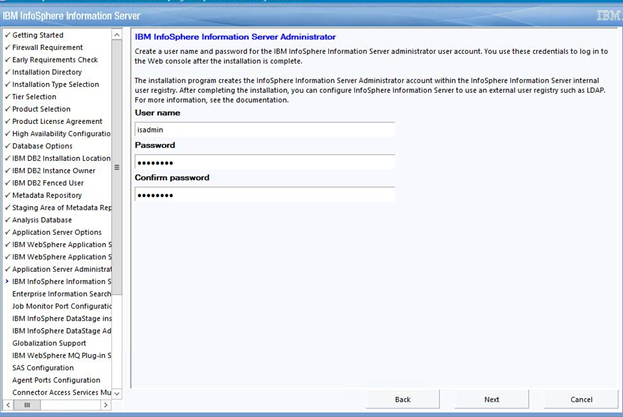
3.1.24) Select the checkbox to skip ISES Install. 
3.1.25) Select the TCP/IP ports. Click Next.
3.1.26) Select the ITAG for Engine tier instance and Click Next.
3.1.27) Provide the DataStage Administrator user name and password. Click Next.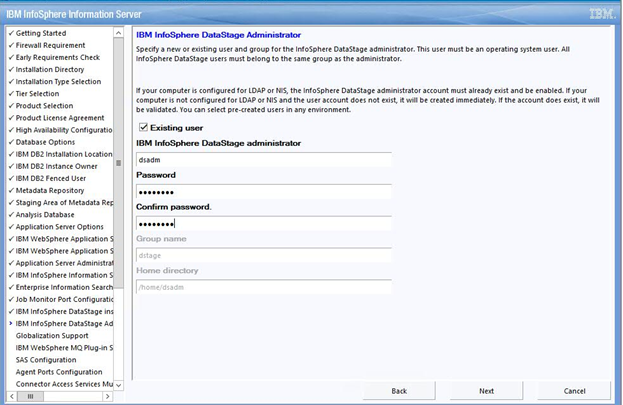
3.1.28) Select Install globalization support and Click Next.
3.1.29) Click Next. 
3.1.30) Click Next.
3.1.31) Specify the Agent port and Click Next. 
3.1.32) Click Next.
3.1.33) If any of the specified ports are in use, you may accept the currently specified range or modify the specified range. Click Next.
3.1.34) Provide the SRDUSER user name and password. Click Next.
3.1.35) Select the default dstage1 project and Click Next.
3.1.36) Provide Operation Database Configuration user name and password, or skip the step and you can configure them subsequently. Click Next.
3.1.37) Select the DataStage Edition options as appropriate and Click Next. 
3.1.38) Ensure that all system requirements are passed and Click Next. 
3.1.39) Check the Preinstallation Summary and Click Install to start the install.
3.1.40) Click Finish to complete the install. 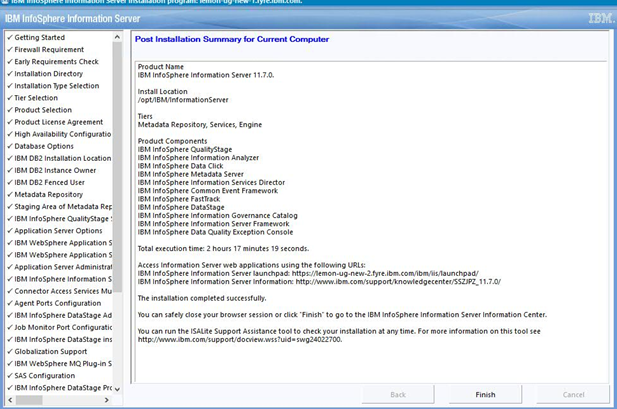
3.1.41) Click “Add Exception”.
3.1.42) Click “Confirm Security Exception”.
3.1.43) You will see the Information Server Launchpad.
3.2) Install in console (silent) mode Information Server Version 11.7.0.2 without enterprise search
3.2.1) Login to the Information Server host. Change directory to <is-suite downloaded build path >is-suite
For example, cd /opt/Builds/is-suite
3.2.2) Prepare the response file.
It is a best practice to first generate a response file, and then use it while installing.
The response file can be generated by running the Suite installer in GUI mode, and clicking the "Cancel" button in the "Preinstallation Summary" screen.
Edit the response file, providing password values and changing any values that are specific for the computer that you are installing the software on.
3.2.3) Run the Installer.
./setup -rsp /opt/Builds/response.txt -verbose
Sample response file
4) Instructions for manually installing Information Server Enterprise Search Version 11.7.0.2 when ISES is not installed in an Information Server 11.7.0.2 installation.
See instructions here.
Was this topic helpful?
Document Information
Modified date:
07 November 2018
UID
ibm10734335