Troubleshooting
Problem
There are two methods to configure a bonded network interface in QRadar.
- The installation wizard includes options for administrators to bond the management interface. The management bonding settings can be updated postinstallation by using the qchange_netsetup utility.
- Standard interfaces that share the role (regular or monitor) can be bonded by using the QRadar user interface to increase the available bandwidth for an appliance.
Resolving The Problem
When bonding is configured in QRadar, there are two ways to implement bonding. The first is during the initial appliance configuration that uses the installation wizard when you set up the management interface. You cannot bond the Management Interface by using the QRadar UI. The second is using the UI in System and License Management to bond a secondary interface.
Bonding the management interface on an existing appliance
Administrators can update their IP address and change their bonding options through out-of-band management (IMM, iDRAC, and so on). SSH connections are not allowed to change IP addresses or update network configuration options for an appliance. To use qchange_netsetup, the administrator is required to remove the host from the deployment, run qchange_netsetup, then add the appliance back to the deployment.
- Select Yes to continue with bonded network interface configuration.

- Select interfaces to configure as bonded interfaces. The interfaces that you select must not already be bonded.

Bonding nonmanagement devices through the user interface
- Log in to the QRadar user interface as an administrator.
- Click the Admin tab.
- Click the System and License Management icon.
- Select the appliance with the interfaces to bond.

- Click Actions > View and Manage System.
- Click the Network Interfaces tab.
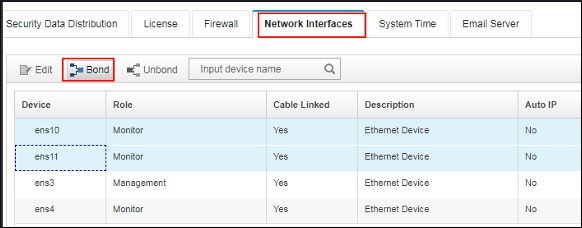
- Highlight the interfaces to bond.
- Type the IP address and the Netmask for the bonded connection.

- Click Save.
Results
The interfaces are bonded on the QRadar appliance. The bonded interface is provided a new device name and the individual interfaces are listed in the user interface with the IP address defined by the administrator.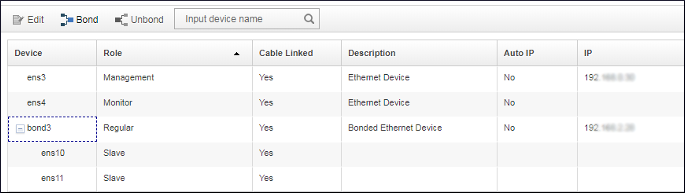
Was this topic helpful?
Document Information
Modified date:
11 January 2023
UID
ibm10729793