How To
Summary
How to add the IdP signer certificate for SAML web SSO in WebSphere Application Server traditional.
Objective
Once you have you have protected the snoop application by trusting any signer, can add the IdP's signer certificate so that you trust SAML Responses only from your IdP.
Environment
This task uses WebSphere Application Server traditional, the snoop application, and your own identity provider. Take note of the following assumptions and the steps that you need to take before you begin.
Assumptions
- The host and SSL port of the local system in this task is example.com:9443
- You have a SAML Identity Provider (IdP) from which to obtain a signing certificate or metadata file.
- You get the metadata file from your IdP administrator.
- The WebSphere global security domain is used.
- The WebSphere administrative console is used to configure the SAML TAI.
- Your logs directory is
(was_home)/WebSphere/AppServer/profiles/(profileName)/logs/(serverName) - Your trace file is
(was_home)/WebSphere/AppServer/profiles/(profileName)/logs/(serverName)/trace.log
Before you begin
- Obtain the IdP metadata or signer certificate from your IdP administrator.
- If you have a choice, get the certificate.
- Bookmark the SAML TAI messages page in IBM Docs to easily find the explanation and user action for any error or warning messages that you might encounter.
- If possible, run your test on the latest WebSphere Application Server fix pack. Even if your final production system is running an earlier fix pack, running this test setup at the latest fix pack level gives you the most recent error handling to better help you find configuration problems.
- Enable SAML web SSO trace on your WebSphere server by using this trace string:
-
*=info:com.ibm.ws.security.web.*=all:com.ibm.ws.security.saml.*=all:com.ibm.websphere.wssecurity.*=all:com.ibm.ws.wssecurity.*=all:com.ibm.ws.wssecurity.platform.audit.*=off - If you encounter login issues when you run this task, a trace is required.
-
- Keep the following links available for reference:
- The CWTAI SAML TAI messages page to easily find the explanation and user action for any error or warning messages that you might encounter.
- The CWWSS SAML runtime messages page to easily find the explanation and user action for any error or warning messages that you might encounter.
- TroubleShoot: SAML web SSO, WebSphere traditional
- Configuring single sign-on (SSO) partners
- Adding an identity provider (IdP) signer certificate to a SAML trust store
- Adding a SAML identity provider (IdP) by using a metadata file
- Importing SAML identity provider (IdP) partner metadata using the wsadmin command-line utility
- SAML web single sign-on (SSO) trust association interceptor (TAI) custom properties
Steps
- Add the IdP signer certificate to the trust store.
Using the metadata file that you received from your IdP administrator, follow the instructions in one of the following tasks in the IBM Documentation:- Adding a SAML identity provider (IdP) by using a metadata file
- In this task, you use wsadmin to import the IdP signer certificate by using the IdP metadata file.
- If you received a signer certificate from your administrator, use the next method.
- Adding an identity provider (IdP) signer certificate to a SAML trust store
- In this task, you either import the signer certificate that you received from your administrator or extract the IdP signer certificate from the metadata file, then import the signer certificate by using the administrative console or wsadmin.
- Use can this method if you have a problem with the previous one.
- Adding a SAML identity provider (IdP) by using a metadata file
- Modify your SAML TAI configuration to set trustAnySigner to false:
- In the administrative console, navigate to Security > Global security > Web and SIP security > Trust association > Interceptors > com.ibm.ws.security.web.saml.ACSTrustAssociationInterceptor
- Select
sso_1.sp.trustAnySigner, then click Edit - Set the value to
false. - Click OK
- Click Save
- Restart the server
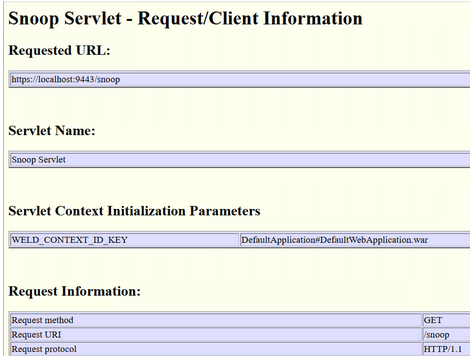
- In a new browser window, navigate to https://example.com:9443/snoop
 Remember to replace example.com and 9443 with your own host and port.
- After the user logs in, the snoop application is displayed in the browser.
Copied!
Document Location
Worldwide
[{"Type":"MASTER","Line of Business":{"code":"LOB67","label":"IT Automation \u0026 App Modernization"},"Business Unit":{"code":"BU048","label":"IBM Software"},"Product":{"code":"SSEQTP","label":"WebSphere Application Server"},"ARM Category":[{"code":"a8m0z000000Cbp2AAC","label":"WebSphere Application Server traditional-All Platforms-\u003ESecurity-\u003ESSO-\u003ETAI"}],"ARM Case Number":"","Platform":[{"code":"PF025","label":"Platform Independent"}],"Version":"All Versions"}]
Was this topic helpful?
Document Information
Modified date:
25 September 2024
UID
ibm17160417