How To
Summary
This document covers how to upgrade a vHMC on x86 from V10R1 or V10R2M1030 to V10R3M1050
Objective
Environment
HMC V10 R3 M1050 supports the following hypervisors:
- x86 : KVM, XEN, ESXi (6.5 / 7.0 / 7.0.2)
Steps
Prerequisites
Before upgrading, complete the following:
1. The minimum HMC levels required to perform install or upgrade via network to HMC V10 R3 M1050 are:
- V10 R1 + vMF70430
-
Mandatory fix for vHMC on x86: vMF70430 (10.1.1010.3)
-
(This fix must be the last fix installed, prior to performing this Upgrade. It is not cumulative)
Fix Central V10R1 - Find vHMC V10R1M1010 Deploy image, click the +Show Patched By to find MF70430
- V10 R2 - NO Pre-Req fix needed
Review all additional "upgrade notes" found in the V10 R3 release notes. The readme file release notes for HMC V10 R3 M1050 Recovery Media and mandatory fix can be found in IBM Fix Central at https://download4.boulder.ibm.com/sar/CMA/HMA/0btxa/5/vMF71419.readme.html
- Use the GUI task Console Management > Console Management > Shut Down or restart the Management Console > Restart HMC then click OK.
OR
- Use the CLI command hmcshutdown -r -t now

NETWORK UPGRADE
Restricted Shell Access
This upgrade method requires restricted shell command-line access.
From the local HMC, select HMC Management > Console Management > Open a Restricted Shell terminal
From a remote location, restricted shell is available through the ssh protocol. For information on how to access HMC command line remotely see
Perform a Save Profile Data for each managed system to save an extra copy of partition/profile configurations. For dual HMCs managing the same server this step is only needed on the upgrade of the first HMC. It cannot be run on HMC with a server in "version mismatch - save area version mismatch" state.
At the command prompt, enter the following command to save profile data for all servers:
lssyscfg -r sys -F type_model*serial_num | while read machine; do bkprofdata -m "$machine" -f Beforeupgrade$(date +%Y%m%d) ; done
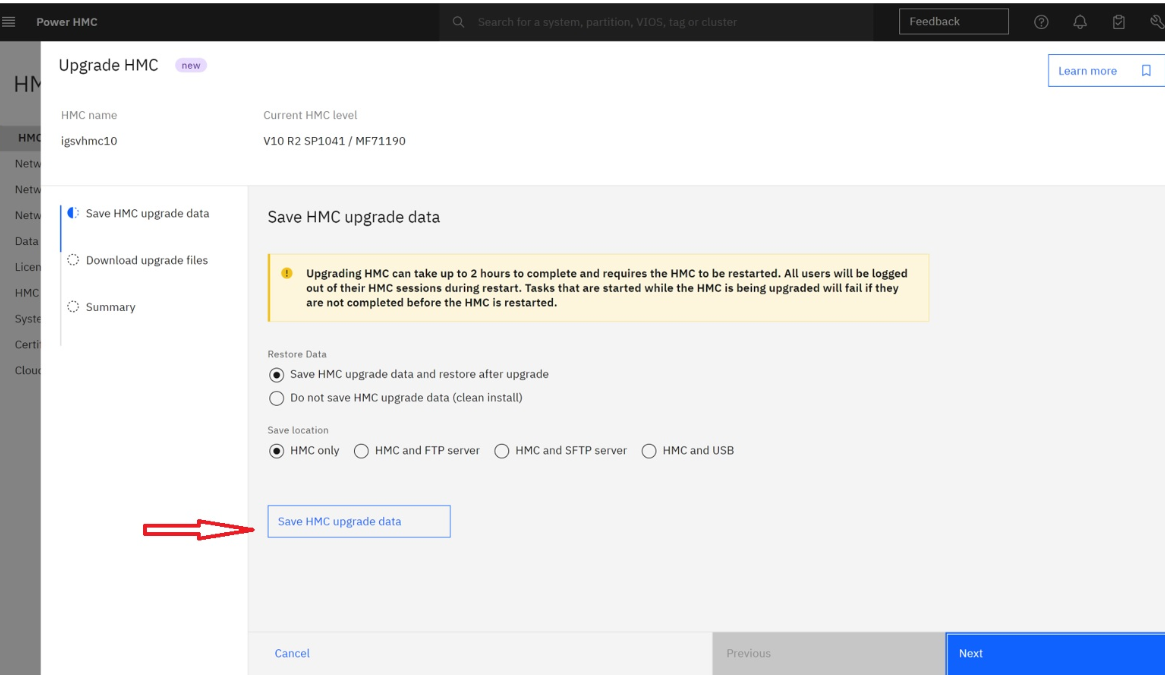
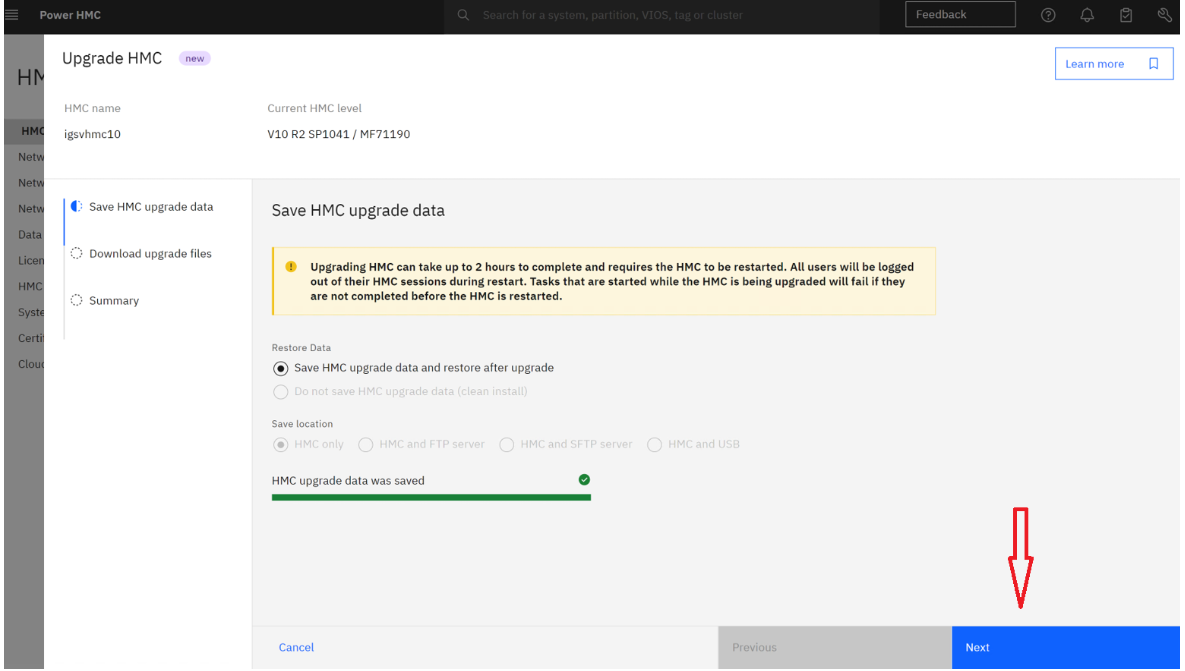
Step 2: Save Upgrade Data
A Save Upgrade Data task must be done to preserve information on the HMC before performing the upgrade. You must upgrade immediately after the Save Upgrade Data task. If you restart the HMC again without doing the upgrade, you must log in and run the Save Upgrade Data task (to hard disk drive) again before performing the upgrade. CLI command - saveupgdata -r disk
| a. |
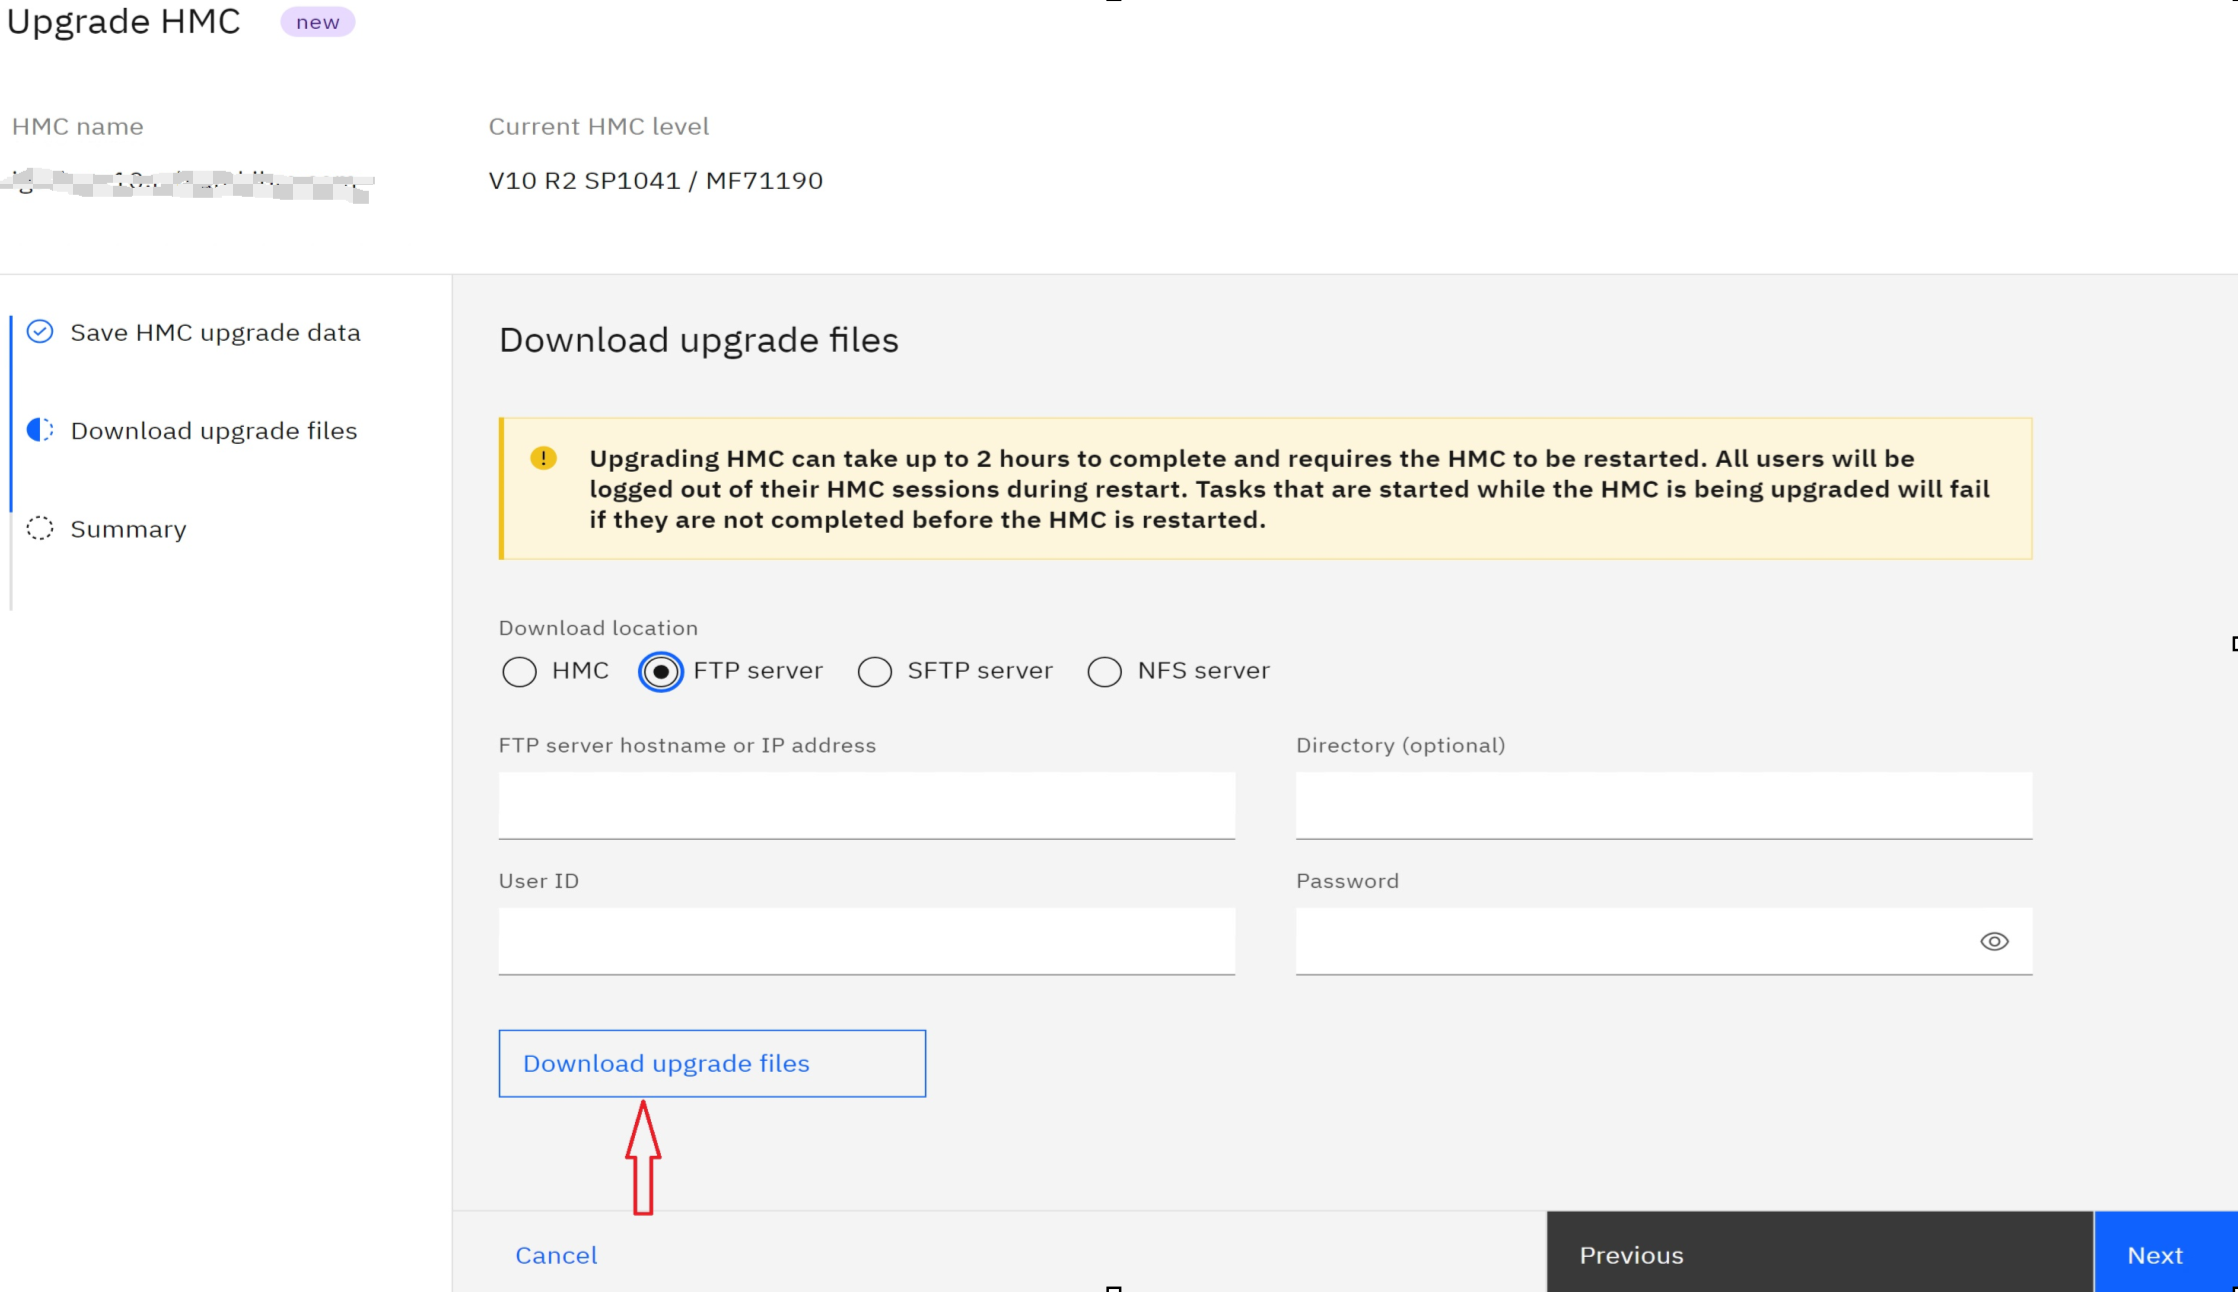
Download the V10R3_network_images_x86.zip from Fix Central. From the Fix Central site, select vMF71419 vHMC for x86 deploy image, click continue. Then find V10R3_network_images_x86.zip and download to your PC. Then get the .zip file moved to your local server. Make sure the file is unzipped, which will give you the necessary network files to perform this upgrade, or use https://public.dhe.ibm.com/software/server/hmc/network/v1050/x86/ to download the network files to your local server.
Open Restricted Shell (or ssh session) and type the following command: getupgfiles -h myserver -u myuser --passwd mypassword -d /mydirectory The parameters of the getupgfiles command:
The following files are downloaded to the directory indicated:
Once the files have all been downloaded successfully, the getupgfiles command returns to the command prompt. |
||||||||||||||||||||||||||||||||||||||
| b. | Set the HMC to do the next reboot from the special location on the hard disk drive where the downloaded V10 files are stored by typing the following command: chhmc -c altdiskboot -s enable --mode upgrade |
||||||||||||||||||||||||||||||||||||||
| c. |
Reboot the HMC using one of the following methods:
Option 1. HMC GUI: HMC Management > HMC Actions, drop down > Restart HMC then click OK. Option 2. Restricted shell command: hmcshutdown -t now -r Note: The initial reboot can take 30 - 45 minutes. Do not reboot or power off; wait for the boot to complete. Once the HMC reboots, the installation starts and typically takes about an hour. After the installation of V10R3M1050 is complete, you should be able to remotely access the HMC again.
|
||||||||||||||||||||||||||||||||||||||
| d. | At the Hardware Management Console login prompt, log in using your user ID and password. |
||||||||||||||||||||||||||||||||||||||
Document Location
Worldwide
Was this topic helpful?
Document Information
More support for:
Hardware Management Console V10
Component:
Hardware Management Console
Software version:
10.1.0 and future releases
Document number:
7079616
Modified date:
01 October 2024
UID
ibm17079616