How To
Summary
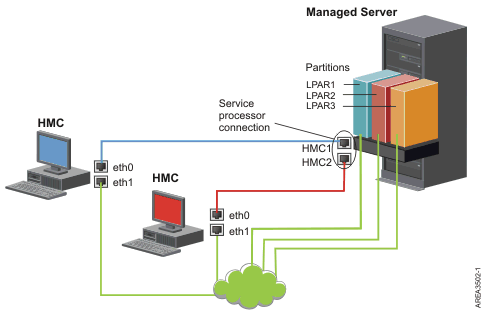
This document provides steps to configure the Hardware Management Console (HMC) for use on a dual network. This process assumes that the HMC being used has two Ethernet adapters installed.
Objective
The following document provides steps to configure the Hardware Management Console (HMC) for use with the recommended private/open network. The recommended configuration is to configure eth0 as a private network for management of the server(s) and configure eth1 for remote HMC access, call home, and dual HMC and/or HMC/partition communications. This document applies to HMC V10R2M1040 View only.
Environment
7063-CR1 V10R2M1040
7063-CR2 V10R2M1040
vHMC for x86 V10R2M1040
vHMC for Power V10R2M1040
Steps
Select HMC Management => Network Settings
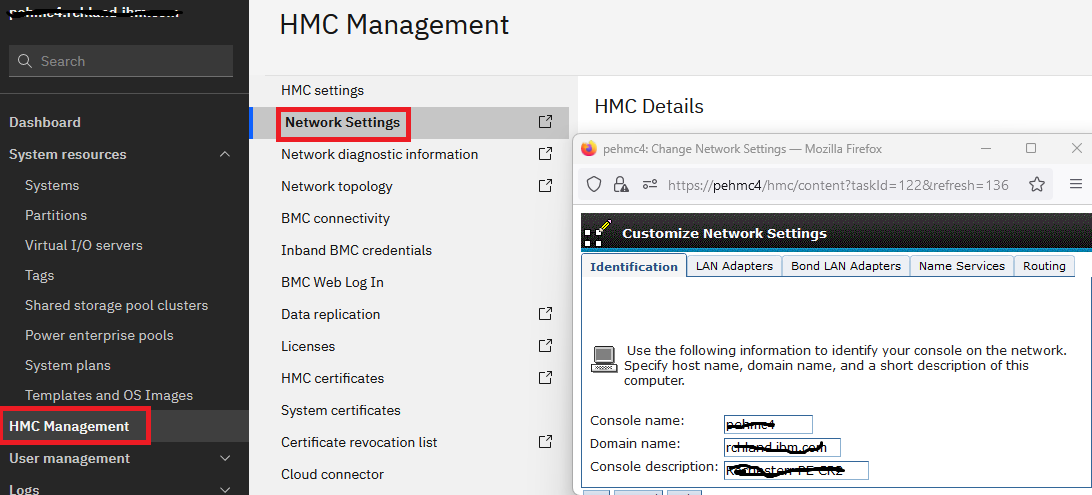
A . Select the Identification tab.
1. The console name should be the host name of the HMC as configured in the DNS.
2. The domain name should be must be filled in ( xxxxxx.com or xxxxxx.org).
3. Make a note of the domain name because it is required later on the Name Services tab.
B. Click on the LAN Adapters tab:
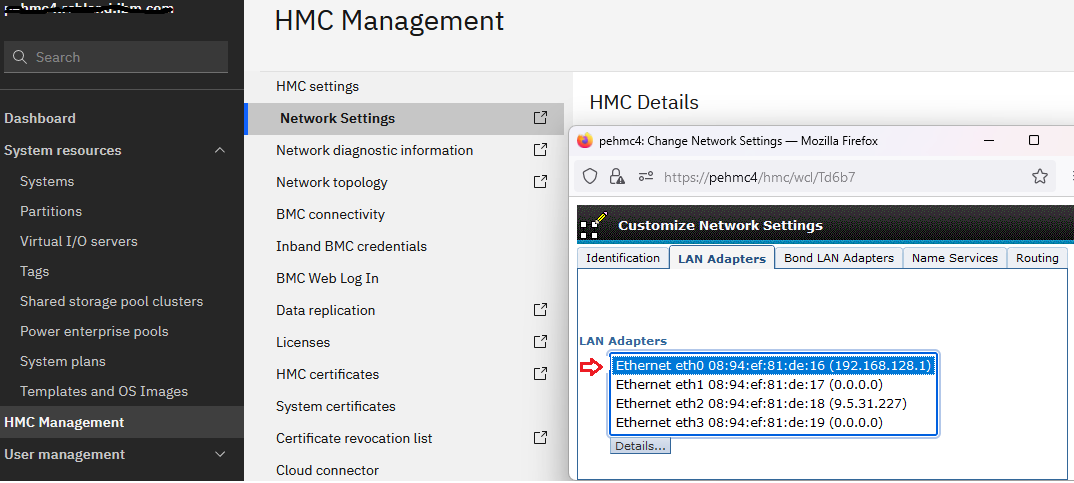
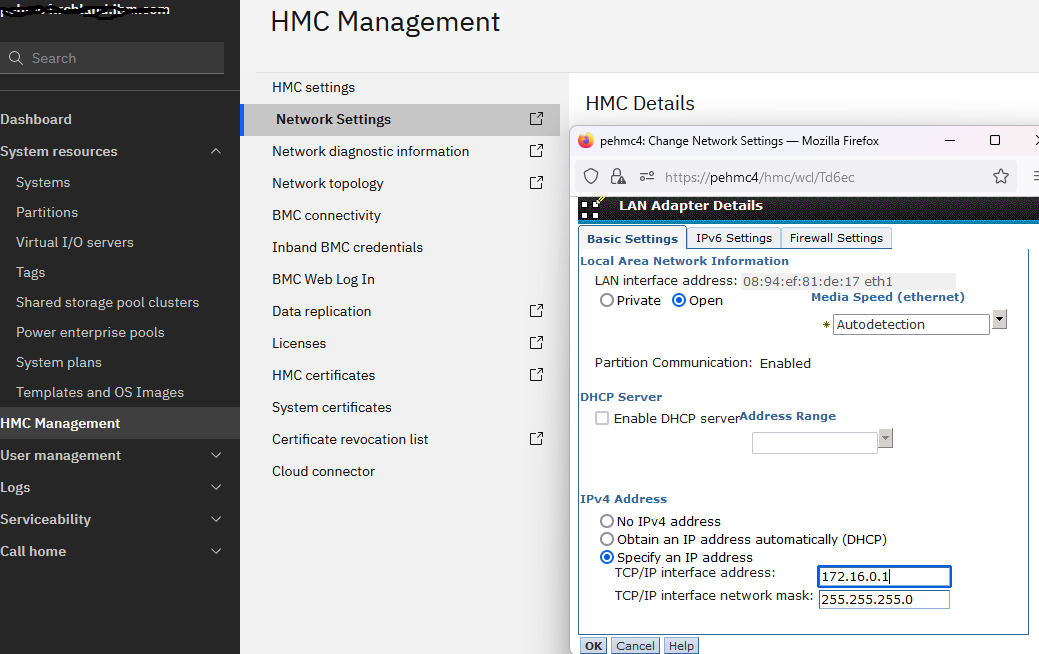
Eth0 should be used for the private LAN. Eth1 should be used for the public LAN. Selecting Ethernet eth0 and clicking on Details provides the following options
Notes:
Repeat for eth1. Below is the details panel for eth1:
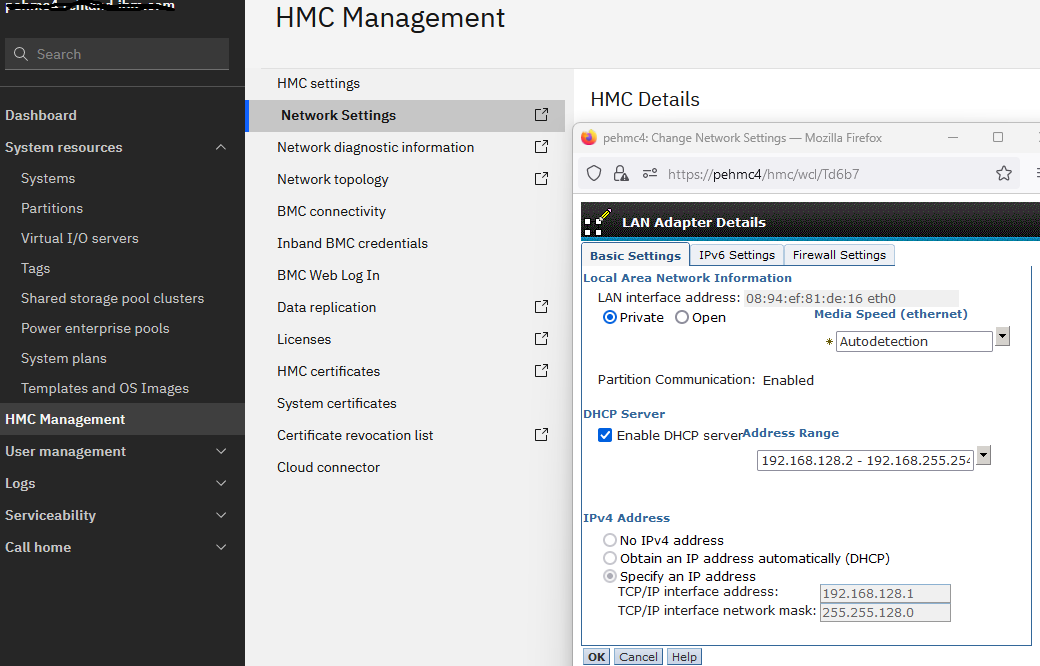
| 1. | Selecting Private makes this the FSP's local network. |
| 2. | Enable DHCP to make the HMC a source for TCP/IP addresses on the Private network. |
| 3. | Select the address range. If two HMCs manage the same server, each HMC must use a unique DHCP Server Address range. Do not select an address range that is used on or overlaps an address range used on the open (intranet) network.. |
| 4. | Specifying a TCP/IP address should automatically get filled in with the base address of the DHCP range filled in above in the DHCP frame of this window. 192.168.128.1 is one below the 192.168.128.2 which is the beginning of the DHCP range. Different ranges may use a different base address, however, the TCP/IP address is filled in automatically for a private LAN when DHCP is selected above. |
| 5. | For media speed, use autodetection exclusively except for the case when the user's switch is set to FORCE FULL DUPLEX. Then set full duplex. |
Special Note for 7063 model HMC's:
If using the above setting for eth0, you should set the BMC to use Dedicated port.
Notes:
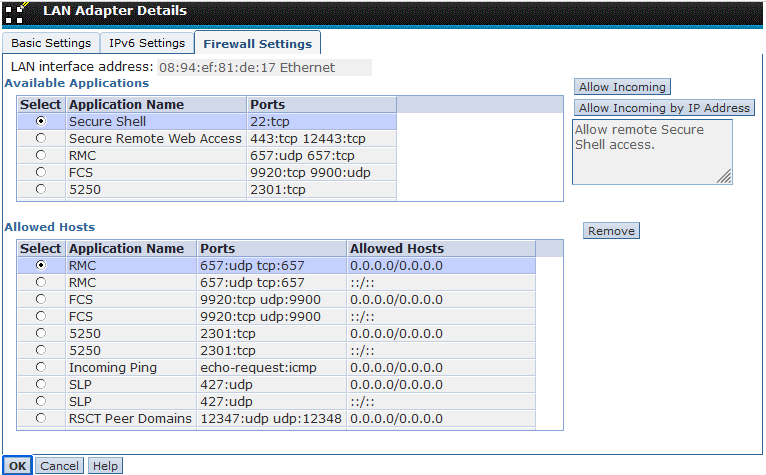
Click on Firewall to view and/or customize firewall settings for the selected interface.
| 1. | eth1 specifies the open network and has access to the location's intranet. Access to the Internet using the location's intranet is allowed and actually preferred for future use of service related functions. Private may not be selected here. |
| 2. | DHCP server may not be selected here (open network). |
| 3. | The HMC can obtain an address using DHCP (automatically) or use a static TCP/IP address. Specify the correct subnet for static TCP/IP address. |
| 4. | For media speed, autodetection should be selected except for the case when the network switch adapter is connected to, is set to FORCE FULL DUPLEX. Then set full duplex. |
Click on Firewall to view and/or customize firewall settings for the selected interface.
Notes:
1. In the Firewall tab, select Available Applications from the top list box. Typically only Secure Shell, and Secure Remote Web Access needs to be added.
2. Click the Allow Incoming button to allow access from any IP address.
1. In the Firewall tab, select Available Applications from the top list box. Typically only Secure Shell, and Secure Remote Web Access needs to be added.
2. Click the Allow Incoming button to allow access from any IP address.
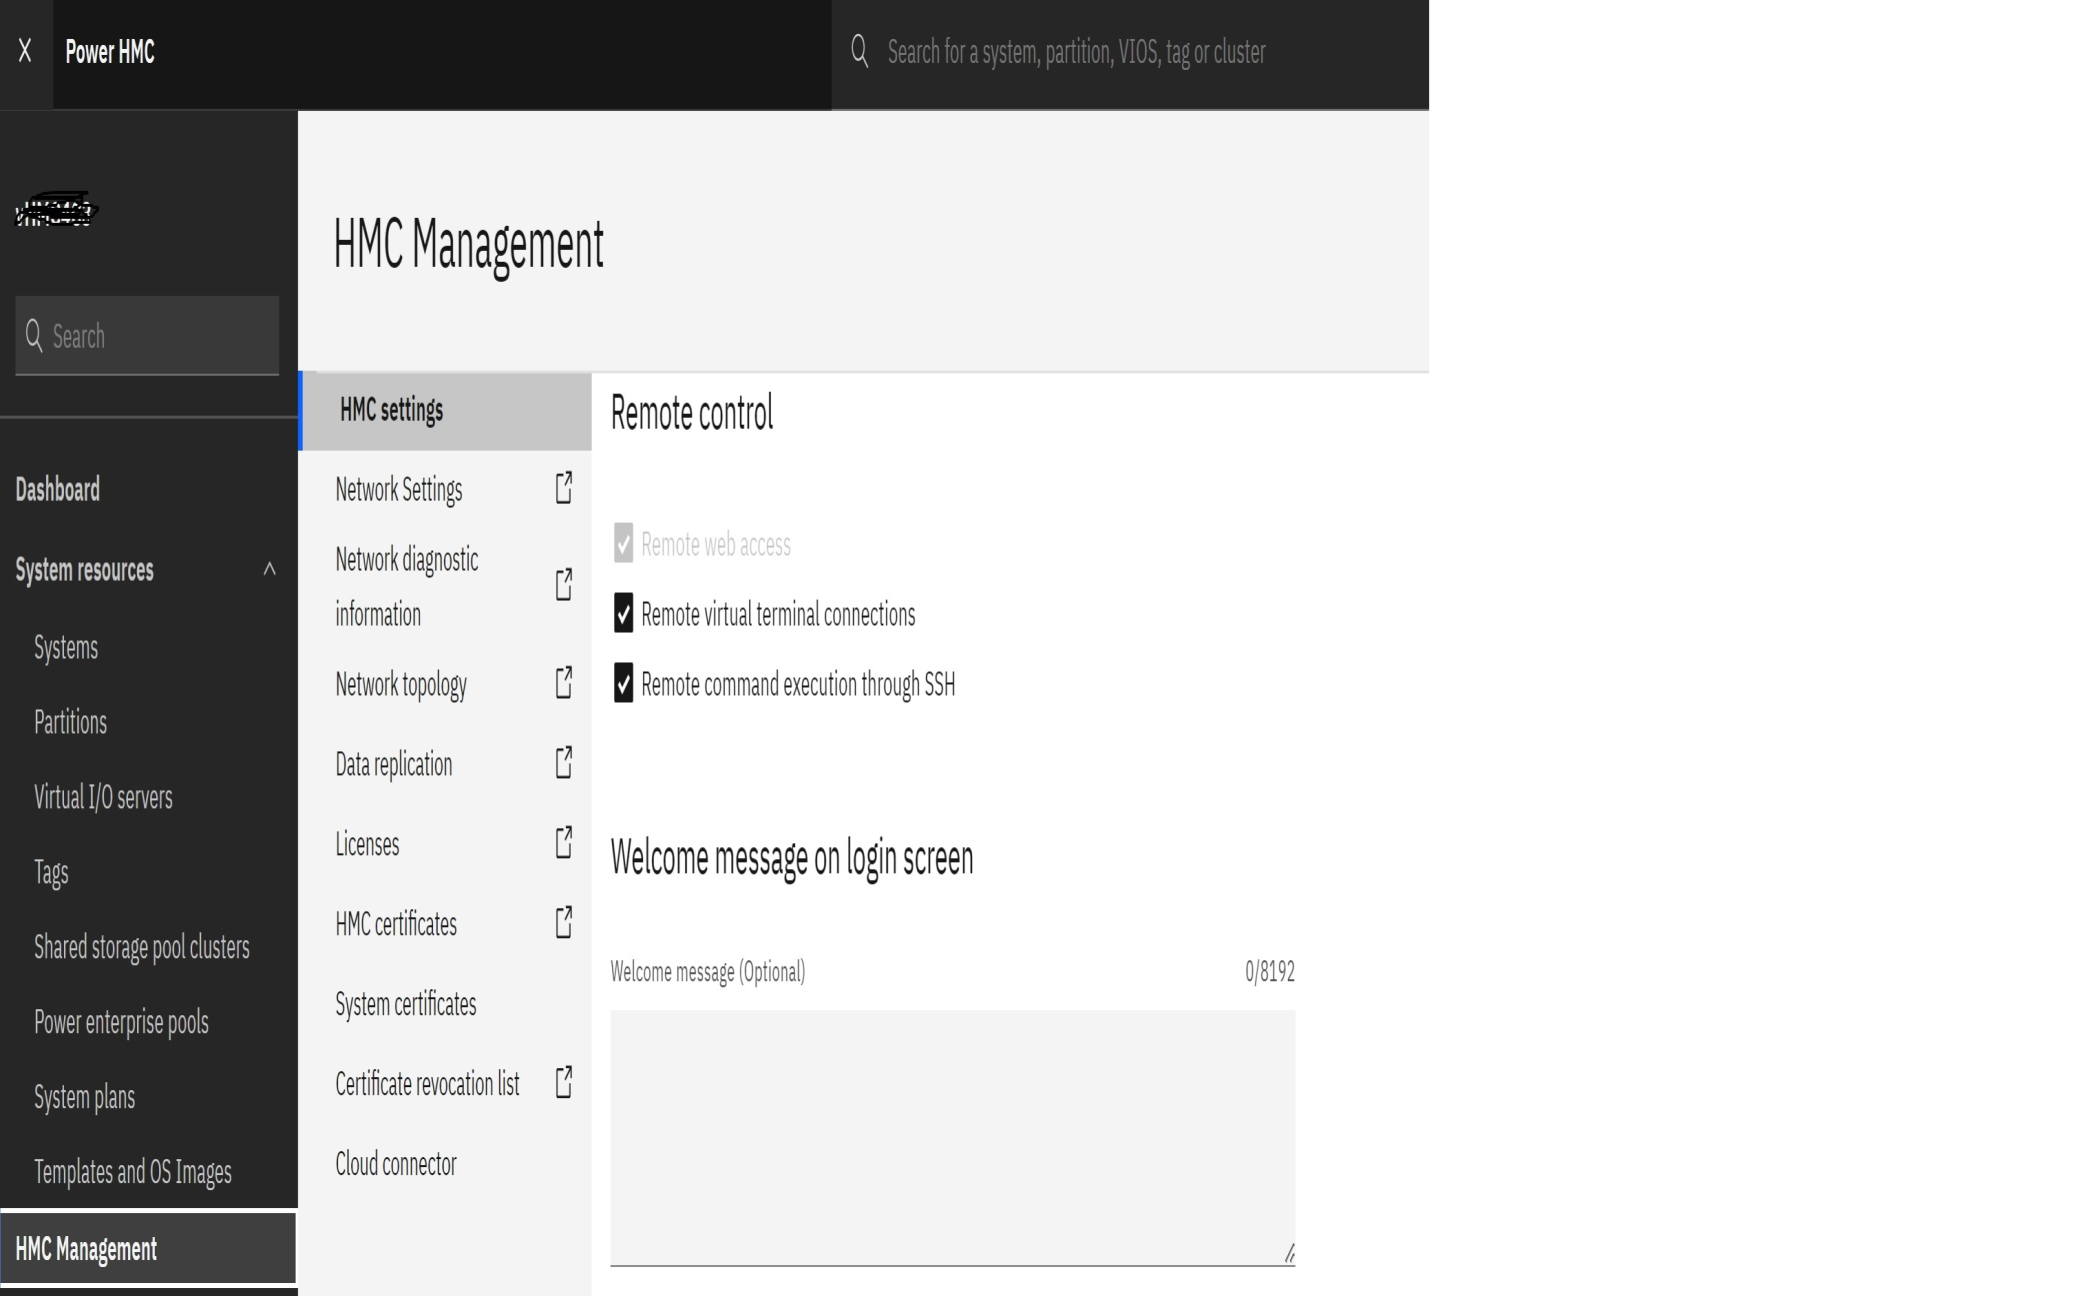
** You can also verify the Remote Control options are enabled by checking the boxes. Go HMC Management screen - Example
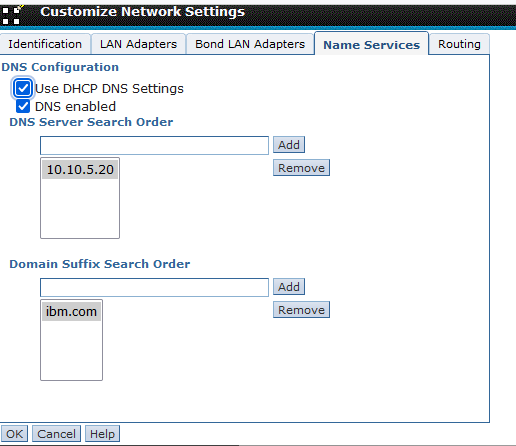
Once the firewall options have been set for eth1, check the Domain Name Services settings by clicking on the Name Services tab in the Change Network Settings:
Notes:
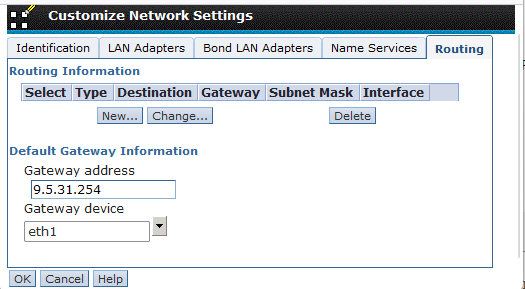
Once all of the DNS server entries and domains have been added, click on the Routing tab from the Change Network Settings:
| 1. | A DNS server is optional but recommended. |
| 2. | Include the Network Identification domain name into the Domain Suffix Search Order. |
Notes:
Click OK, OK to save the changes.
The HMC may prompt to generate a new self-signed certificate that includes the new network information. Click yes to generated the new certificate. The HMC will restart.
| 1. | A Net type route that matches the private network may automatically show up in the routing information. The default gateway should be the open networks default gateway. |
| 2. | The gateway device should be eth1. |
| 3. | If no open network is being used, the default gateway need not be filled in. |
The HMC may prompt to generate a new self-signed certificate that includes the new network information. Click yes to generated the new certificate. The HMC will restart.
Additional Information
To setup BMC connection on a 7063 model HMC, select HMC Management > BMC Connectivity
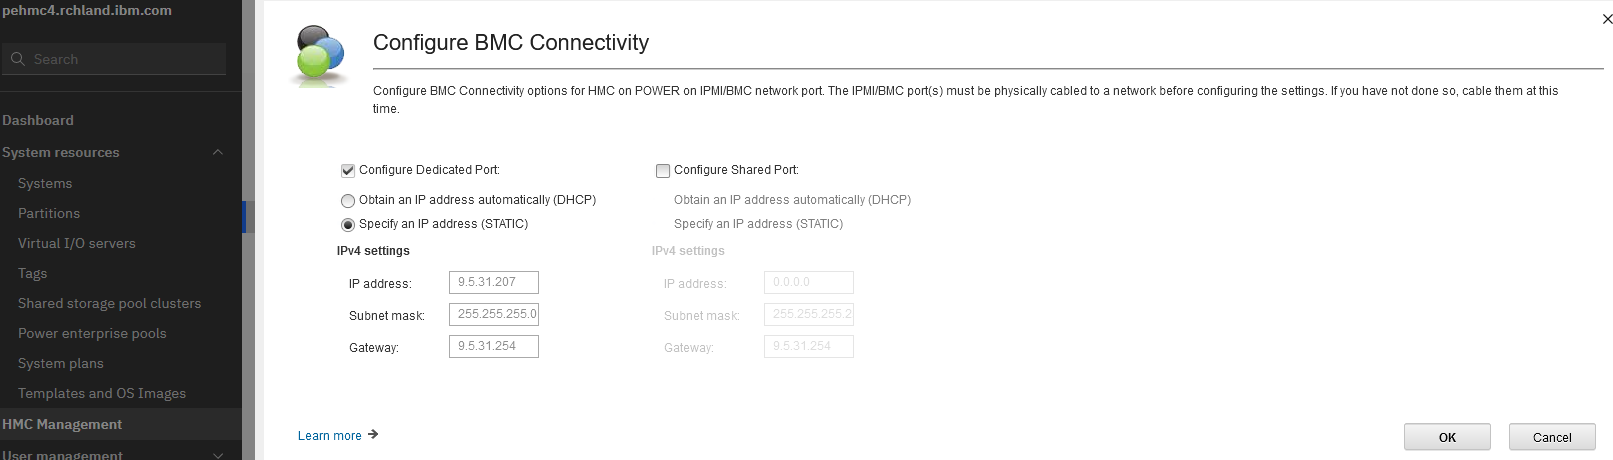
You will need an IP address on your open network, along with the subnet mask and Gateway IP. Then make sure you have the BMC/IPMI port cabled to your network.
7063-CR1 port cabling - https://www.ibm.com/docs/en/power9?topic=rack-cabling-mounted-7063-cr1-hmc
7063-CR2 port cabling - https://www.ibm.com/support/pages/how-configure-bmc-hmc-7063-cr2
Document Location
Worldwide
[{"Type":"MASTER","Line of Business":{"code":"LOB57","label":"Power"},"Business Unit":{"code":"BU058","label":"IBM Infrastructure w\/TPS"},"Product":{"code":"7063CR2","label":"Hardware Management Console (7063-CR2)"},"ARM Category":[{"code":"a8m0z000000GnS5AAK","label":"HMC"}],"ARM Case Number":"","Platform":[{"code":"PF025","label":"Platform Independent"}],"Version":"10.2.0"}]
Was this topic helpful?
Document Information
Modified date:
29 February 2024
UID
ibm17010065