How To
Summary
The installation of the Maximo Application Suite is described. The IBM MAS CLI utility is used.
Objective
To show how to use the IBM MAS CLI Utility to install MAS. (For information on prerequisites for installing MAS, including MAS licenses, IBM Entitlement Key, and others, refer to the MAS CLI documentation.)
Environment
The procedure in this note requires an admin host that can access the Red Hat OpenShift cluster to be used for MAS installation. This host can be Linux, Windows, or Mac. The host must have Podman or Docker installed. Refer to Podman or Docker installation documentation.
In some cases, if it's not possible to run a container in the admin host, an option is to download the CLI from GitHub.
For the steps described here, an Ubuntu v22.04 virtual machine is used. Docker is used to illustrate the installation of the MAS CLI tool. If Podman is used, use the `podman` command in place of `docker` in the commands.
In the screenshots provided, a Red Hat OpenShift cluster v.4.12 is used. Ensure that the cluster has the required storage classes.
Steps
For assistance on issues encountered in using the MAS CLI tool, a ticket can be submitted to IBM Support.
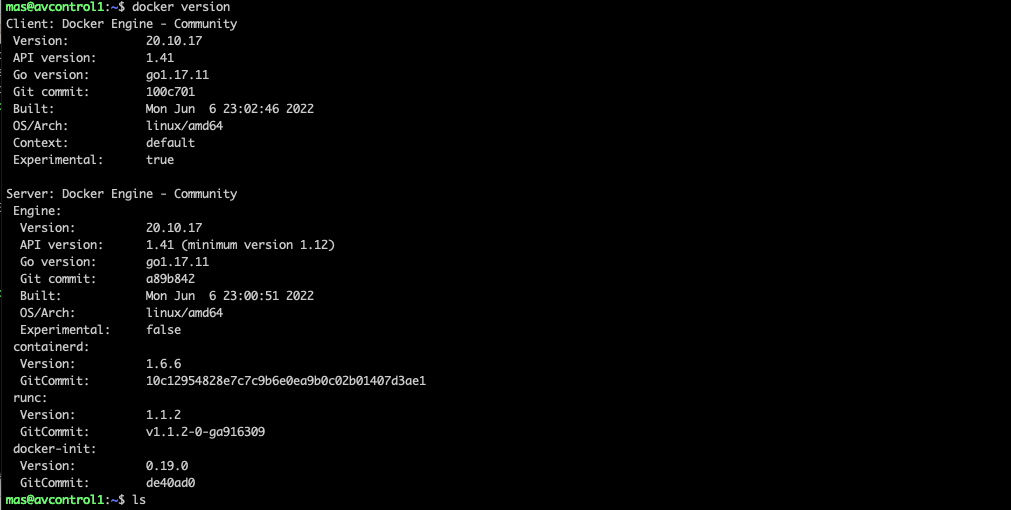
0. Check the Docker status.
1. Ensure that a copy of your MAS license exists in the directory of your choice in the host.

2. Create the MAS CLI utility container and do a volume mount where the license file is saved.
docker run -it --rm -v ~:/mnt/home --pull always quay.io/ibmmas/cli

The local volume is accessible inside the container.

Tip: Before installation, check for your available storage classes. In the screenshot, available storage classes in the cluster are shown.

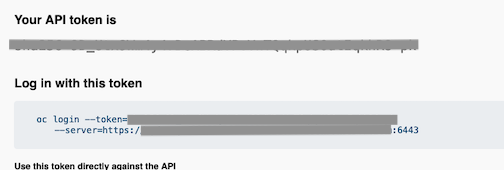
3. In the MAS CLI container, login to the Red Hat OpenShift cluster that you will use to install MAS in.
Copy the login token from the Red Hat OpenShift console and paste it in the command line:


4. From hereon, any of the "available commands" listed when the container is first created and the MAS DevOps Collection playbooks and roles can be used.
Using the `mas install` command
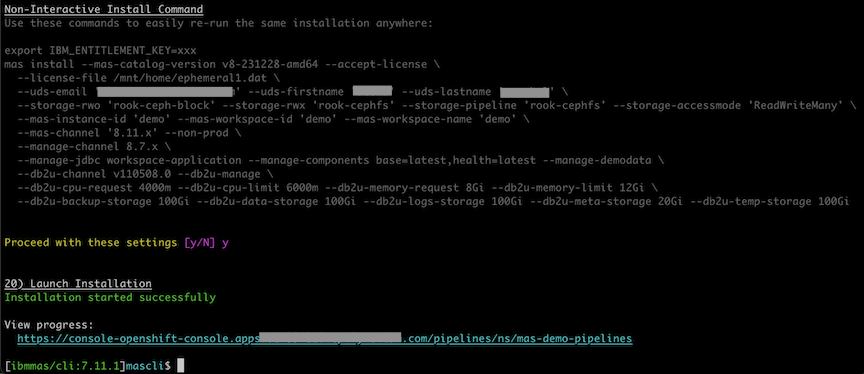
The following example shows the `mas install` command. Bear in mind that the installer version in the screenshots is v7.11.1 and the current version can vary from what is shown in the following screenshots. Also, yes and no options default to the option that appears in capital letter. That is, a question with available options "[Y/n]" defaults to "yes" when no answer is provided.)
Running the `mas install` command, the target Red Hat OpenShift cluster is set. If `oc login` was not run previously, you are allowed to log in. The screenshot shows what happens when `oc login` was run before the `mas install` command:
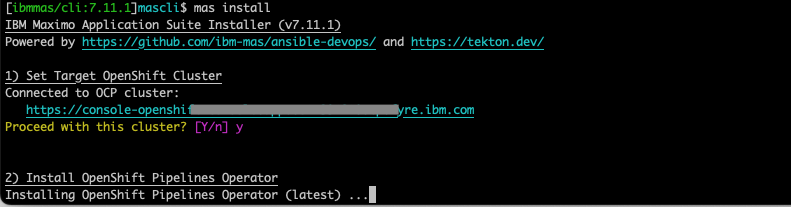
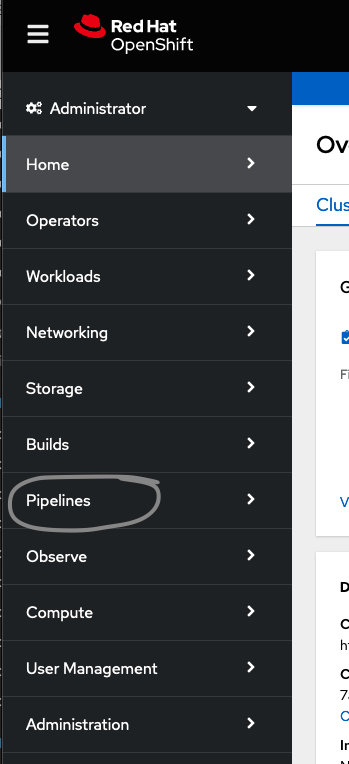
The installation pauses for a few minutes to install or detect the Red Hat OpenShift Pipeline Operator in the Red Hat Openshift cluster. When done, the status of #2 changes to "OpenShift Pipelines Operator is installed and ready". If the operator is not already installed, the Red Hat OpenShift console gets a new menu called "Pipelines".

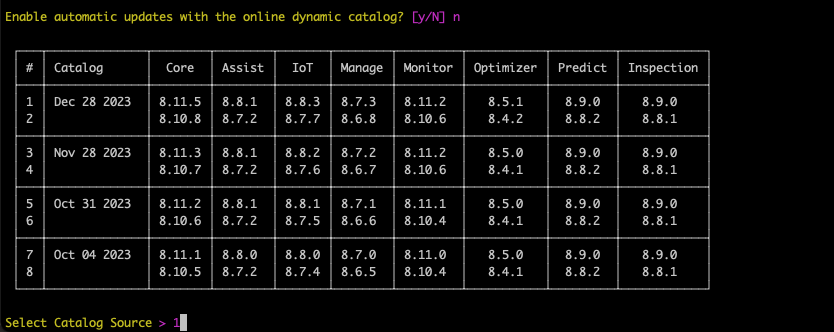
Information on catalog selection is available. Choosing the default static catalog option, the available catalogs are presented next:
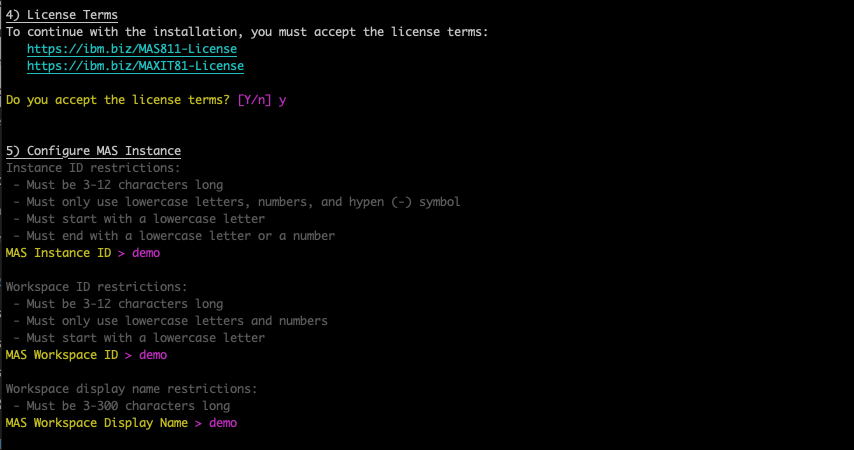
Next, accept the license terms, and then choose the MAS instance id and workspace id. Workspace Display Name can be changed after installation.
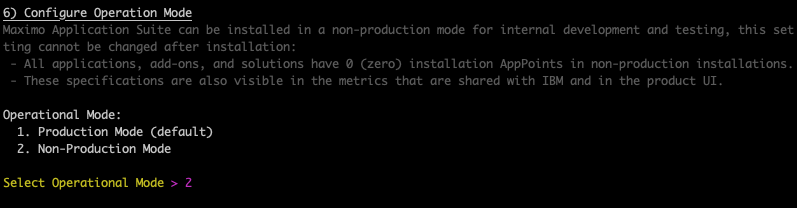
Configure the operation mode. This example shows installation in a nonproduction mode.
Next, the configuration of Domain and Certificate Management can be skipped as shown.

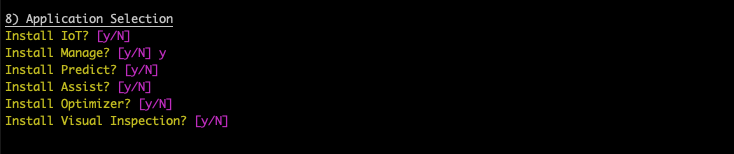
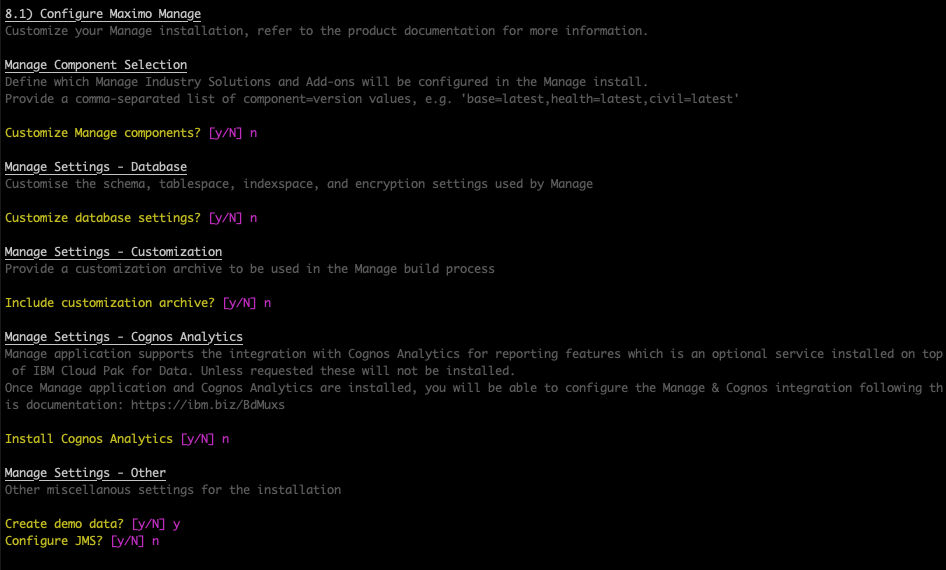
Application selection is next. One can opt to install the MAS core app only, in which case, "n" is selected in all the apps. In this example, Manage is chosen along with the MAS core app.
The next questions are on Manage configuration. The following example chooses only to add a demo data.
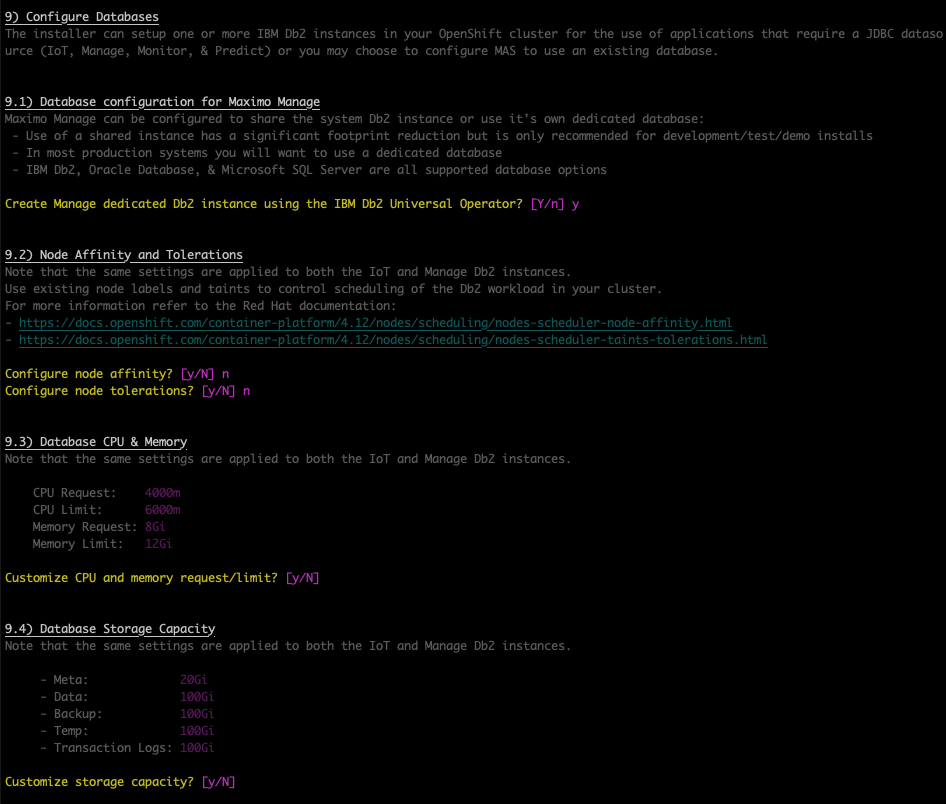
Database configuration: this example shows that a dedicated Db2 instance is installed along with the Manage app. In some instances, customers opt to use an existing database. Configuration is not in the scope of this example.
Configuration of Kafka is shown next. This example does not use any apps what use Kafka, hence the message in the screenshot.

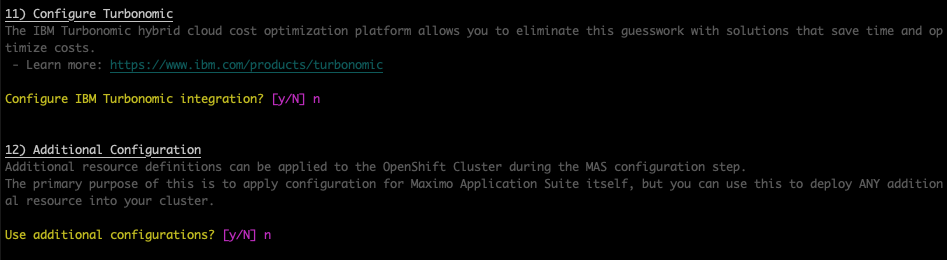
Turbonomic configuration and additional configuration:
Storage classes are detected next. In this case, the storage classes need to be entered. IBM Cloud Storage and Red Hat OpenShift Data Foundation storage classes are automatically detected.


Provide the path for the license file, UDS contact email, first name, and last name.

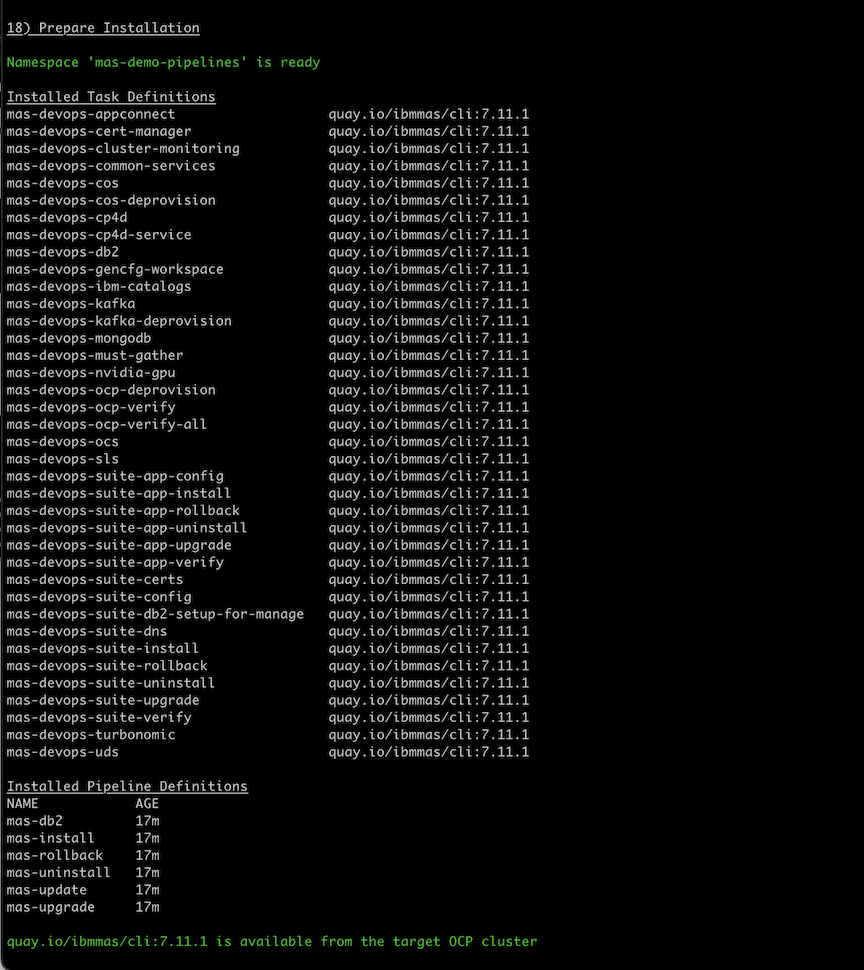
Preparation of installation is shown next.
Review:

Before approving the installation configuration, a noninteractive command is provided in case the same installation configuration needs rerunning, and one does not want to go through the interactive mode again.
Once you exit the container, the container is deleted. (If a persistent container is created (without the `--rm` switch in the docker run command) the container can be restarted and reused.)
To monitor the progress of the installation, go to the url generated from the installation.
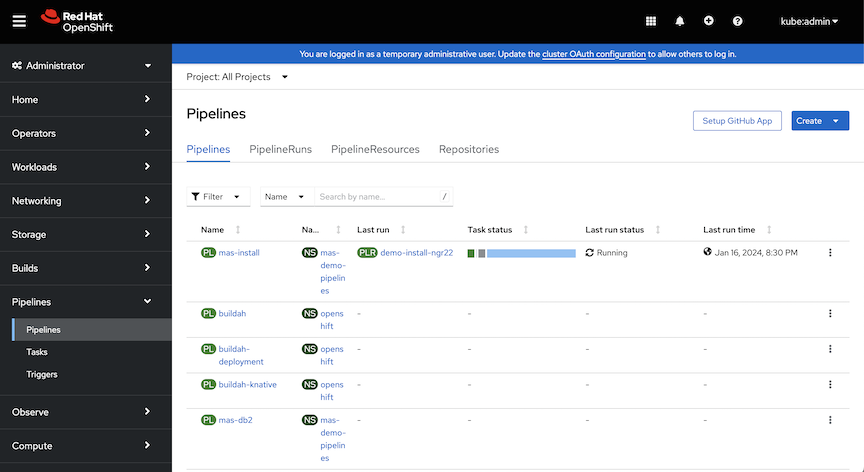
Click the pipeline run (`demo-install-ngr22` in the screenshot).

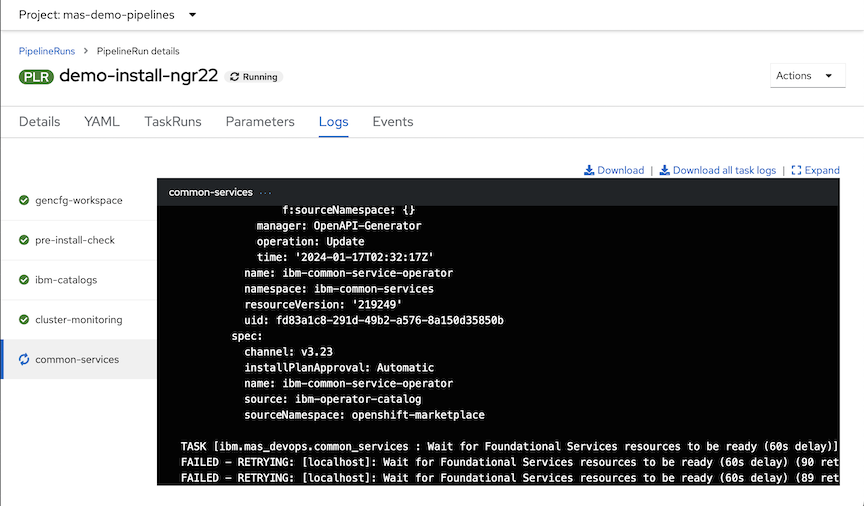
The scheme shows the tasks that are pending to run (indicated by the hourglass icon) and currently running (indicated by the spinning circle icon). Tasks that are done are indicated by green checkmarks.
The "Logs" tab shows more information on completed and running tasks.
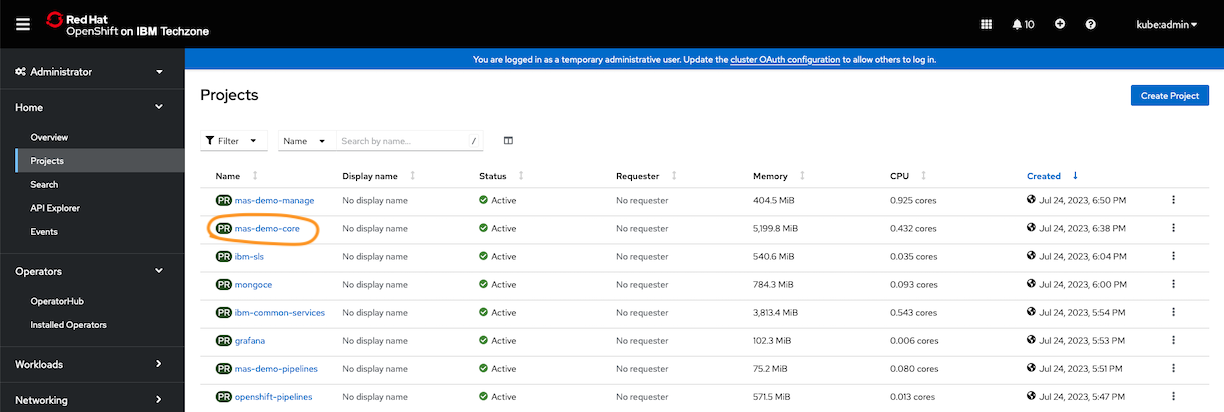
The progress of the installation can also be monitored by going to the project created at each task. For example, to get more information on the progress of the installation of the core app, go to the `mas-<instance id>-core` project. Go to Home-> Projects. Then, click the core project (in this example, it is `mas-demo-core`).
In the "Inventory" tile, click "Pods".
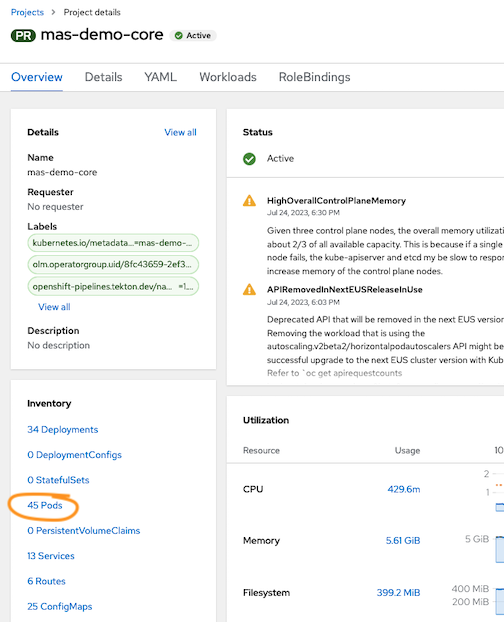
The list of pods under the core project is shown. (This route is one of the many ways to get to this view of the Red Hat OpenShift console.)
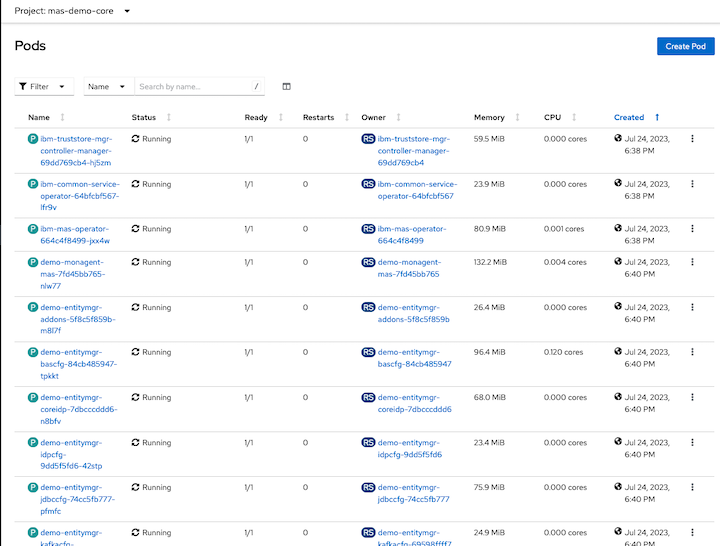
From here, logs from a pod can be viewed by clicking the pod name and going to the "Logs" tab.
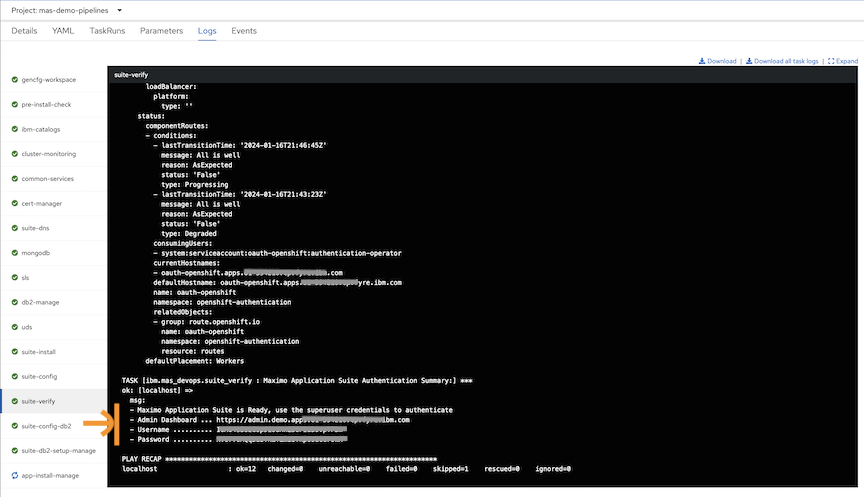
After the `suite-verify` task is done, obtain the MAS administration URL and superuser credentials. The logs under the task provide this information.
When installation is done, the pipeline shows the status of "Succeeded".
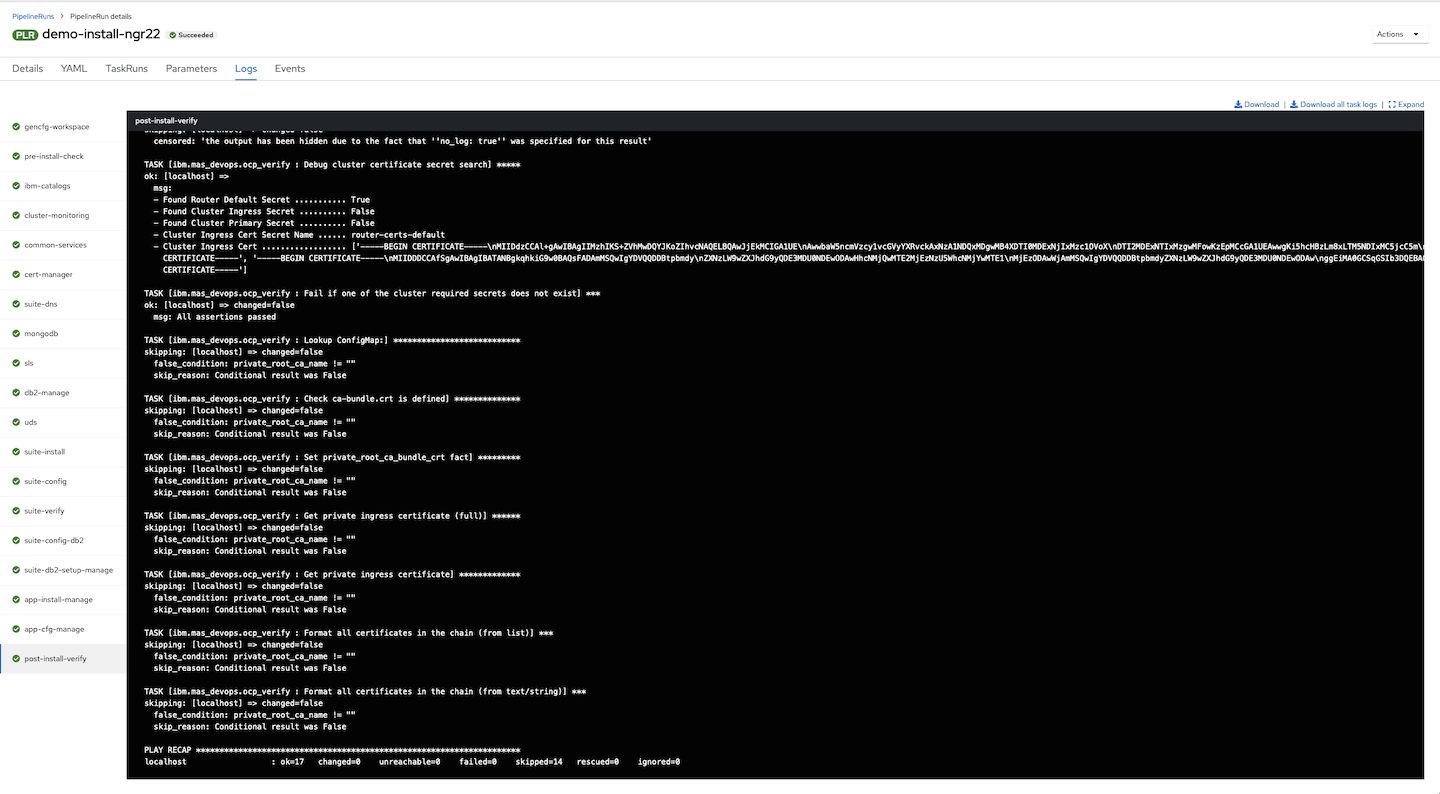
When a pipeline run fails, logs are available. For help on troubleshooting, submit a ticket to IBM Support. Include the MAS MustGather data.
Using the MAS DevOps Collection Ansible Playbooks and Roles
As mentioned in item 4, MAS DevOps Collection playbooks and roles can be run in the IBM MAS CLI container.
The following example installs the Manage application in a Red Hat OpenShift cluster that has MAS already installed, by using the `oneclick_add_manage` playbook.

The logs of the tasks in this case show up in the command line.
Document Location
Worldwide
[{"Type":"MASTER","Line of Business":{"code":"LOB59","label":"Sustainability Software"},"Business Unit":{"code":"BU059","label":"IBM Software w\/o TPS"},"Product":{"code":"SSRHPA","label":"IBM Maximo Application Suite"},"ARM Category":[{"code":"a8m50000000CbKNAA0","label":"Install"}],"ARM Case Number":"","Platform":[{"code":"PF025","label":"Platform Independent"}],"Version":"8.10.0;8.11.0"}]
Was this topic helpful?
Document Information
Modified date:
17 January 2024
UID
ibm17001353