How To
Summary
This guide will cover the process of adding an Azure billing target under Enterprise
Agreement (EA) to your Turbonomic appliance starting v8.6.4+ or later.
Steps
Additional Information
Overview:
2 Azure configuration and data collection
3 Turbonomic Azure Billing Target data collection
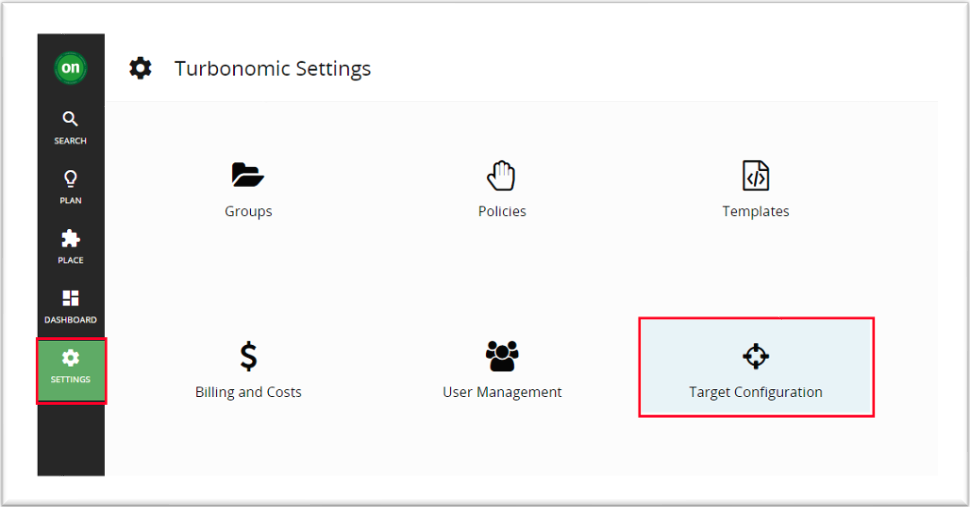
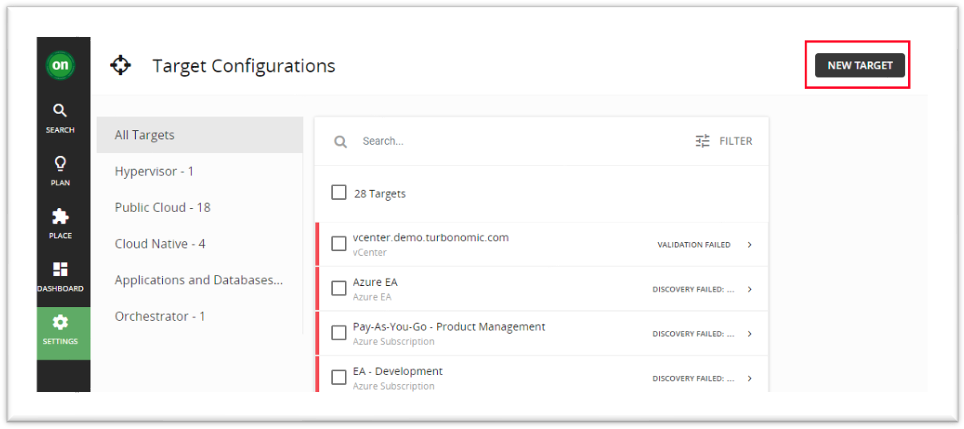
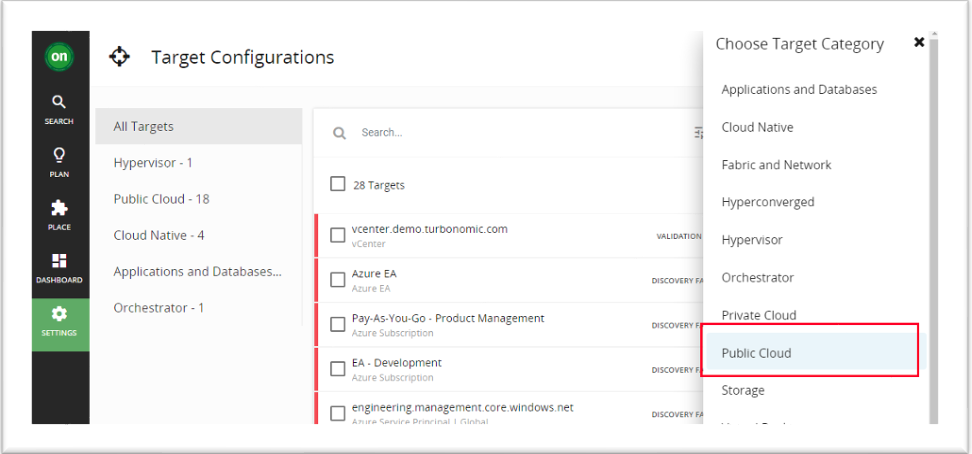
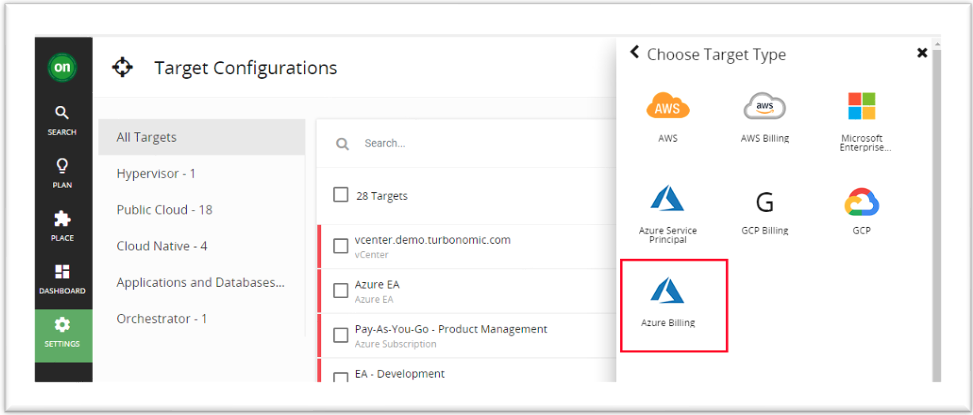
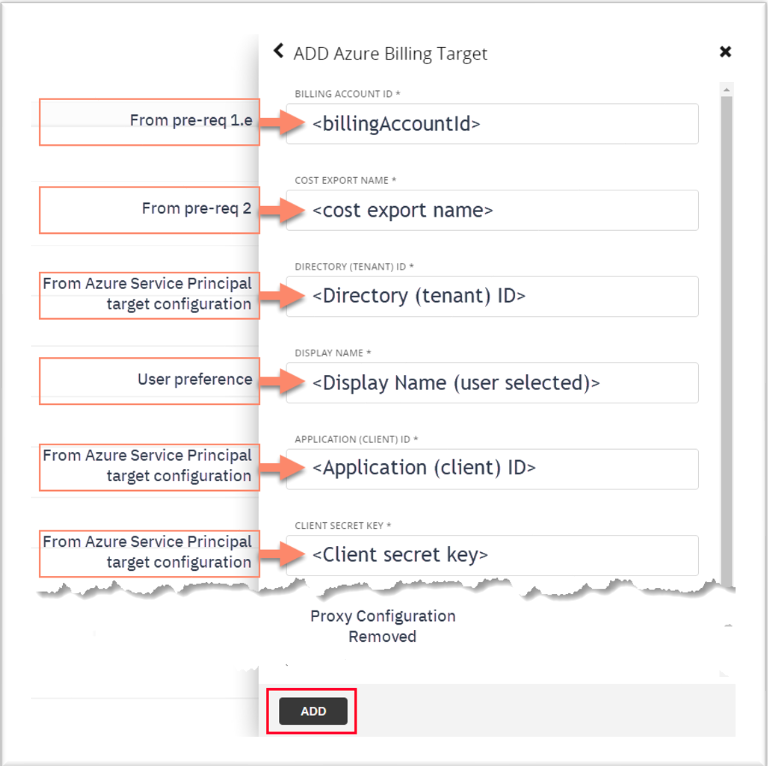
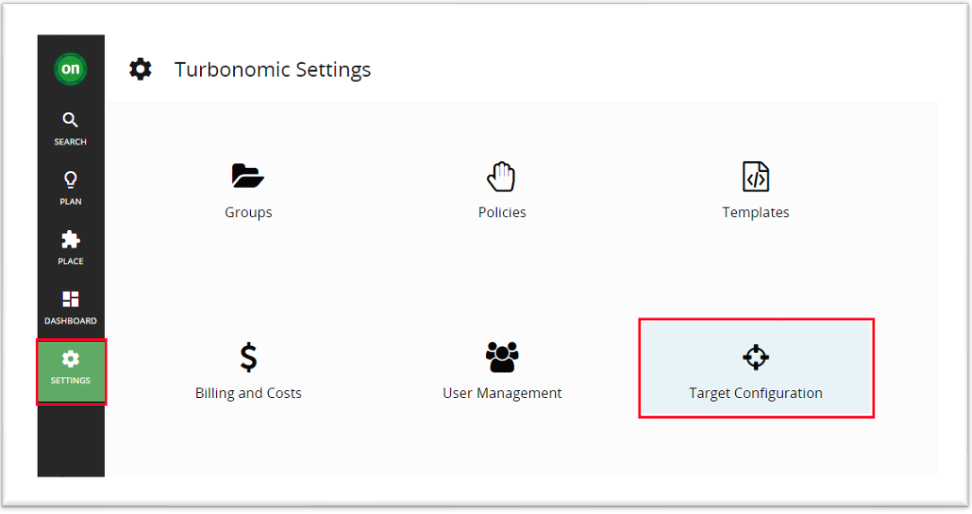
4 Turbonomic Azure Billing target configuration
5 Azure Billing Target verification
To perform these functions in the Azure portal, you must use an account with the Global Administrator role with elevated access – this level of permission is required for the initial configuration of Azure and is not needed by the Turbonomic application.
If your account already has this permission, proceed to 2. Azure configuration and data collection
-
For EA, assign the EnrollmentReader role to the Azure Service Principal name (SPN). For MCA, assign the Billing Account Reader role to the Azure Service Principal name (SPN):
To assign these roles, the portal user must be a Global Administrator and must have elevated access. The elevated access grants permission to assign roles in Azure Subscriptions and Management Groups associated with the Azure Active Directory.
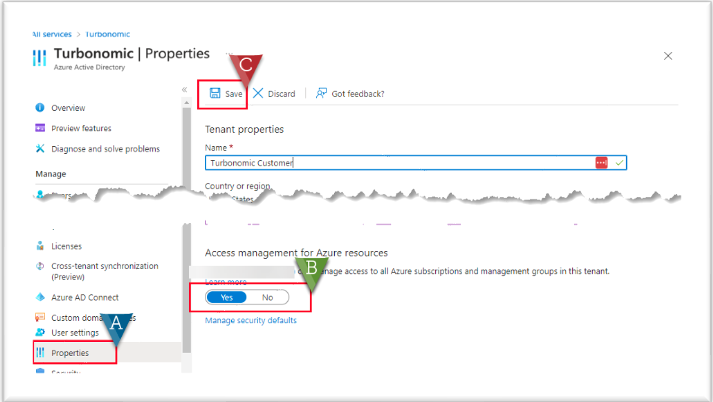
Assign the elevate access permission to the Global Administrator user using the Azure Portal:
2.1.1 For assigning EnrollmentReader role, gather the required parameters for the API call (If you are MCA customer, skip this section and proceed to 2.1.2)
You can use this table to help you organize the Azure information requirements:
|
Parameter |
Value |
Source |
|
billingAccountName |
Billing account ID |
|
|
billingRoleAssignmentName |
||
|
api-version |
2019-10-01-preview |
Static Value |
|
properties.principalId |
Object ID |
|
|
properties.principalTenantId |
Tenant ID |
|
|
properties.roleDefinitionId |
24f8edb6-1668-4659-b5e2-40bb5f3a7d7e |
Static Value |

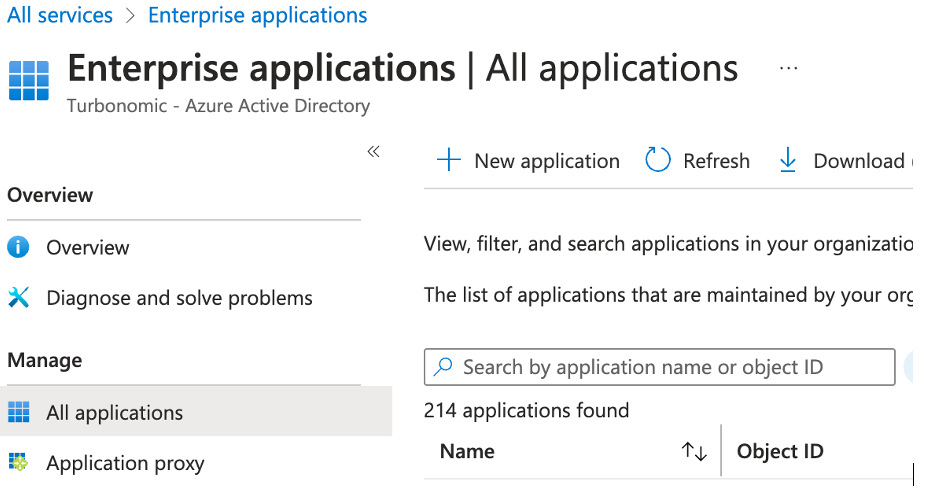
Navigate to Enterprise Applications and select the All applications blade. Find the correct application. Use the Search box, if necessary.
Select the application Name -> Click Overview -> Copy the Object ID.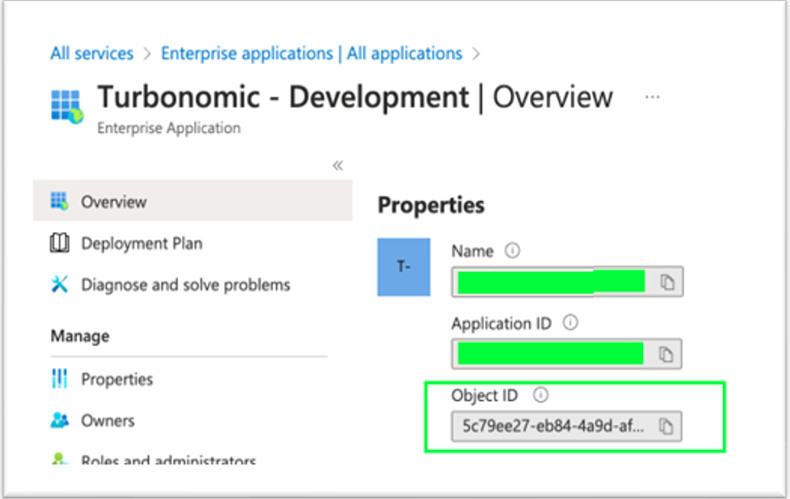
f. properties.roleDefinitionId: Verify the EnrollmentReader role definition ID as provided by Microsoft (24f8edb6-1668-4659-b5e2-40bb5f3a7d7e) and replace billingAccountName with the billing Account ID fetched in 2.1 (a).
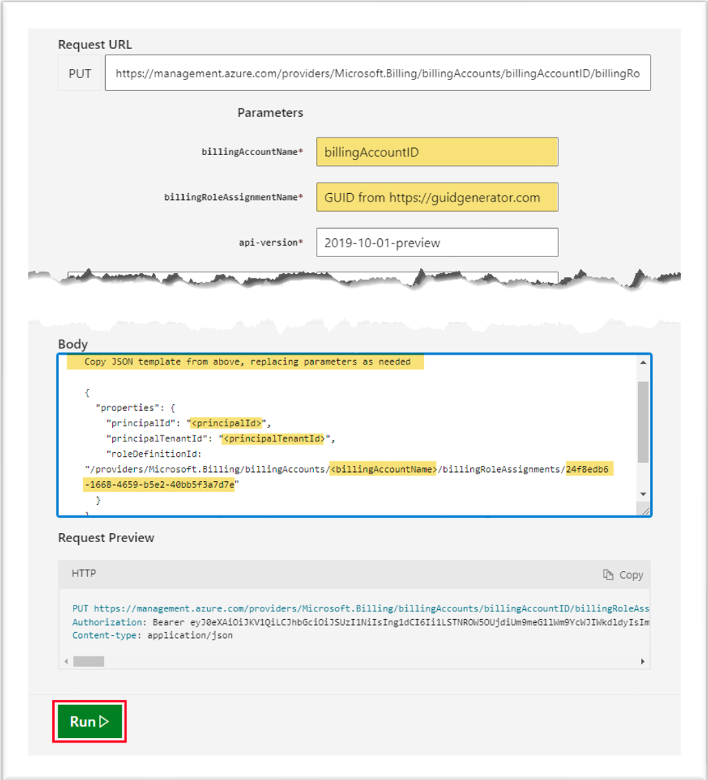
g. Update the red highlighted text in the following JSON template using the values gathered above from 1.e. Note that the “roleDefinitionId” property is a single line of JSON but may span multiple lines in this document.
|
{
"properties": { "principalId": "principalId", "principalTenantId": "principalTenantId", "roleDefinitionId": "/providers/Microsoft.Billing/billingAccounts/billingAccountName/billingRoleAssignments/24f8edb6-1668-4659-b5e2-40bb5f3a7d7e" } } |
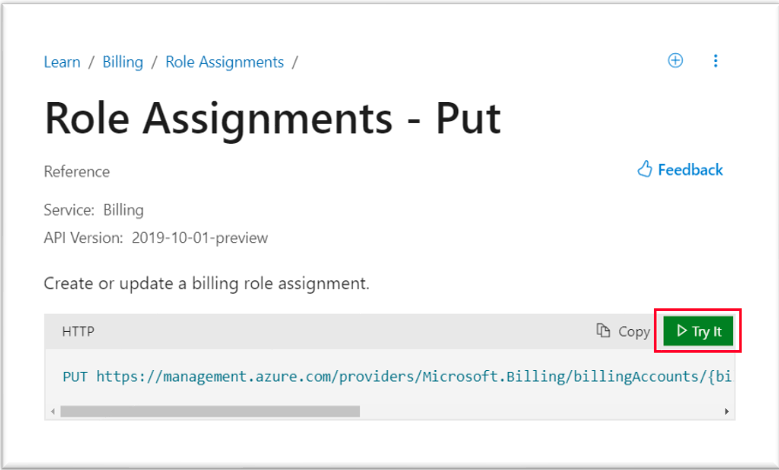
h. Assign the EnrollmentReader role to Service Principal Name
- Click Try It
- Sign in (create your Learn profile if you don’t yet have one) transfer the details you’ve collected above to the API call generation form.
2.1.2 For MCA, assign Billing account reader role (skip this section if you have an EA)
a. To assign Billing account reader role to Azure SPN, navigate to Billing Account -> Cost Management + Billing -> Click Access Control (IAM) -> Click Add -> Select Billing account reader role 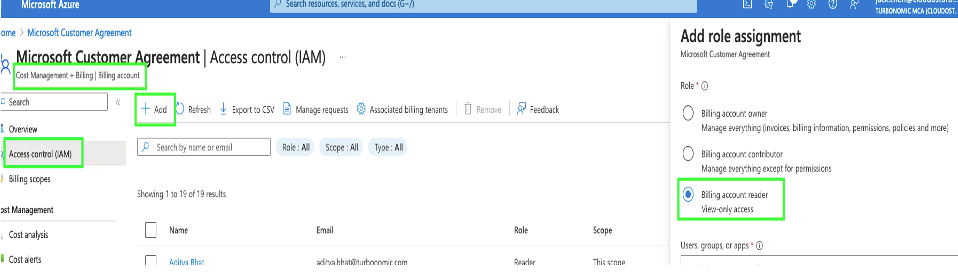
Note: Starting v8.8.4, Turbonomic also supports collecting the billed cost data via the Azure Cost Details API. This is set as the default mode. If you have a larger topology i.e cost exports > 2GB, we recommend configuring the cost exports to collect the billed data. If you do not want to configure the cost exports, skip this section and proceed to 3 Turbonomic Azure Billing Target data collection
The cost export must be created as follows:
- EA accounts - Create the cost export at Billing Account scope.
- MCA accounts – Create the cost export at Billing Profile scope.
Note: For MCA accounts, if you previously set up a cost export at the Billing Account scope, you must delete the cost export and create a new one at the Billing Profile scope. Create this cost export for each active Billing Profile that falls under your MCA Billing Account. All cost exports you create for your active Billing Profiles are required to have the same name.
The Azure cost export must be stored in a Subscription and Storage Account that the Turbonomic Azure Service Principal has access to.
2.2.1 Cost Export Permissions:
Choose a Subscription and Storage Account that if not already configured, provide Reader and Data Access and Storage Blob Data Reader for the storage account and container associated with the cost export. There are two methods for accessing storage blob data within a storage account. You need to implement only one of these methods.
2.2.1 Assign permissions using the account access key for Shared Key authorization
The Azure cost export requires that Turbonomic’s Azure Service Principal to have the following access to the Storage Account:
- Microsoft.Storage/storageAccounts/listkeys/action
- Microsoft.Storage/storageAccounts/blobServices/containers/blobs/read (dataAction)
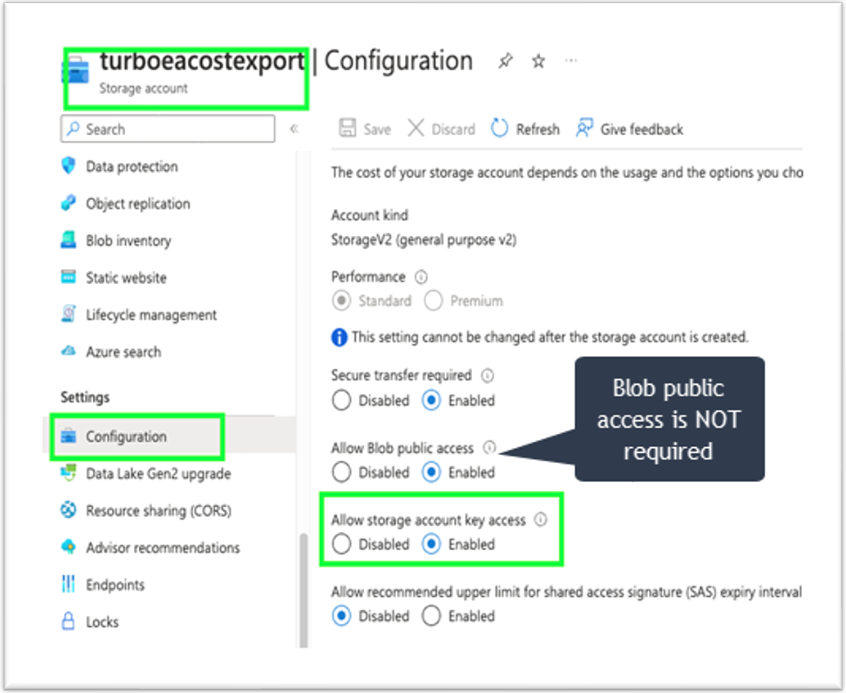
To enable Shared Key authorization, the storage account must have Allow storage account key access enabled, as shown below.
In the Azure portal, navigate to the Storage Account to be used for the Cost Export. Select the Configuration blade and ensure that the Allow storage account key access property is set to Enabled.
2.2.1.2 Assign permissions using Azure Active Directory credentials
Requires Turbonomic’s Azure Service Principal to have the following access on the Storage Account:
- Microsoft.Storage/storageAccounts/read
Requires Azure Service Principal to the following access on the Storage Container:
- Microsoft.Storage/storageAccounts/blobServices/containers/read
- Microsoft.Storage/storageAccounts/blobServices/containers/blobs/read (dataAction)
With the appropriate permissions in place, it’s now time to configure Azure to generate the daily cost export that Turbonomic will consume.
In the Azure portal, navigate to Billing scopes to either scope to a Billing Account (for EA accounts) or Billing Profile (for MCA accounts), then navigate to Cost and Management + Billing and select the Exports blade. Click the + Add link.

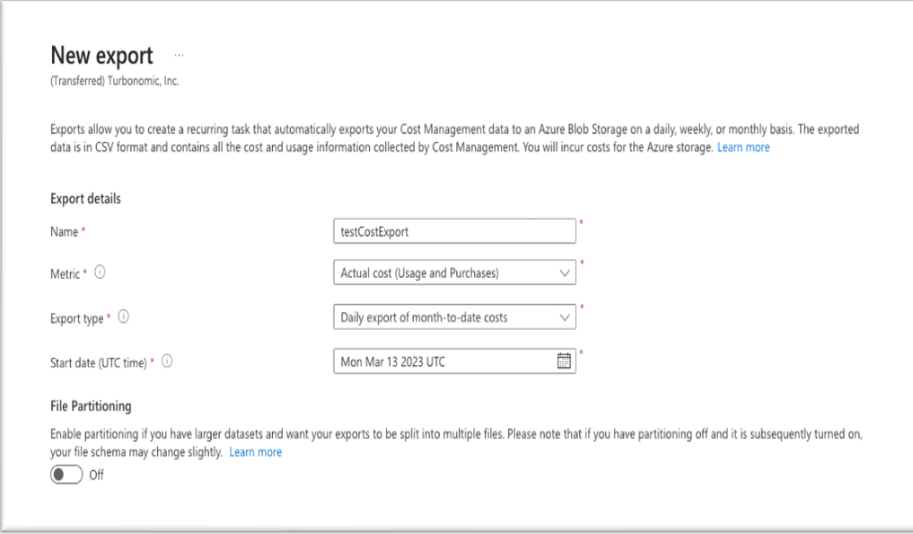
Configure a new Cost export with the following parameters:
- Name: Enter a user-defined Name for the cost export. NOTE: This name will be used when adding the target in Turbonomic.
- Metric: select Actual Cost (Usage and Purchases).
- Export Type: select Daily export of month-to-date costs.
- Start Date: select or enter the current date.
- File Partitioning: Both modes (On/Off) are supported. If you have a large cost export, it is recommended to enable the file partitioning.
- Storage – on the lower portion of the New Export blade, choose an existing storage account or create a new one. Choose a Subscription and Storage Account that Turbonomic’s Azure Service Principal target has access to.
- Subscription - Customer’s Preference.
- Storage Account - Customer’s Preference (“turboeacostexport” as an example for a new bucket).
- Container - Customer’s Preference (“cost-export-container” as an example).
- Directory - Customer’s Preference (“costExportDir” as an example).
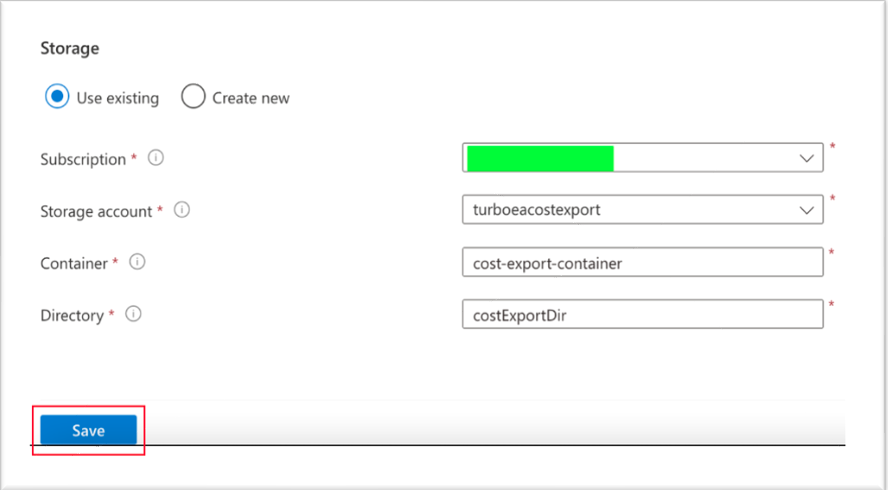
Click Save to create the cost export.
The above storage configuration structure can be visualized when navigating to the chosen storage account. Below is a screenshot for reference. 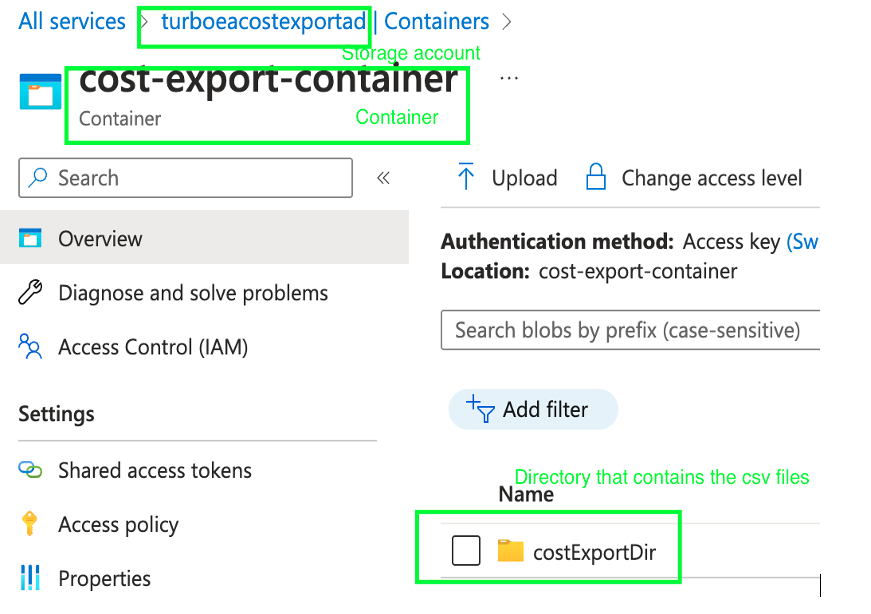
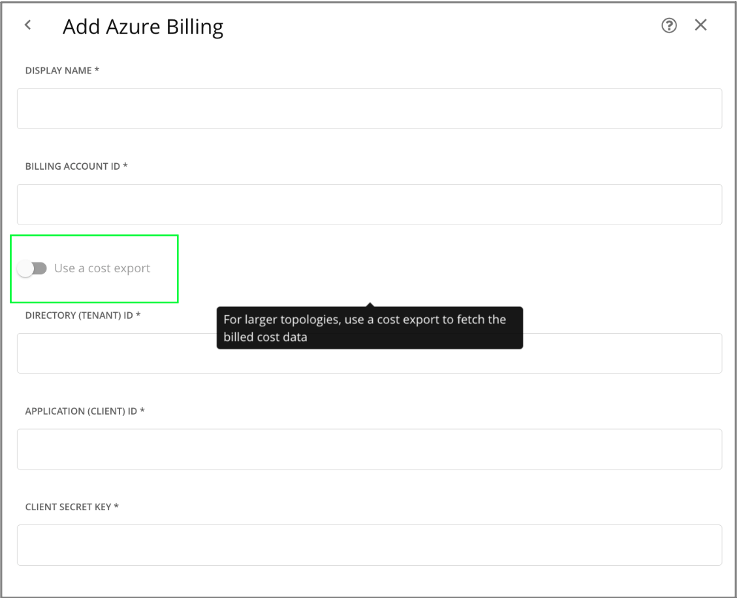
You can use the following table to collect the information you will need from your Turbonomic Azure Service Principal configuration.
|
Data Element |
Value |
|
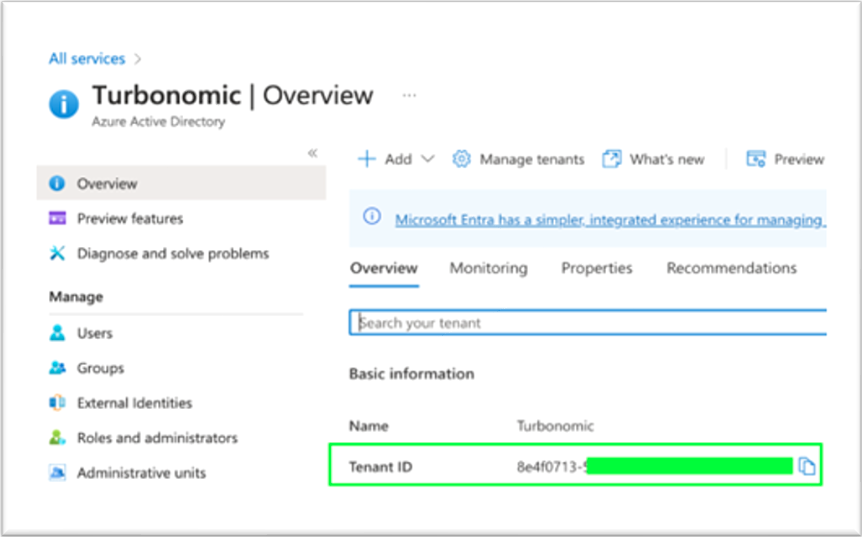
Directory (tenant) ID |
|
|
Application (client) ID |
|
|
Client Secret Key |
If you have this information available, proceed to 4. Turbonomic Azure Billing target configuration
Follow the below steps to get the Directory ID, Application ID, and Client Secret Key from the Azure portal:
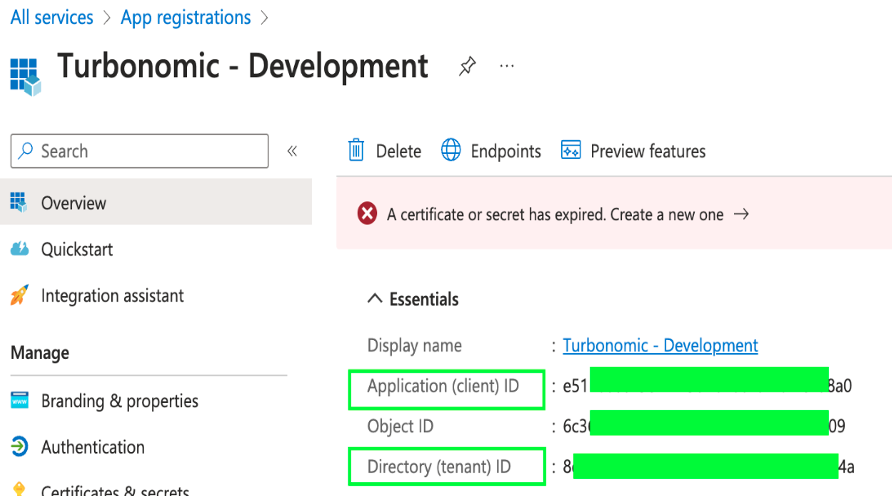
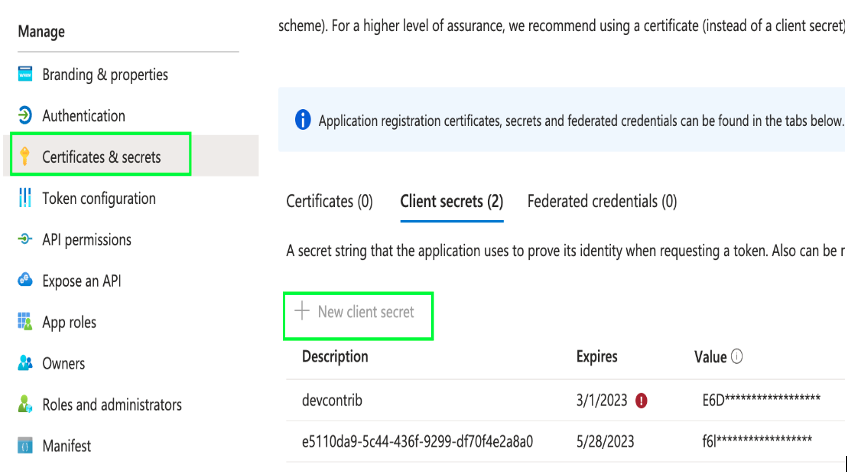
Note: If you generate a new Client secret key, change the Client secret key in Turbonomic’s Azure Service Principal target to match the newly generated one.
Document Location
Worldwide
Was this topic helpful?
Document Information
Modified date:
25 April 2023
UID
ibm16964600