Flashes (Alerts)
Abstract
The following updates are available in release 2.0.84 SC of Planning Analytics Workspace.
Content
The following new and changed features in books and reporting are available in Planning Analytics Workspace 2.0.84.
Usability improvement in synchronization for visualizations
The Synchronize feature for visualizations was improved for usability in Planning Analytics Workspace 2.0.84. Previously, the user interface displayed dimension synchronization labels instead of hierarchy synchronization.
You now see the hierarchy synchronization option in the Synchronize feature under Visualization properties. Dimension names also display with the hierarchy names now for easy identification.
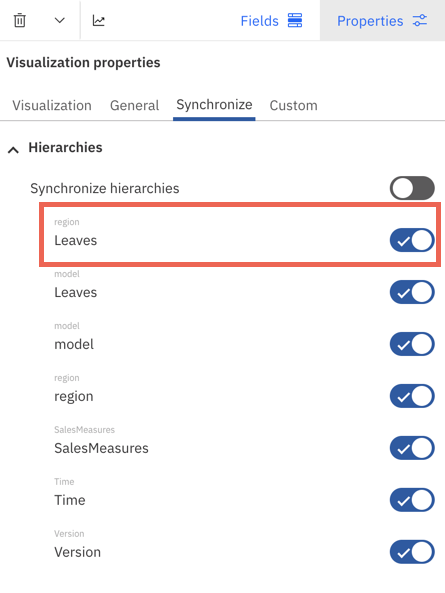
There is no other change to the Synchronize feature and it continues to work as before.
New forecast capabilities for Line visualization
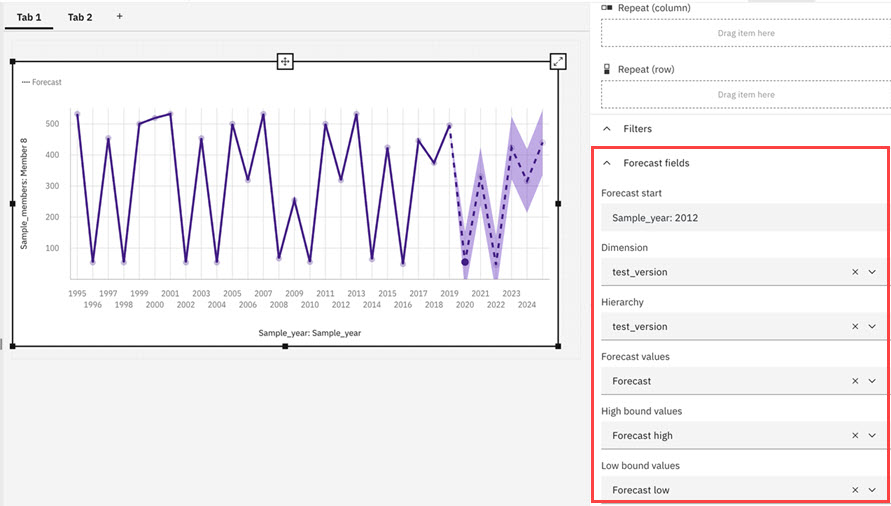
The Line visualization now includes three slots to specify High bound, Low bound, and Forecast values. You can use this improved visualization to view forecast data independent of the forecasting interface in Planning Analytics Workspace.
As with current forecasting capabilities, High bound and Low bound are used to draw the envelope and Forecast indicates the forecasted values. Additionally, you must specify a Forecast start to indicate when the forecast data starts.
View section icons
Section icons can now be enabled in a view independent of section header strings.
To enable or disable section icons in the cube viewer, click View options, and then toggle section icons by clicking the check box next to Section icons.
When section icons are enabled, they are displayed on the context, row, and column sections.
![]()
The following new and changed features in plans and applications are available in Planning Analytics Workspace 2.0.84.
Revert approvals in plans
Plan owners and co-owners can now cancel previously approved tasks.
- Open the plan in edit mode.
- Under Plan tasks, click the Submissions link on a task to open the Submissions log.
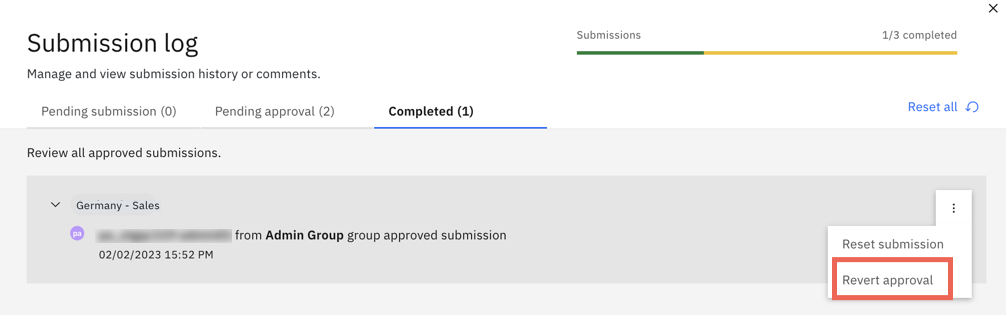
- Click Pending approval or Completed to find the approved submission. Submissions that require multiple approvals and were only partially approved are under Pending approval. Submissions that were fully approved are under Completed.
- Click the menu next to the task for which you want to cancel an approval and select Revert approval.
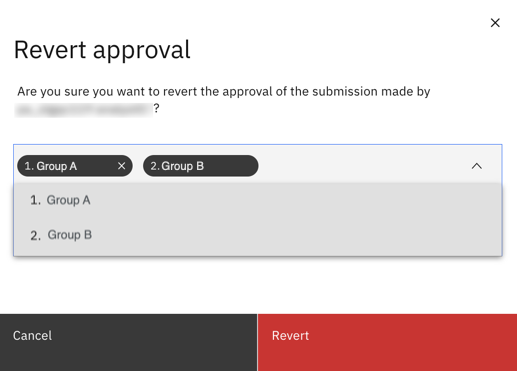
- Select the approver group or groups from whom you want to remove approval and click Revert.
Where there are multiple approvers for a task, when you revert an approval, approval is also removed from any next in line approvers. In the following example, if you remove Group A's approval, Group B's is also removed. Both Group A and Group B need to approve the submission again.
Improvements to the 'Task flow' pane for plans
Several usability improvements are introduced to the Task flow pane for plans in Planning Analytics Workspace 2.0.84.
The Task flow pane is available on the Plan tasks tab of a plan.
You can now edit a task directly from the Task flow pane. Hover the cursor on a task, then click the Edit icon to open the task editor.
You can also use full screen mode to maximize the canvas when you are working in the Task flow pane. Click the Full screen icon ![]() to enter full screen mode, where the Task flow pane and the Tasks list occupy the entire screen.
to enter full screen mode, where the Task flow pane and the Tasks list occupy the entire screen.
The following new and changed modeling features are available in Planning Analytics Workspace 2.0.84.
TurboIntegrator process debugger
The process editor in Planning Analytics Workspace includes a debugger user interface that allows you to set line breakpoints, continue to the next breakpoint, and step over to the next line. Conditional breakpoints are also supported.
You can enable the debug mode only on one process at a time.
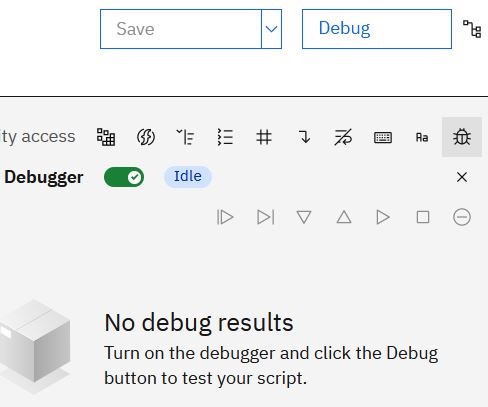
On the Script tab in the process editor, click the debugger icon to open the debugger pane.
![]()
In this pane, use the Debugger toggle switch to enable the debug mode.
Using breakpoints, you can stop the execution of code at a particular line. To set a breakpoint, click the line number in the code editor.
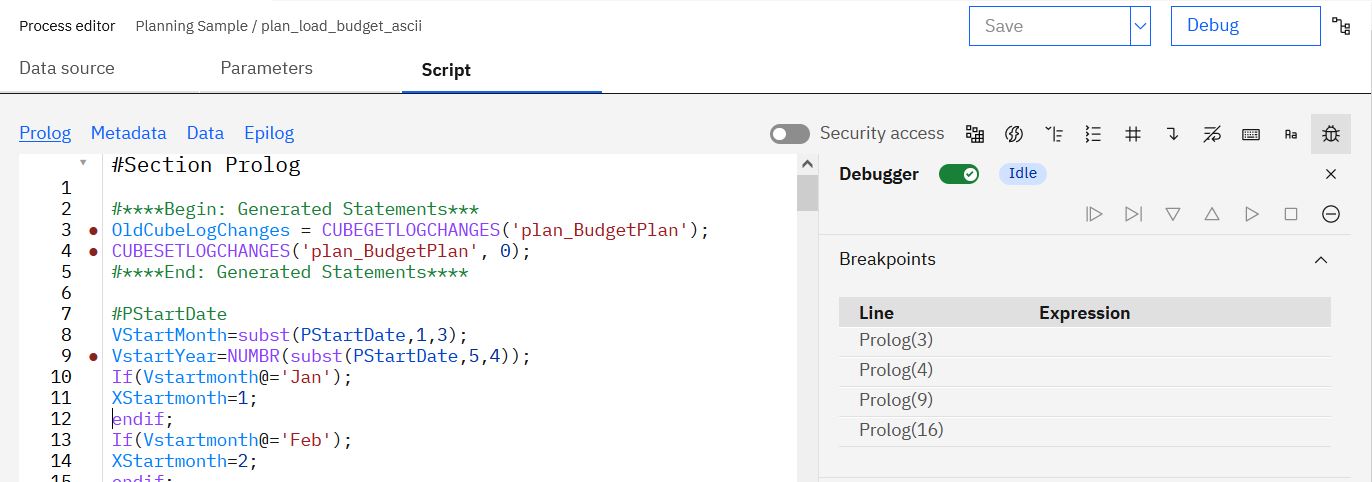
With the debugger running, navigate through the code by using these buttons:
| Continue | |
| Step over | |
| Step in | |
| Step out | |
| Continue to end | |
| Stop execution | |
| Remove all breakpoints |
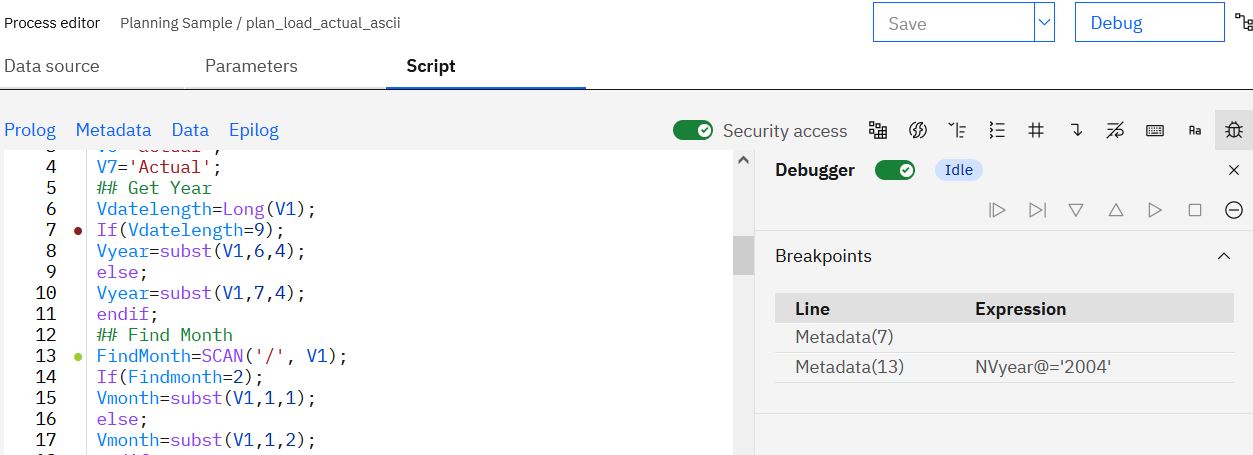
To enter an expression, click the Expression field for the selected breakpoint, and type the expression.
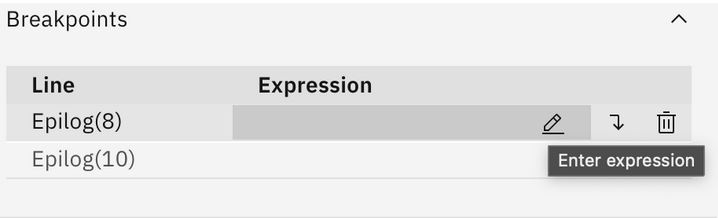
In the following example, the expression Vyear@='2004' is entered for the line 13 breakpoint to stop debugging when the input data is for year 2004.
The debugger includes a panel with the current variables, parameters, and their respective values. These values are read only.
Rename hierarchy levels in the dimension editor
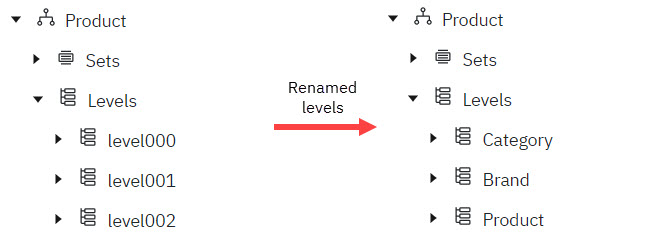
You can now rename hierarchy levels directly in the new experience dimension editor.
By default, levels within a hierarchy are named level000 (highest level of consolidation), level001, level002, and so on.
You can assign custom level names in the dimension editor to make hierarchy levels more easily identifiable. For example, this Product hierarchy has three levels corresponding to Category, Brand, and Product. Customizing the levels with the relevant names makes it easier to work in the hierarchy.
- Open the hierarchy in the dimension editor.
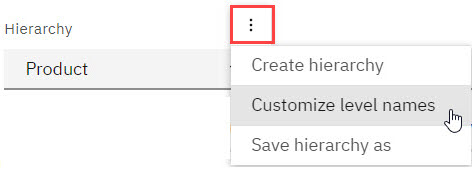
- Click the Action button next to the Hierarchy label, then click Customize level names.
- Enter a custom name for each hierarchy level.
- Click Done.
Manage users and groups on a Planning Analytics database (Cloud only)
A new editor provides an intuitive interface to manage users and groups on a Planning Analytics database. You can also use the editor to import users and groups from Planning Analytics Workspace into a Planning Analytics database.
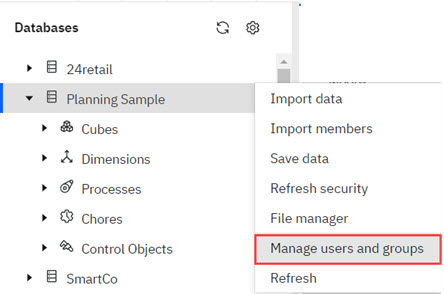
To open the new Users and groups editor on a modeling workbench, right-click a database on the Databases tree and then click Manage users and groups.
The Users and groups editor displays your current database users and groups in an enhanced cube view.
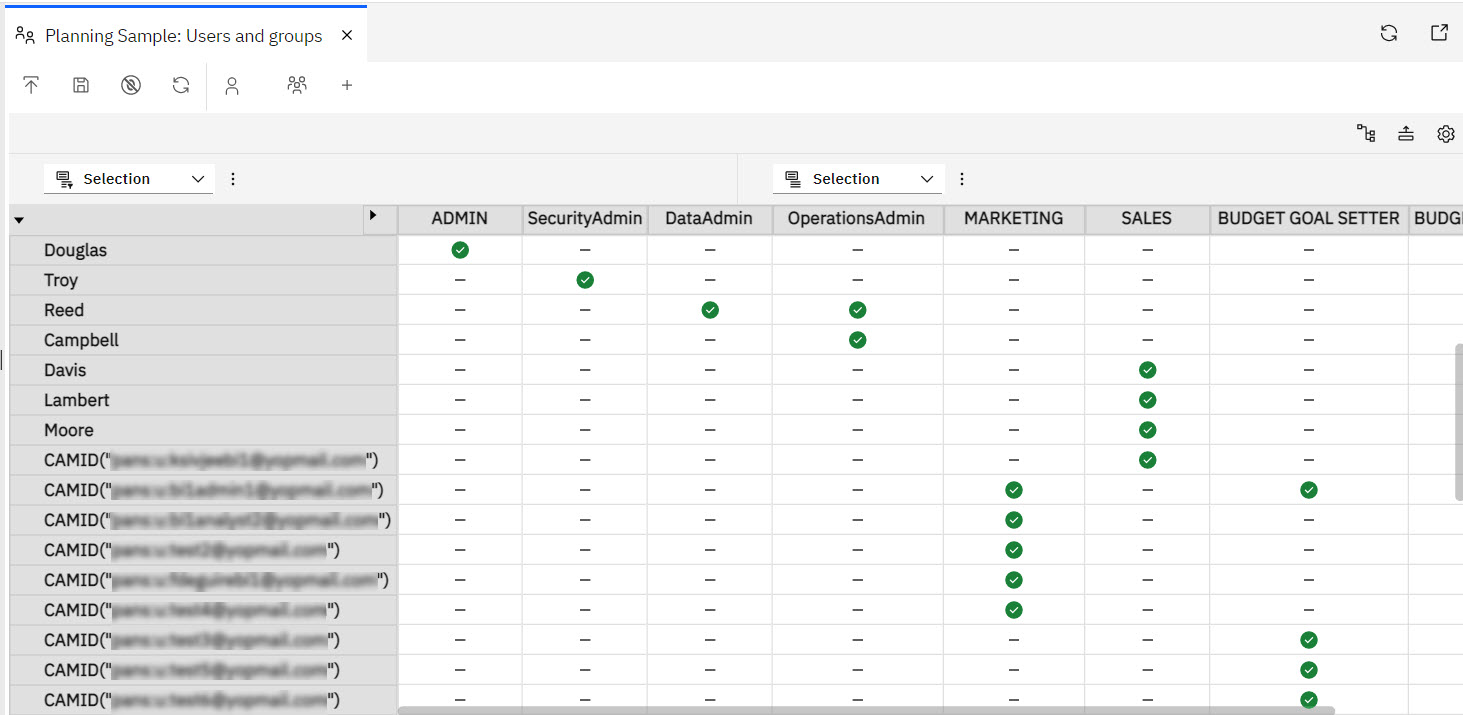
Use the standard view options to manage sets and to select multiple row or column headers in the Users and groups editor.
You can use these options to manage existing users and groups on your Planning Analytics database:
- To assign or remove a user to a group, right-click at the intersection of a user and group name, then click Assign user to group or Remove user from group.
- To assign all users to a group, right-click the group name, then click Assign group.
- To remove all users from a group, right-click the group name, then click Remove group.
- To assign a user to all groups, right-click the user name, then click Assign user.
- To remove a user from all groups, right-click the user name, then click Assign user.
- To remove a group from the database, right-click the group name, then click Remove group.
- To remove a user from the database, right-click the user name, then click Remove user.
You can also use the Users and groups editor to import users and groups from Planning Analytics Workspace into a Planning Analytics database or to create a new group on the Planning Analytics database.
- To create a new group on the database, click
 .
. - To add users that exist in Planning Analytics Workspace to the Planning Analytics database, click
 . Select the users, then click Add.
The users are added to the database, but not assigned to any groups.
- To add groups that exist in Planning Analytics Workspace to the Planning Analytics database, click
 . Select the groups, then click Add.
The groups are added to the database. In addition, any users within the groups are also added to the database and assigned to the appropriate groups.
Copy object names from the Databases tree
You can now copy name objects from the Databases tree.
You can copy the object name to your clipboard by hovering your cursor over the node that you want to copy, and then pressing CTRL+C (Windows) or CMD+C (Mac).
When copying the object name for a member, the value copied is the MUN (Member Unique Name).
Classic dimension editor removed from the modeling workbench in Planning Analytics Workspace 2.0.84
In Planning Analytics Workspace 2.0.84, the classic dimension editor was removed from the modeling workbench. The classic dimension editor remains available on books.
All dimension creation and maintenance in the modeling workbench must be performed in the new experience dimension editor. The new experience dimension editor was introduced on the modeling workbench in Planning Analytics Workspace 2.0.82.
Was this topic helpful?
Document Information
Modified date:
16 February 2023
UID
ibm16953451