How To
Summary
How to configure SAML web SSO for WebSphere Application Server traditional
Objective
This example uses the WebSphere administrative console to configure the SAML web SSO TAI to protect your application. The snoop application is used in the example.
The example is performed in 3 phases:
- Protect the snoop application with the SAML TAI without requiring a certificate from the identity provider (IdP).
- Add the IdP's signer certificate to the trust store and modify the SAML TAI configuration to trust the IdP.
- Modify the SAML TAI configuration to protect your application.
The configuration is split into three phases so that it is easier to debug problems that you might encounter. Troubleshooting steps are provided to help if you have problems at runtime.
Environment
This task uses WebSphere Application Server traditional, the snoop application, and your own identity provider. Take note of the following assumptions and the steps that you need to take before you begin.
Assumptions
- The host and SSL port of the local system in this task is example.com:9443
- You can find the SSL port to use as the value for WC_defaulthost_secure in the file (profileRoot)/config/cells/(cellName)/nodes/(nodeName)/serverindex.xml .
- (profileRoot) is usually (WAS_HOME)/profiles/(profileName), but it might be in another path.
- When you perform this task, replace example.com:9443 with the host and port of your own host and SSL port.
- You have SAML Identity Provider (IdP) and you are, or can contact, your IdP administrator.
- The IdP administrator exports a metadata file or signing certificate from the IdP and you obtain the file from your IdP administrator.
- Your IdP hostname is idp.example.com with an IdP-initiated login page of https://idp.example.com/samlLogin/idpInitiated?target=snoop that is associated with ACS URL https://example.com:9443/samlsps/acs
- When you perform this task, replace the values with the ones that are valid for your IdP. The ACS URL belongs to your WebSphere server and you replace the host and port.
- You are performing bookmark style SSO login as described on SAML single sign-on scenarios, features, and limitations.
- In this scenario, the request is sent to WebSphere first. The user is then redirected to the IdP for login. From the IdP's point of view, it is an IdP-initiated login. After the user logs in, the IdP redirects to the ACS URL that is in it's configuration for the login URL.
- The WebSphere DefaultApplication is installed.
- This application provides the snoop endpoint.
- WebSphere security is enabled.
- The WebSphere global security domain is used.
- The WebSphere administrative console is used to configure the SAML TAI.
- Your logs directory is
(was_home)/WebSphere/AppServer/profiles/(profileName)/logs/(serverName) - Your trace file is
(was_home)/WebSphere/AppServer/profiles/(profileName)/logs/(serverName)/trace.log
Before you begin
- Obtain the IdP metadata or signer certificate from your IdP administrator.
- If you have a choice, get the certificate.
- Bookmark the SAML TAI messages page in IBM Docs to easily find the explanation and user action for any error or warning messages that you might encounter.
- If possible, run your test on the latest WebSphere Application Server fix pack. Even if your final production system is running an earlier fix pack, running this test setup at the latest fix pack level gives you the most recent error handling to better help you find configuration problems.
- Enable SAML web SSO trace on your WebSphere server by using this trace string:
*=info:com.ibm.ws.security.web.*=all:com.ibm.ws.security.saml.*=all:com.ibm.websphere.wssecurity.*=all:com.ibm.ws.wssecurity.*=all:com.ibm.ws.wssecurity.platform.audit.*=off- If you encounter login issues when you run this task, a trace is required.
- Keep the following links available for reference:
- The CWTAI SAML TAI messages page to easily find the explanation and user action for any error or warning messages that you might encounter.
- The CWWSS SAML runtime messages page to easily find the explanation and user action for any error or warning messages that you might encounter.
- TroubleShoot: SAML web SSO, WebSphere traditional
- Enabling your system to use the SAML web single sign-on (SSO) feature
- Configuring single sign-on (SSO) partners
- Importing SAML identity provider (IdP) partner metadata using the wsadmin command-line utility
- SAML web single sign-on (SSO) trust association interceptor (TAI) custom properties
Steps
- Start the WebSphere administrative console as an administrator and log in as an administrator.
- Install the SAML TAI ear file, WebSphereSamlSP.ear, from the installableApps directory:
- Navigate to Applications > Application Types > WebSphere enterprise applications.
- If an application with the name WebSphereSAMLSP is already installed, skip to the next numbered step:
- Click Install
- Under Local file system, click Browse
- Navigate to (was_home)/installableApps directory.
- Choose WebSphereSamlSp.ear
- Click Open
- Click Next on each subsequent panel, then click Finish.
- Wait for the application to install, then click Save.
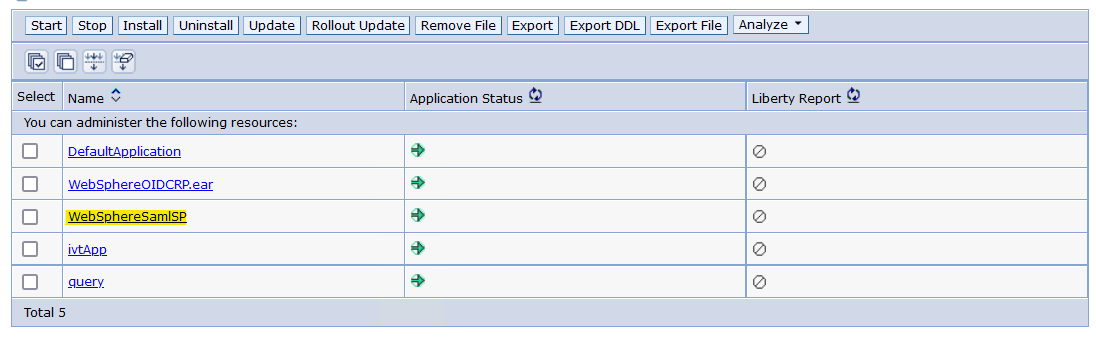
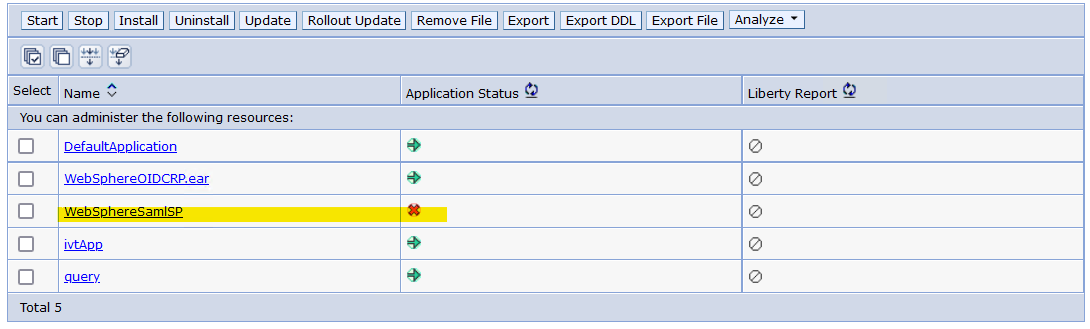
- WebSphereSAMLSP is installed and the Application Status is stopped:
- Find your realm name (If you are using 8.5.5.23 or 9.0.5.13 or later, this step is not required)
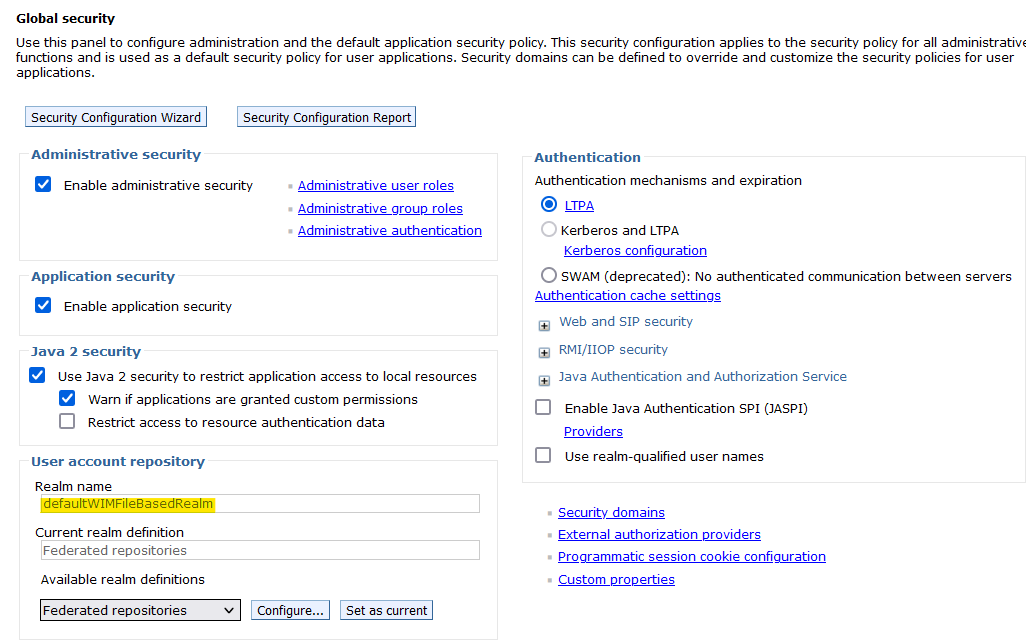
- Navigate to Security > Global security
- Your realm name is in the Realm name field under User account repository.
- The default value is defaultWIMFileBasedRealm
- Save this value for later.
- Example:
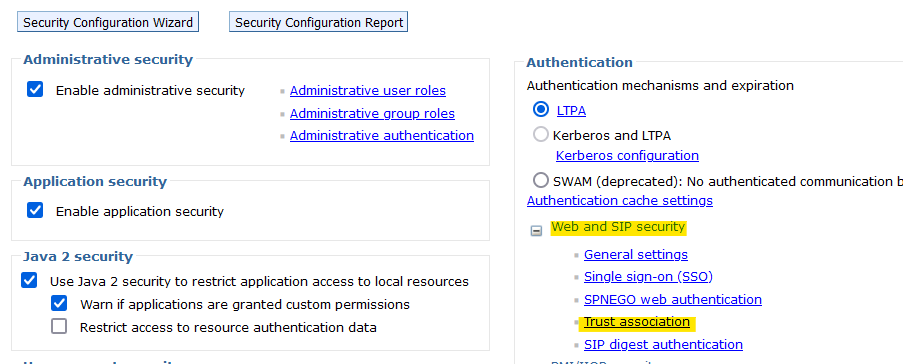
- Enable trust association:
- Click Web and SIP security > Trust association
- If Enable trust association is not checked, check it, then click Apply
- Click Web and SIP security > Trust association
- Add the SAML TAI to the list of interceptors:
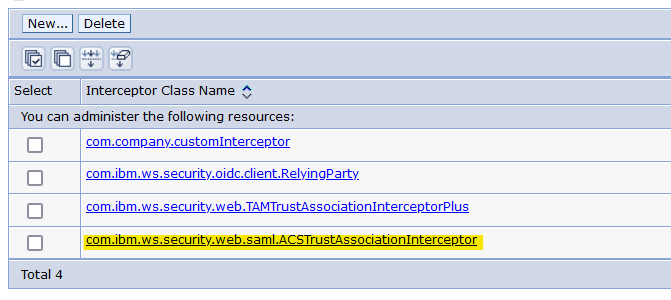
- Click Interceptors
- Full path: Security > Global security > Web and SIP security > Trust association > Interceptors
- If the SAML TAI is already in the list, skip to the next numbered step:
- Click New
- Enter
com.ibm.ws.security.web.saml.ACSTrustAssociationInterceptorin the Interceptor class name field. - Click OK
- Click Interceptors
- Configure the SAML TAI:
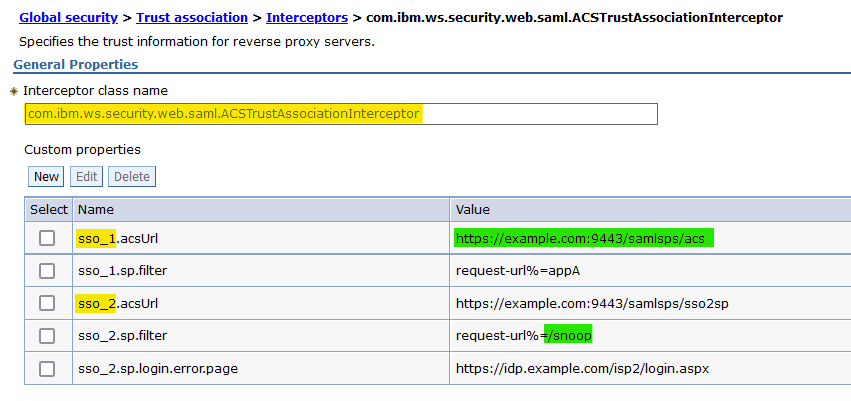
- Click com.ibm.ws.security.web.saml.ACSTrustAssociationInterceptor
- From this point on, this task is going to assume that the SAML TAI was not previously configured. If it was, custom properties might be configured for the TAI that include sso_(id) prefixes. Example:
- This task uses the prefix sso_1 . Substitute with a prefix that is not in use when you run the task.
- This task uses sso_(id).acsUrl=https://example.com:9443/samlsps/acs and a filter that intercepts the snoop application.
 If you have any config entry that conflicts with these settings, then you must disable them for you to get successful results from this task.
- From this point on, this task is going to assume that the SAML TAI was not previously configured. If it was, custom properties might be configured for the TAI that include sso_(id) prefixes. Example:
- Add custom properties to the SAML TAI:
- All custom properties names and values are case sensitive.
- Click New, then add the following custom properties, replacing all example.com URLs with your own:
-
Property
Value Comments sso_1.acsUrlhttps://example.com:9443/samlsps/acsThe URL to which the IdP sends requests.sso_1.sp.filterrequest-url%=/snoopThis filter tells the SAML TAI to intercept all requests with a URL that contains the string /snoop.sso_1.sp.login.error.pagehttps://idp.example.com/samlLogin/idpInitiated?target=snoopThe IdP-Initiated login URL for your application on your IdP.sso_1.sp.acsErrorPagehttps://www.example.comAn error page to which to redirect when the SAML token fails validation or authentication.sso_1.sp.useRealmdefaultWIMFileBasedRealmThis value is set to the value that you saved from step 4 earlier in this task.If you are using 8.5.5.23 or 9.0.5.13 or later, you can set the value toWAS_DEFAULT.sso_1.sp.redirectToIdPonServerSidefalseWhen redirectToIdPonServerSide is set to false, JavaScript is used when the login request is sent to the IdP. This property setting prevents fragments in the request URL from being lost.sso_1.sp.trustAnySignertrueFor the first test, you trust any signer. After you get through a successful test, we'll go back and add the IdP's signer certificate and trust it. - Results:
-
- Add the required global security custom properties:
- Navigate to Security > Global security > Custom properties
- Add or change the value for the com.ibm.websphere.security.DeferTAItoSSO property:
- If the com.ibm.websphere.security.DeferTAItoSSO property is in the list of properties, click on the property name. Otherwise, click New.
- Enter the following values:
- Name:
com.ibm.websphere.security.DeferTAItoSSO - Value:
com.ibm.ws.security.web.saml.ACSTrustAssociationInterceptor
- Name:
- Click OK
- If the com.ibm.websphere.security.DeferTAItoSSO property is in the list of properties, click on the property name. Otherwise, click New.
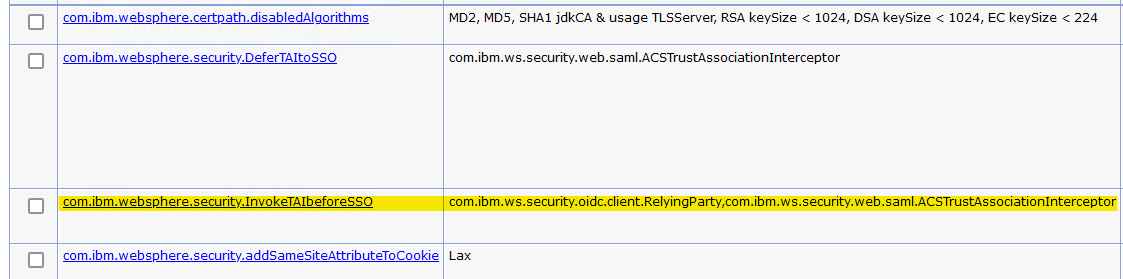
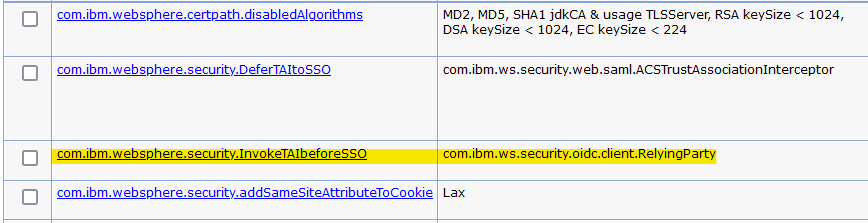
- Add or change the value for the com.ibm.websphere.security.InvokeTAIbeforeSSO property:
- If the com.ibm.websphere.security.InvokeTAIbeforeSSO property is in the list of properties, and the com.ibm.ws.security.web.saml.ACSTrustAssociationInterceptor class name is in the list of values, skip to the next lettered step.
- If the com.ibm.websphere.security.InvokeTAIbeforeSSO property is in the list of properties, click on the property name. Otherwise, click New.
- Enter the Name
com.ibm.websphere.security.InvokeTAIbeforeSSO- If there is already a value in the Value filed, go to the end of the value and add a comma, then add the value
com.ibm.ws.security.web.saml.ACSTrustAssociationInterceptor. - Otherwise, set the value to
com.ibm.ws.security.web.saml.ACSTrustAssociationInterceptor.
- If there is already a value in the Value filed, go to the end of the value and add a comma, then add the value
- Click OK
- If the com.ibm.websphere.security.InvokeTAIbeforeSSO property is in the list of properties, and the com.ibm.ws.security.web.saml.ACSTrustAssociationInterceptor class name is in the list of values, skip to the next lettered step.
- Click com.ibm.ws.security.web.saml.ACSTrustAssociationInterceptor
- Save the configuration and logout of the administrative console:
- Click Save
- Logout of the administrative console.
- Restart your server:
- Stop your server.
- Clear your logs directory.
- Start your server.
- Export your SAML SP configuration into a metadata file and give it to your IdP administrator.
- Start wsadmin
- Run the following admin task:
AdminTask.exportSAMLSpMetadata('-spMetadataFileName /tmp/spdata.xml -ssoId 1')
Where /tmp is a temporary directory on your workstation. - Give the spdata.xml file to your IdP administrator to import to your IdP.
- Wait for confirmation of the import.
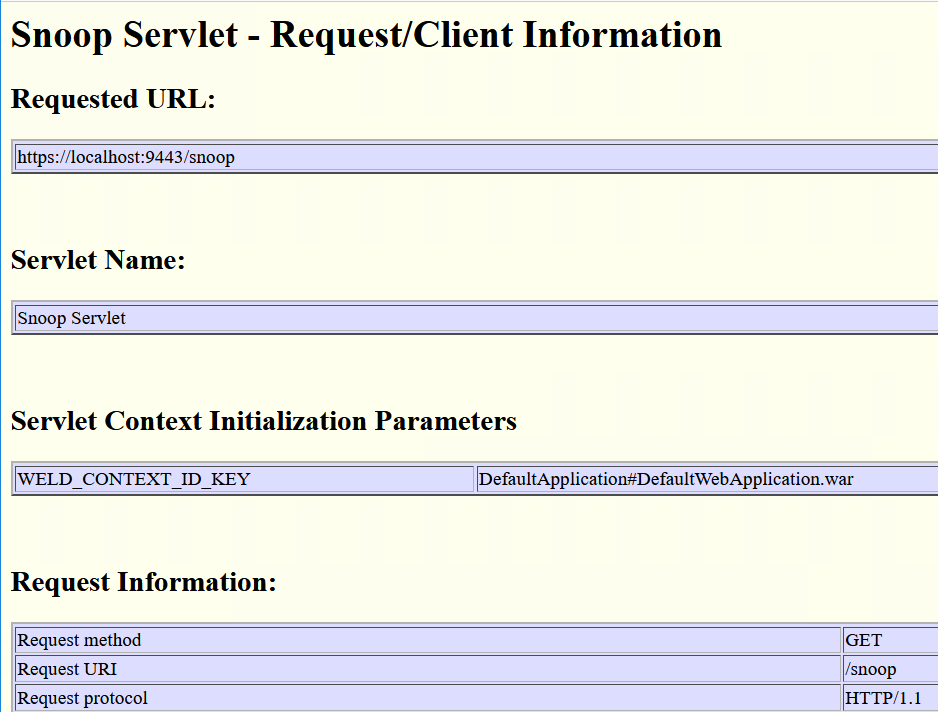
- In a new browser window, navigate to https://example.com:9443/snoop
- It is important that the host and port of the URL in the browser's address bar match the host and port of the configured acsUrl.
Otherwise, the SAML TAI does not have access to its required cookies when the IdP redirects back to the WebSphere server after the user logs in. - The user is redirected to the IdP to log in.
- After the user logs in, the snoop application is displayed in the browser.
- If any of the results in the previous step did not happen, proceed to the Troubleshoot tab at the top of this document.


Next step
Now that you have protected the snoop application by trusting any signer, you'll want to add the IdP's signer certificate so that you trust SAML Responses only from your IdP.
Proceed to the Add IdP signer certificate tab above.
Proceed to the Add IdP signer certificate tab above.
Copied!
Document Location
Worldwide
[{"Type":"MASTER","Line of Business":{"code":"LOB67","label":"IT Automation \u0026 App Modernization"},"Business Unit":{"code":"BU048","label":"IBM Software"},"Product":{"code":"SSEQTP","label":"WebSphere Application Server"},"ARM Category":[{"code":"a8m0z000000Cbp2AAC","label":"WebSphere Application Server traditional-All Platforms-\u003ESecurity-\u003ESSO-\u003ETAI"}],"ARM Case Number":"","Platform":[{"code":"PF025","label":"Platform Independent"}],"Version":"All Versions"}]
Was this topic helpful?
Document Information
Modified date:
25 September 2024
UID
ibm16854721