Fix Readme
Abstract
This document contains guidance for installation of the 11.7.1.4 upgrade package available on Fix Central. It can be used to upgrade 11.7.1.0, 11.7.1.1, 11.7.1.2 or 11.7.1.3 installations on any operating system.
Content
Table of Contents
1) Introduction
2) General installation information
2.1) Environment
2.2) Using a password or passwordless SSH for upgrading the Microservices tier
3) Downloads and pre-upgrade steps
4) Installation
4.1) Instructions for upgrading Information Server in GUI mode of the Update Installer
4.2) Instructions for upgrading Information Server in Console mode of the Update Installer
5) Post upgrade actions
5.1) Information Analyzer microservice
5.2) Enabling Information Analyzer column analysis jobs in WebSphere Liberty installations
5.3) Usage of Information Server Administration (web) console
5.4) Upgrade Db2 version 11.1 to Db2 11.5
5.5) (Optional) Change communication between the services tier and the repository tier to TLS 1.2
5.6) Disable the Kafka log cleaner
5.7) Information Server Microservices tier needs an additional key
5.8) Information Server Microservices tier launchpad and Administration console can intermittently fail
5.9) Information Server Microservices tier launchpad does not display icons properly
5.10) Users with jobs involving File Connector, Azure Connector, or Snowflake Connector
5.11) Using SQL Server 2019 as the database repository
5.12) Desktop icons for Information Server web console and Launchpad
5.13) File Connector jobs need update of CLASSPATH and job recompilation
5.14) Clean up shared open source deployment on the services tier when a Microservices tier is present
5.15) Reboot systems before another fix pack or service pack are installed
5.16) Installation of the Oracle connector patch
5.17) Installations that started with 11.7.1.0 must complete upgrade of Microservices tier
5.18) Installations with a Microservices tier must address Solr collections
5.19) Remove all unused cached container images
1) Introduction
The IBM InfoSphere Information Server 11.7.1.4 ispkg image is available for upgrading of Information Server 11.7.1.0, 11.7.1.1, 11.7.1.2 or 11.7.1.3 installations. The steps for upgrading to 11.7.1.4 depends on whether a Microservices tier is installed.
11.7.1.4 upgrade prerequirements:
- Information Server 11.7.1.0, 11.7.1.1, 11.7.1.2 or 11.7.1.3 must be installed.
- If you have an Information Server 11.7.1.0 installation with a Microservices tier, you must first upgrade to Information Server 11.7.1.3 before 11.7.1.4 is installed.
- If you have a Microservices tier, it must be at the same version as the services tier.
- See technote for issues you might need to address before the installation, and also issues that might affect you after the installation.
- If you use Db2 as the repository database, Db2 versions before 11.1.4.6 are not supported on Red Hat Enterprise Linux (RHEL) 8. After Information Server is upgraded to 11.7.1.4, you can upgrade Db2 to a supported version. For usage with Information Server, Db2 11.5 can be obtained from Passport Advantage.
- In 11.7.1.4, the Microservices tier container runtime is changed from Docker to containerd. Additional disk space is needed for containerd (see details later in this document).
If Watson Knowledge Catalog (WKC) is installed, then upgrade to 11.7.1.4 is not supported.
- If WKC is installed but is not in use, you can manually uninstall WKC to allow installation of 11.7.1.4. See Remove Watson Knowledge Catalog from an Information Server 11.7.1.0 installation for details.
- If WKC is installed and is in use, you cannot install 11.7.1.4.
Note:
1. The installation of 11.7.1.4 removes all Solr collections. Collections created for Quick scan cannot be re-created; if you need your prior Quick Scan results (in Solr collections), do not install 11.7.1.4.
2. If you need to add a Microservices tier, or enhance an existing Microservices tier in an Information Server 11.7.1.0 installation, you must use technote instead of this technote.
3. If you need to add a Microservices tier to an Information Server 11.7.1.1 or later installation, you must use technote.
4. OpenId Connect support is added in some Information Server web applications. See technote for details.
5. SQL Server 2019 support was added in Information Server 11.7.1.3.
2) General installation information
2.1 Environment
For the Information Server host system, ensure that your system meets the Information Server 11.7.1.4 System requirements. Disk space requirements are included in the System requirements.
Refer to the version 11.7.1.0 pre-installation checklist to validate your system.
2.2 Using a password or passwordless SSH for upgrading the Microservices tier
If the Microservices tier was installed after the other tiers were installed then there is no need to set up passwordless SSH from a user on the Information Server host to the master node host. The Microservices tier should be patched after the other tiers are patched.
In this case, you do not have to set up passwordless SSH from the Information Server host to the master node.
However, for a multiple nodes environment, you must set up passwordless SSH for the root user from the master node to the worker nodes.
The specified non-root user must have sudo privilege with NOPASSWD enabled.
In this case, you do not have to set up passwordless SSH from the user running the installation on the Information Server host to the master node.
For a multiple nodes environment:
ii. You must set up passwordless SSH for the specified non-root user from the master node to the worker nodes.
You must set up passwordless SSH from the user running the installation on the Information Server host to the master node.
For a multiple nodes environment, passwordless SSH must also be set up for the root user from the master node to the worker nodes.
The specified non-root user must have sudo privilege with NOPASSWD enabled.
You must set up passwordless SSH from the user running the installation on the Information Server host to the master node.
For a multiple nodes environment:
i. The specified non-root user must be set up in the same manner on all nodes.
ii. Passwordless SSH must also be set up for the specified non-root user from the master node to the worker nodes.
a. If the file /root/.ssh/id_rsa.pub does not exist, create the SSH Keys with the following command:
> ssh-keygen -f /root/.ssh/id_rsa -q -N ""
b. Copy the SSH public key to the Microservices tier node with the following command:
> ssh-copy-id -i /root/.ssh/id_rsa.pub root@<enterprise search="" node="">
c. Validate the root passwordless SSH connection to the Microservices tier node with the following command:
> ssh root@<enterprise search="" node=""> hostname
A non-root user with sudo privileges can be set up for passwordless SSH in the same manner.
3) Downloads and pre-upgrade steps
1. Before any of your systems are patched to 11.7.1.4, you must take backups:
- 11.7.1 documentation
- 11.7 documentation
The listed documentation includes information for backup of the microservices tier.
3.1) Update the Update Installer to the latest version. Use 11.7.1.116 or later.
3.1.1) On the Information Server host, download the latest Update Installer.
3.1.2) In the document, Updating IBM InfoSphere Information Server, Version 11.7, and installing additional products, under Version 11.7, click the link installing_fixes_fixpacks_updates117.html.
3.1.3) See section “Installing a new version of the Update Installer before installing an update, fix, or patch” for the steps to extract the new Update Installer and run updateImage.sh.
If you used the default directory for Information Server, the Update Installer is installed in /opt/IBM/InformationServer/Updates/bin.
3.2) Download the 11.7.1.4 images
You must download the relevant images from IBM Fix Central depending on your installation choices.
For details on locating the images, see the Download document
3.2.1) On the Information Server host, download, and extract the Information Server 11.7.1.4 ispkg image from IBM Fix Central.
For example, fixpack_FP4_IS1171_linux64_11710-11713.tar.gz
Note:
1. Set your umask to 022 before the image is extracted.
2. Unpack the file to get the ispkg and readme files.
3.2.2) On the Microservices tier, download the IBM Information Server Enterprise Search v11.7.1.4 image from IBM Fix Central. Do not extract the file.
For example, fixpack_FP4_IS1171_microservices_11710-11713.tar.gz
3.3.2) Ensure that your system meets all system requirements for 11.7.1.4 installations. For example, on the microservices tier, the requirements for slirp4netns and fuse-overlayfs are different after 11.7.1.1.
3.3.3) If you are upgrading the Microservices tier, verify that your system meets the requirements for usage as the Microservices tier of IBM InfoSphere Information Server 11.7.1.4.
3.3.4) Using SQL Server 2019 as the database repository
If you currently use SQL Server as the database repository, then since 11.7.1.3, you can choose to use SQL Server 2019.
To do so, use SQL Server documentation to upgrade your database to SQL Server 2019 before installation of 11.7.1.4.
More steps are required after 11.7.1.4 is installed; the steps are listed in section 5.11.
3.3.5) Windows installations must enable TLS 1.2 support in Internet Explorer
IMPORTANT - This step must be followed even if your using an alternative web browser to Internet Explorer.
3.3.6) AIX installations must upgrade OpenSSL
OpenSSL must be upgraded to version 1.0.2.2102 or later. See Downloading and Installing or Upgrading OpenSSL and OpenSSH.
3.3.7) WebSphere Application Server Network Deployment
For installations that use WebSphere Application Server Network Deployment, we recommend upgrading to version 9.0.5.12 or later.
3.3.8) WebSphere Application Server Liberty
For installations that use WebSphere Application Server Liberty on UNIX, cleanup Liberty installation artifacts. No action is needed for installations on Windows:
a. Change directory to your Information Server installation location. For example, /opt/IBM/InformationServer.
b. If folder wlp.backup exists, delete the folder.
c. If folder wlp.new exists, delete the folder.
3.3.9) Update JDK
To avoid credential-mapping errors from their DataStage clients for previously working users, update the JDK to the latest available version. See technote 6552878 for details.
3.3.10) Red Hat Linux 8.5 and later installations might encounter error messages related to 'which'
On Red Hat Linux 8.5 and later installations, the Install log might contain many error messages indicating a syntax error; an unexpected end of file when the function definition for `which' is imported. To avoid the problem, do one of the following:
- Unset the 'which' shell function definition by running the following command:
> unset which - Move or remove the shell initialization file /etc/profile.d/which2.sh or /etc/profile.d/which2.csh, depending on the shell of your choice, and initialize the shell session such that the BASH_FUNC_which%% variable is not exported.
3.3.11) If you have a Microservices tier, and currently have 11.7.1.0 installed, as indicated previously, you must apply Information Server 11.7.1.3, and next, execute the preupgrade steps in technote 6828335. More steps are needed after 11.7.1.4 is installed.
3.3.12) In 11.7.1.4, the Microservices tier container runtime is changed from Docker to containerd. Due to this transition, an extra 90GB of free disk space is required for the /var/lib/containerd directory. In case the partition containing this directory does not have enough disk space create a new partition for the /var/lib/containerd directory, and move the current content. In case an XFS file system is used for the new partition, it must be formatted with ftype=1 flag.
4) Installation
Use the following instructions irrespective of whether you have a Microservices tier.
Note:
Before you begin the upgrade to 11.7.1.4
2. If you are upgrading the Microservices tier
i. The Microservices tier must be at the same version as the Information Server services tier.
ii. Ensure that all pods are up and running.
iii. Upgrade either to Ansible 2.9.x or Ansible Core 2.12.x.
Do not upgrade to any other intermediate version.
You can check the Ansible version on your system with ansible --version.
Information on Ansible 2.9 can be found at https://docs.ansible.com/ansible/2.9/installation_guide/intro_installation.html.
Details on how to install Ansible Core 2.12.x can be found at https://docs.ansible.com/ansible-core/2.12/installation_guide/intro_installation.html
Additionally, ensure that the following required system packages are installed:
yum install python-netaddr
yum install python-dns
3. The installation program changes the network protocol of your installation to TLS 1.2.
However, communication between the services tier and the repository tier is not changed to TLS 1.2; it can be changed post-install.
4.1) Instructions for upgrading Information Server in GUI mode of the Update Installer
4.1.1) Log in to the Information Server host. Change directory to <IS_HOME>/Updates/bin
For example, cd /opt/IBM/InformationServer/Updates/bin
4.1.2) Verify that the Update Installer version is 11.7.1.116 or later.
./installUpdates -version
If you need to update the Update Installer, see step 3.1.
4.1.3) Initiate the Fix Pack install with the following command:
./installUpdates
This command launches the Update Installer in GUI mode.
4.1.4) Provide information as required in each panel to complete the installation.
Click Login.
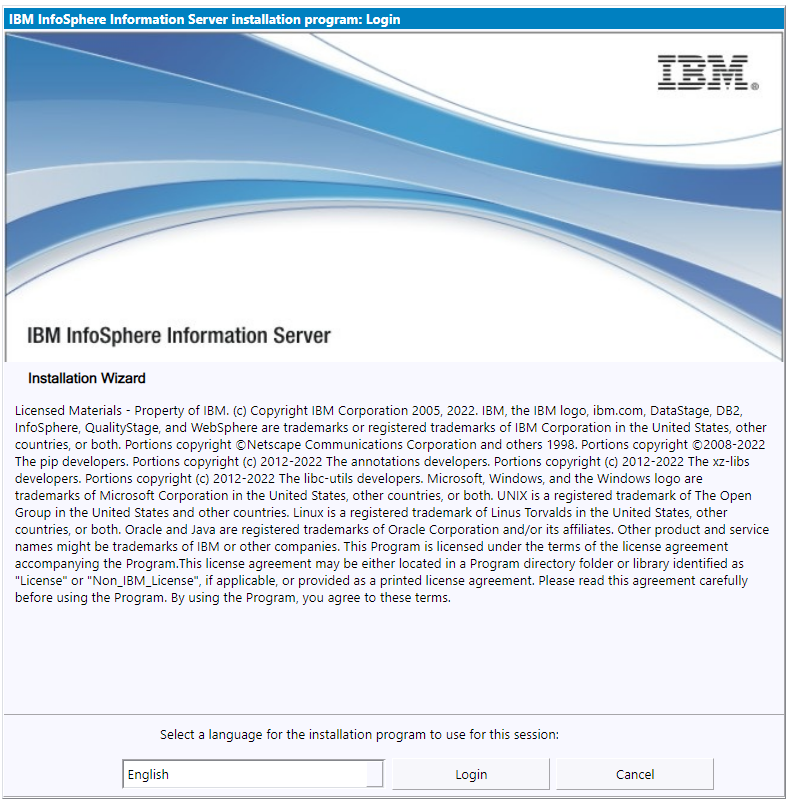
4.1.5) Review the System requirements, Release Notes, and Planning information.
Click Next.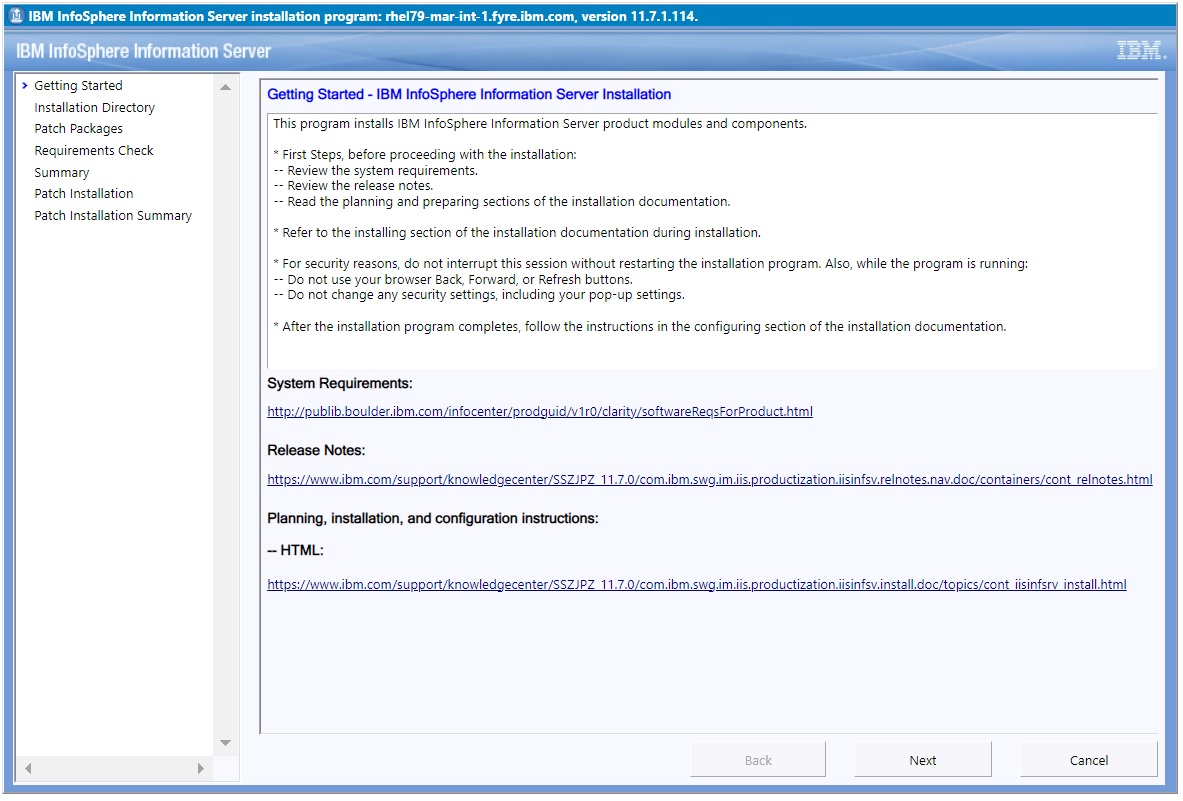
4.1.6.1) If your installation does not include Watson Knowledge Catalog, click Next.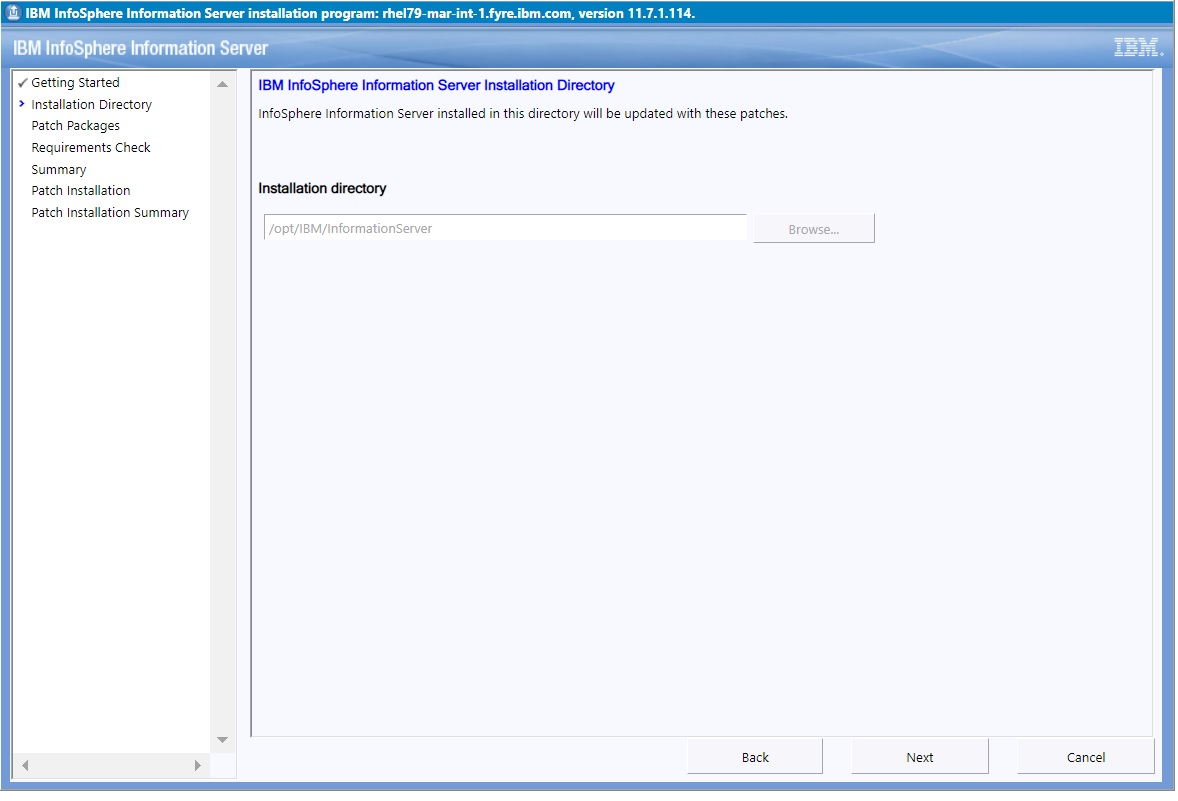
4.1.6.2) If Watson Knowledge Catalog is installed, select the checkbox to indicate whether you intend to apply 11.7.1 Fix Pack 4 to your version 11.7.1.0 installation. Installations with Watson Knowledge Catalog are not permitted to install 11.7.1 Fix Pack 4 until Watson Knowledge Catalog is manually uninstalled. See technote for steps to manually uninstall Watson Knowledge Catalog.
If you select the checkbox to apply Fix Pack 4 to your version 11.7.1.0 installation, and click Next, the following error is displayed.
4.1.7) In this step choose whether to upgrade the Microservices tier.
4.1.7.1) If you do not have a Microservices tier select the "Skip installation of Information Server microservices tier" checkbox.
Since addition of a Microservices tier during the Fix Pack upgrade is not supported, click Next, and skip forward to step 4.1.8.
Later, if needed you can add a Microservices tier. Refer to technote for details.
4.1.7.2) If you have a Microservices tier, you might choose to skip its upgrade while your other Information Server tiers are upgraded to 11.7.1.4.
Note:
1. If you choose to skip upgrade of the Microservices tier, then before the upgraded Information Server installation is used, the Microservices tier must be upgraded. Follow technote to upgrade the Microservices tier to be at the same 11.7.1.4 version as the other Information Server tiers.
2. In case you previously installed the Microservices tier by following technote, you must skip upgrade of the Microservices tier in this step. Upgrade the other Information Server tiers to 11.7.1.4, and use the same technote to upgrade the Microservices tier. Skipping the upgrade prevents overwriting of your handcrafted inventory file.
Select the "Skip patching of Information Server microservices tier" checkbox to skip the upgrade.
Click Next.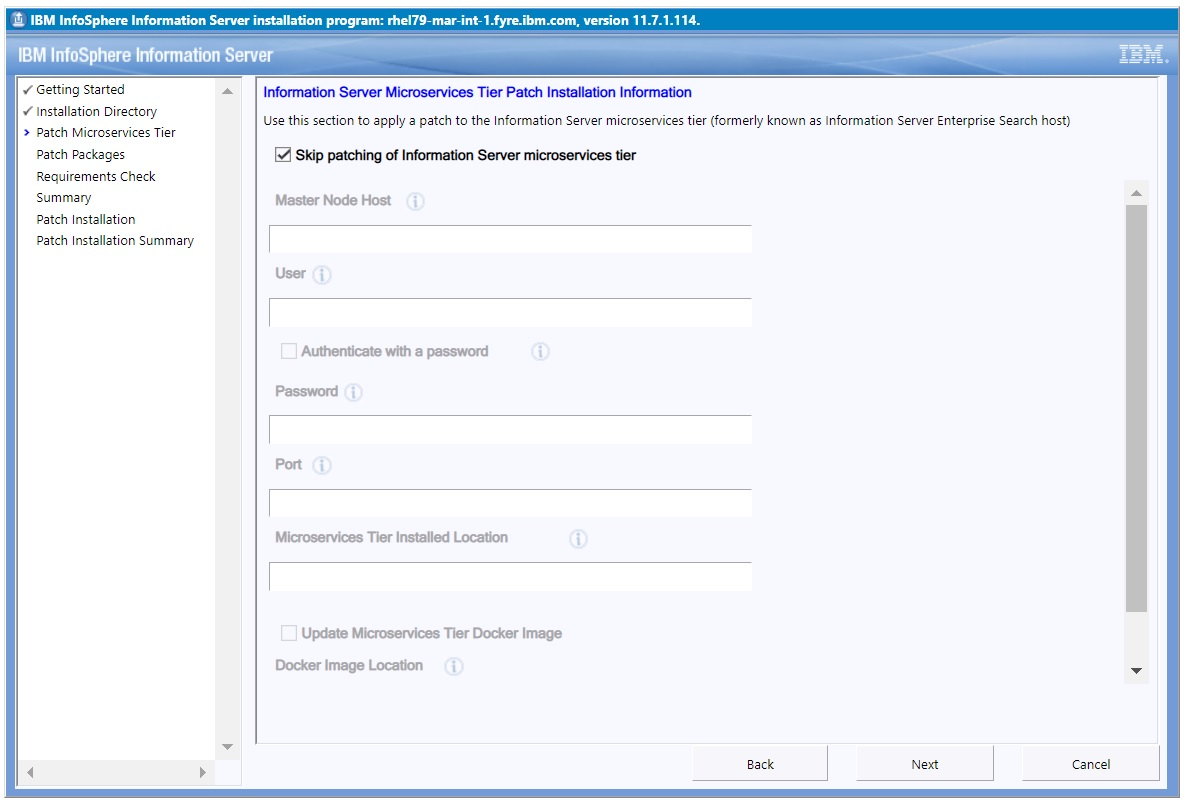
If you are currently using version 11.7.1.1, 11.7.1.2 or 11.7.1.3, skip forward to step 4.1.8.
If Information Server 11.7.1.0 is in use, the following panel is displayed.
The installation program does not support these actions during a fix pack installation. Hence, select the "Skip enhancements of the Information Server microservices tier" checkbox.
Click Next.
Skip forward to step 4.1.8.
4.1.7.3) To upgrade the Microservices tier
Note:
1. In case you previously installed the Microservices tier by following technote, you must skip upgrading the Microservices tier in this step and instead, follow the instructions in step 4.1.7.2.
2. The Microservices tier must be at the same version as the Information Server services tier.
3. All pods must be up and running.
You can check the status of the pods by running the following command:
kubectl get pods --all-namespaces
4. Upgrade either to Ansible 2.9.x or Ansible Core 2.12.x.
Do not upgrade to any other intermediate version.
You can check the Ansible version on your system with ansible --version.
Information on Ansible 2.9 can be found at https://docs.ansible.com/ansible/2.9/installation_guide/intro_installation.html.
Details on how to install Ansible Core 2.12.x can be found at https://docs.ansible.com/ansible-core/2.12/installation_guide/intro_installation.html
Additionally, ensure that the following required system packages are installed:
yum install python-netaddr
yum install python-dns
Provide the relevant information in the panel:
a. Deselect the "Skip patching of Information Server microservices tier" checkbox.
b. Specify a fully qualified domain name for the Master Node Host.
c. Specify the same User as was used during the initial installation of the Microservices tier.
d. For more information on "Authenticate with a password", see section 2.2.
e. If you specify a non-root user, in /etc/security/limits.conf, the hard and soft setting of nofile and nproc for the specified user must be 10240.
Also, umask must be set to 022 in ~/.bashrc.
4.1.8) In the list of "Packages to be installed", select the 11.7.1.4 ispkg file you downloaded from IBM Fix Central.
The package name is similar to as shown in section 3.2.1.
Click Next.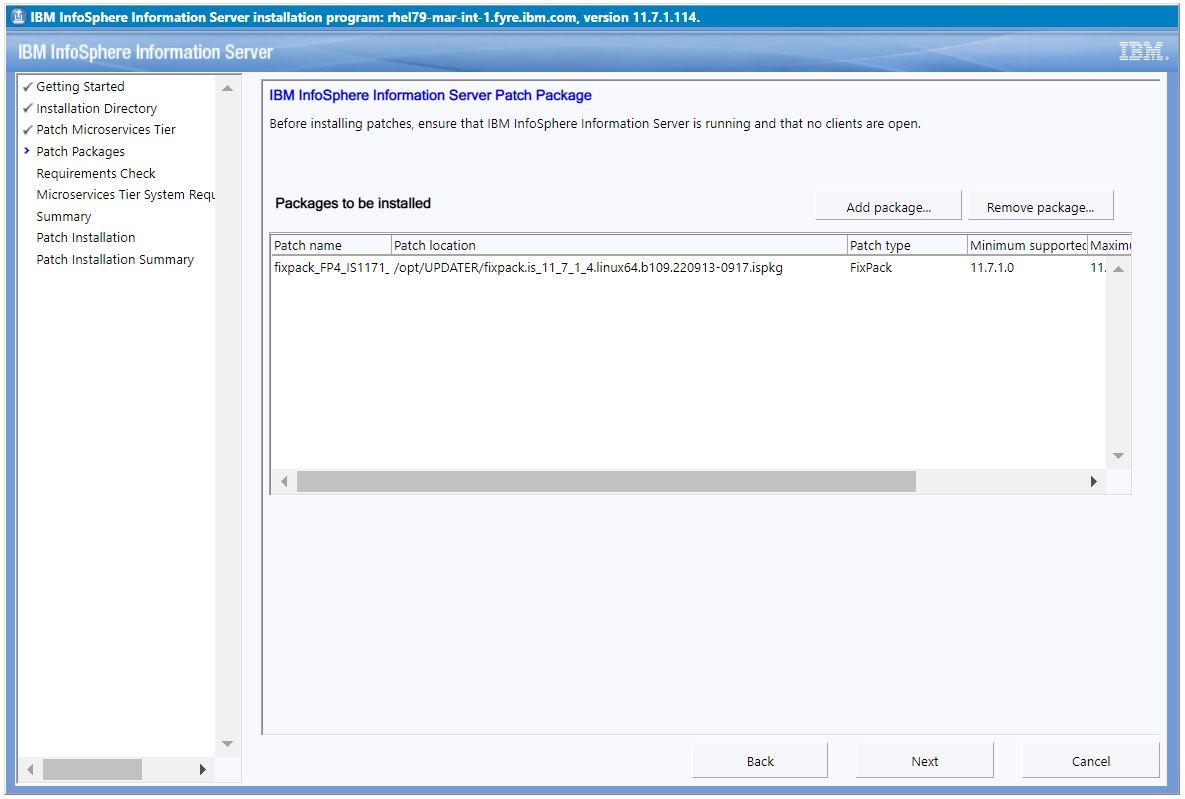
The Installer again checks whether Watson Knowledge Catalog is installed on the system. If present, the following error is displayed.
If Watson Knowledge Catalog is installed, you cannot install 11.7.1 Fix Pack 4 until Watson Knowledge Catalog is manually uninstalled. See technote for steps to manually uninstall Watson Knowledge Catalog.
4.1.9) If you have a Microservices tier, provide your existing credentials for Kafka and Solr (for example, solruser, solrpwd etc). The Update Installer creates the specified users in Kafka and Solr; they do not have to be an operating system user, Information Server user, or LDAP user.
Later, you can use the specified values for maintenance actions such as accessing the Solr web UI.
Click Next.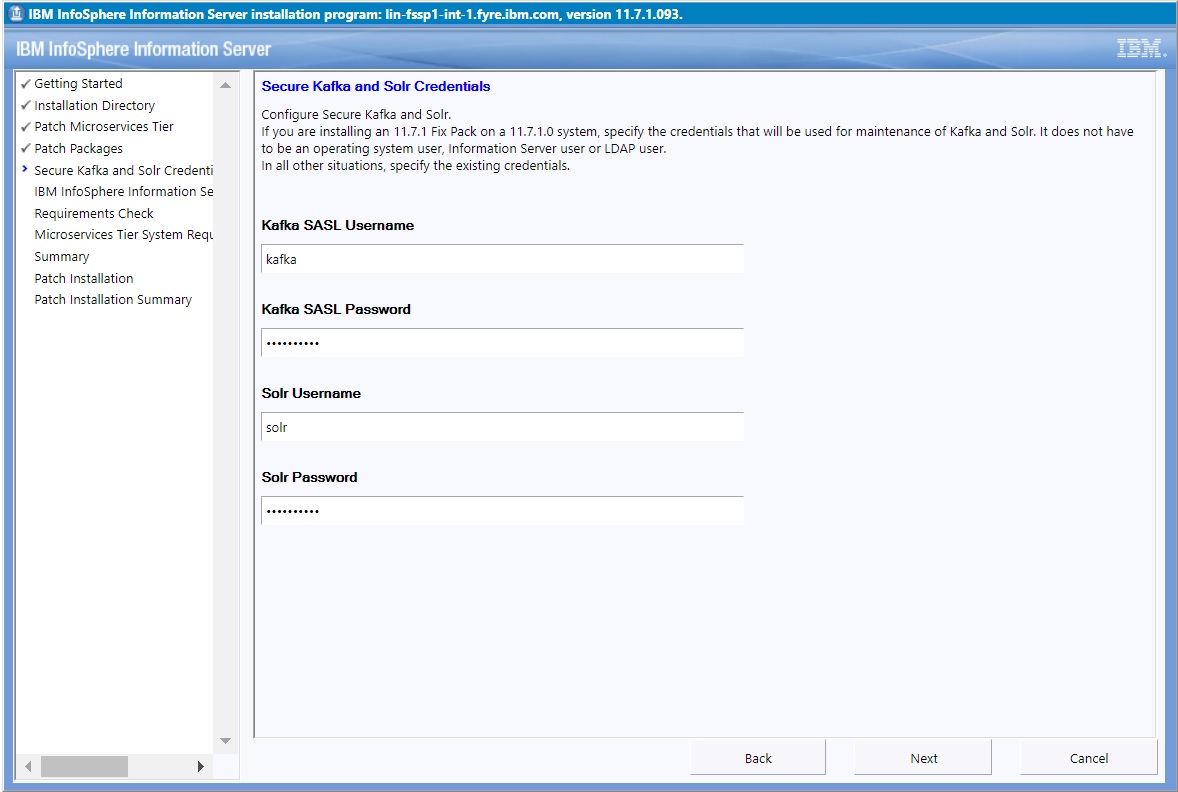
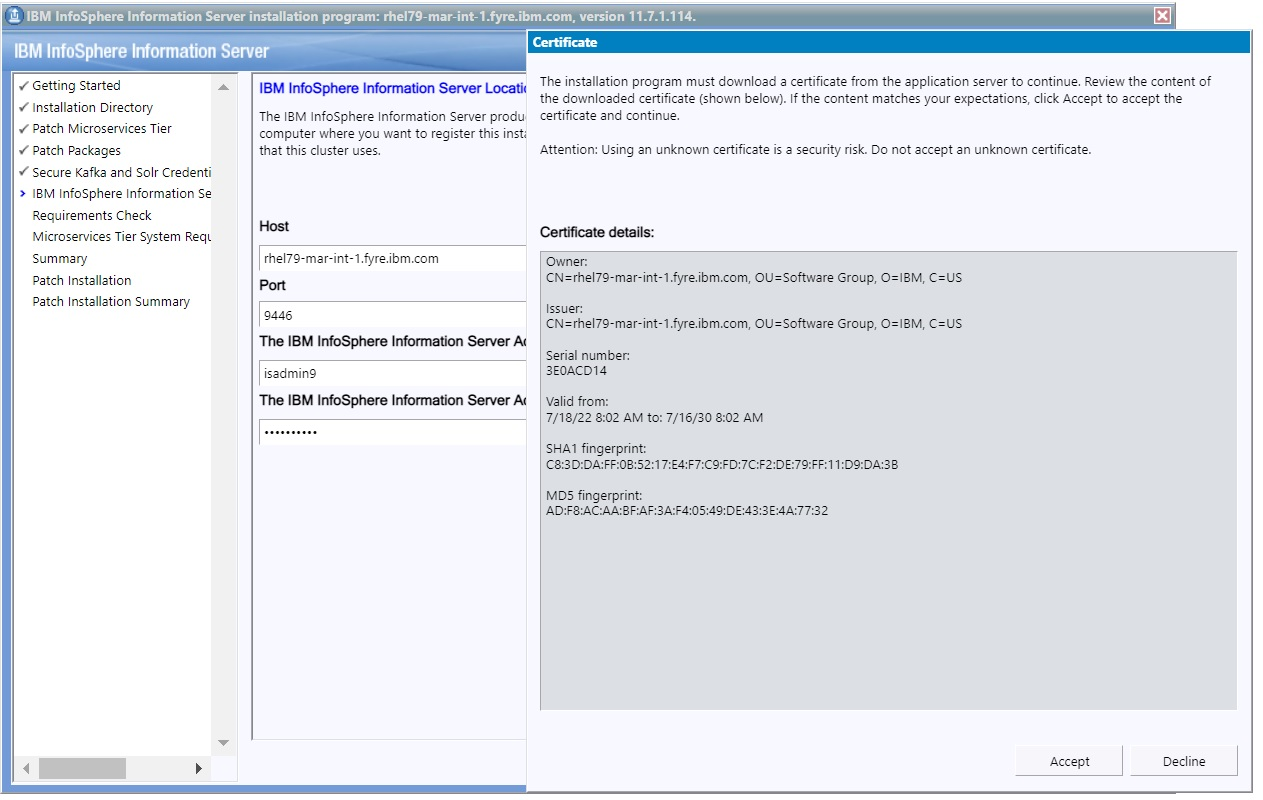
4.1.10) Provide the Information Server Administrator user name and password. Accept the certificate and click Next.
Accept the certificate. Click Next.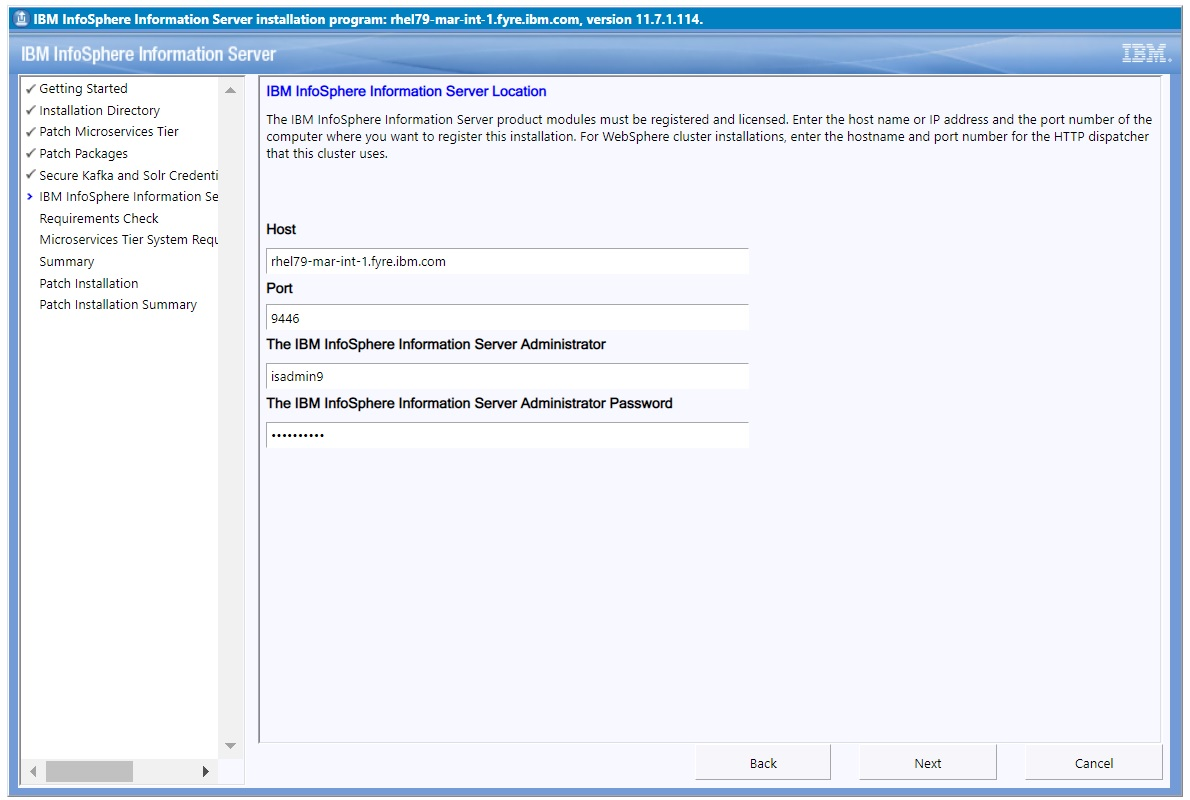
4.1.11) On the System Requirements Check page, confirm that all system requirements passed, and then click Next.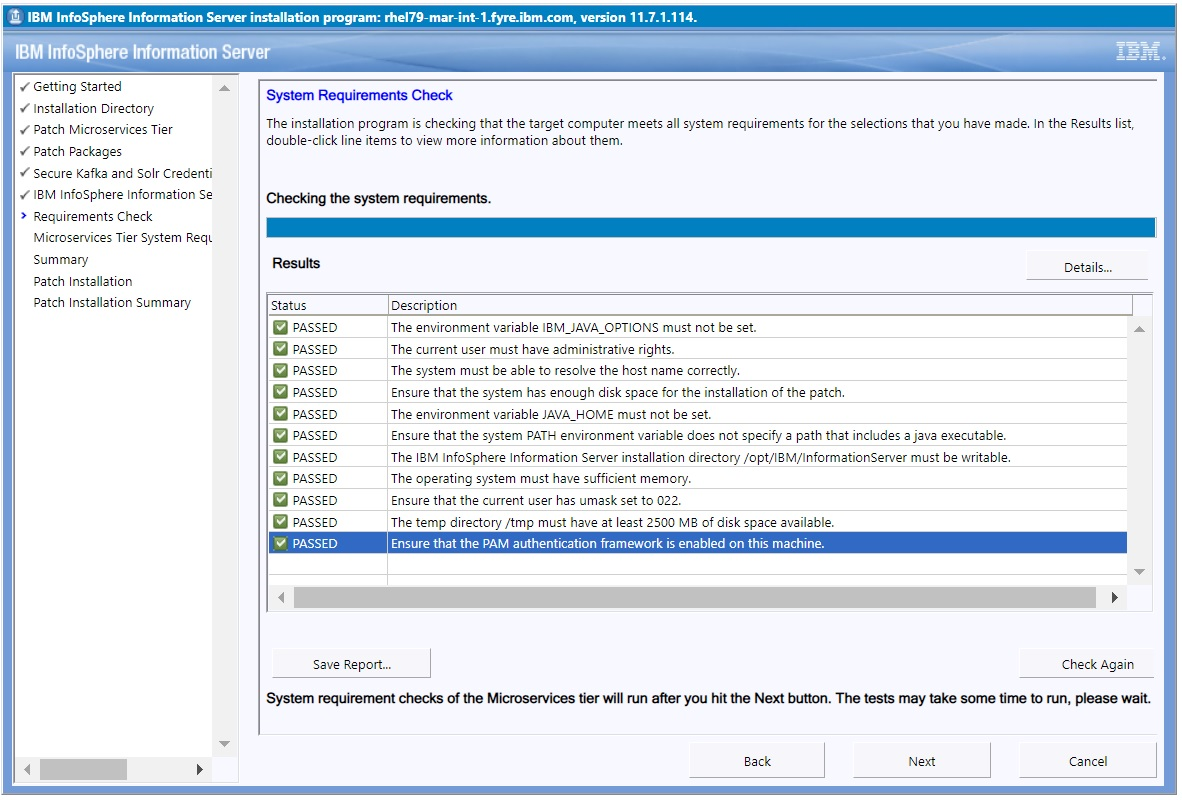
4.1.12) If you have a Microservices tier, examine the results from system requirement checks of the Microservices tier. If all is good, click Next.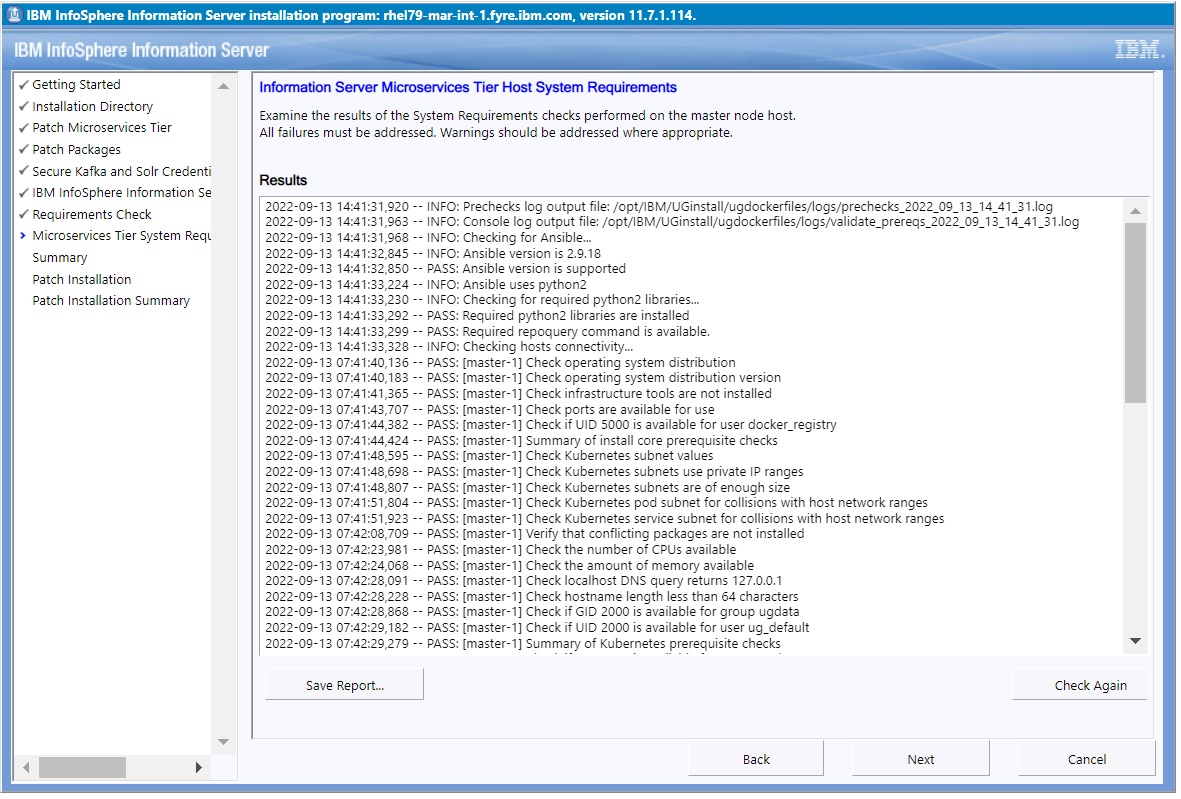
4.1.13) Review the Preinstallation Summary and click the Install button to start the installation.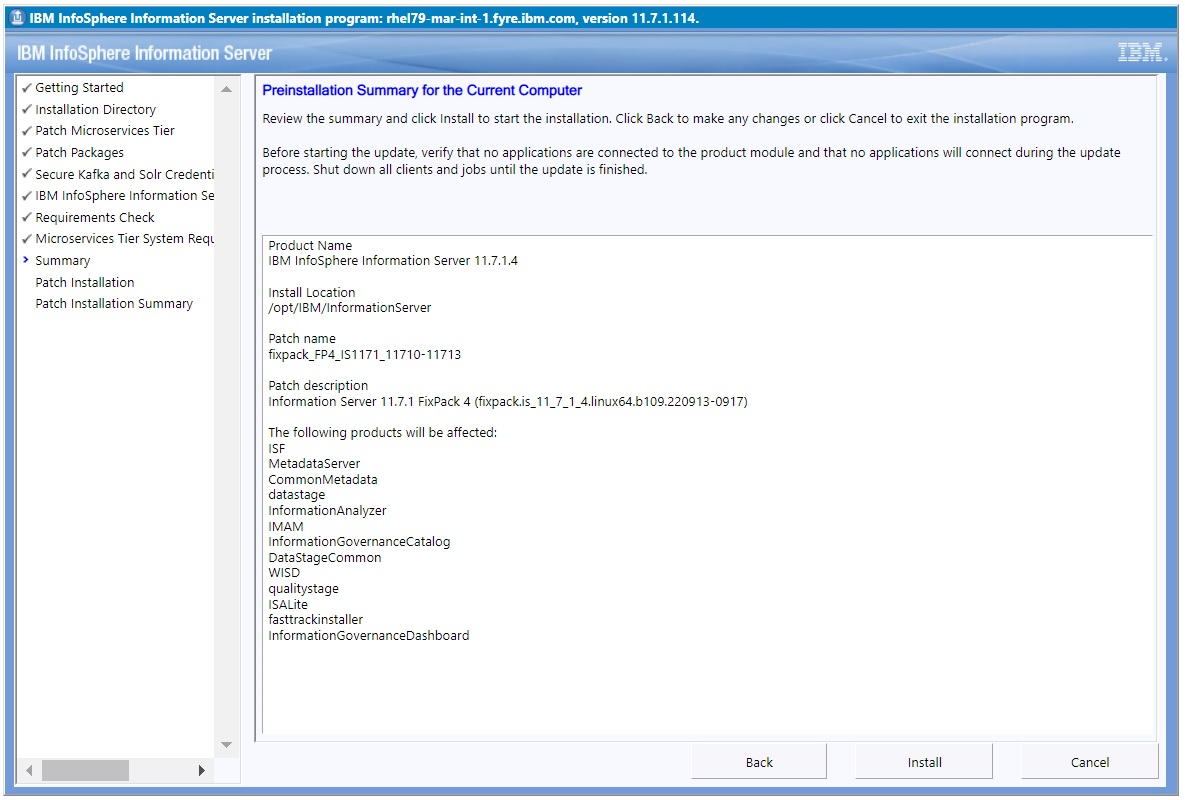
4.1.14) Click the Finish button after the installation completes.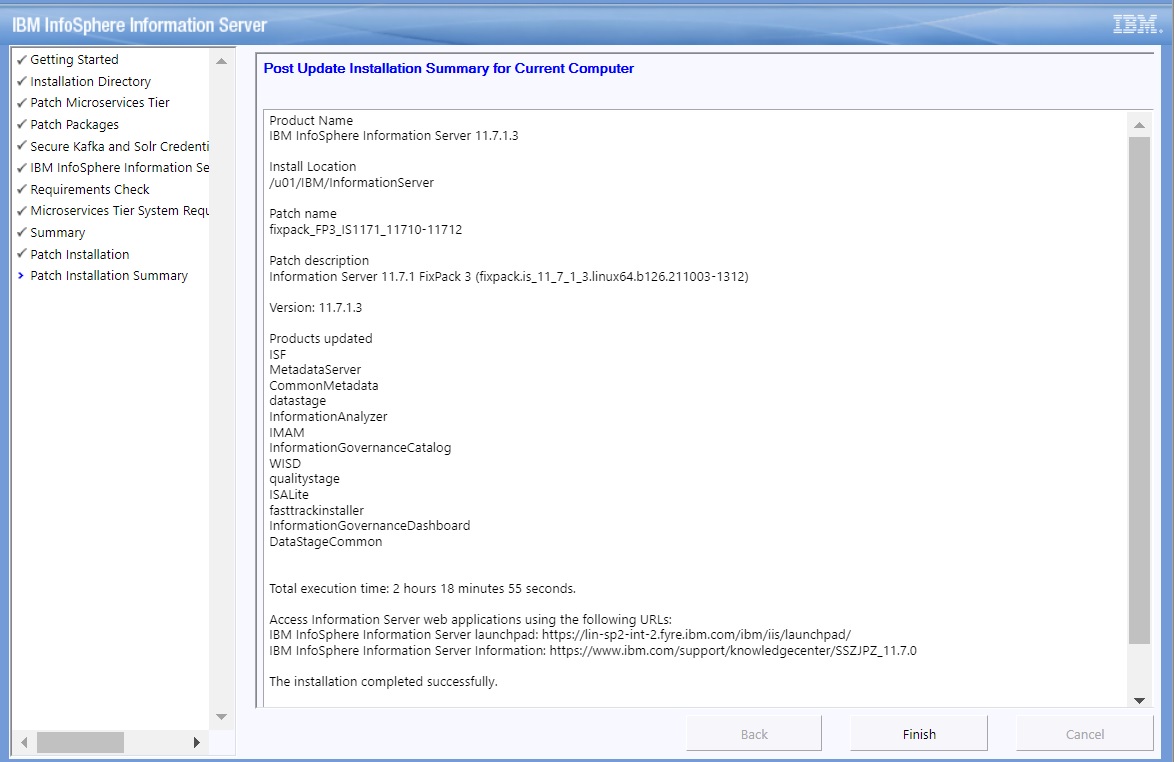
4.1.15) Click “Advanced”.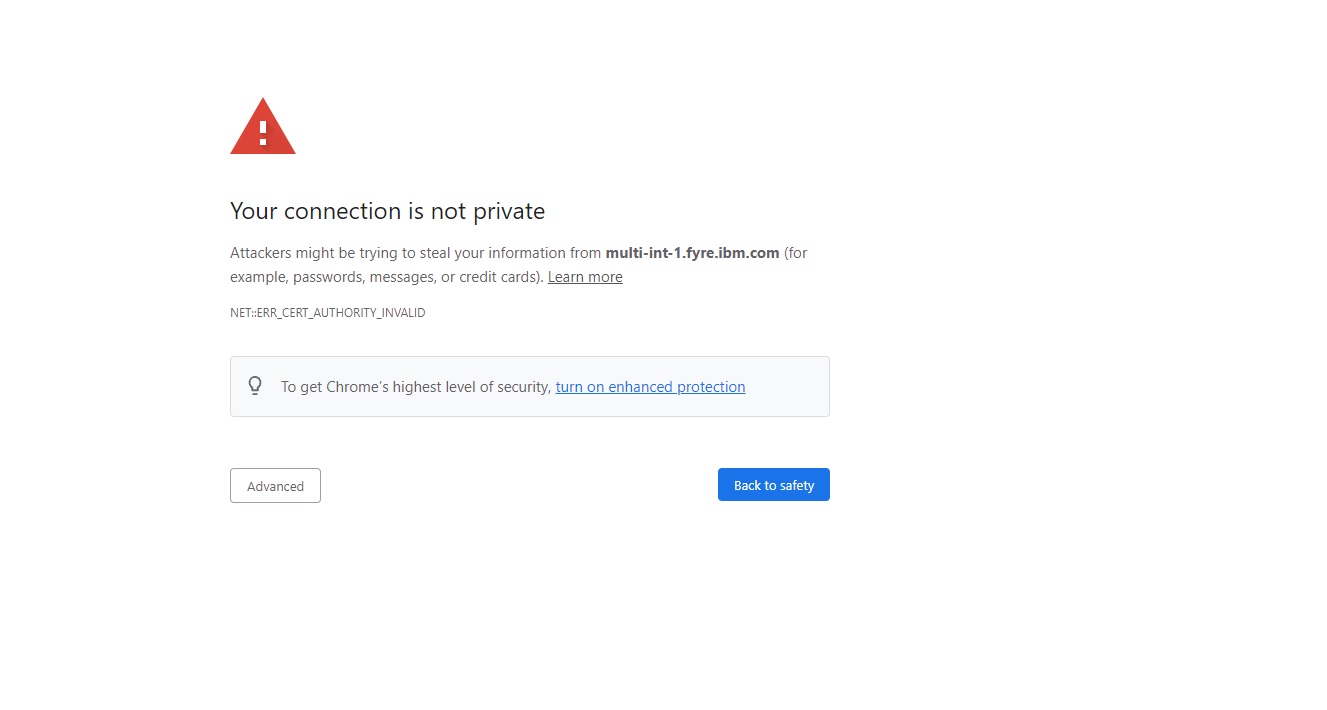
4.1.16) Click the link "Proceed to ..."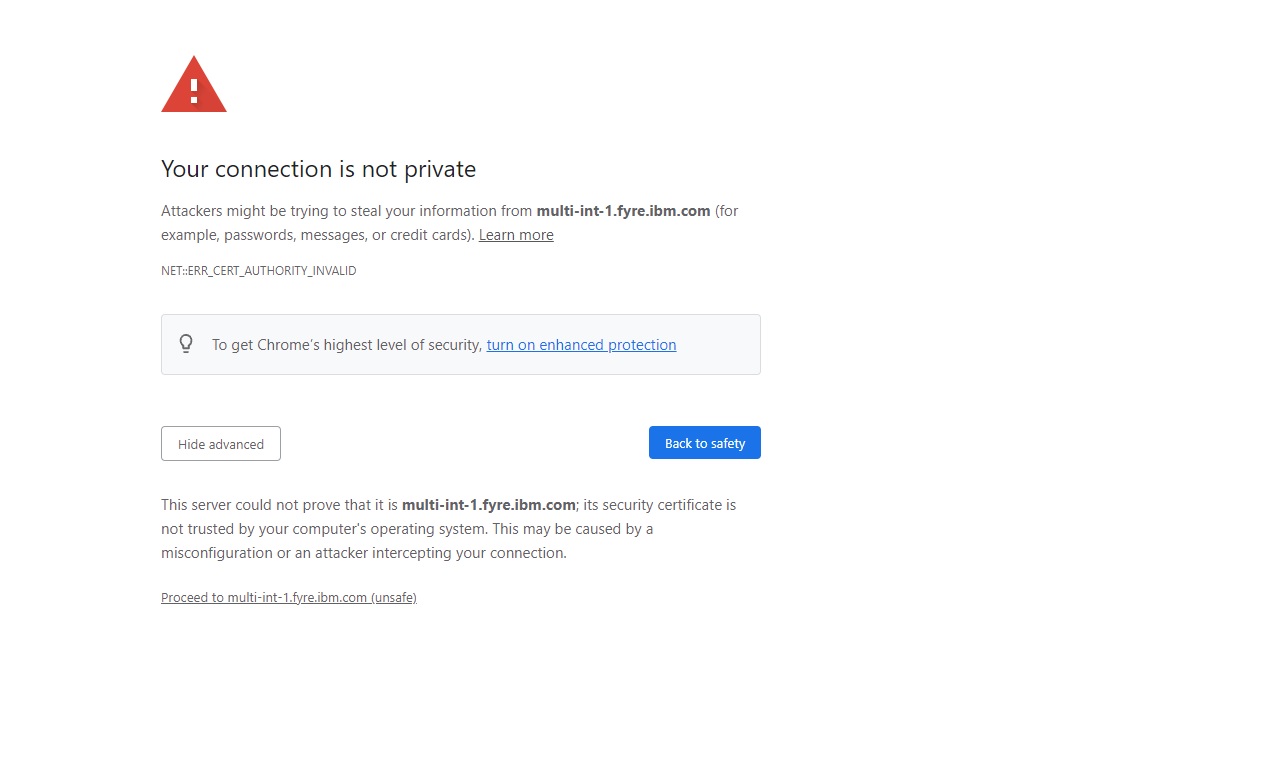
4.1.17) The Launchpad is displayed.
4.1.17.1) If you don't have a Microservices tier, the Information Server Launchpad is displayed.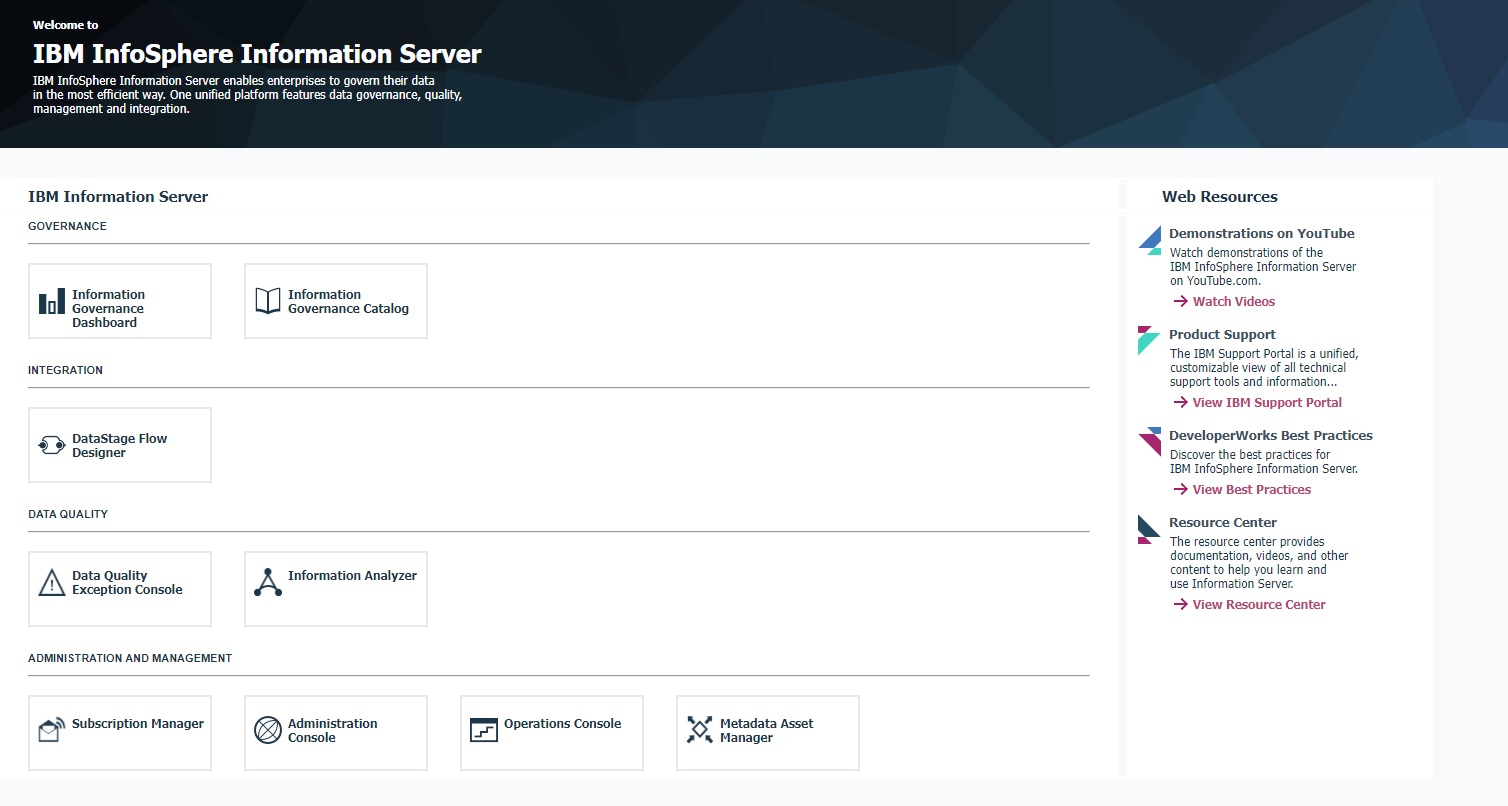
4.1.17.2) If you have a Microservices tier, the Information Server (Microservices) Launchpad is displayed.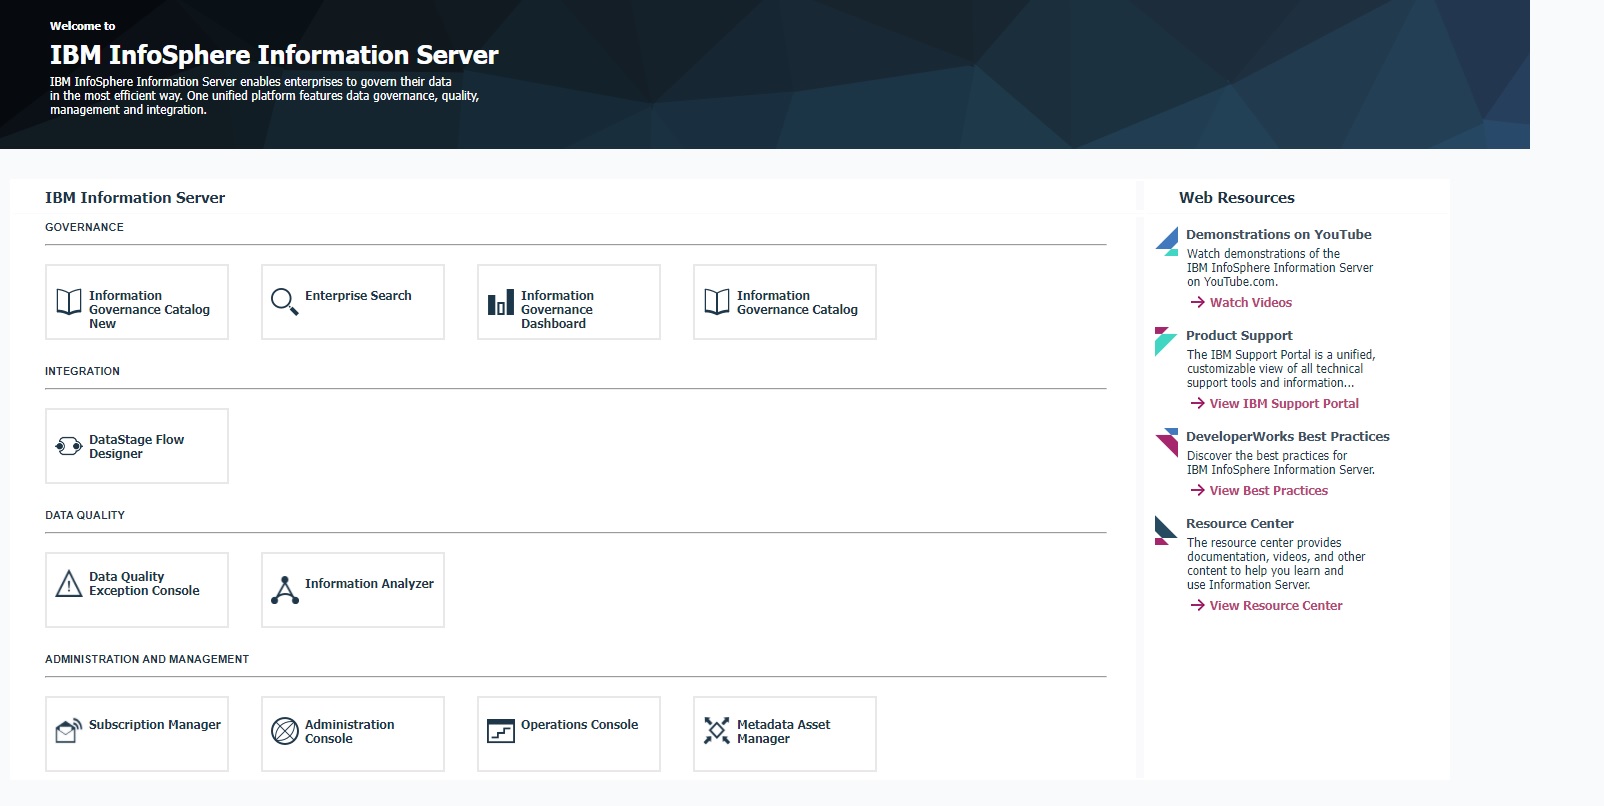
4.2) Instructions for upgrading Information Server in Console mode of the Update Installer
Note:
1. The Microservices tier must be at the same version as the services tier before installation of 11.7.1.4.
2. The validation checks performed by the Update Installer in Console mode are not as extensive as the checks performed when the Update Installer is in GUI mode.
4.2.1) Log in to the Information Server host. Change directory to <IS_HOME>/Updates/bin
For example, cd /opt/IBM/InformationServer/Updates/bin
4.2.2) Before the Update Installer is started, check the Information Server 11.7.1.4 System requirements and make sure that your system meets the requirements.
4.2.3) Verify that the Update Installer version is 11.7.1.116 or later.
./installUpdates -version
If you need to update the Update Installer, see step 3.1.
4.2.4) Run the Update Installer to upgrade Information Server.
For example, installUpdates -i /opt/IBM/InformationServer/ -p /opt/Builds/ISPKG/<ispkg_file_name>.ispkg -verbose -console -properties <property_file_name>
where
<ispkg_file_name> is the ispkg file you downloaded from IBM Fix Central
<property_file_name> is the name of the property file wherein you specify values for the various properties that control the installation on the Microservices tier. If you don't have a Microservices tier, you do not have to specify "-properties".
The Update Installer prompts you for the Information Server administrator user ID and password, and the WebSphere Administrator user ID and password.
Sample property file
5.1) Information Analyzer microservice
Information Analyzer users that are migrating from stand-alone Information Server to Information Server with a Microservices tier must migrate the rule execution results to the IA micro-service by running following command for each project containing rule execution results:
/IBM/InformationServer/ASBServer/bin/IAAdmin -user -password -migrateXmetaMetadataToMicroservice -projectName
Do not specify the project name to migrate all projects.
The migration might take a long time depending on the number of projects and rule execution results to migrate.
5.2) Enabling Information Analyzer column analysis jobs in WebSphere Liberty installations
Installations that use WebSphere Liberty with a Db2 repository must follow the steps in technote to enable column analysis jobs.
5.3) Usage of Information Server Administration (web) console
You might not be able to log in to the Information Server Administration (web) console.
Clear the browser cache and cookies and again try to log in to the Administration console.
5.4) Upgrade Db2 version 11.1 to Db2 11.5
For a supported version of Db2, upgrade Db2 to version 11.1.4.6, or 11.5.6.0, or later.
For upgrades to Db2 version 11.5.6.0, if you do not have a Db2 11.5 license, perform the following steps:
Linux
Windows
AIX
c. Stop WebSphere Application Server for Information Server.
d. Follow Db2 instructions to upgrade Db2 to version 11.5.4.0
e. Follow Db2 instructions to use db2licm to apply the license.
For example,
Change directory to the location where Db2 11.5 was installed.
h. Start WebSphere Application Server for Information Server.
You can use the following technotes depending on your repository type:
If a Microservices tier is not installed, the Kafka log cleaner must be disabled for Windows platform as follows:
a) edit kafka/conf/server1.properties
b) search the log cleaner property and set it to false: log.cleaner.enable=false
c) restart the services
5.7) Information Server Microservices tier needs an additional key
If you have a Microservices tier, upgrade it to 11.7.1.4, and run the following commands on your services tier
$ cd <IIS_INSTALL_LOCATION>/ASBServer/bin
$ ./iisAdmin.sh -set -key com.ibm.iis.ug.installed.version -value 11714
This issue is not applicable to WebSphere Application Server Liberty installations.
If your installation contains WebSphere Application Server Network Deployment 9.0.0.7 or earlier, opening of the Information Server Microservices tier launchpad or Administration console might intermittently fail with the following exception in the browser:
Error 404:com.ibm.ws.webcontainer.servlet.exception.NoTargetForURIException:
No target servlet configured for uri:/ibm/iis/launchpad
Error 404:com.ibm.ws.webcontainer.servlet.exception.NoTargetForURIException:
No target servlet configured for uri:/ibm/iis/console
Such errors can be resolved by appending the following jars in the Ignore-Scanning-Archives section of WAS_INSTALL_LOCATION/AppServer/properties/amm.filter.properties.
Append a comma, space and backward slash (similar to as shown in the following lines) to the existing list and also add the following lines:
jackson-annotations-2.12.1.jar, \
jackson-core-2.12.1.jar, \
jackson-databind-2.12.1.jar, \
log4j-api-2.11.2.jar
Save the file.
Restart WebSphere Application Server.
Note: We recommend upgrading WebSphere Application Server Network Deployment to version 9.0.5.6 or later.
a. kubectl edit Ingress iis-server
ingress.kubernetes.io/configuration-snippet: |
proxy_redirect "https://$host:<IIS services tier port>/" "https://$host/";
proxy_redirect "https://<Microservices tier short host name>:<IIS services tier port>" "https://<Microservices tier short host name>/";
proxy_redirect "https://<Microservices tier host name alias>:<IIS services tier port>" "https://<Microservices tier host name alias>/";
proxy_redirect "https://<Microservices tier IP address>:<IIS services tier port>" "https://<Microservices tier IP address>/";
a. kubectl edit Ingress iis-redirect
ingress.kubernetes.io/configuration-snippet: |
proxy_redirect "https://$host:<IIS services tier port>/" "https://<IIS services tier short host name>:<IIS services tier port>/";
proxy_redirect "https://<Microservices tier short host name>:<IIS services tier port>" "https://<IIS services tier short host name>:<IIS services tier port>/";
proxy_redirect "https://<Microservices tier host name alias>:<IIS services tier port>" "https://<IIS services tier host name alias>:<IIS services tier port>/";
proxy_redirect "https://<Microservices tier IP address>:<IIS services tier port>" "https://<IIS services tier IP address>:<IIS services tier port>/";
Ensure that the newly added proxy_redirect lines are properly aligned with the prior proxy_redirect line as consumption of the file contents is sensitive to the formatting.
kubectl delete pods -l app=ingress-nginx -n kube-system
kubectl get pods -l app=ingress-nginx -n kube-system
On the Information Server host:
1. Add a host alias property:
$ ./iisAdmin.sh -set -key com.ibm.iis.ug.host.aliases -value
<Microservices tier long host name>,<Microservices tier short host name>,<Microservices tier alias name>,<Microservices tier IP address>
$ ./iisAdmin.sh -d -key com.ibm.iis.ug.host.aliases
On the Browser host:
Add an entry in the hosts file
UNIX: /etc/hosts
Windows: <Drive>:\Windows\System32\drivers\etc\host on Windows)
with IP address, long host name, short host name, and alias name as follows:
<Microservices tier IP address> <Microservices tier long host name> <Microservices tier short host name> <Microservices tier alias name>
5.10) Users with jobs involving File Connector, Azure Connector, or Snowflake Connector
The Connector Migration tool must be run against all such jobs. See technote for details.
5.11) Using SQL Server 2019 as the database repository
In section 3.3.4, if you changed your database repository to SQL Server 2019, the following steps are required:
NOTE: Save backups of each file before it is changed.
The locations of the database.properties files depend on your usage of WebSphere.
WebSphere Liberty:
<ISHOME>/ASBServer/apps/lib/iis/15properties
<ISHOME>/ASBServer/conf
<ISHOME>/wlp/usr/servers/iis/lib/iis/15properties
WebSphere Network Deployment stand-alone:
<ISHOME>/ASBServer/apps/lib/iis/classes
<ISHOME>/ASBServer/conf
<WEBSPHERE_HOME>/AppServer/profiles/InfoSphere/classes
WebSphere Network Deployment cluster:
<ISHOME>/ASBServer/apps/lib/iis/classes
<ISHOME>/ASBServer/conf
Also, on each node:
<WEBSPHERE_HOME>/AppServer/profiles/<node>/classes
The imam_staging_repository.properties file is located in <ISHOME>/ASBServer/conf.
In each applicable file, change type=sqlserver2017 to type=sqlserver2019.
c. As the Administrator/root user, update the property com.ibm.iis.xmeta.repo.conn.POJO_STAGING by running the following commands> cd <ISHOME>/ASBServer/bin
> ./xmetaAdmin.sh setProperty -file ../conf/imam_staging_repository.properties -dbfile ../conf/database.properties com.ibm.iis.xmeta.repo.conn.POJO_STAGING
d. Restart WebSphere for the changes to take effect.
The Desktop icons for "Web console for IBM InfoSphere Information Server" and "IBM InfoSphere Information Server Launchpad" might appear as empty on your desktop.
You can do the following steps to make the icon be displayed:
a. Right-click the icon
b. Click Properties
c. Click Change icon
d. Select Ok
e. Select Apply
5.13) File Connector jobs need update of CLASSPATH and job recompilation
File Connector jobs that use orcstream builder need CLASSPATH to be updated, and the jobs to be recompiled. See technote for details.
5.14) Clean up shared open source deployment on the services tier when a Microservices tier is present
If you installed Information Server with a Microservices tier, and choose to not update the Microservices tier when an Information Server fix pack is applied, the Update Installer installs extra "shared-open-source" services on the services tier. Additionally, Information Server is configured to use these services instead of the services on the Microservices tier, and a shared-open-source directory is erroneously created on the services tier.
Follow these steps to reconfigure Information Server to again work with the Microservices tier:
a. Change directory to the shared-open-source directory on the services tier:
AIX or Linux: cd /opt/IBM/InformationServer/shared-open-source
Windows: cd C:\IBM\InformationServer\shared-open-source
b. Uninstall shared-open-source services on the services tier
AIX: bin/uninstall-aix-services.sh
Linux: bin/uninstall-linux-services.sh
Windows: bin\uninstall-windows-services.bat
c. Use the iisAdmin tool to set the zookeeper host and port in Information Server (specify your Microservices tier host name):
AIX and Linux: ./iisAdmin.sh -set -key com.ibm.iis.sdp.zookeeper.connect -value <masterNodeHost>:2181/kafka
Windows: iisAdmin.bat -set -key com.ibm.iis.sdp.zookeeper.connect -value <masterNodeHost>:2181/kafka
See iisAdmin command documentation for more information.
d. Delete the shared-open-source directory on the services tier:
AIX or Linux: rm -r /opt/IBM/InformationServer/shared-open-source
Windows: rmdir /s C:\IBM\InformationServer\shared-open-source
For Windows installations, after Information Server 11.7.1.0 or 11.7.1.1 is updated to Information Server 11.7.1.4, the systems must be rebooted before a patch, Service Pack, or Fix Pack is applied.
5.16) Installation of the Oracle connector patch
After Information Server 11.7.1.4 is installed, if you use the Oracle connector with Oracle 19c database or Exadata 19, you must install DT160334 - Optimizing the usage of resolve synonym calls in Oracle Connector.
If you have a Microservices tier, and did step 3.3.11, execute the post-upgrade steps in technote 6828335.
5.18) Installations with a Microservices tier must address Solr collections
Due to a major version upgrade of Solr in 11.7.1.4, certain Solr collections need to be manually deleted and re-created.
To upgrade the collections:
1. log in to the Microservices tier machine command line as the installation user
2. Execute the following commands:
kubectl exec solr-0 -- curl -sS 'http://localhost:8983/solr/admin/collections?action=DELETE&name=analysis'
3. Change directory to /opt/IBM/UGinstall/ugdockerfiles (use your Microservices tier installation directory)
4. Execute ./run_playbook.sh playbooks/ug_services/deploy_solr_collections.yaml -y
5. Follow the steps to rebuild the index for InfoSphere Information Server clients.
6. Follow the steps to rebuild the exception set index for Data Quality Exception Console.
5.19) Remove all unused cached container images on the Microservices tier
The command
crictl rmi --prune removes all unused cached container images.14 October 2022: Initial publish
19 October 2022: On Windows, use Update Installer 11.7.1.116 if 11.7.1.105 was installed
03 November 2022: Requirement for slirp4netns and fuse-overlayfs is on the microservices tier, Clarify log cleanup in 5.6.
16 March 2023: removal of unused cached container images
02 November 2023: Kafka and Solr credentials are only needed on the Microservices tier
Was this topic helpful?
Document Information
Modified date:
21 June 2024
UID
ibm16613951


