How To
Summary
This document shows the procedure to update the BMC, and PNOR images on the 7063-CR2 HMC.
Objective

Environment
Steps
Updating Firmware
The 7063-CR2 firmware is made up of two separate components
- BMC - image for the Baseboard Management Controller
- Server image - PNOR
A boot priority system, allows for the selection of a previous image to be used. It useful when there is a need to revert to a prior image.
On the OpenBMC UI, the image file that is listed at the top (for each stack, BMC, and PNOR), the image with the highest boot priority, is used the next time the device is booted. You can change the boot order for the image file by clicking the arrow icons.
Image State Definitions
- Functional: The running image on the device.
- Active: The image is available to boot from, but is not currently the running image. If the image is the top image in the relevant table, it becomes the functional image the next time the device is rebooted.
- Activating: The image is being activated and becomes either Active or Failed.
- Failed: The image failed to activate.
- Ready: The image is ready to be activated.
- Invalid: This image is an invalid image and cannot be activated.
The OpenBMC UI or the openbmctool commands can be used to both view or update the firmware images.
IMPORTANT: Updating the BMC and PNOR firmware images is a disruptive process for the HMC. The HMC must be powered off before updating the BMC or PNOR firmware. It is recommended that both BMC and PNOR firmware images are updated before powering the HMC back on. This does not affect the systems managed by the HMC.
Updating Firmware Using OpenBMC
1. Access the BMC with a web browser and log in as user "root" or another user with Administrator privileges.
2. Ensure the HMC is powered off. See the "Server Power" status on the top of the BMC web GUI.
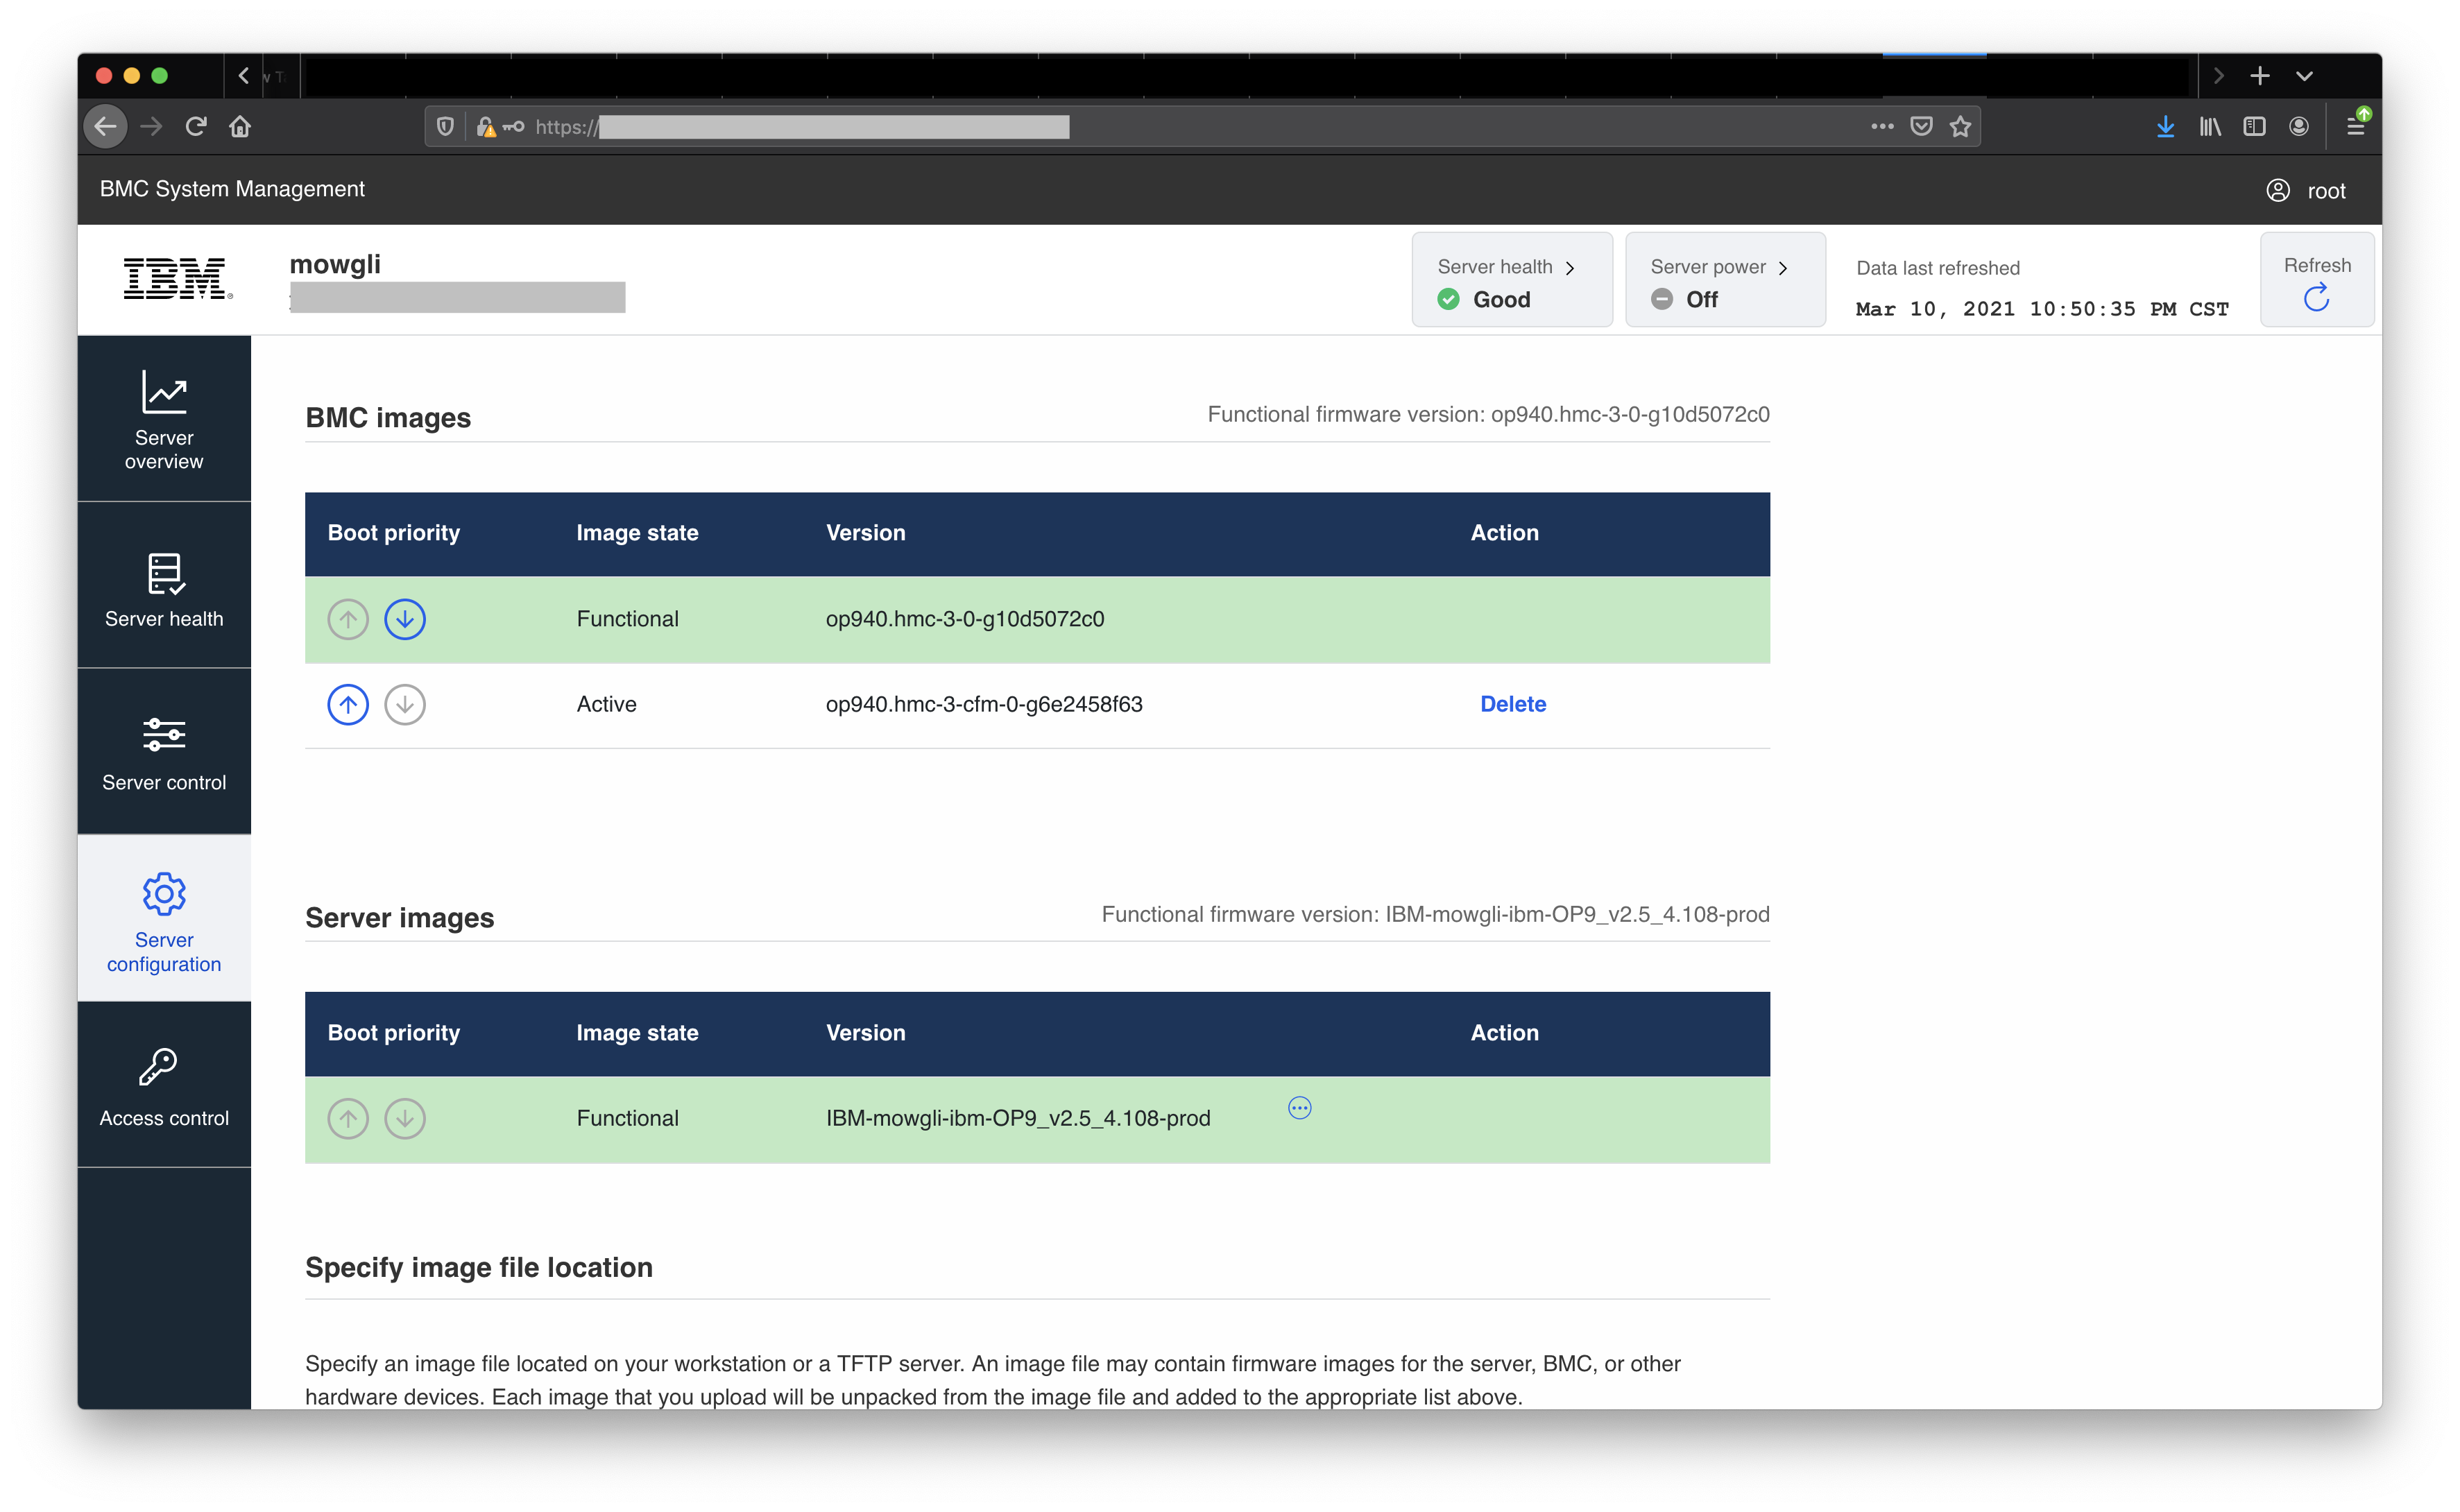
3. Access Server configuration -> Firmware
The previous image shows the state before firmware update.

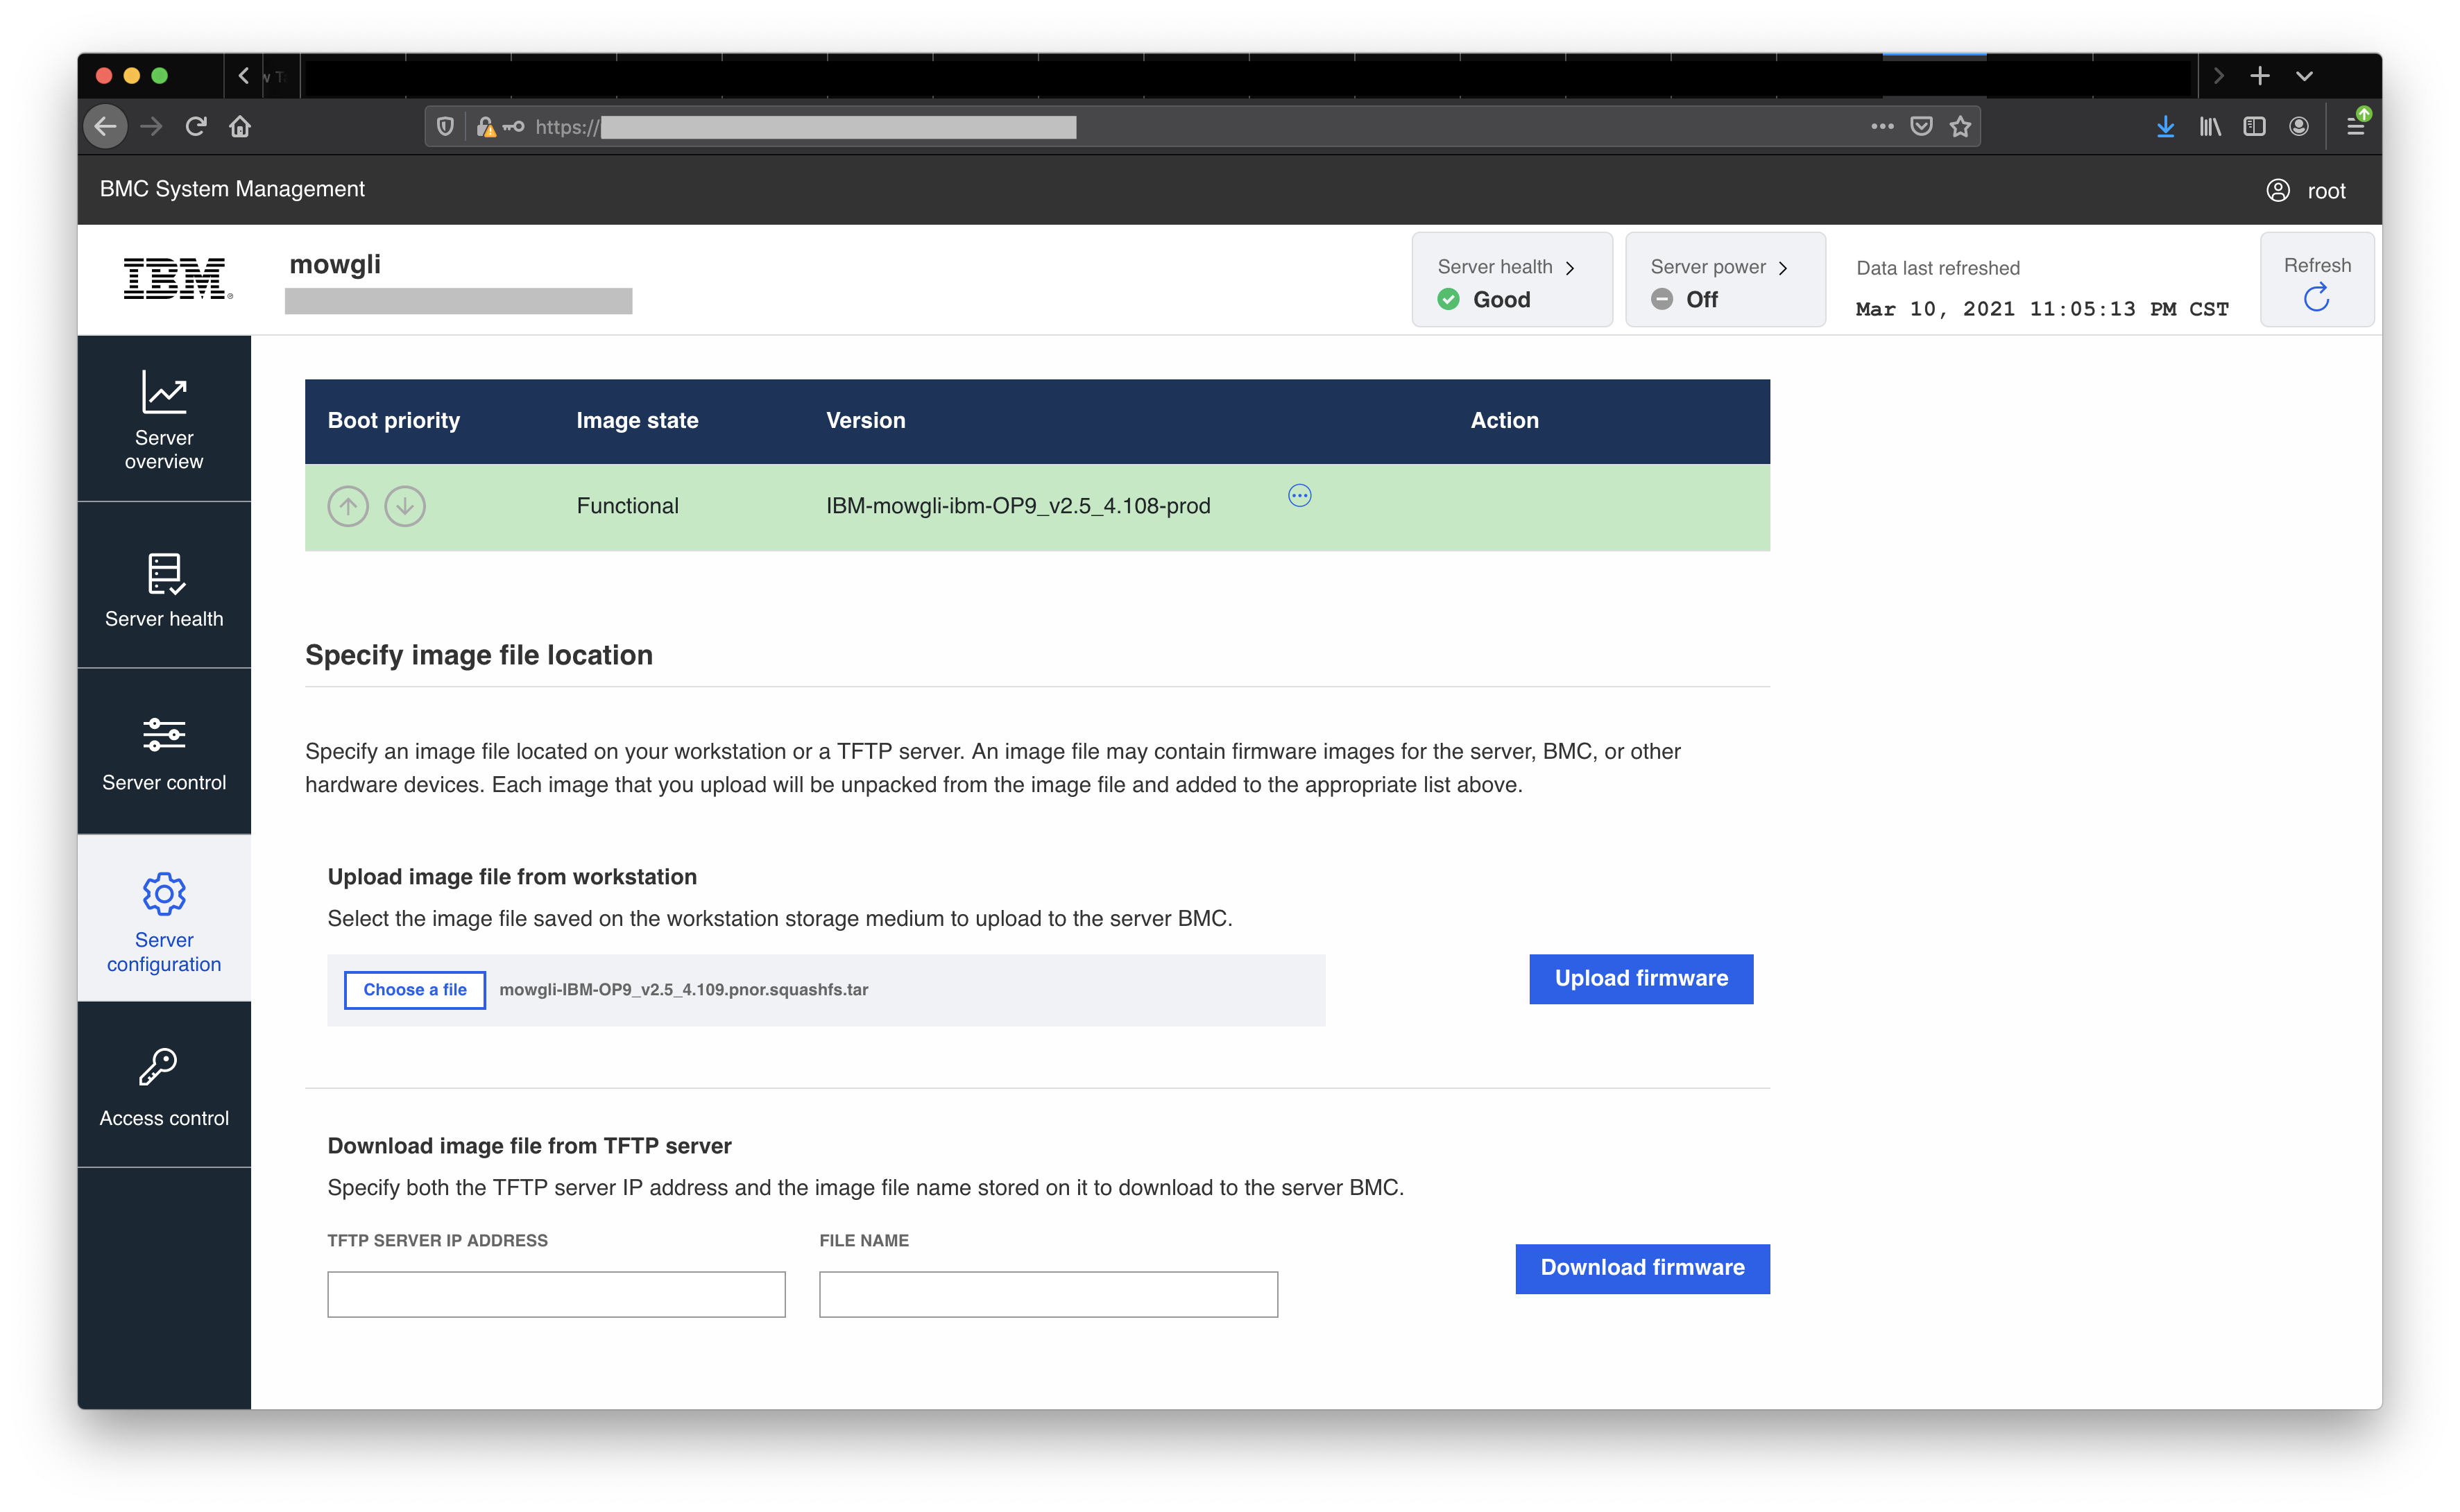
4. Scroll down on the page to locate the section to upload the firmware image.
5. Click Choose a file and browse your local file system for the location of the BMC or PNOR image. In the previous image, a BMC image was selected.
6. Click Upload firmware
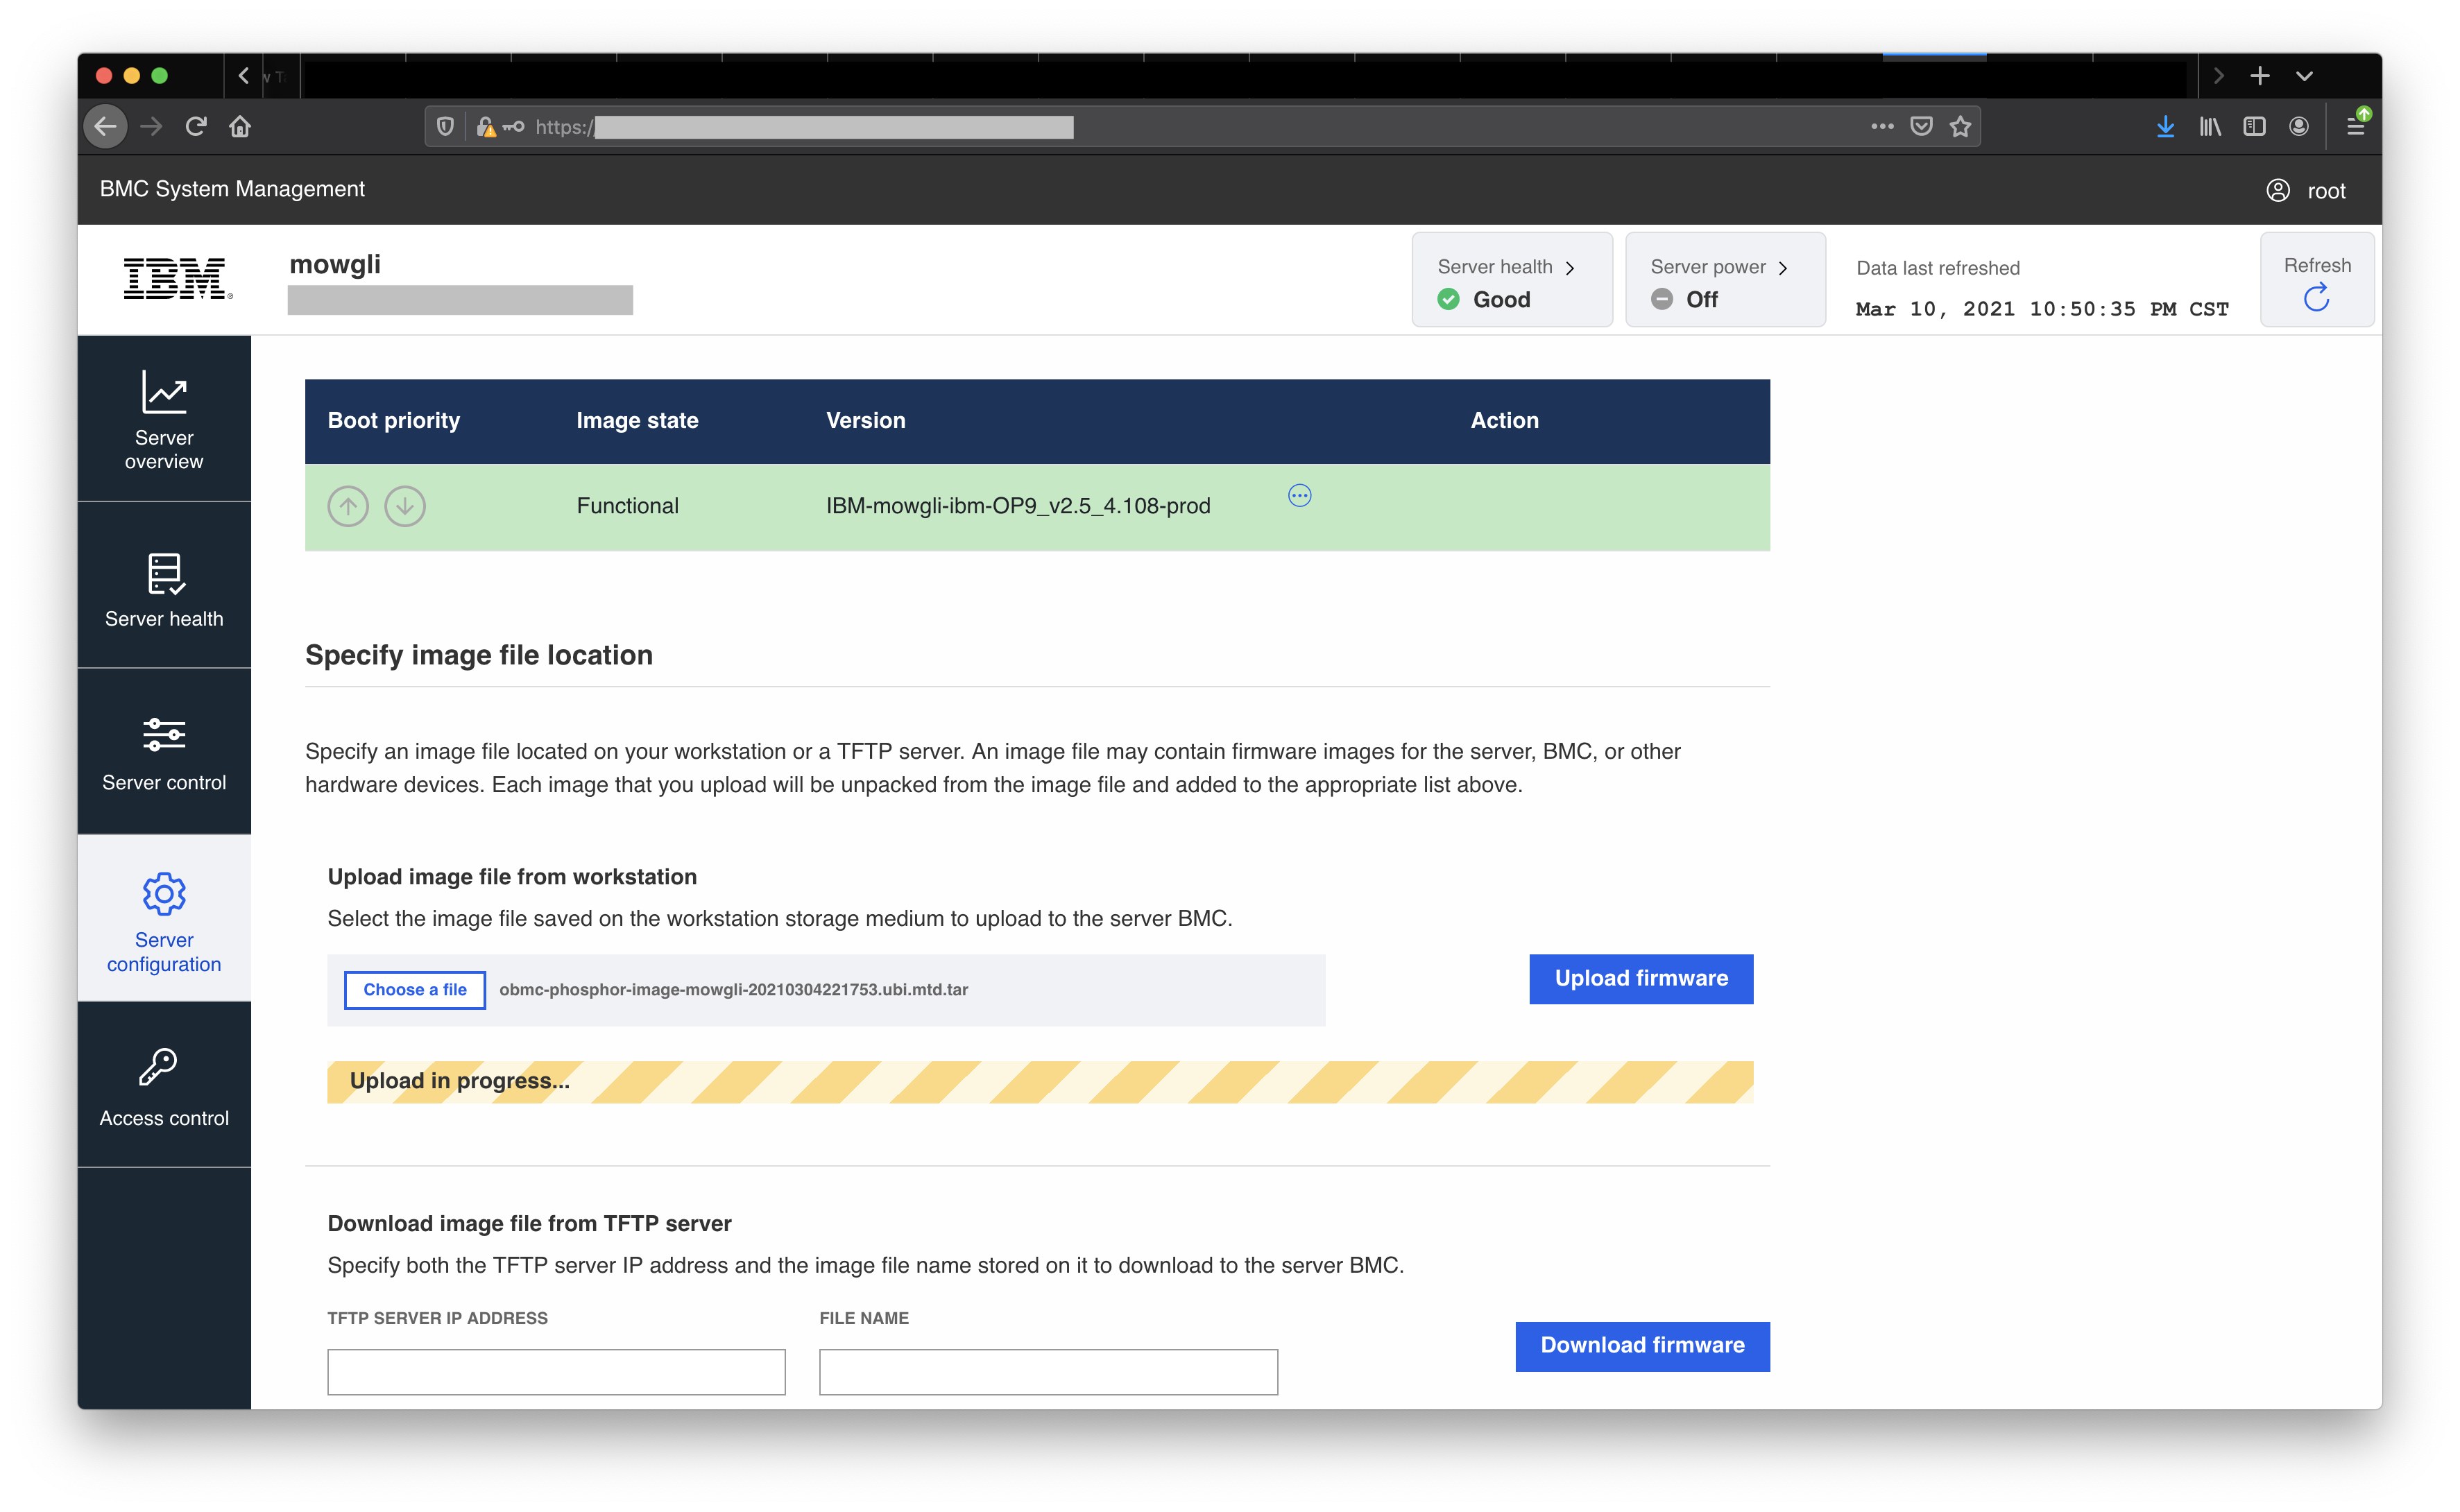
The Upload in progress... message is displayed
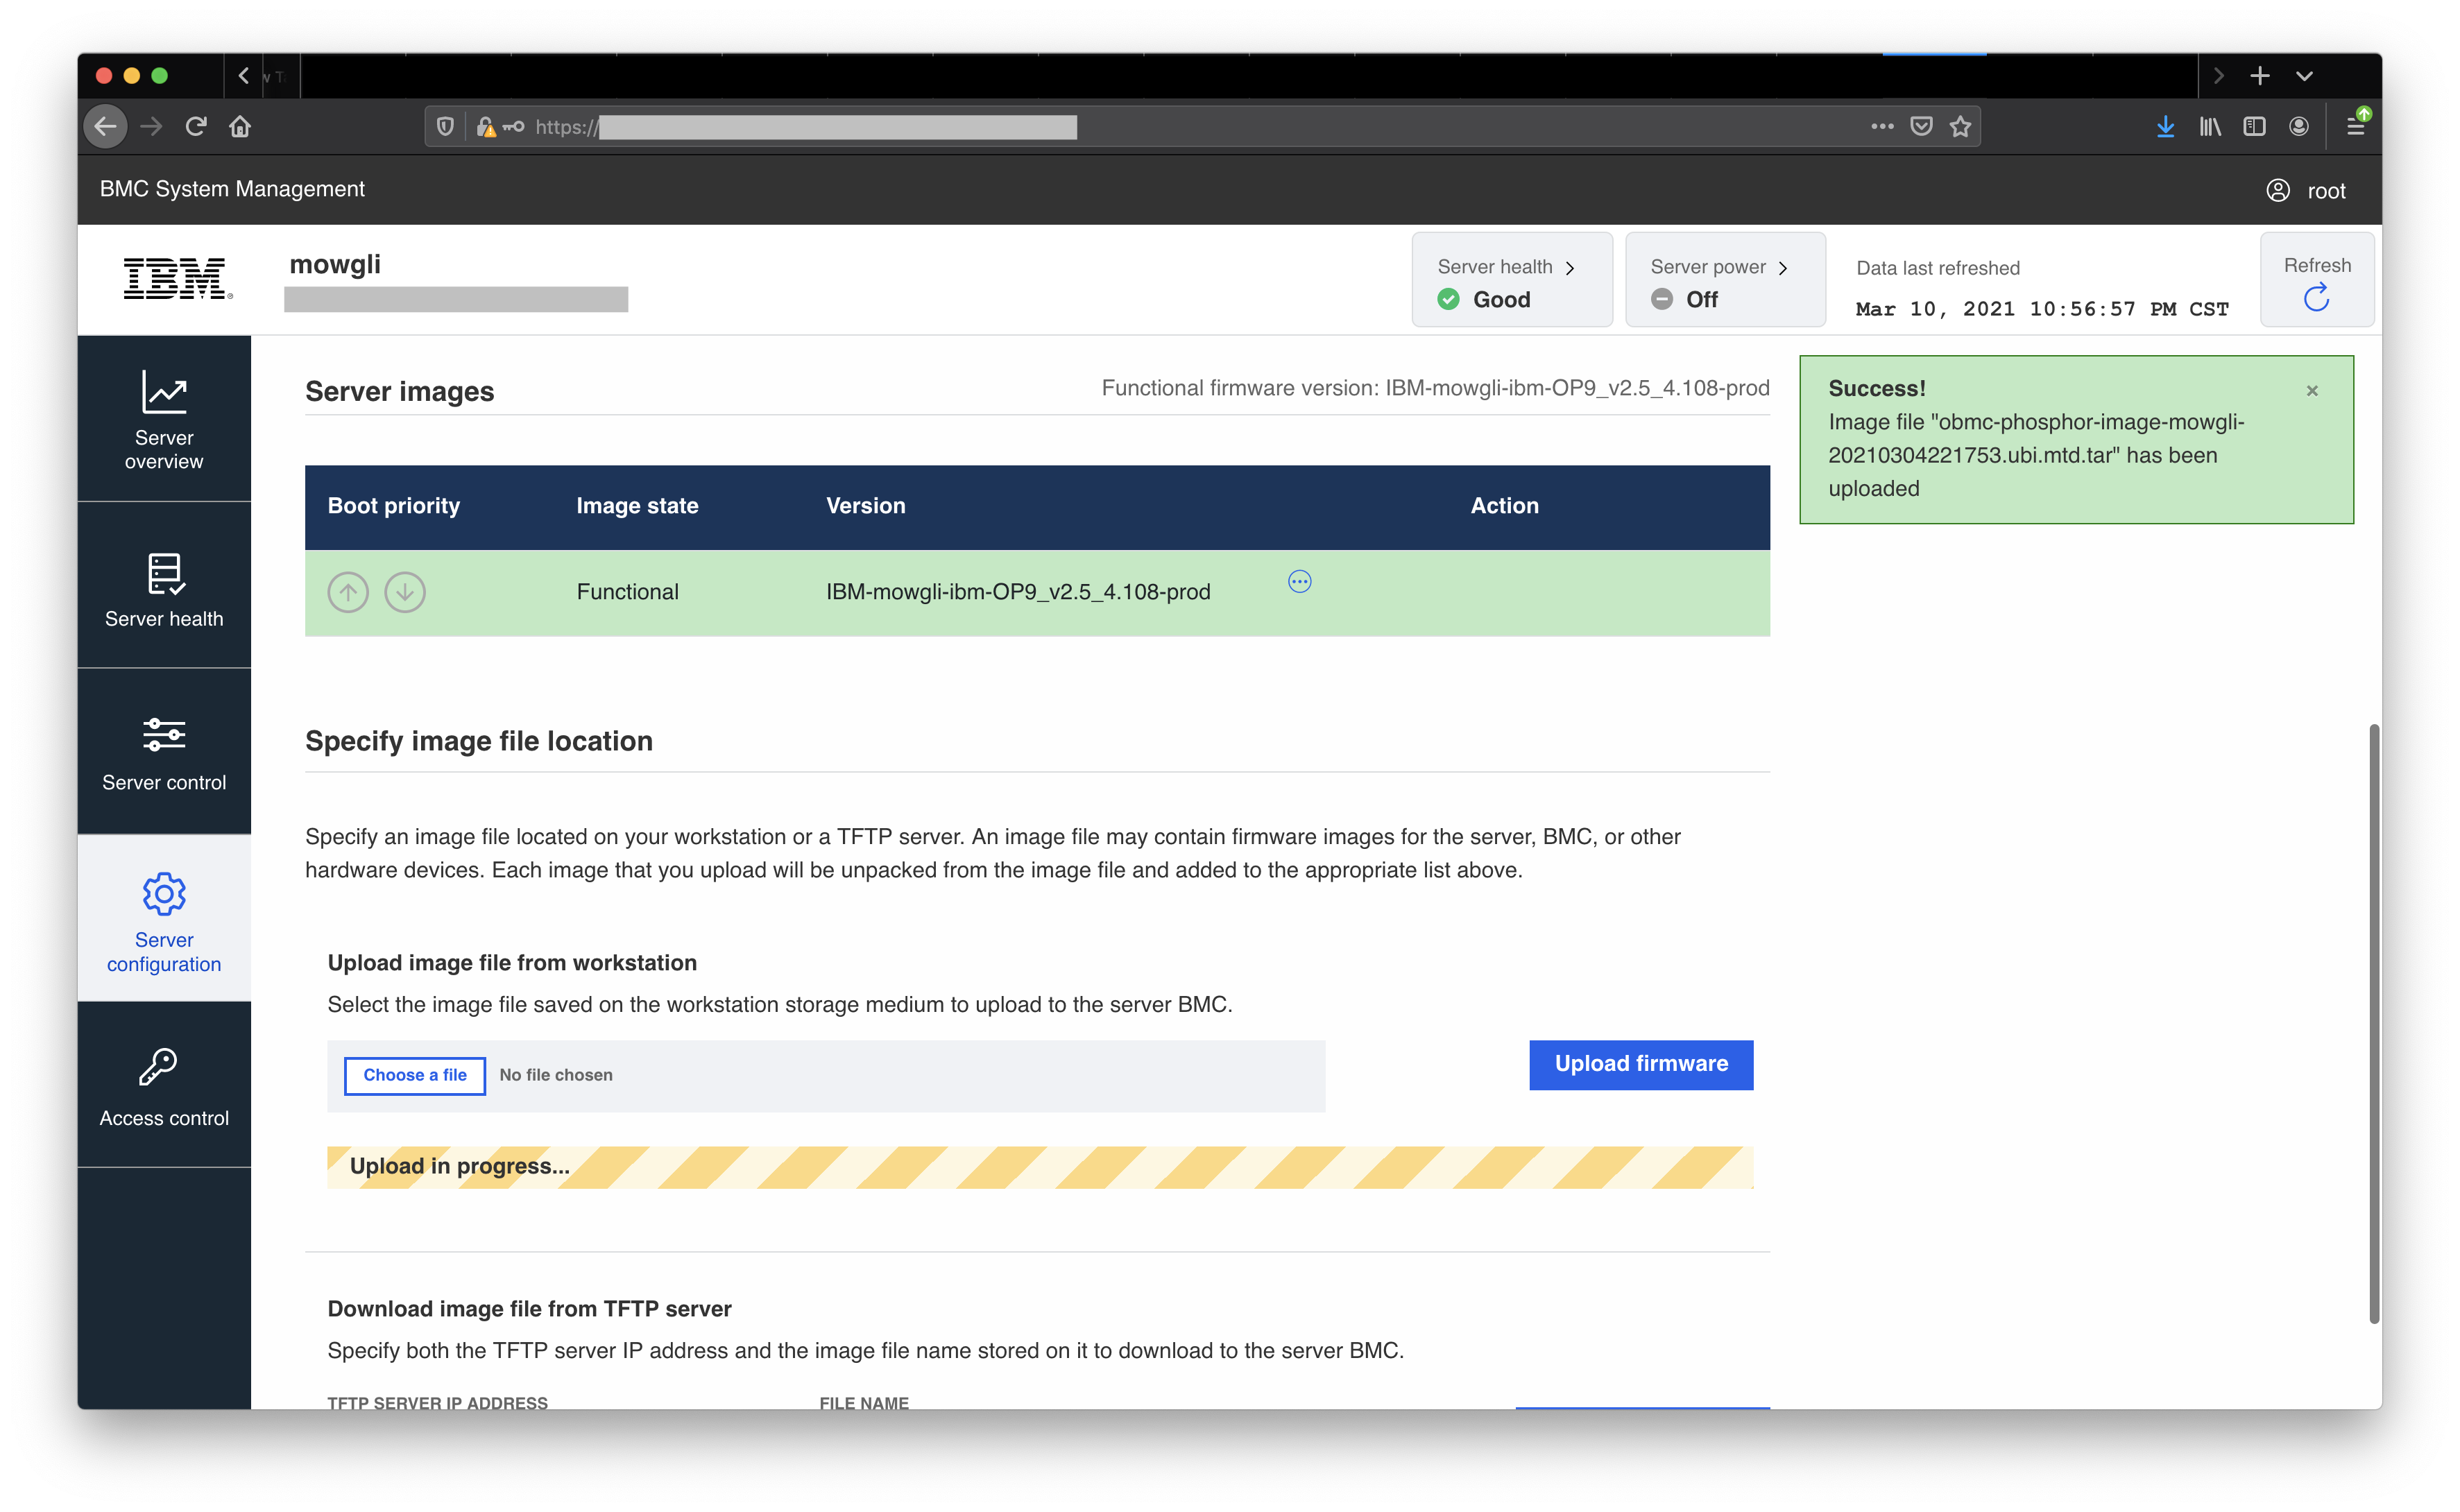
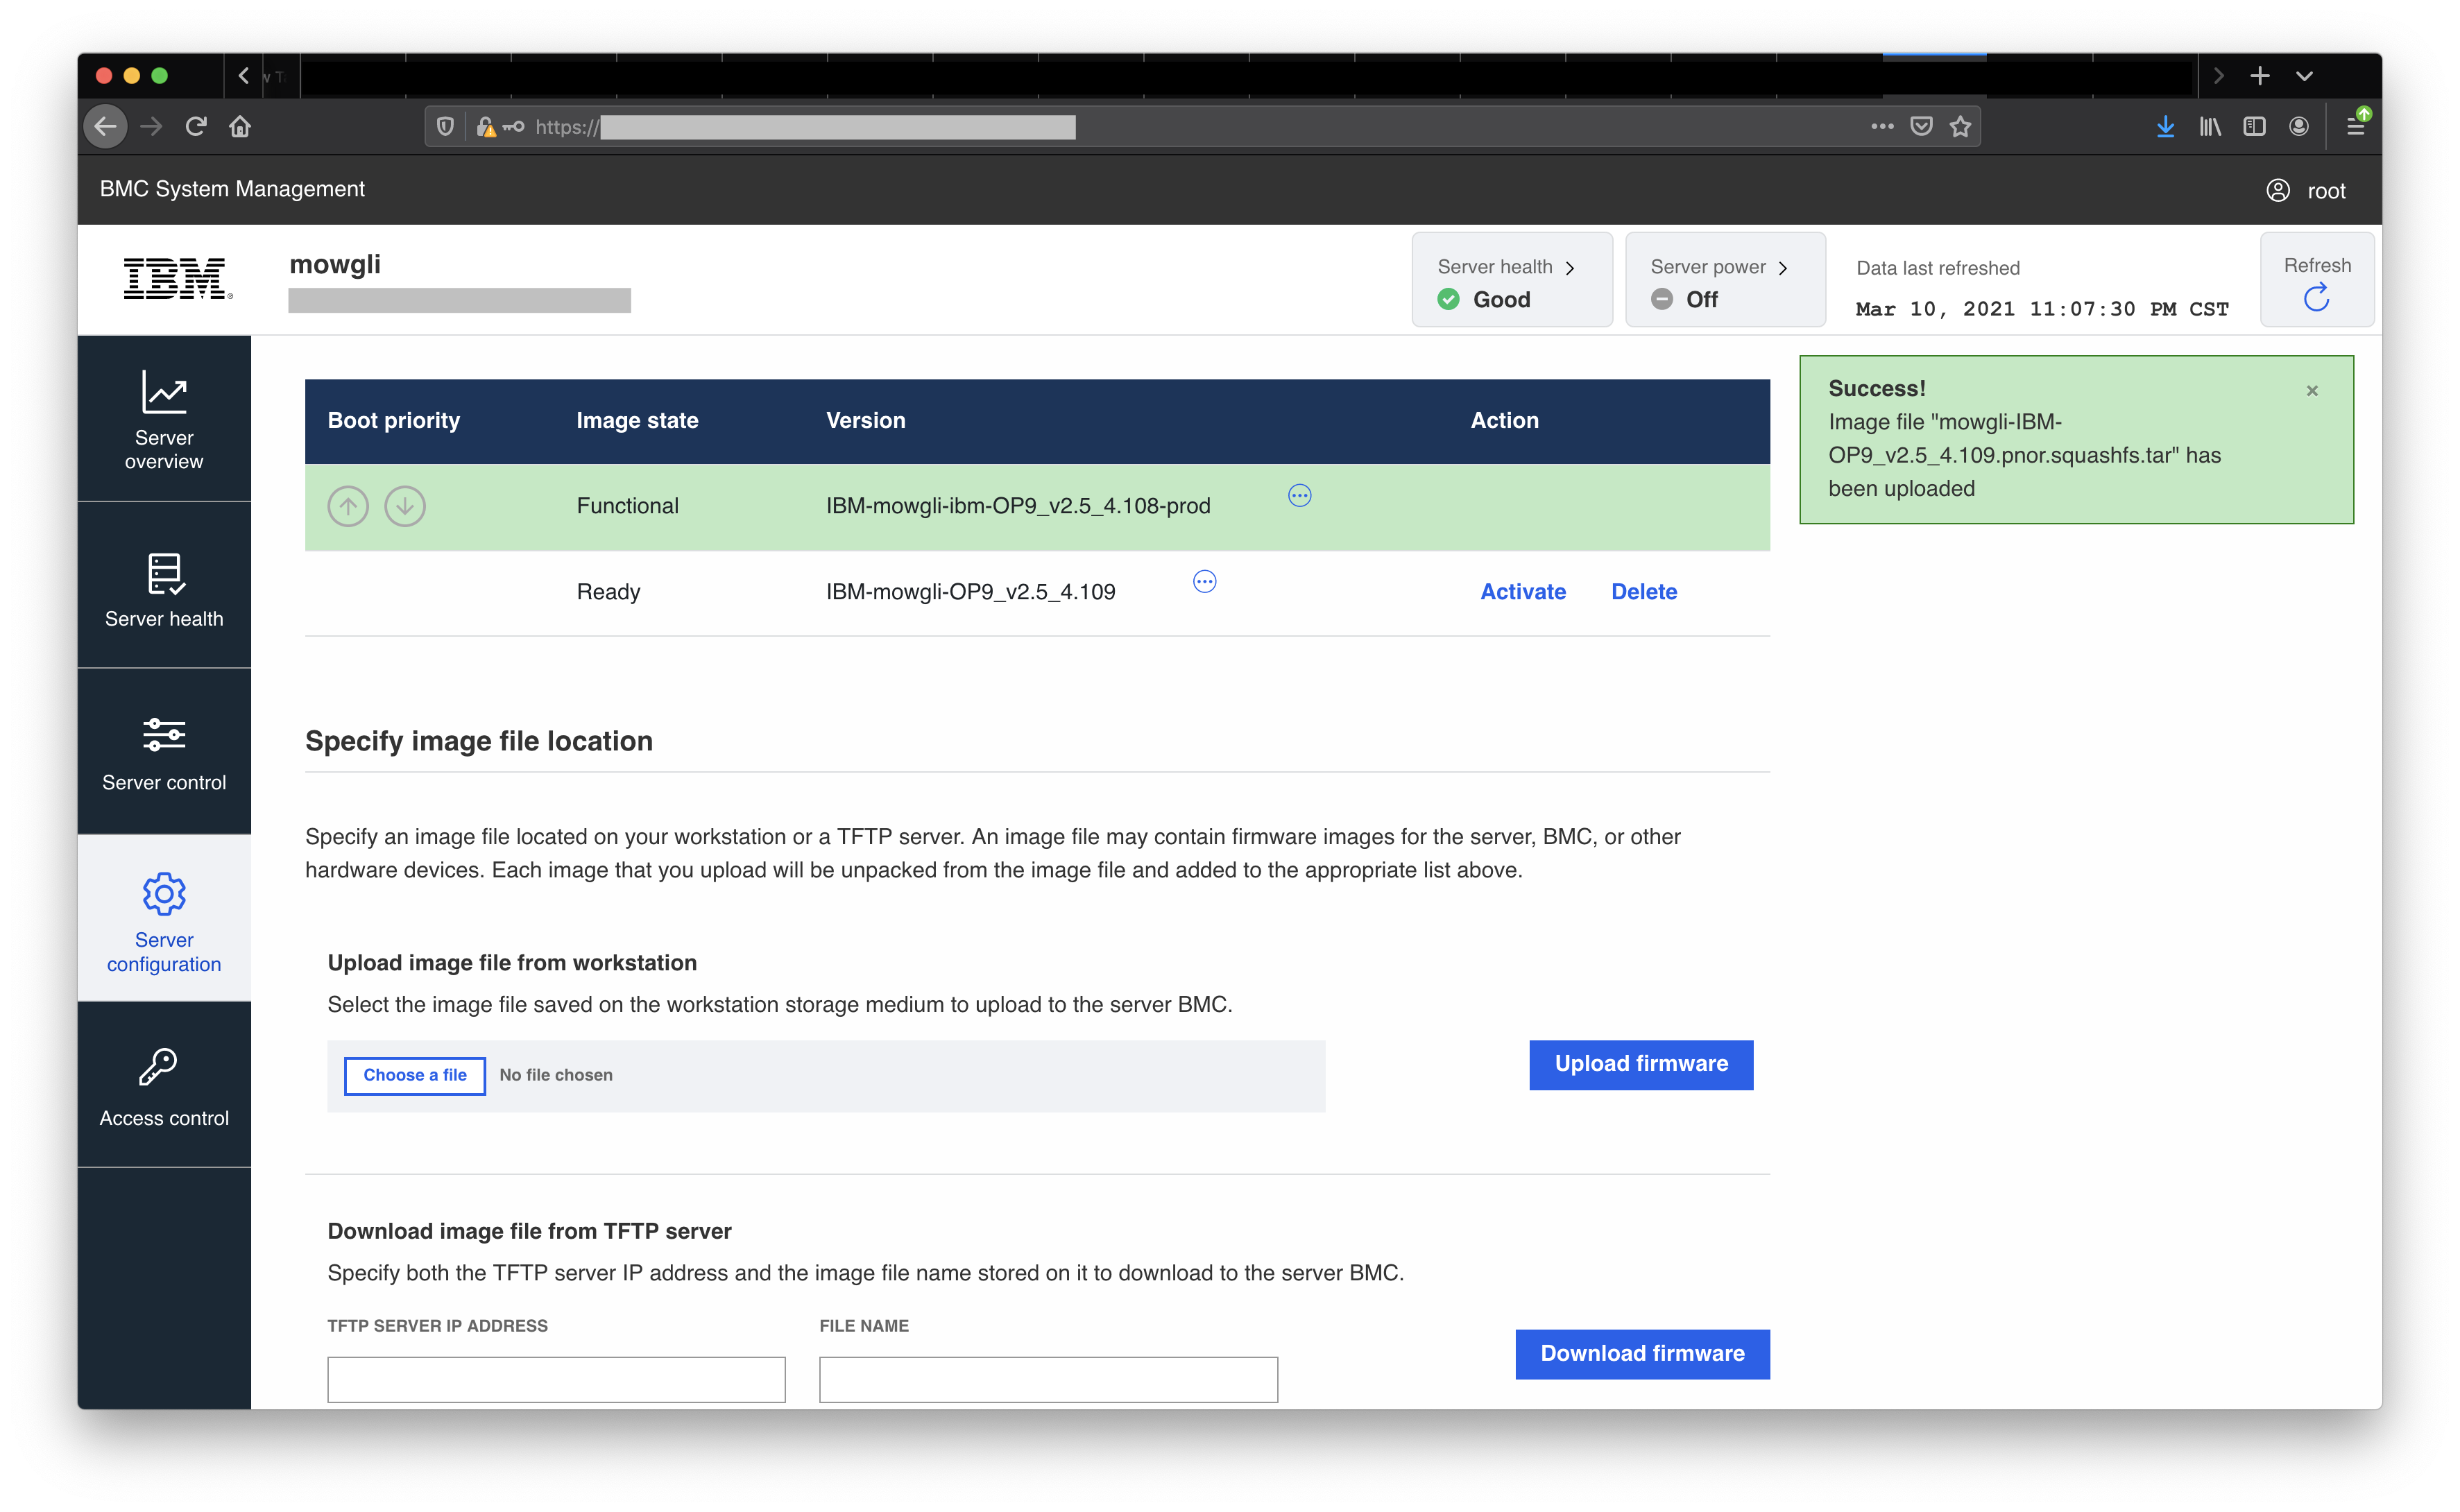
A confirmation message is displayed when the upload is complete.
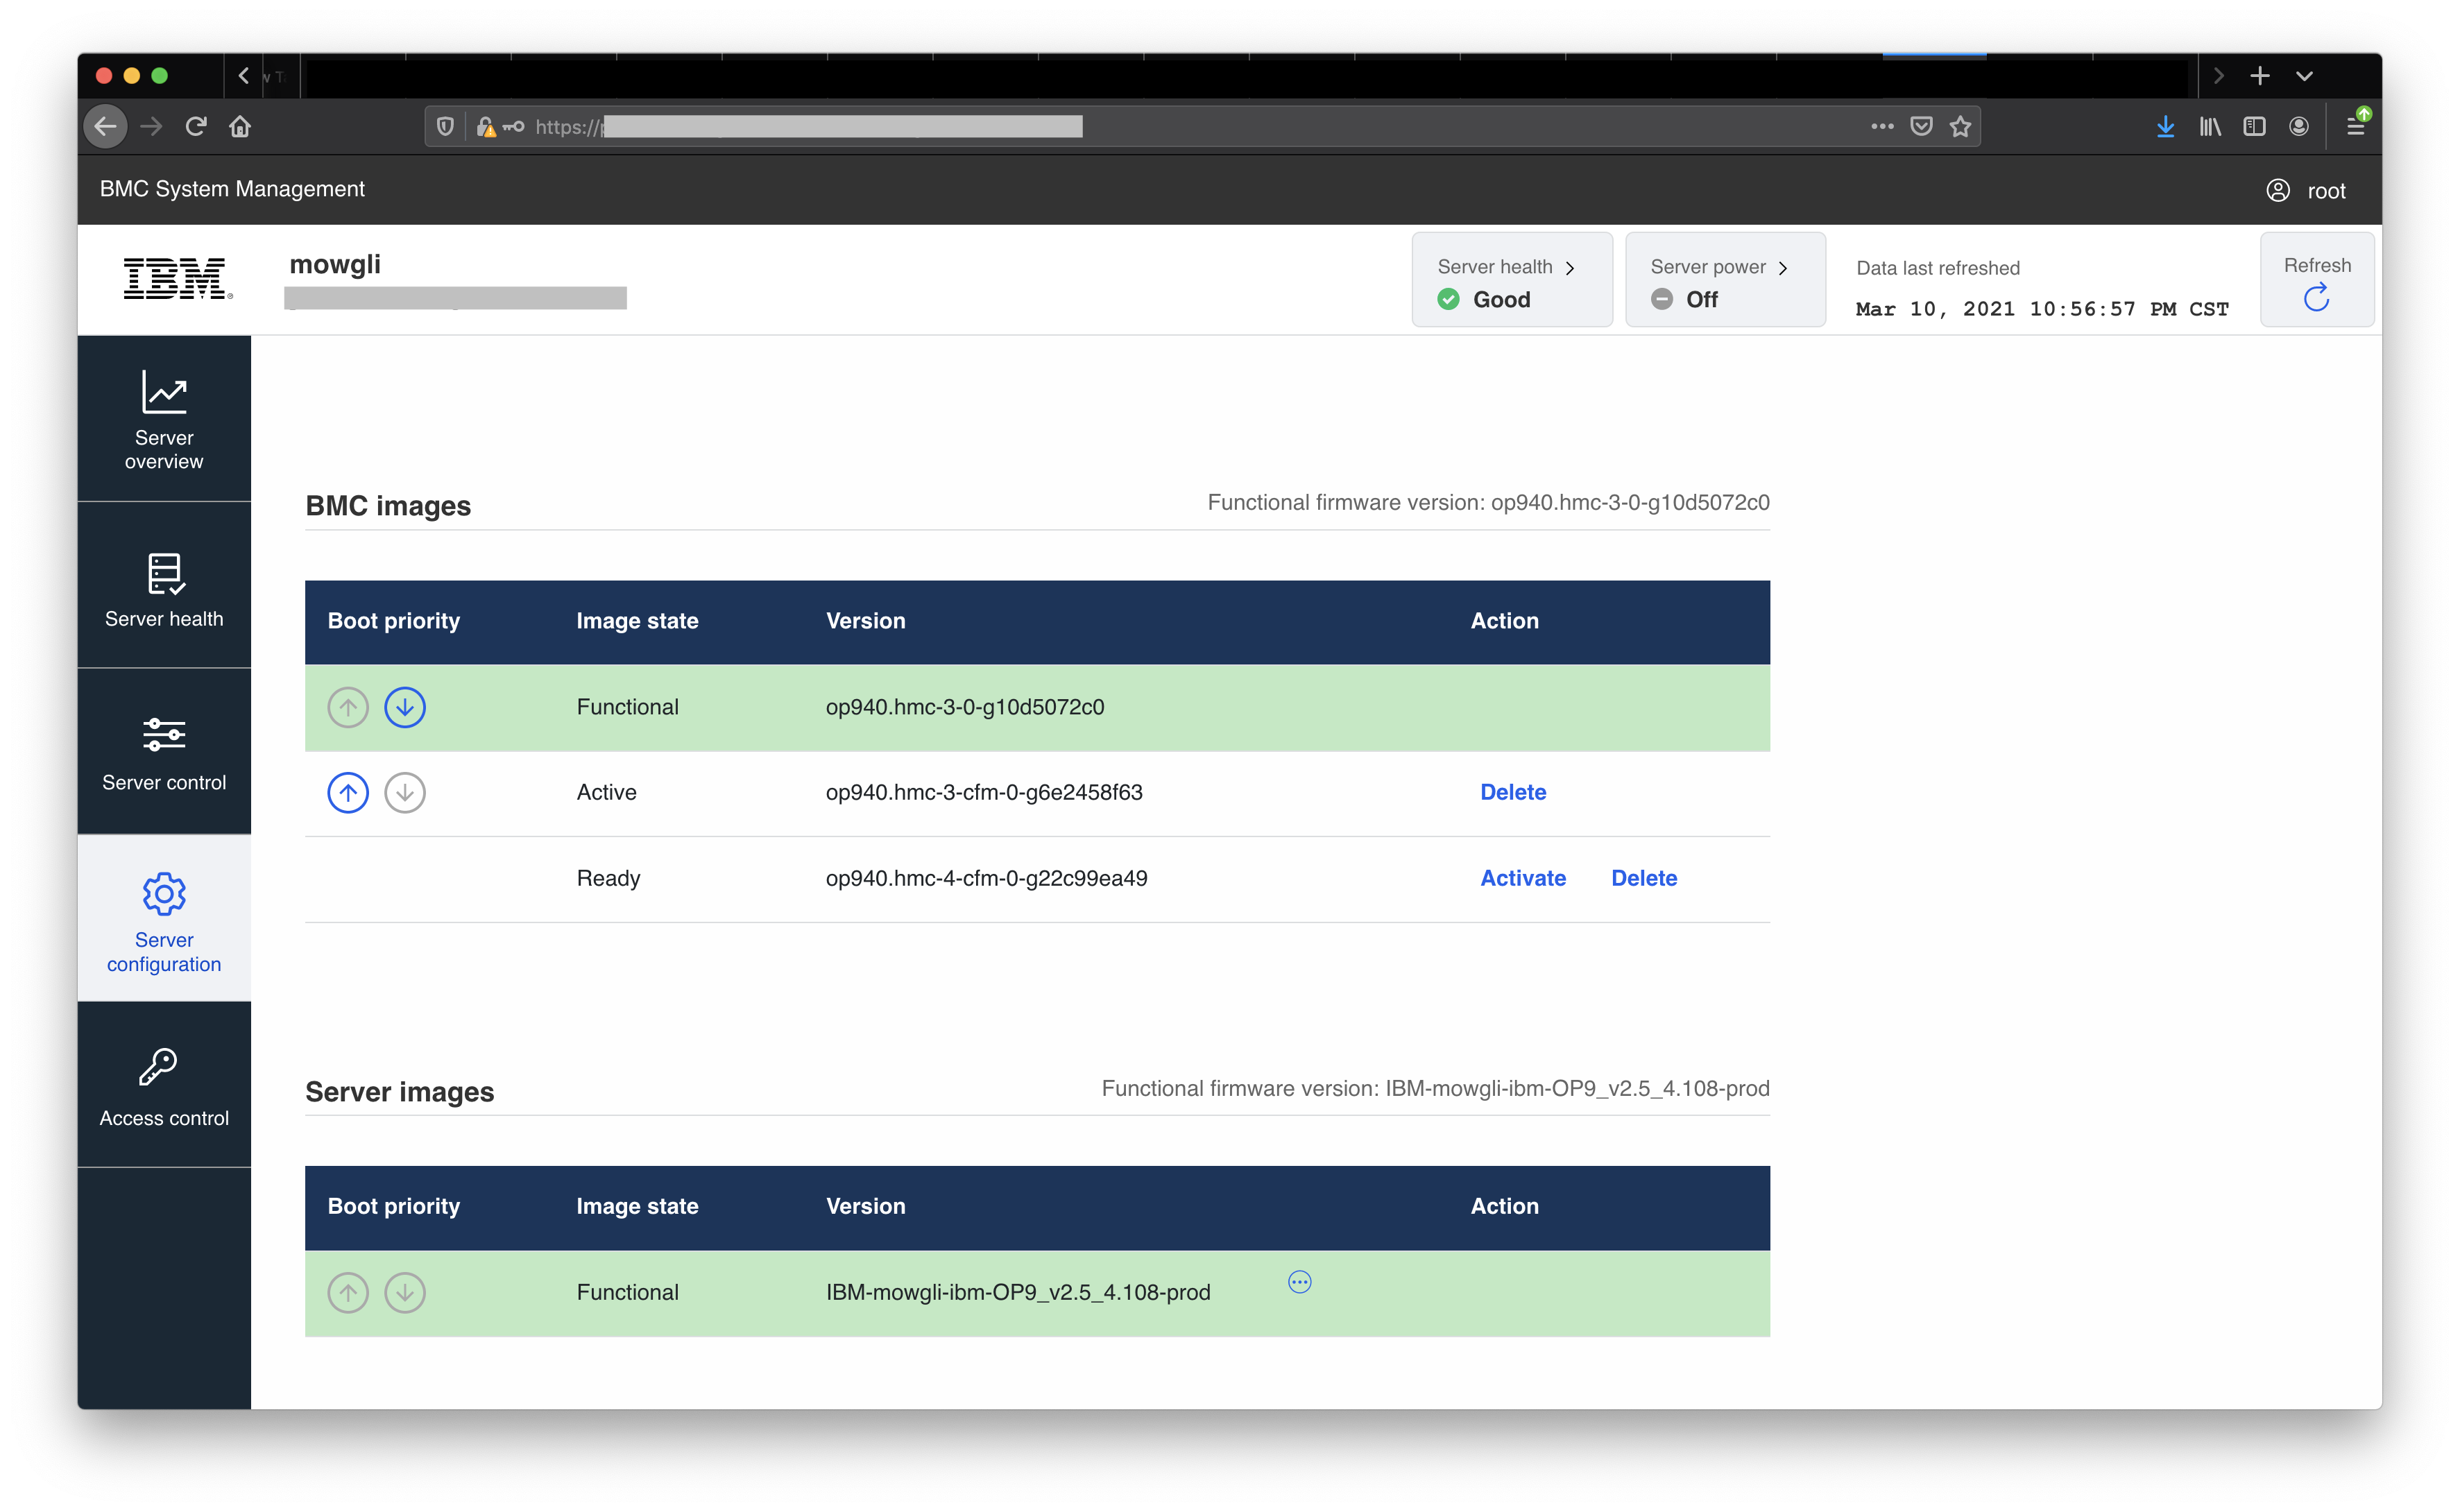
7. The new image is now in a Ready state. Click Activate, under the Action column to activate it.
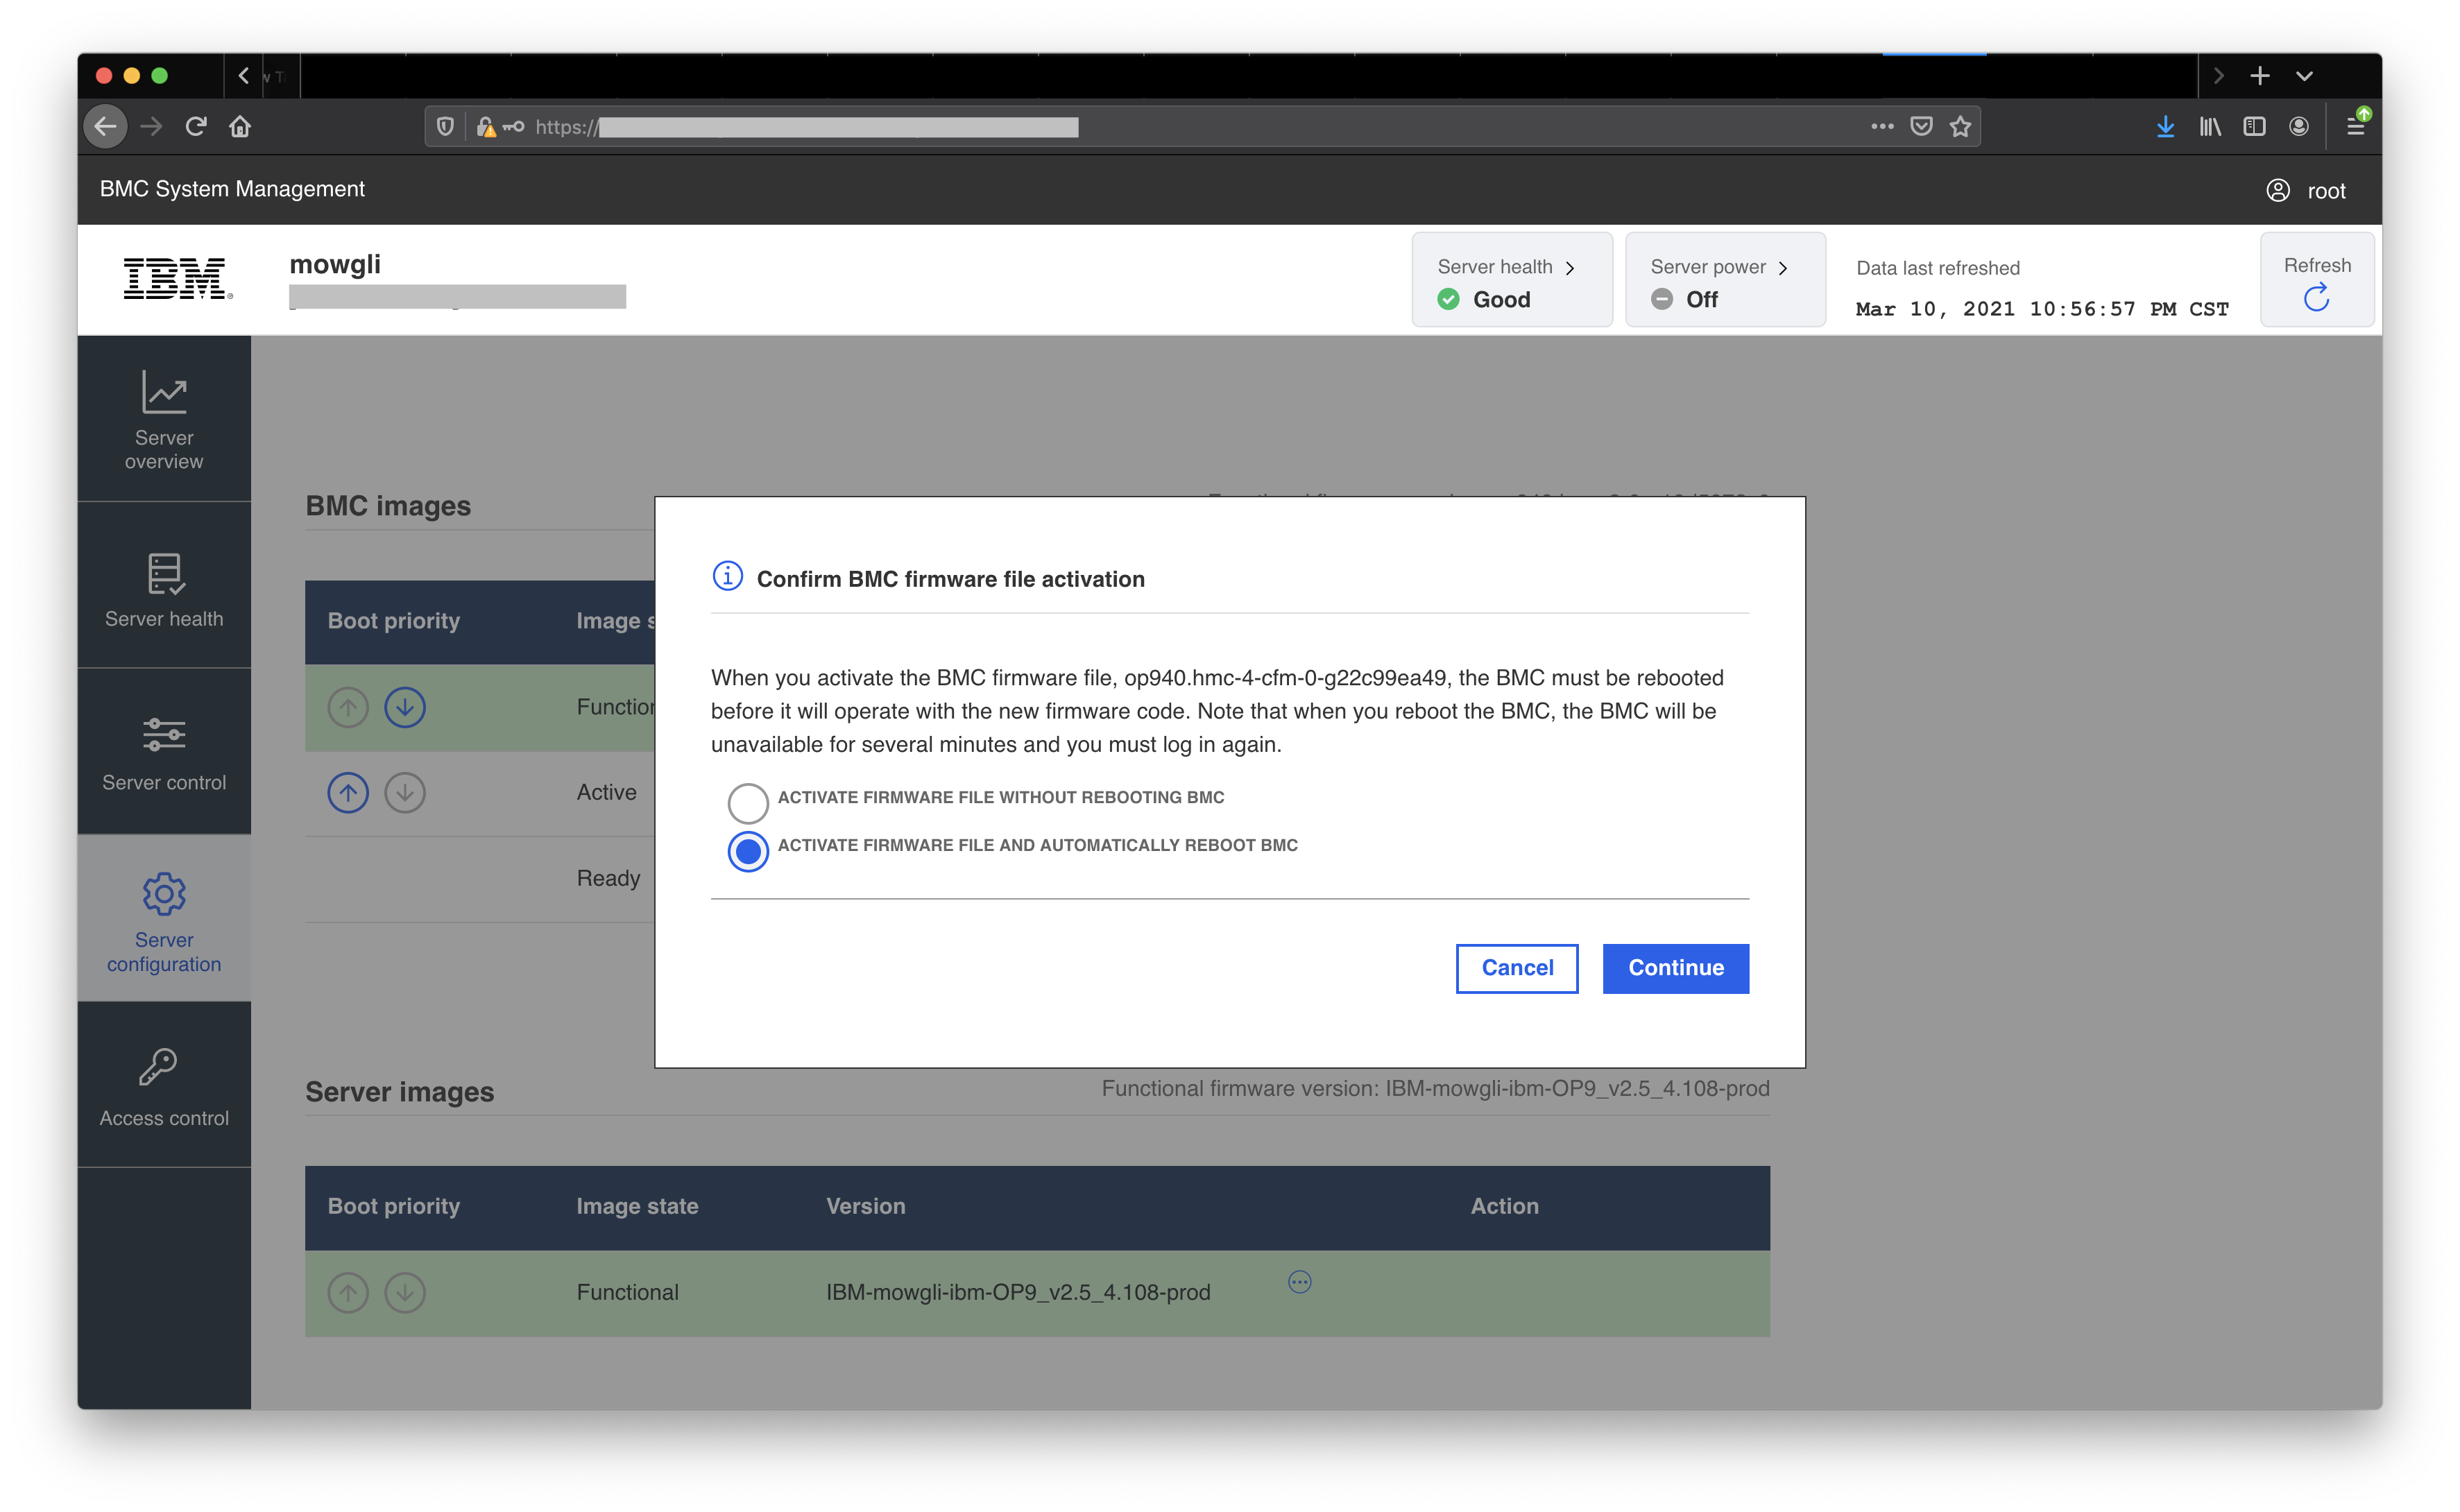
The user is presented with a confirmation panel with the options to "ACTIVATE FIRMWARE FILE WITHOUT REBOOTING BMC" and "ACTIVATE FIRMWARE FILE AND AUTOMATICALLY REBOOT BMC".
8. Select ACTIVATE FIRMWARE FILE AND AUTOMATICALLY REBOOT BMC and click Continue
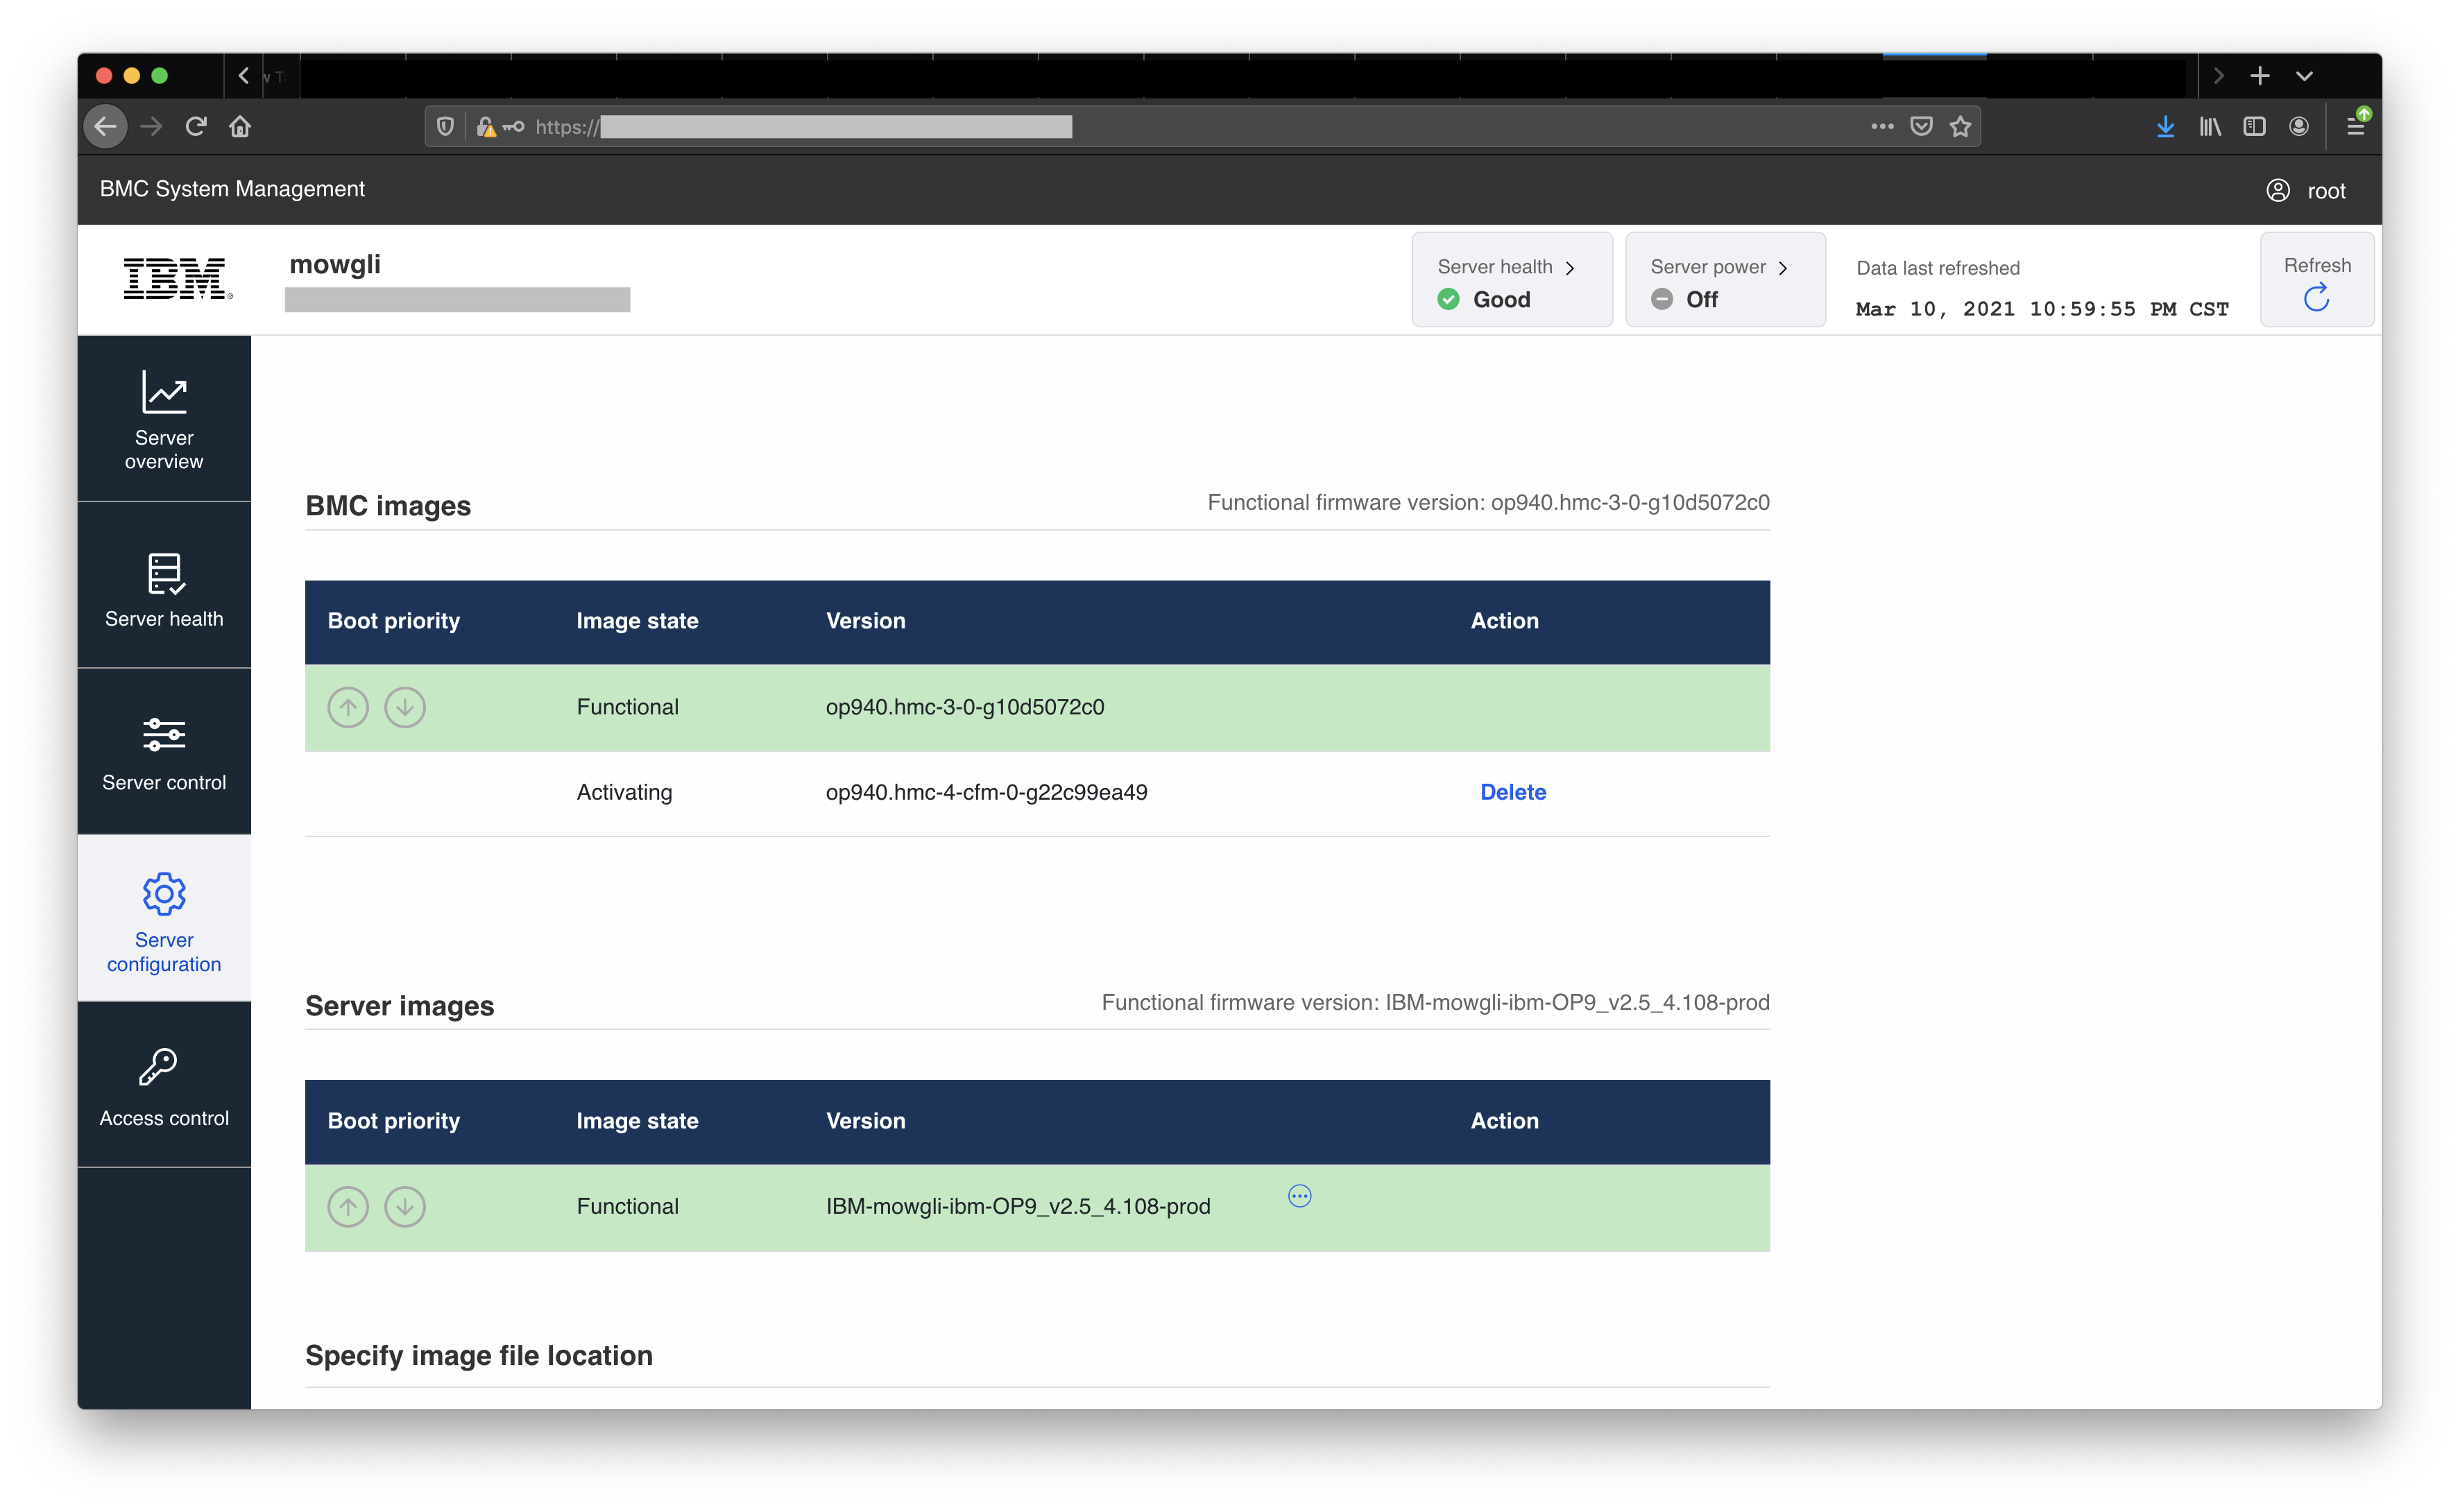
The image state shows Activating

The image moves to Functional state (the running image on the device)

If successful, a message is displayed on the upper right of the session, showing Success! BMC is rebooting.

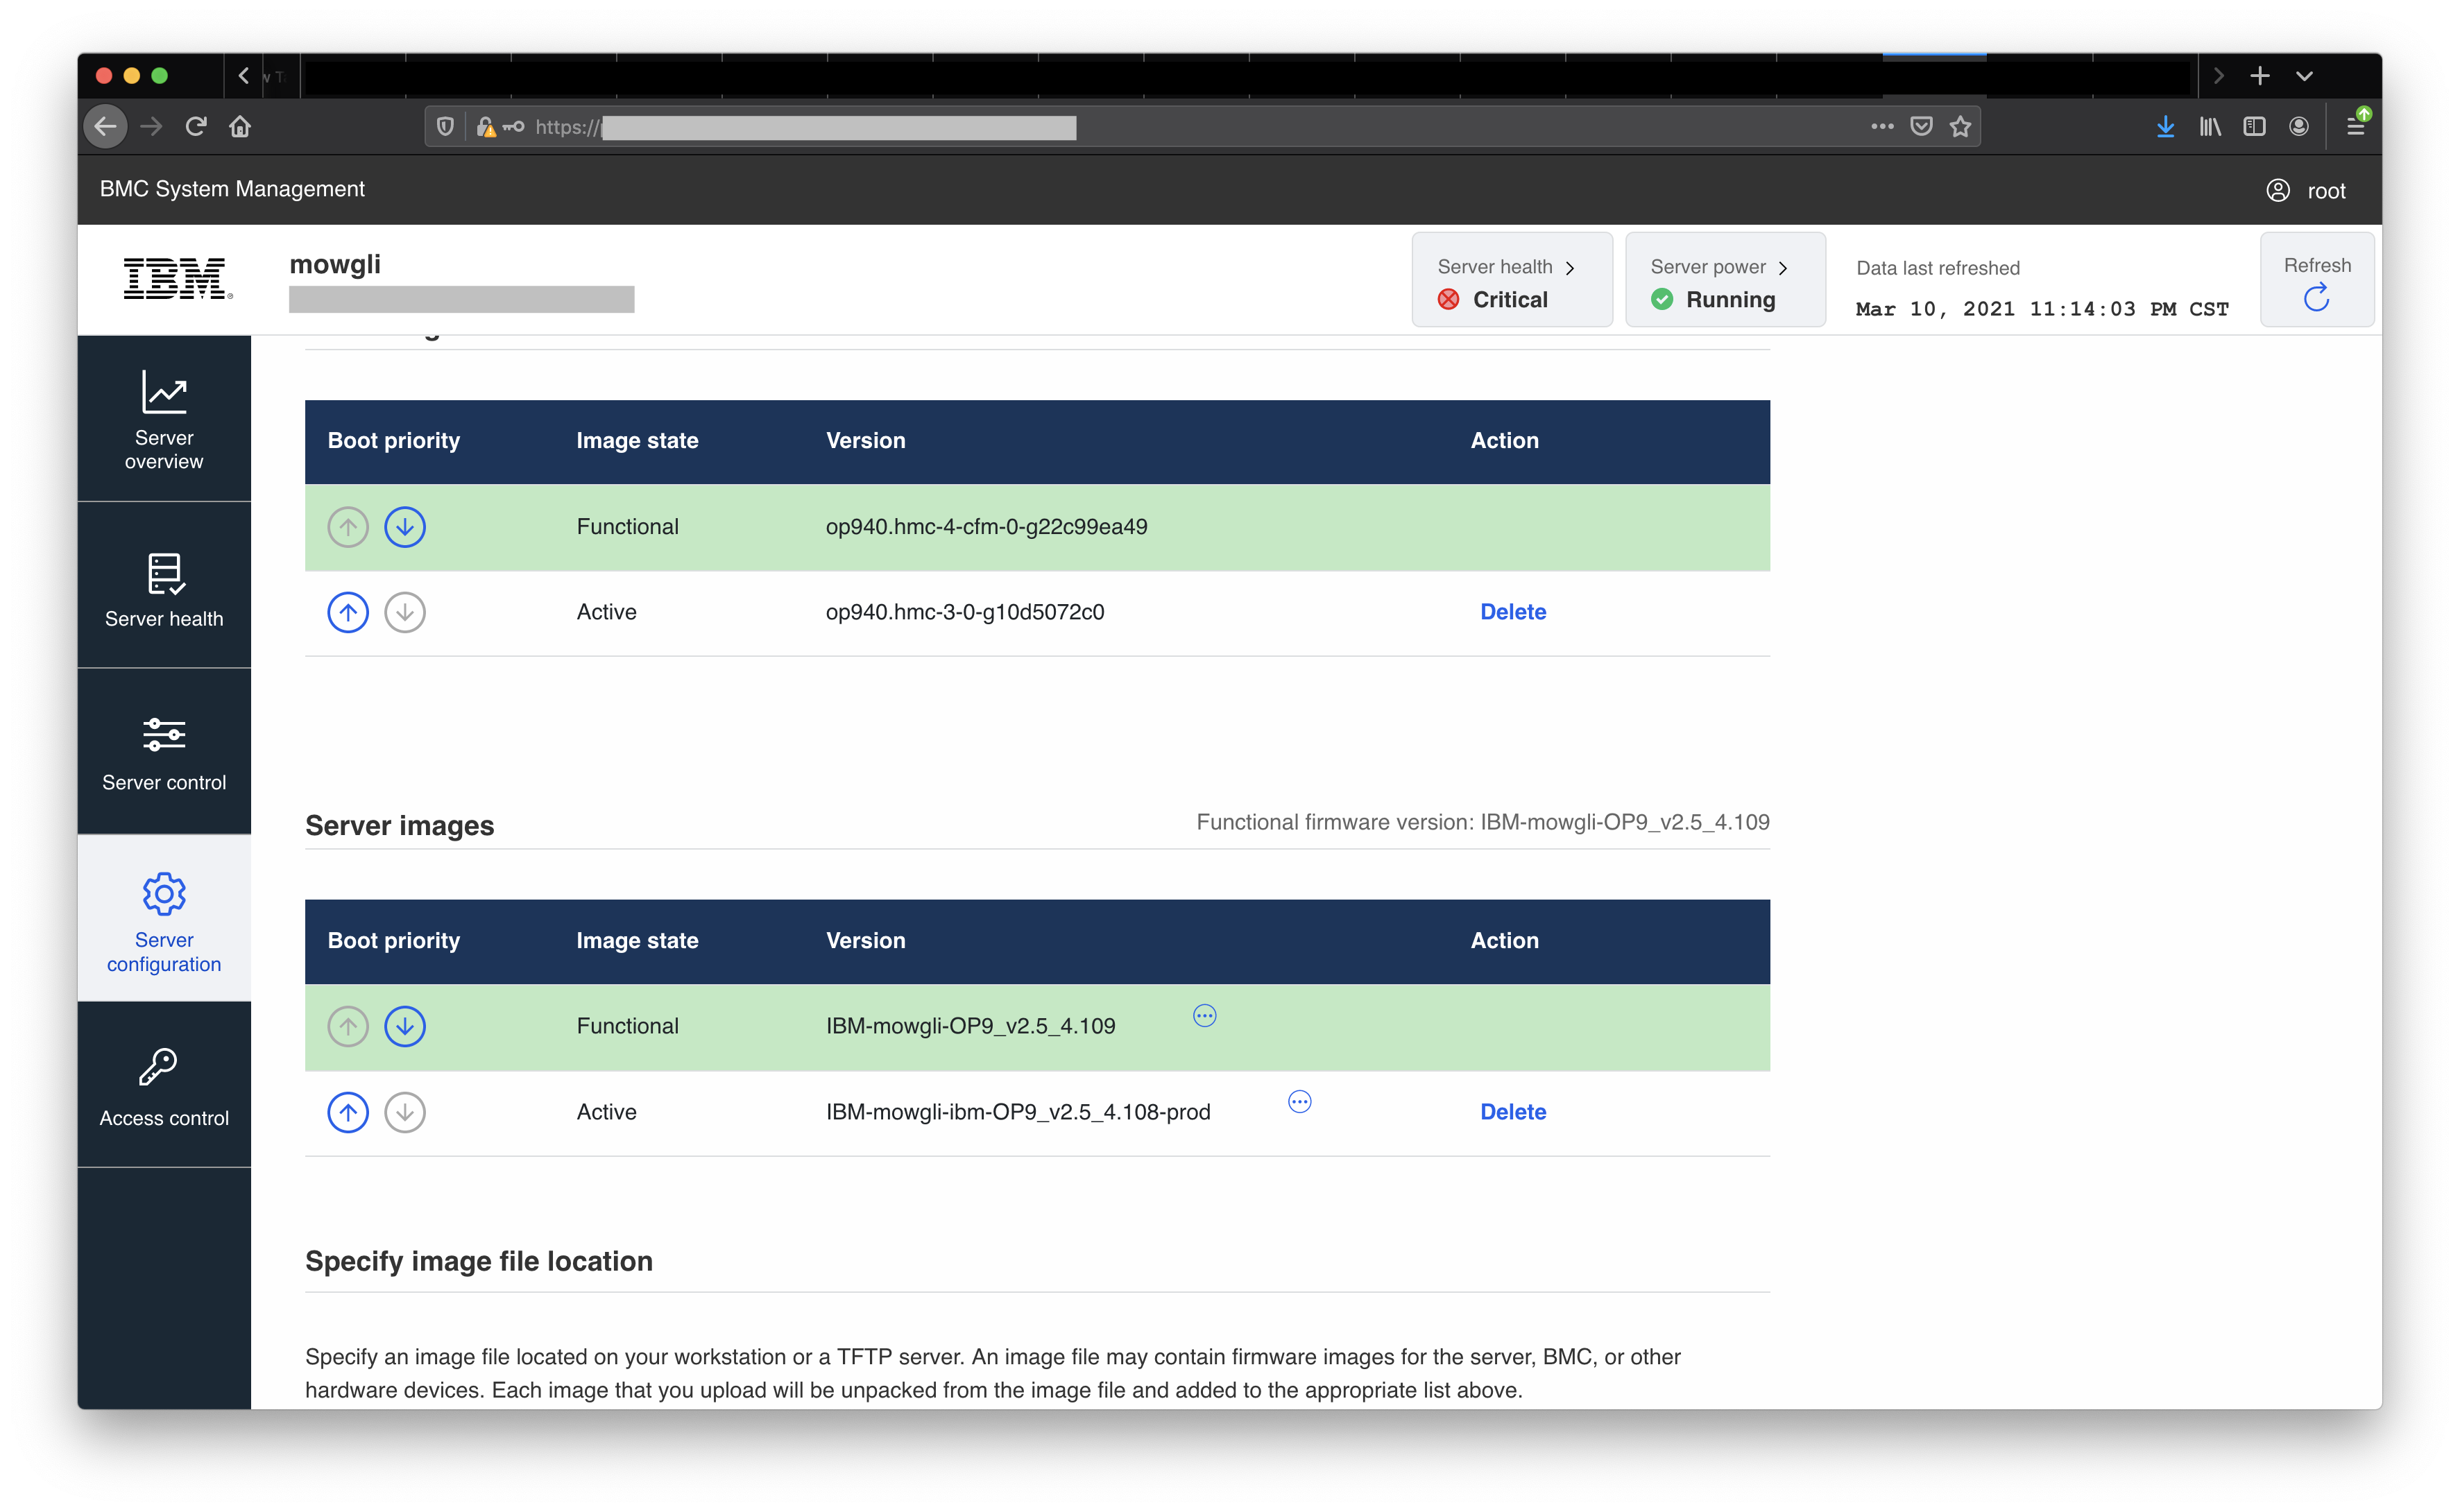
After the BMC comes back up and the UI is refreshed, the new image is now listed on the top line (first in boot priority), and the previous image is now listed second. The original second image was removed.
The BMC portion of the update is now complete.
The next image to update is the PNOR or Server image.
1. Scroll down on the page to locate the section to upload the firmware image.
2. Click Choose a file and browse your local file system for the location of the PNOR image.
3. Click Upload firmware

The Upload in progress... message is displayed
A confirmation message is displayed when the upload is complete.
4. The new image is now in a Ready state. Click Activate, under the Action column to activate it.
The user is presented with a confirmation panel with the options to "ACTIVATE FIRMWARE FILE WITHOUT BOOTING SERVER" and "ACTIVATE FIRMWARE FILE AND AUTOMATICALLY BOOT SERVER".
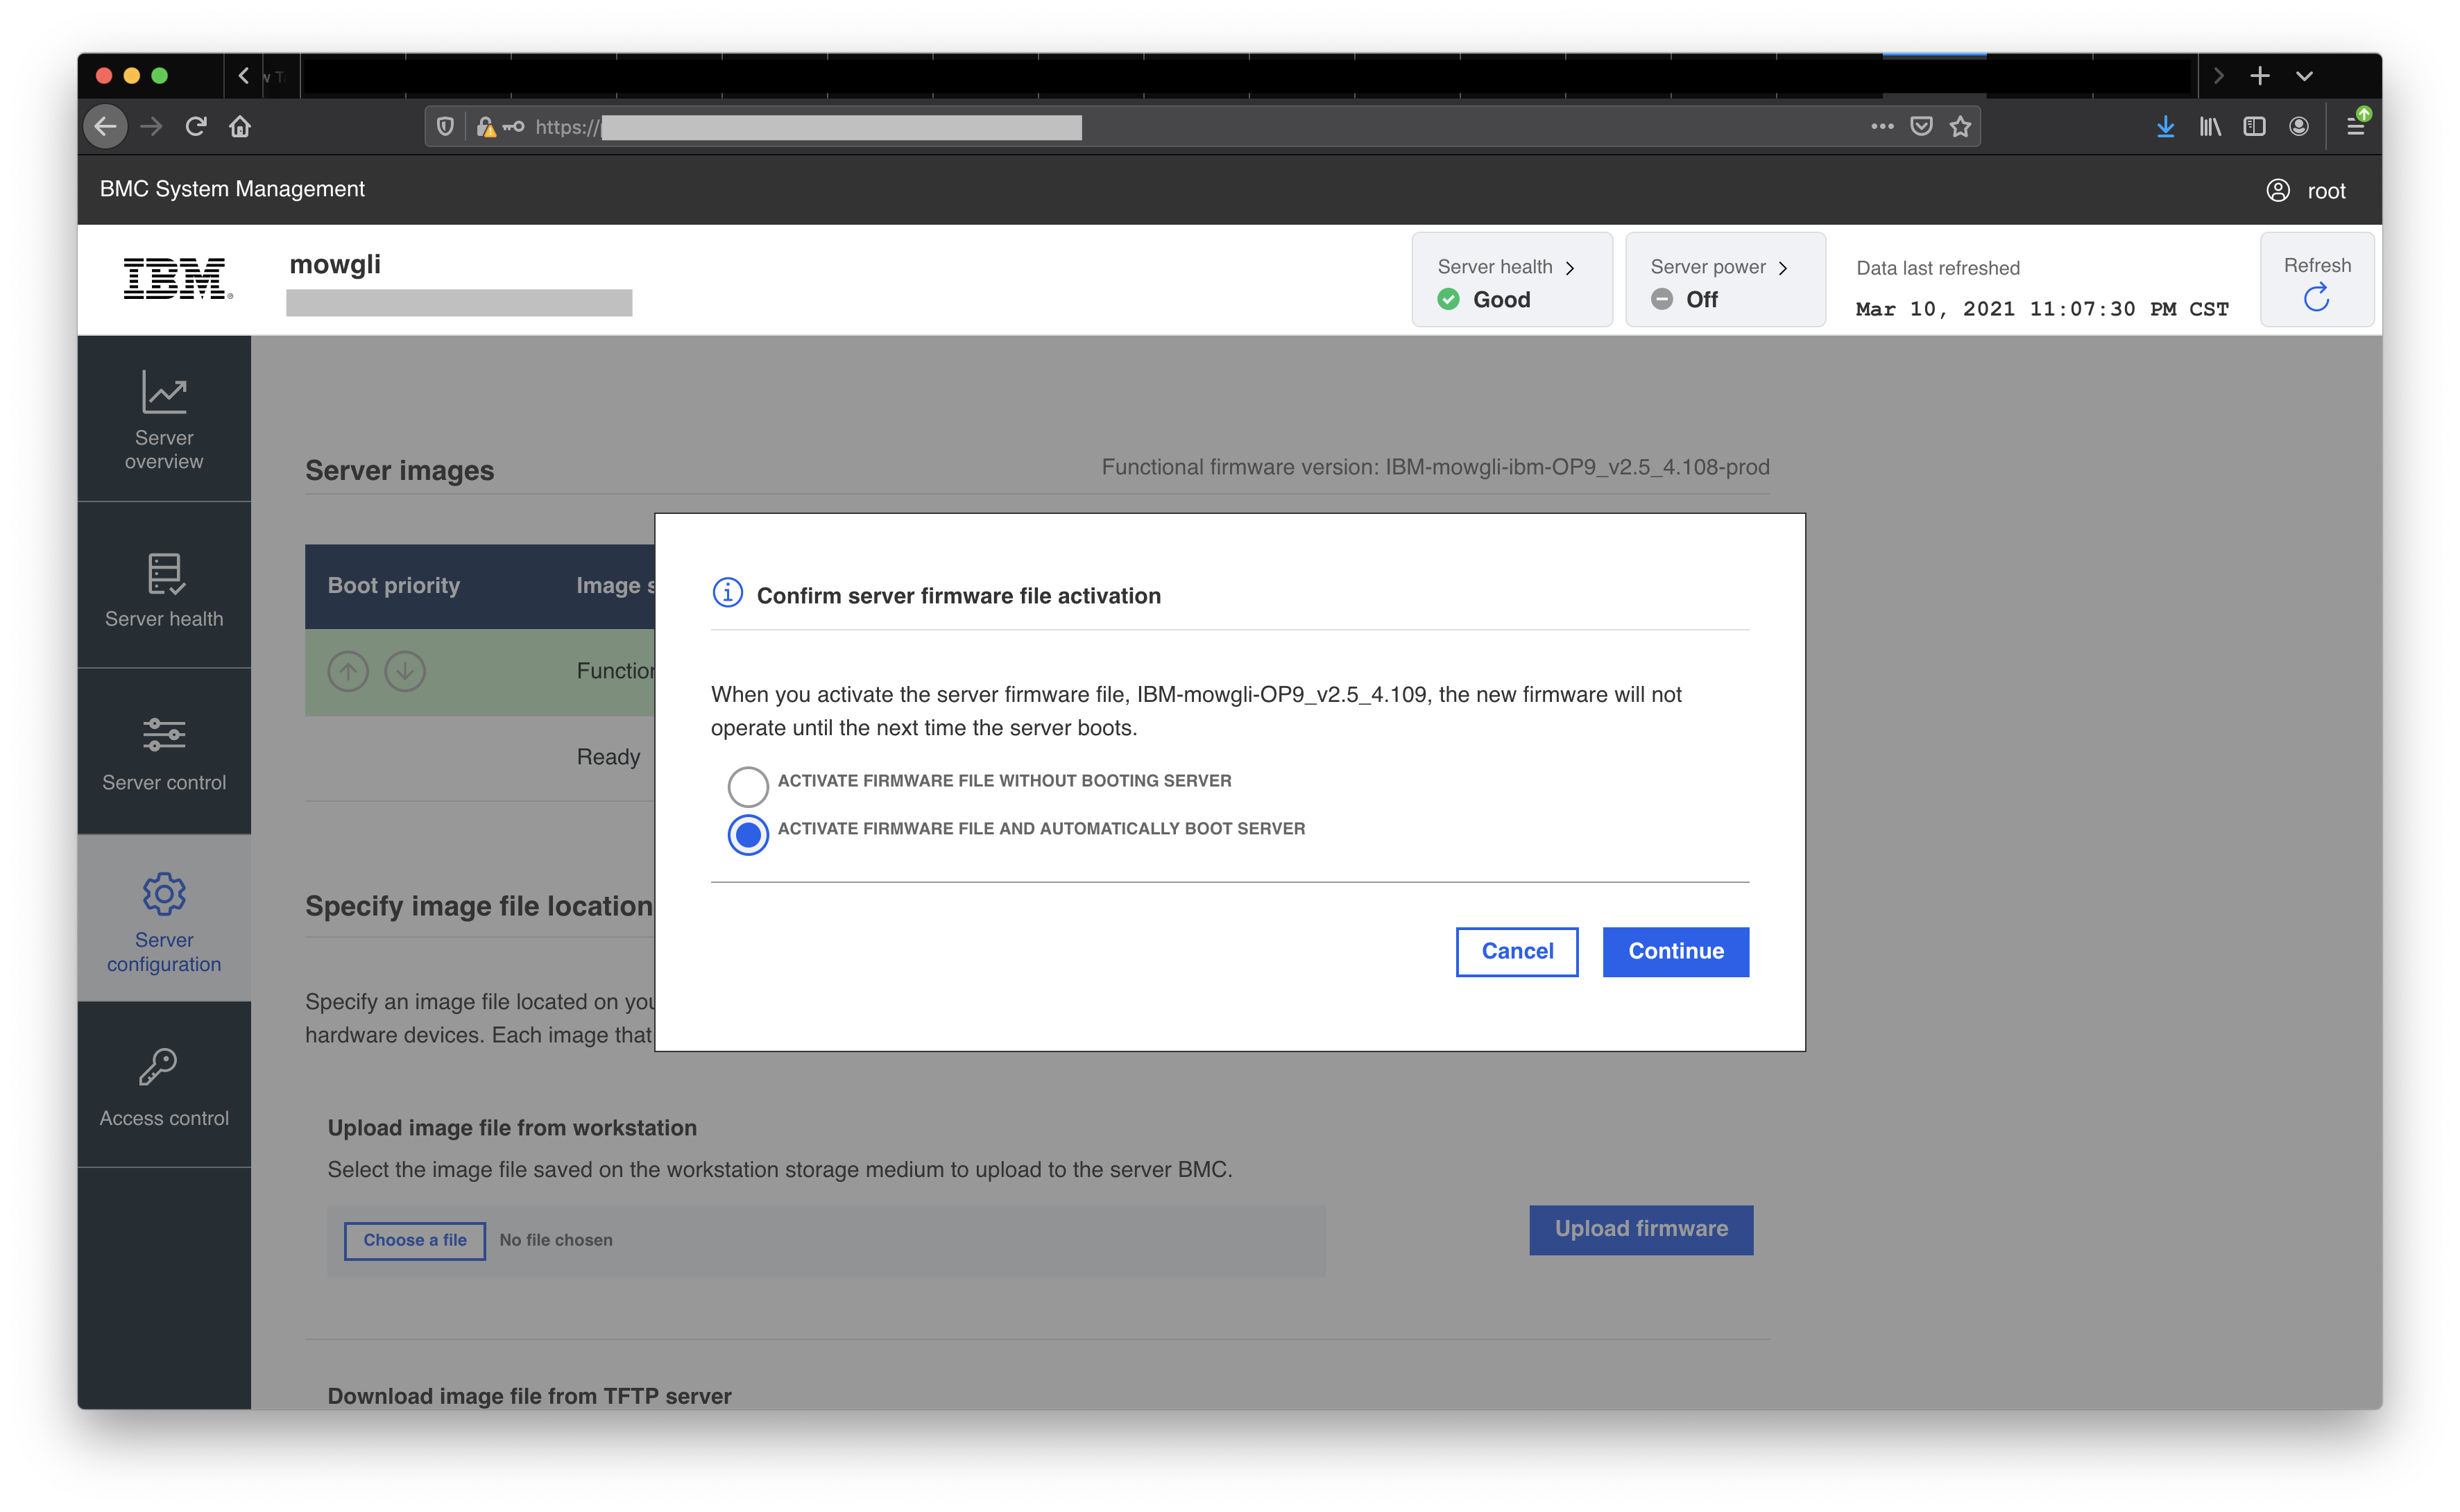
5. Select ACTIVATE FIRMWARE FILE AND AUTOMATICALLY BOOT SERVER and click Continue
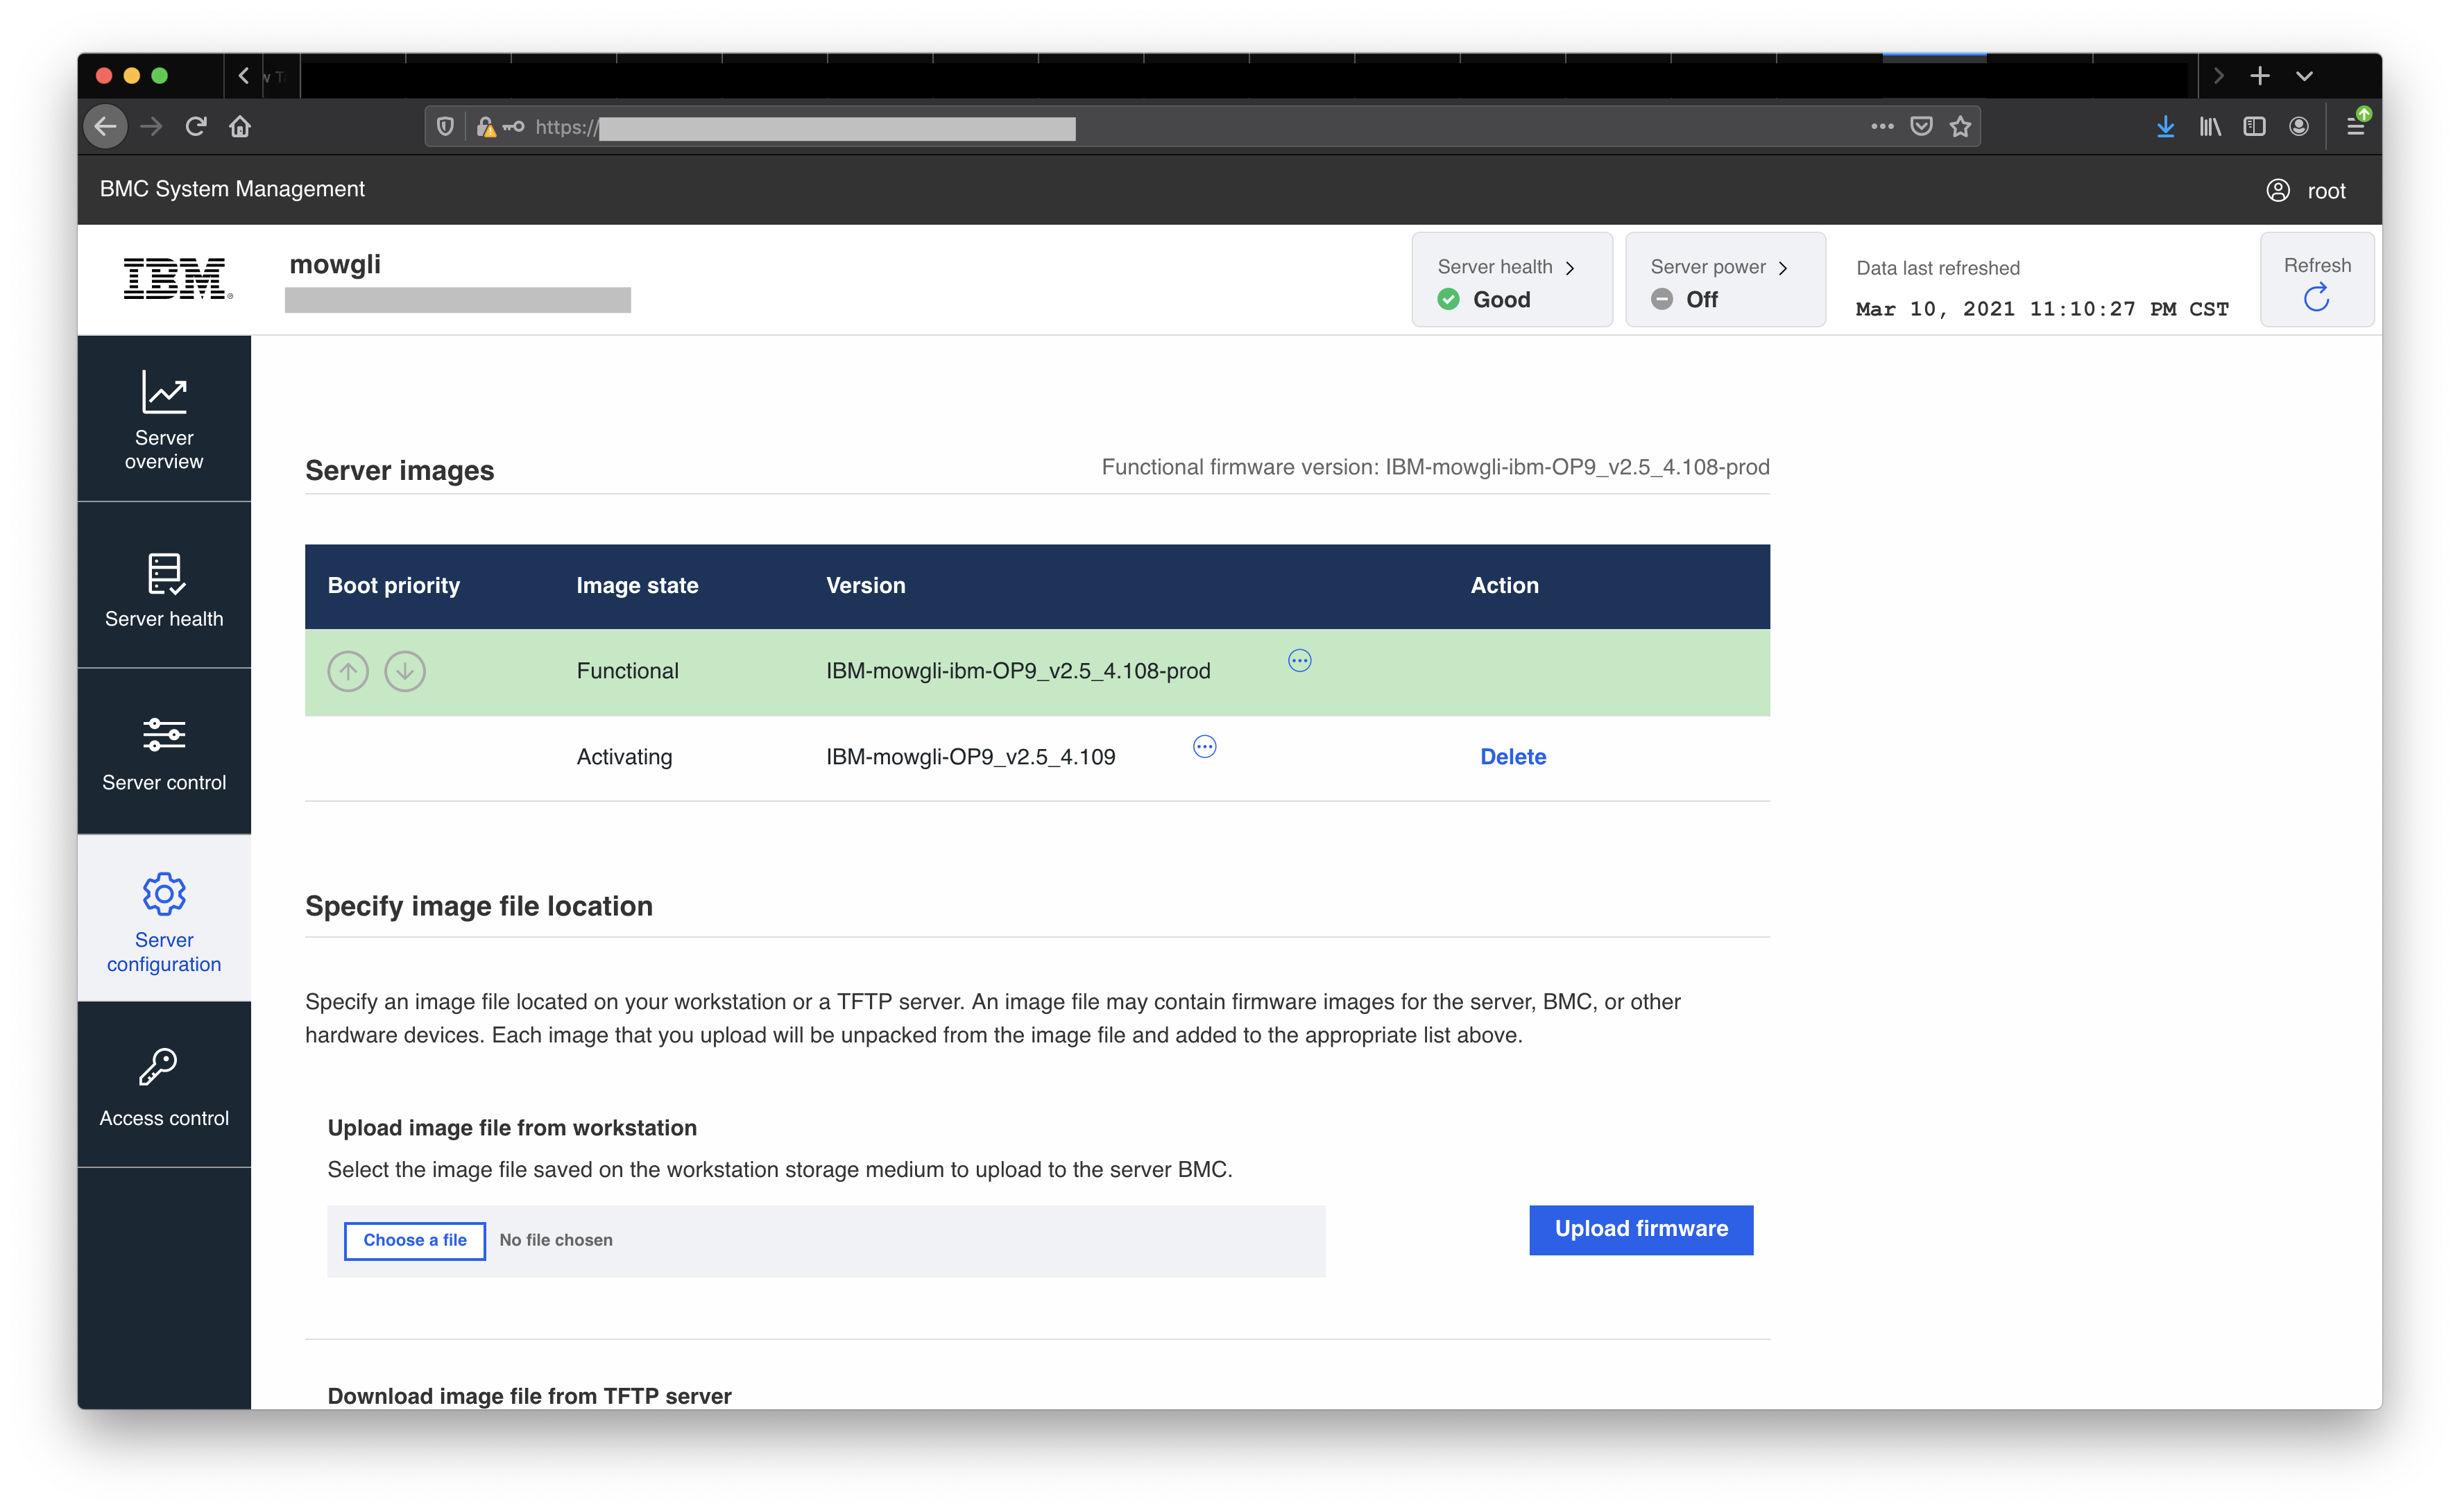
The image state shows Activating
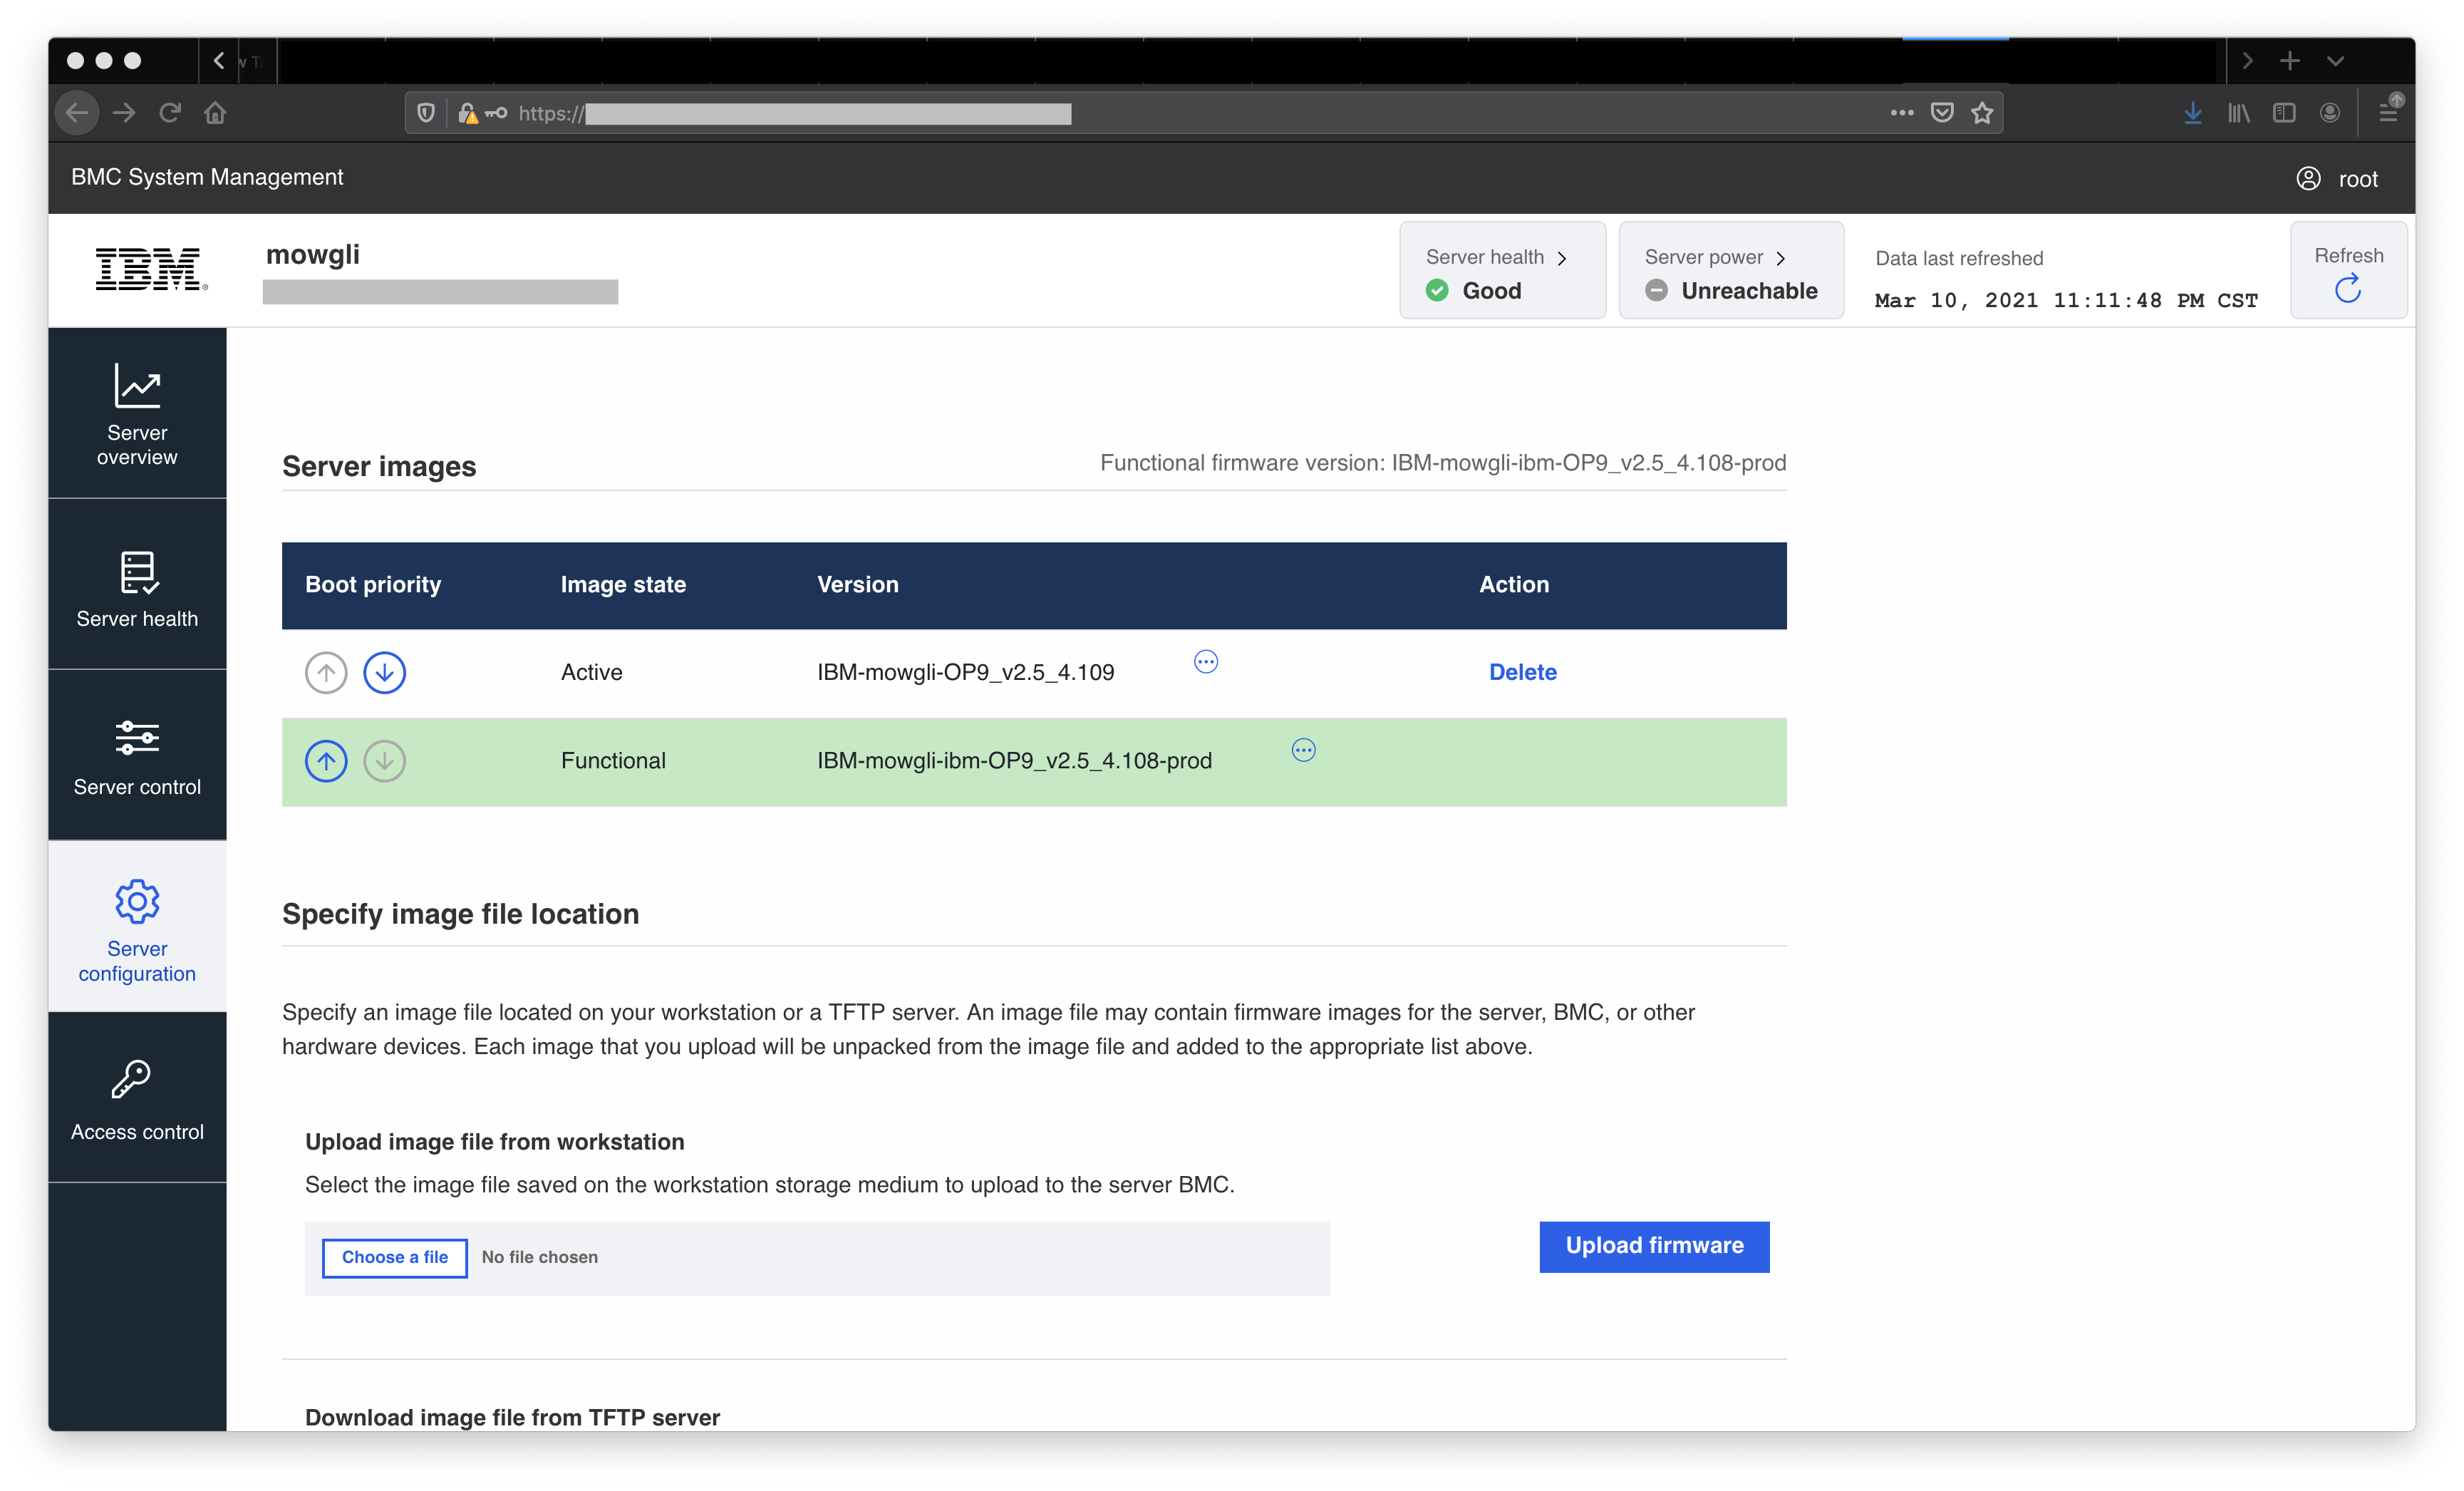
The image moves to Functional state (the running image on the device)
Related Information
Document Location
Worldwide
Was this topic helpful?
Document Information
Modified date:
07 June 2024
UID
ibm16611249