How To
Summary
ISPF provides several exit points to allow customization of many of the data set access features of ISPF/PDF. Here are some examples of how to use these exit points to provide more function to ISPF.
Objective
Environment
Steps
Write an ISPF Program Development Facility Exit
Do you ever want ISPF to work differently? Would you like to:
- Create a data set list that doesn’t include certain data sets?
- Have your own line commands recognized from the member list or data set list?
- Determine which users are selecting a particular program?
ISPF provides several exit points in the Program Development Facility component to where you can customize ISPF for your site.
Here’s how to write an exit to let the S command do something sensible in a member list that doesn’t accept S as a line command.
Write a REXX Exit
Step 1 - Write a REXX exit routine
Here is a simple REXX routine that processes an S line command. If the data set is likely to be a load module, the member is browsed. Otherwise, the member is viewed. All other line commands are processed by ISPF.
/* rexx member list line command exit to allow S line command */
arg lcmd dsnm volname
if lcmd = 'S' then                  /* line command is S       */
  do
    if index(dsnm,'.LOAD') = 0 then /* not load module         */
      address ispexec 'VIEW DATASET('dsnm')'
    else                            /* LOAD module             */
      address ispexec 'BROWSE DATASET('dsnm')'
    exit 8
  end
else                                /* different line command  */
  exit 0
Step 2 - Update the Configuration table
- If you don’t already have a keyword file data set, use the Data Set Utility, option 3.2, to create a sequential data set with a record length of at least 251 for fixed records or 255 for variable records.
- Use the ISPCCONF command to update the configuration table.
- Enter a meaningful name in the configuration keyword member field.
- Select option 1 to create a keyword file.
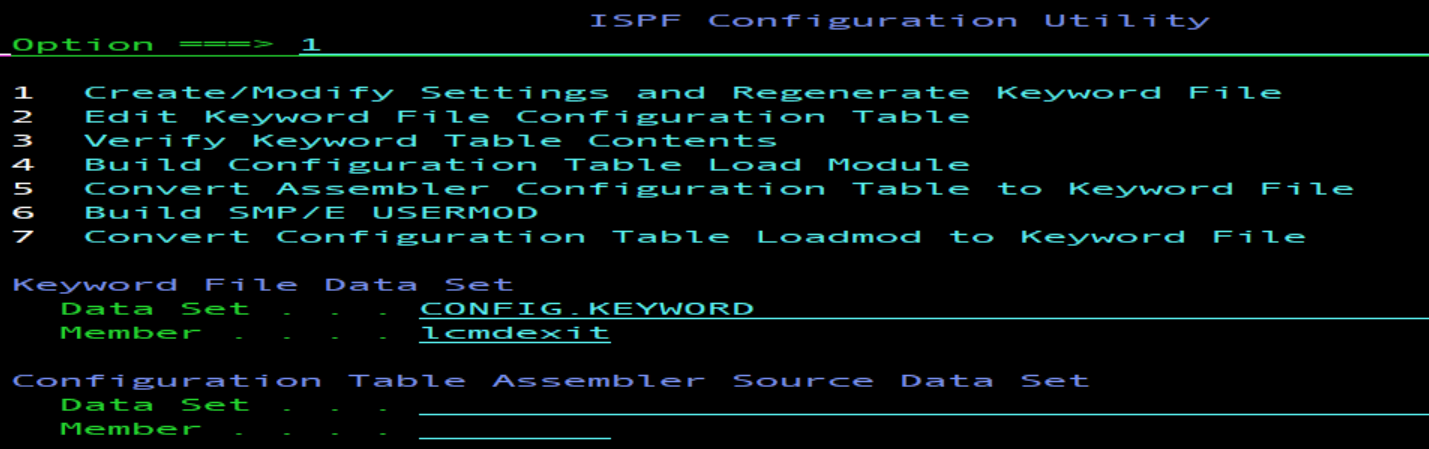
- Select option 3 to update the PDF exit values.
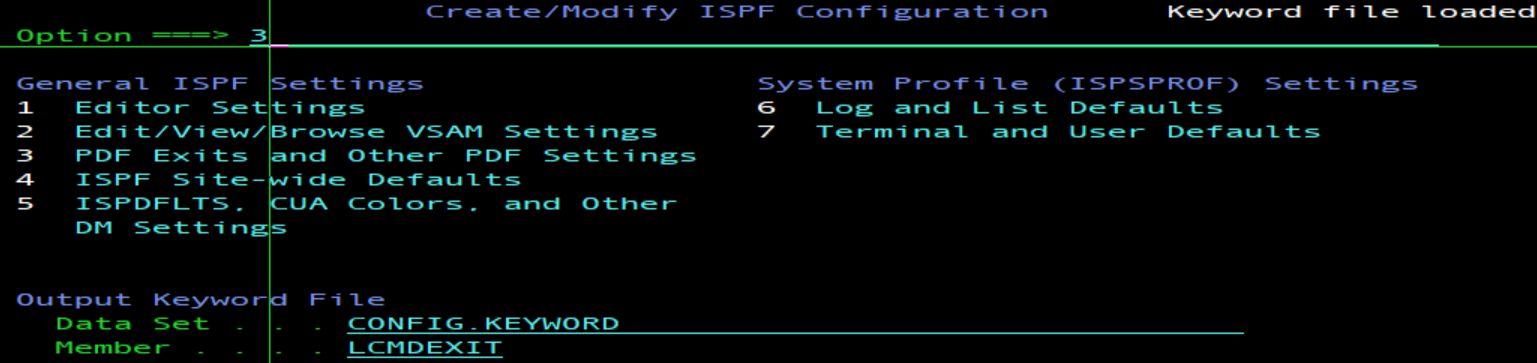
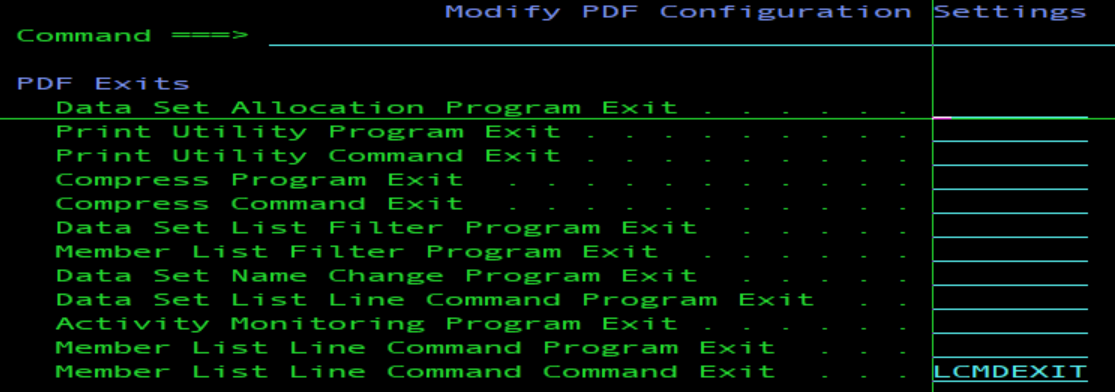
- Enter the name of your REXX exec in the Member List Line Command Command Exit field.
- Press the End key until you see the keyword file on the screen. Verify that the keywords look the way you want them to. Press End to return to the ISPF Configuration Utility panel.
- Build the configuration table. The two options to build a configuration table are:

- Select 4 to build the configuration table load module (unless you are required to build an SMP/E USERMOD by your site process).
- On the Build Configuration Table Load Module panel, keep the name of the Input Keyword File Data set, and enter the name of the Output Configuration Table Load Module Data Set you want to use:
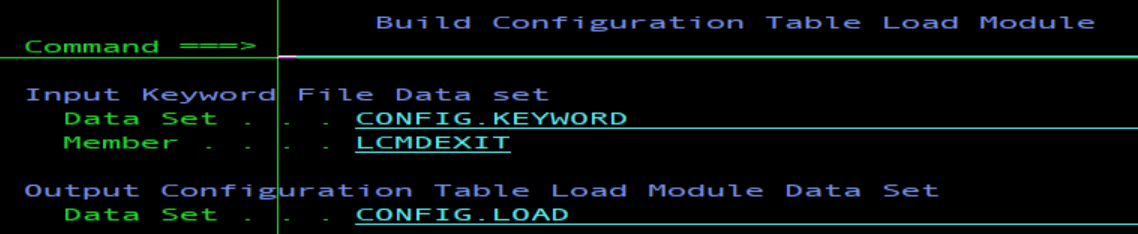
- Press Enter to create a load module called ISPCFIGU.
Step 3 - Allocate the data sets
To use the configuration table, member ISPCFIGU must be allocated where ISPF can find it. The easiest thing to do is to allocate the load module data set to ISPLLIB.
To use the REXX exit, the REXX data set must be allocated to either SYSPROC or SYSEXEC.
Write a CLIST to free the existing allocations and allocate the ddnames with the REXX allocated to SYSPROC and the configuration table allocated to ISPLLIB.
PROC 0
CONTROL NOFLUSH LIST
FREE FI (ISPLLIB )

ALLOC F(ISPLLIB)  SHR REUSE DA('&SYSUID..CONFIG.LOAD' )
FREE FI (SYSPROC )

ALLOC F(SYSPROC)  SHR REUSE DA('&SYSUID..CLIST' +
                               'ISP.SISPEXEC' +
                               'SYS1.SBPXEXEC' +
                               'GIM.SGIMCLS0' +
                               'SYS1.HRFCLST' +
                               'SYS1.DGTCLIB' +
                               'ISP.SISPCLIB' +
                               'SYS1.SBLSCLI0' +
                               'FMN.SFMNCLIB' +
                               'SYS1.SERBCLS' +
                               'SYS1.SCBDCLST')
Step 4 - Run ISPF with the Member List Line Command Exit
- From TSO READY, run the allocation CLIST.
- Start ISPF.
- From Option 3.1, the Library Utility, display a member list. Use the S command. For a load module data set, the S command browses the member. For a data set that is not a load module, the S command views the member.
Write a Program Exit
There are several program exits in the ISPF Samples library, ‘ISP.SISPSAMP’. Modify these samples to create your own exit. In this case, we are going to use sample ISRDSLEX to create a data set list filter exit. The exit prevents the Data Set List Utility from listing any data sets with a high-level qualifier of SYS1, or listing any data sets when a particular volume is entered on the Data Set List Utility entry panel.
Step 1 - Write a program exit routine
- Copy from ‘ISP.SISPSAMP(ISRDSLEX)’ to ‘userid.PRIVATE.SOURCE(DSLSYS)’
- Edit ‘userid.PRIVATE.SOURCE(DSLSYS)’
- Change all instances of ISRDSLEX to DSLSYS.
- Scroll to the end of the program and change the SYSVOL constant to a value appropriate to your system. On my system SMPXDL is not available.
SYSVOL DC C'SMPXDL'
- If you want to change the high-level qualifier to something other than SYS1, change the SYSNAME constant as well. If you want the high-level qualifier to have a different length, change this statement as well (note that the search string is "SYS1." which has a length of 5):
CLC DSNAME(5,@05),SYSNAME
Step 2 - Assemble and Link the program exit
- If you already have JCL for assembling and linking a program, modify the JCL to use the assembly language program as the input.
- If you don’t have JCL,
- use the Foreground Assembler, option 4.1, to assemble the program
- Make sure you have an object data set to store the output that uses the naming convention ‘userid.PRIVATE.OBJ’.
- Enter your source data set name on the panel and select member DSLSYS.
- Press enter to assemble the member.
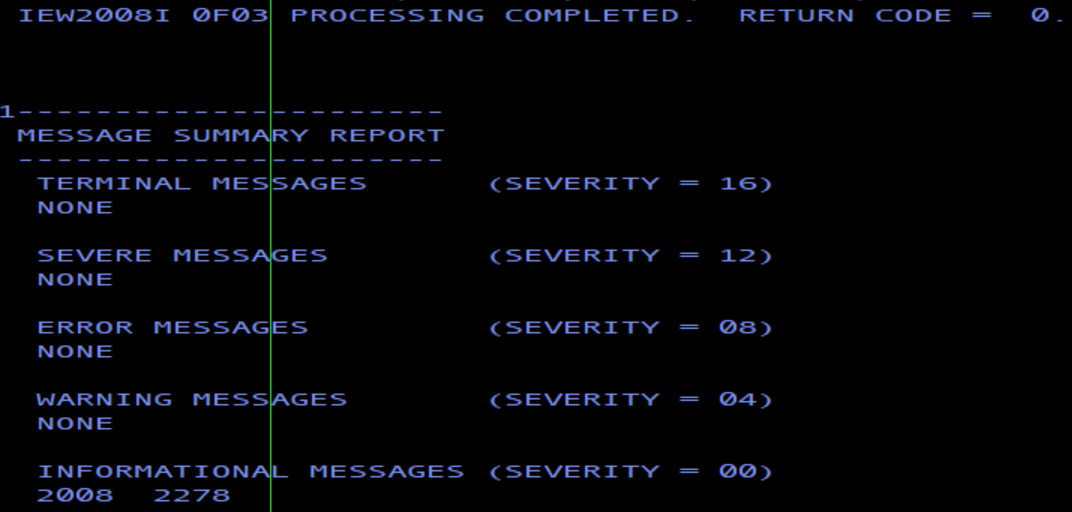
- The assembly language listing displays automatically. Scroll to the end of the listing. If the program assembles without error, the last line shows:
- use the Foreground Assembler, option 4.1, to assemble the program
Return Code 000
- Use the Foreground Binder/Linkage Editor, option 4.7, to bind the program.
- Make sure you have a load module data set to store the program object that uses the naming convention ‘userid.PRIVATE.LOAD’.
- Enter the name of the object data set on the panel and select member DSLSYS.
- Press enter to bind the object.
- The binder listing displays automatically. Scroll to the end of the listing. If the binder completed without error, the listing shows:
Step 3 - Update the Configuration table
- If you don’t already have a keyword file data set, use the Data Set Utility, option 3.2, to create a sequential data set with a record length of at least 251 for fixed records or 255 for variable records.
- Use the ISPCCONF command to update the configuration table.
- Enter a meaningful name in the configuration keyword member field.
- Select option 1 to create a keyword file.

- Select option 3 to update the PDF exit values.
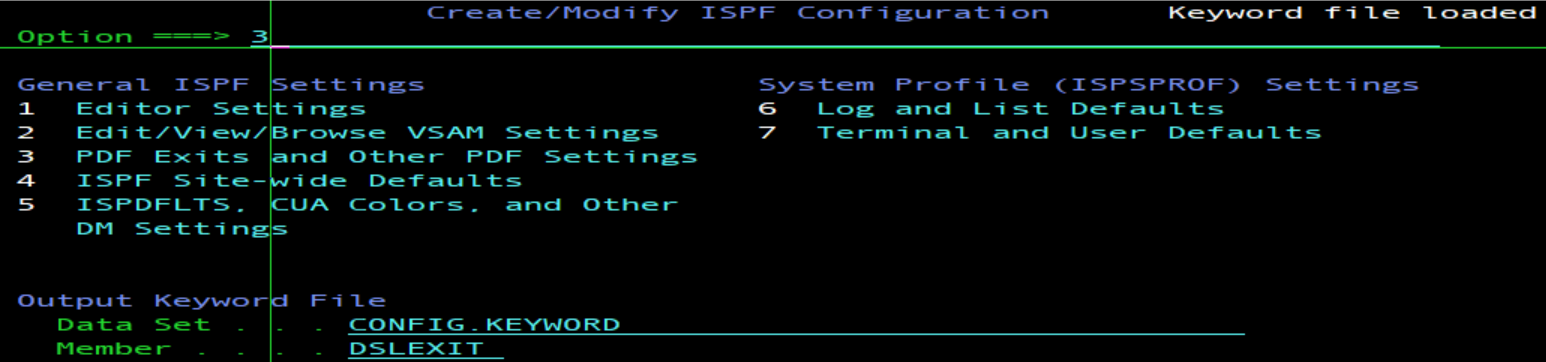
- Enter the name of the program exit in the Data Set List Filter Program Exit field.

- Press the End key until you see the keyword file on the screen. Verify that the keywords look the way you want them to. Press End to return to the ISPF Configuration Utility panel.
- Build the configuration table. The two options to build a configuration table are:

- Select 4 to build the configuration table load module (unless you are required to build an SMP/E USERMOD by your site process).
- On the Build Configuration Table Load Module panel, keep the name of the Input Keyword File Data set, and enter the name of the Output Configuration Table Load Module Data Set you want to use:

- Press Enter to create a load module called ISPCFIGU.
Step 4 - Allocate the data sets
To use the configuration table and the program exit, allocate both the configuration table load library and the program exit load library to ISPLLIB. If you don’t already have data sets allocated to ISPLLIB, you can write a simple CLIST to allocate the data sets.
PROC 0
CONTROL NOFLUSH LIST
FREE FI (ISPLLIB )

ALLOC F(ISPLLIB)  SHR REUSE DA('&SYSUID..CONFIG.LOAD' +
                               '&SYSUID..PRIVATE.LOAD')
Step 5 - Run ISPF with the Member List Line Command Exit
- From TSO READY, run the allocation CLIST.
- Start ISPF.
- From Option 3.4, the Data Set List Utility, use a data set name level of SYS* to display a data set list. No SYS1 data sets appear in the list.
- From Option 3.4, use a volume serial of SMPXDL. No data sets are listed and a message is displayed.
Document Location
Worldwide
Was this topic helpful?
Document Information
Modified date:
01 July 2022
UID
ibm16591255