How To
Summary
The steps in the document guide you toward securing Planning Analytics Application Web (TM1 Contributor/PMPSVC), by using a keystore provided to you in PFX/PKCS12 format. In this document, you replace the keystore used by Planning Analytics Application Web, with your own.
Steps
PRE-REQUISITE
- TM1 Admin Server and TM1 Servre already secured by using custom certificates/keystore
- Back up the PA_INSTALL_DIR\configuration\ folder to a different directory
EXPORTING CURRENT COGNOS CONFIGURATION SETTINGS
- Open Cognos Configuration as an Administrator
- Click File > Export As
- Save the file to the PA_INSTALL_DIR\configuration\ directory.
- In this example, the file is named export.xml

- Close Cognos Configuration

PREPARE THE CONFIGURATION DIRECTORY
- Delete file PA_INSTALL_DIR\configuration\cogstartup.xml
- Delete file PA_INSTALL_DIR\configuration\caSerial
- Delete contents of PA_INSTALL_DIR\configuration\csk\ folder
- Delete contents of PA_INSTALL_DIR\configuration\certs\ folder
- Rename PA_INSTALL_DIR\configuration\export.xml to cogstartup.xml
- Do not open Cognos Configuration until instructed
CONFIGURE ENVIRONMENT VARIABLES FOR COMMAND PROMPT
- Open Command Prompt as an Administrator
- Update and execute the following to set the PA_INSTALL_DIR path to your TM1 Server installation directory
- set PA_INSTALL_DIR=C:\Program Files\ibm\cognos\tm1_64

CONVERT CUSTOM IBMTM1 KEYSTORE TO PKCS12 FORMAT FOR IBM PLANNING ANALYTICS APPLICATION SERVER
- Open Windows Services, stop the IBM Cognos TM1, TM1 Admin Server, and TM1 Server service
- Open Command Prompt as an Administrator. Navigate to the \bin64\ folder inside the PA Install Directory:
- cd "%PA_INSTALL_DIR%\bin64\"

- The Planning Analytics Application Web server requires it's keystore to have an ID of encryption. We must temporarily rename the ID of the certificate in our keystore before we convert it to a format used by the application server.
- gsk8capicmd_64 -cert -rename -db "%PA_INSTALL_DIR%\bin64\ssl\ibmtm1.kdb" -stashed -label ibmtm1_server -new_label encryption

- Convert the ibmtm1 keystore file to a PKCS12 keystore for the Planning Analytics Application Web server:
- gsk8capicmd_64 -keydb -convert -db "%PA_INSTALL_DIR%\bin64\ssl\ibmtm1.kdb" -stashed -old_format kdb -new_db "%PA_INSTALL_DIR%\configuration\certs\CAMKeystore.p12" -new_pw "CustomPA!@" -new_format pkcs12

- Rename the CAMKeystore.p12 file to CAMKeystore
- rename "%PA_INSTALL_DIR%\configuration\certs\CAMKeystore.p12" CAMKeystore

- Ensure that the file has been created in the specified directory:
- Rename the ID of the certificate in our ibmtm1 keystore back to ibmtm1_server.
- gsk8capicmd_64 -cert -rename -db "%PA_INSTALL_DIR%\bin64\ssl\ibmtm1.kdb" -stashed -label encryption -new_label ibmtm1_server


CONFIGURE PLANNING ANALYTICS APPLICATION WEB
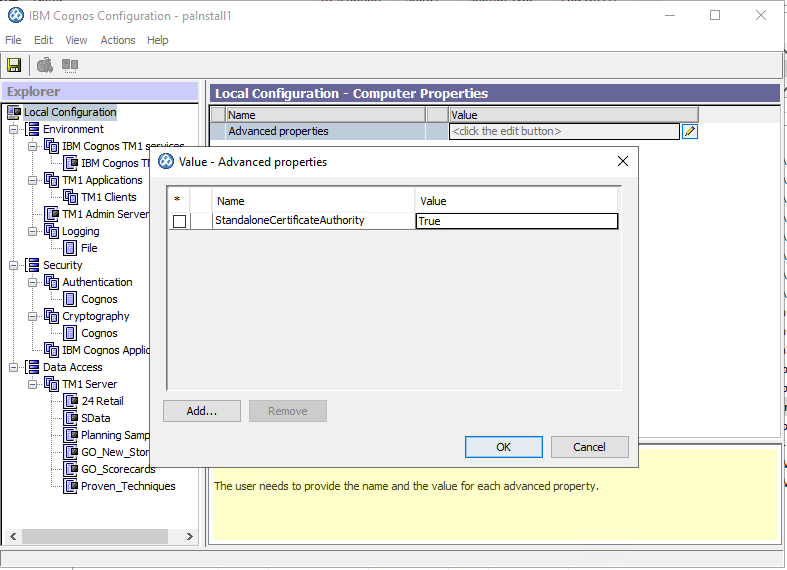
- Open Cognos Configuration as an Administrator
- Update Local Configuration > Advanced Properties to include StandaloneCertificateAuthority = True
- Update all URLs under TM1 Applications section to use https
- Update Cryptography > Cognos > Key store password, to match the password of your keystore
- In this document, the password is CustomPA!@

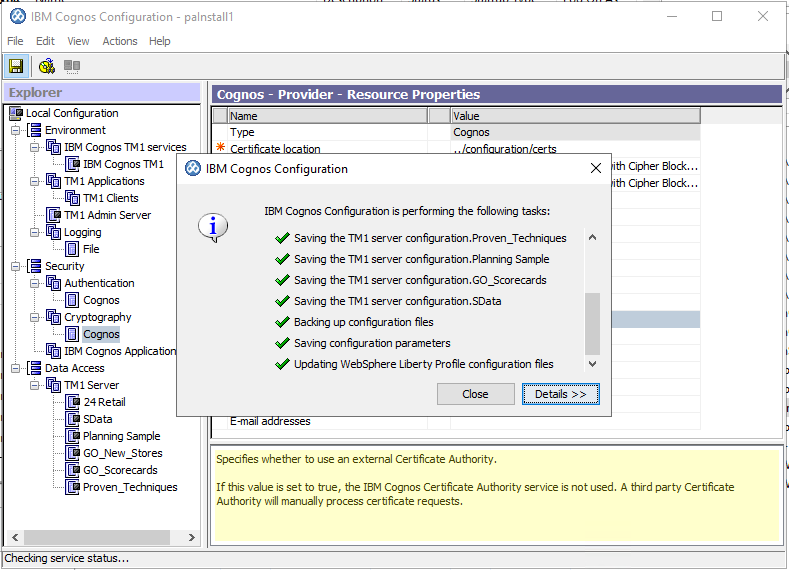
- Update Cryptography > Cognos > Use third party CA to True
- Save the configuration. This step can take a few moments to complete
- Close Cognos Configuration
- Remove all ibmtm1.* files from the PA_INSTALL_DIR\webapps\pmpsvc\WEB-INF\bin64\ssl\ directory
- Copy your ibmtm1.* files (your keystore) from the PA_INSTALL_DIR\bin64\ssl\ directory to PA_INSTALL_DIR\webapps\pmpsvc\WEB-INF\bin64\ssl\


VALIDATE YOUR PLANNING ANALYTICS APPLICATION WEB CONFIGURATION
The following validation steps use the Chrome web browser. If you are using another browser, you need to adjust the steps as required.
- Open Windows Services, start the IBM Cognos TM1 service
- Access the Planning Analytics Application Web URL using Chrome, for example: https://painstall1.fyre.ibm.com:9511/pmpsvc/
- Assuming your certificates are valid and trusted, you should see the following:
- "Not Found" is expected here as there is no webpage at the root of this server. This test is still valid to confirm that port 9012 is secured by using your custom certificates.

- If Planning Analytics Application Web has already been configured, you will be logged in to the application instead of the initialization page
POST-CONFIGURATION STEPS
- Any applications that communicate with Planning Analytics Application Web, must be updated to trust the new custom certificates
Document Location
Worldwide
[{"Type":"MASTER","Line of Business":{"code":"LOB10","label":"Data and AI"},"Business Unit":{"code":"BU059","label":"IBM Software w\/o TPS"},"Product":{"code":"SSD29G","label":"IBM Planning Analytics"},"ARM Category":[{"code":"a8m50000000KzK7AAK","label":"Planning Analytics-\u003ESecurity-\u003ESSL"}],"ARM Case Number":"","Platform":[{"code":"PF025","label":"Platform Independent"}],"Version":"All Versions"}]
Was this topic helpful?
Document Information
Modified date:
21 April 2022
UID
ibm16573071