How To
Summary
Technician application is part of the Maximo Mobile application suite. This document discusses the functionality in Technician application.
Steps
Configure Security Access for Mobile users in Maximo (Desktop)
- Log in to Maximo as maxadmin
- Create a mobile security group in the Security Groups application
- Go to Applications tab and filter for Technician in the Description field.
- Click Manage/Apply Template button
- Click "Apply Template" button. A system message pops up:
"BMXAA9465W - The authorizations for the TECHMOBILE security template is applied to the MM security group for the TECHMOBILE Work Center. Existing authorizations are not replaced, but additional authorizations are applied" - Click OK
- Click "Object Structure Authorizations" button and review the permission
- Filter for Work Order Tracking app
- Click "Grant Listed Options for this Application" button
- Go to Object Structures tab, filter for MXAPIASSIGNMENT
- Click "Grant Listed Options for This Object Structure" button
- Save the record
- Go to Labor tab and select "Authorize Group for their own labor" checkbox
- Go to Users application and filter for a mobile user
- Go to the Groups tab.
- Add the Mobile security group and save the record
Technician app on a Mobile Device
1) Go to a mobile device
Download and install Maximo Mobile app (MAS) or Maximo Mobile for EAM (Maximo 7.6.1.2) from Apple App Store or Google Play store.
For windows users, download, and install an installation package for windows platform.
2) Open the application and enter Maximo URL
3) Log in as a mobile user
Supporting data downloads automatically after user logged in

Supporting data is defined in Query Definition action of Object Structures application
For examples,
MXAPISYNONYMDOMAIN, MXAPIITEM, MXAPIINVENTORY, MXAPILOCATIONS, MXAPIASSET, MXAPIFAILURELIST, MXAPIWORKTYPE, MXAPIORGANIZATION, MXAPIASSETMETER, MXAPILOCATIONMETER, MXAPIALNDOMAIN, MXAPILABORCRAFTRATE
Create local work orders
1) Click "+" on Navigator to create a new work order
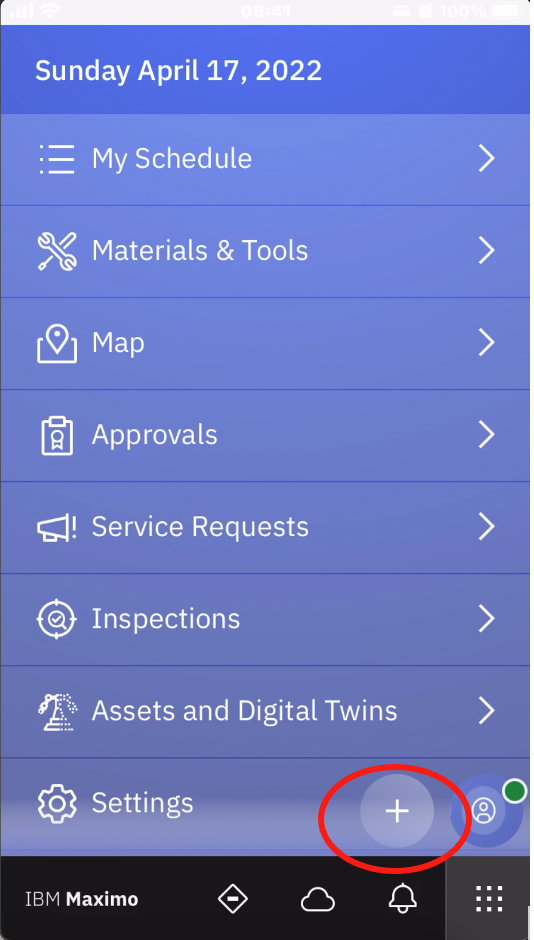
2) Select create work order
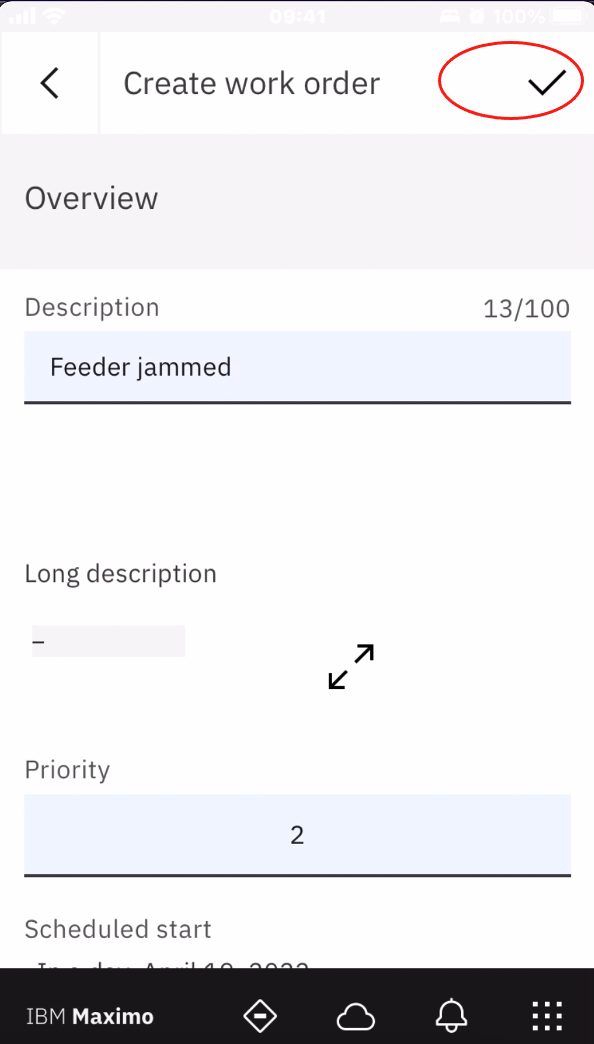
3) Populate all fields (description, start, and end date time, work type, classification
4) Click the checkmark to save and submit the work order
5) A new work order is created with status set to "Waiting on approval"
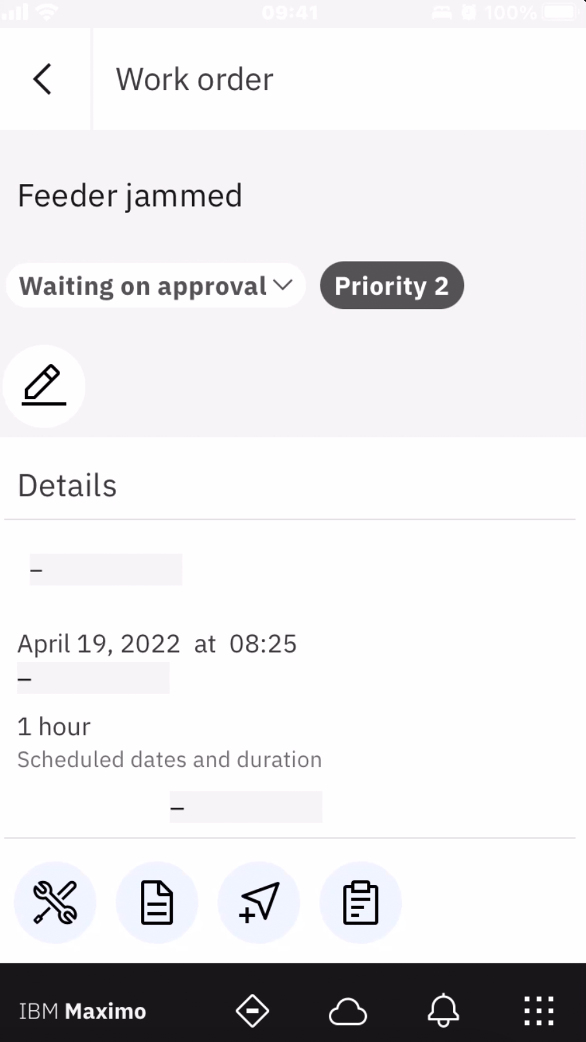
6) Click the drop-down to change the status to Approved
A work order number is assigned to the new work order
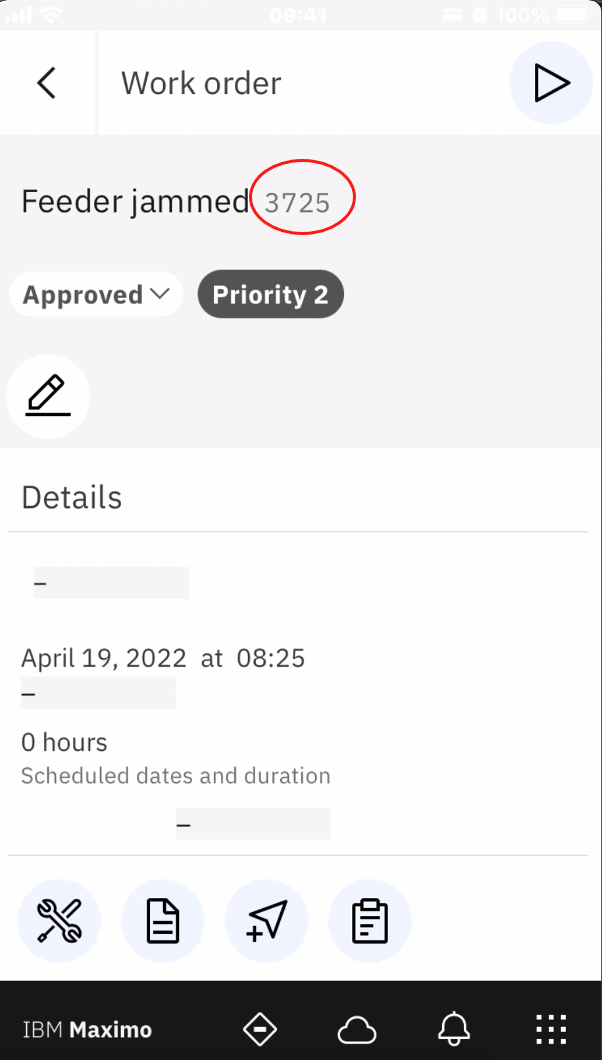
7) The work order from mobile device synchronizes with Maximo (desktop) instantly
Download work orders from Maximo (Desktop)
1) Go to Maximo (Desktop)
2) Go to Object Structures application
3) Select MXAPIWODETAIL object structure
4) Select Query Definition action
Filter for ASSIGNEDWOLIST query
5) Check the query clause:
(siteid = (select defsite from maxuser where userid =:USER) and status in (select value from synonymdomain where domainid ='WOSTATUS' and maxvalue not in ('CAN','CLOSE','COMP','WAPPR')) and wonum in (select wonum from assignment where laborcode = (select laborcode from labor, maxuser where labor.personid = maxuser.personid and maxuser.userid=:USER and labor.orgid = (select orgid from site where siteid = (select defsite from maxuser where userid =:USER))) and (siteid = (select defsite from maxuser where userid =:USER))))
Default query is to download assigned Work list excluding the following statuses:
CAN,CLOSE,COMP,WAPPR
This query can be modified according to business requirement
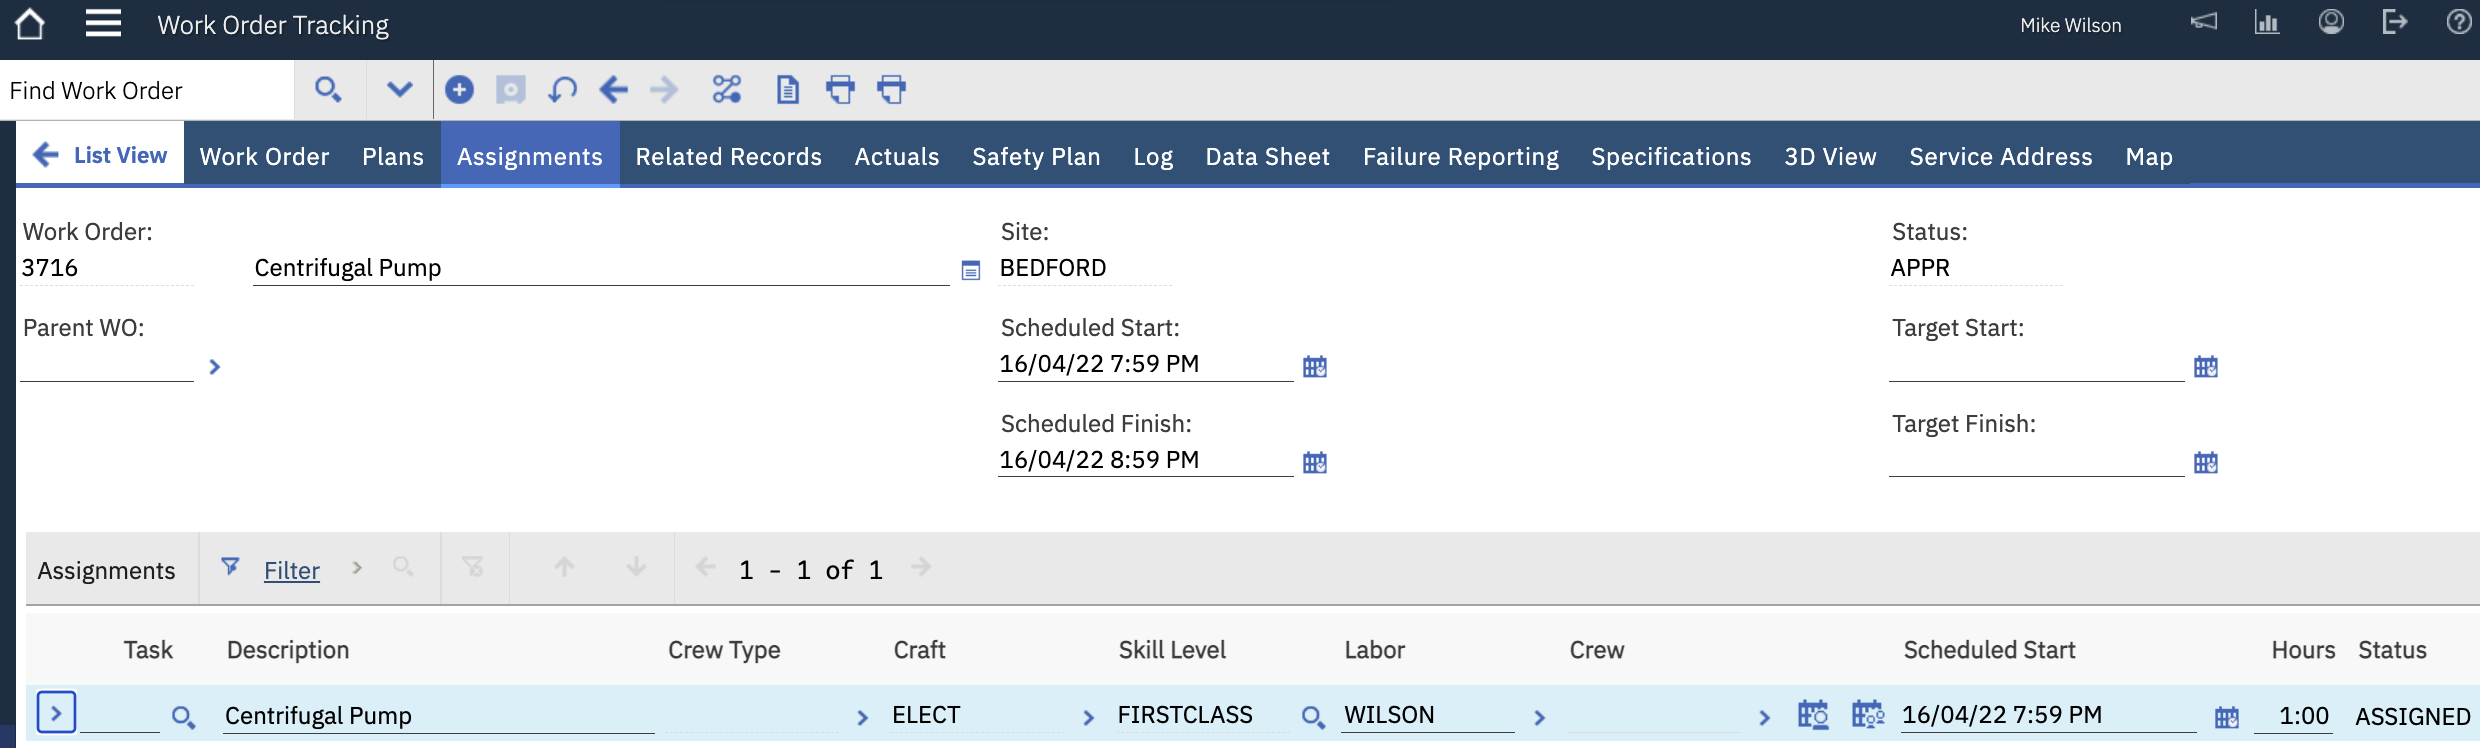
6) Go to Work Order Tracking application and create a new work order
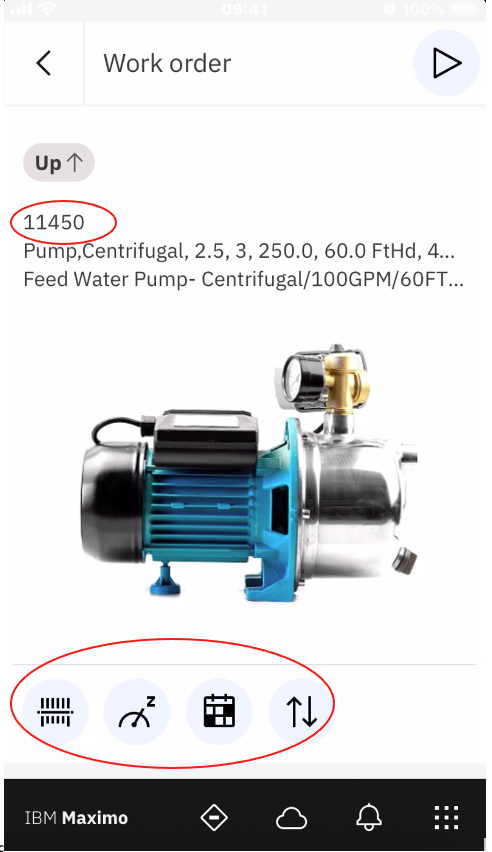
Enter asset 11450
7) Go to Assignments tab
Enter a labor code for the mobile user in the labor field
Scheduled start defaults to the current date time
Approve the work order
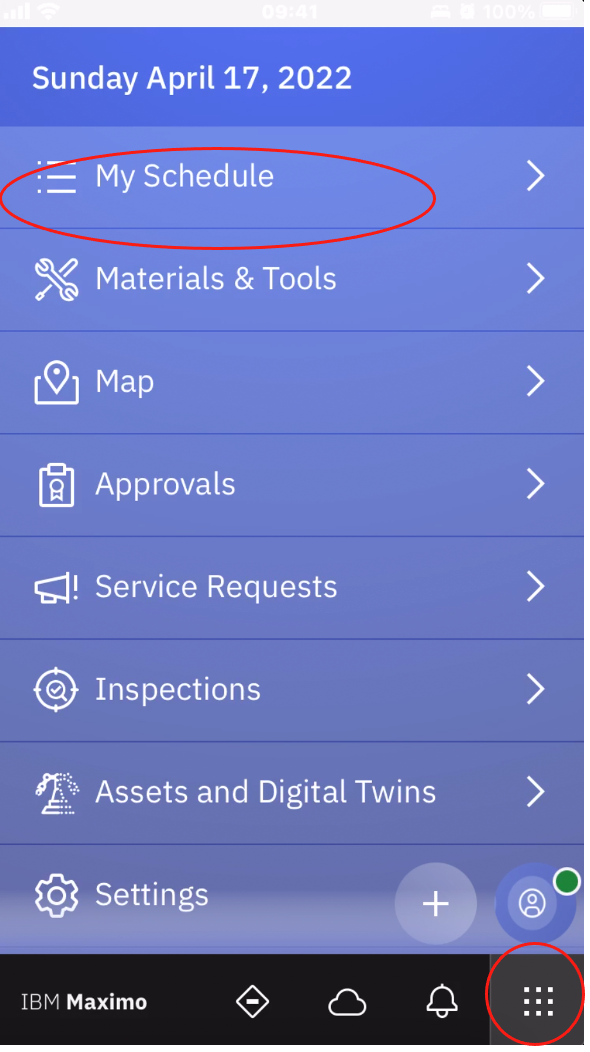
8) Go to a mobile device
Log in to Maximo Mobile application
Click the navigator button
Click "My Schedule" to go to the Technician application
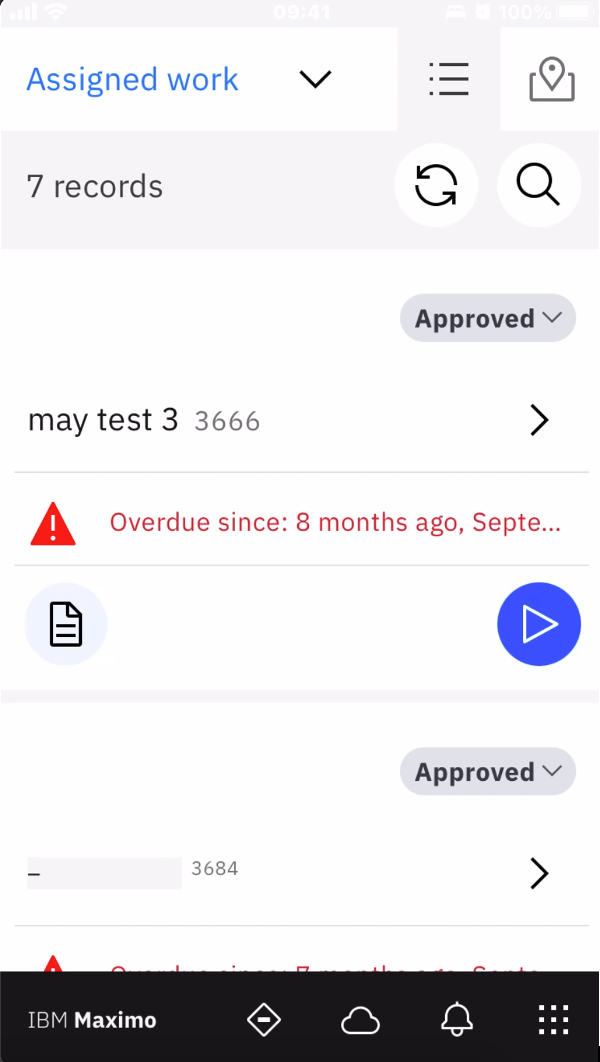
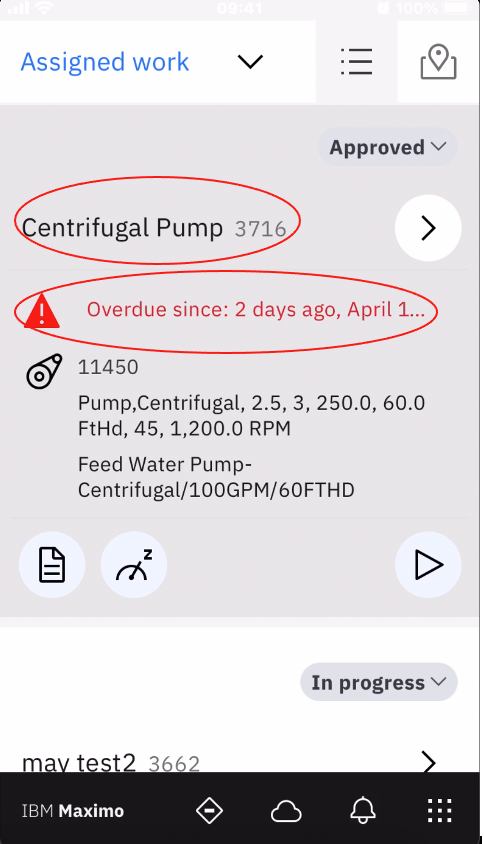
9) "Assigned work" display a list of work orders from running the ASSIGNEDWOLIST query
Search for a work order
1) Click the lookup icon
2) Either search by entering a work order number or click the barcode icon to scan in a work order
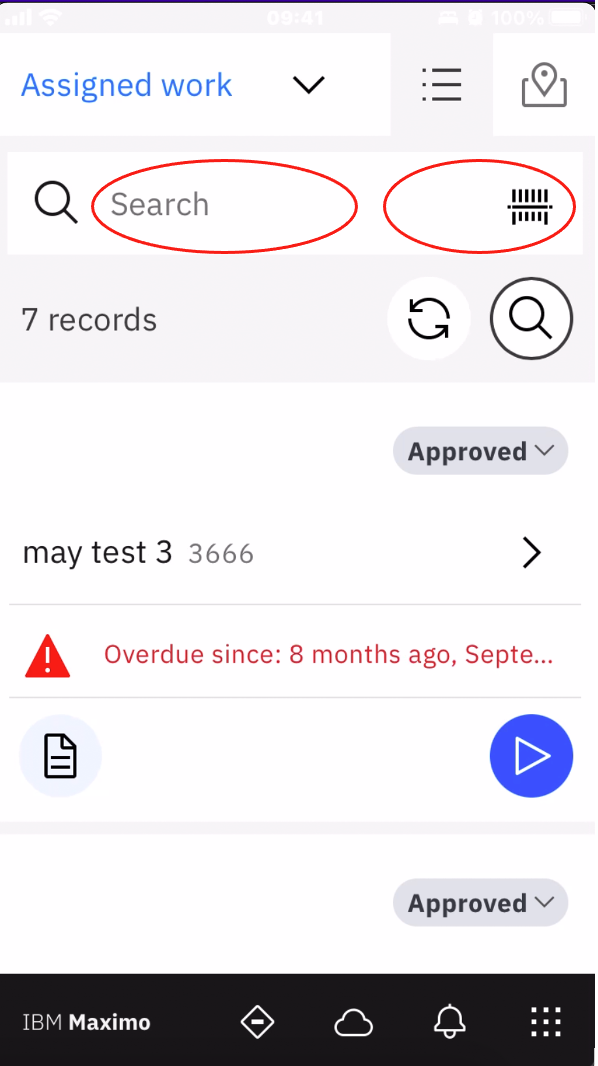
For example, enter work order 3716
Enter work order details
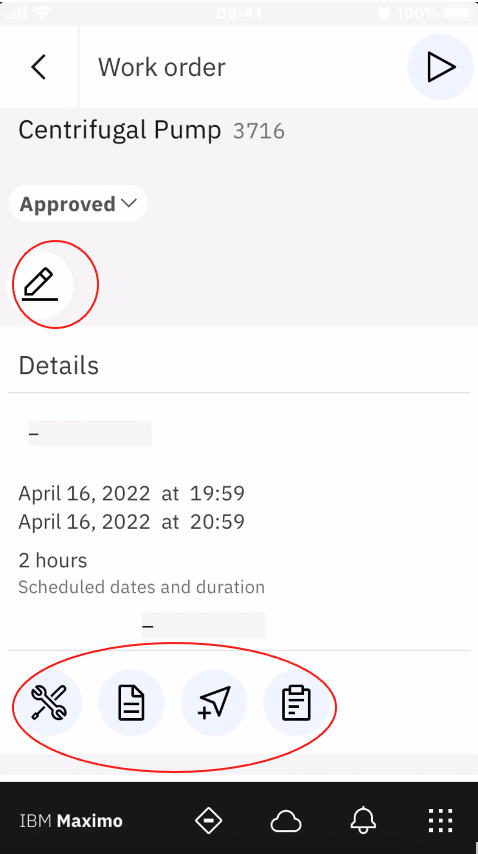
1) Click the work order to go to work order details screen
2) Click the pencil icon to edit work order details
For example, description, priority, schedule start date, and scheduled finish date, duration, work type, asset, location
- Click the wrench icon to get reserved items or request materials
- Click the paper icon to create work log
- Click the location icon to capture device location
- Click the clipboard icon to report failure or edit labor, materials, tools
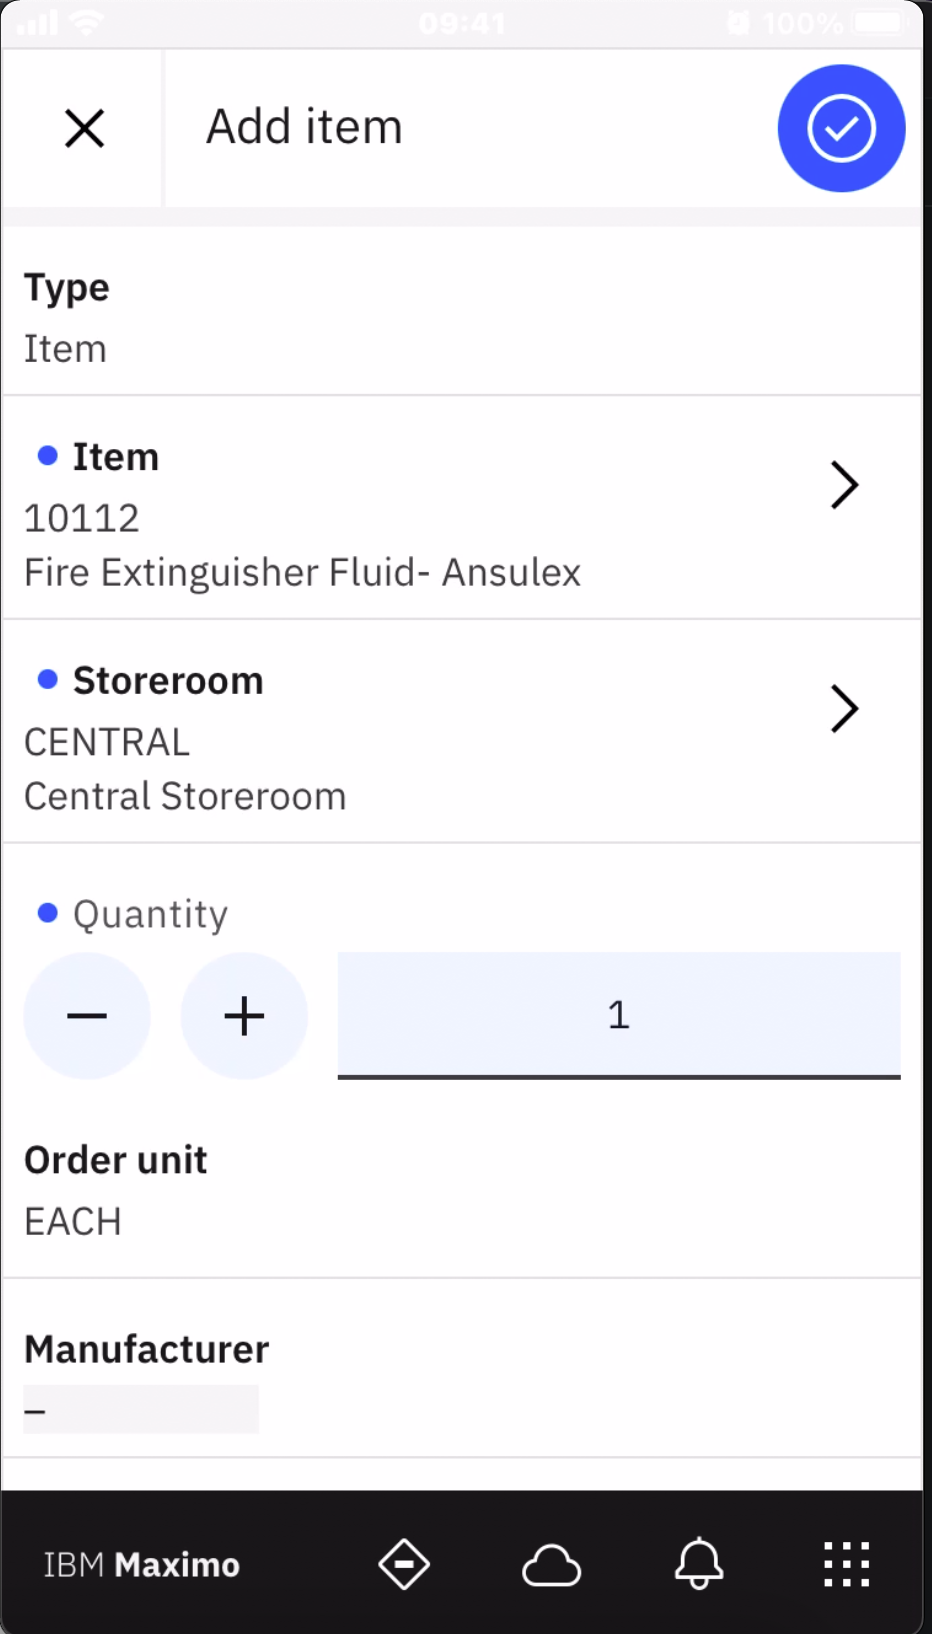
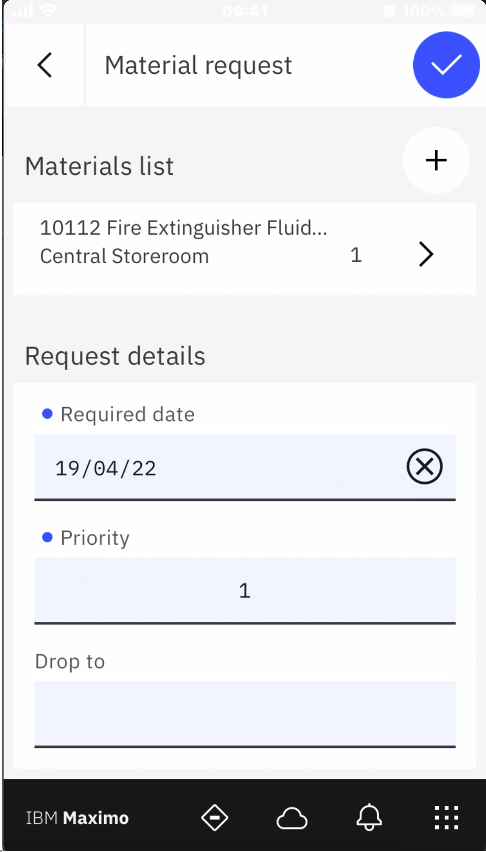
3) Click the wrench icon and select request materials
Enter item, storeroom information, quantity
Click the blue button
Enter date and priority
Click the blue button
4) Go back to the work order details screen
5) Go to "Asset and location" section
- Click the Scanner icon to scan an asset
- Click the Meter icon to enter meter reading
- Click the Calendar icon to review Asset and location history
- Click the up or down arrow icon to report asset down time
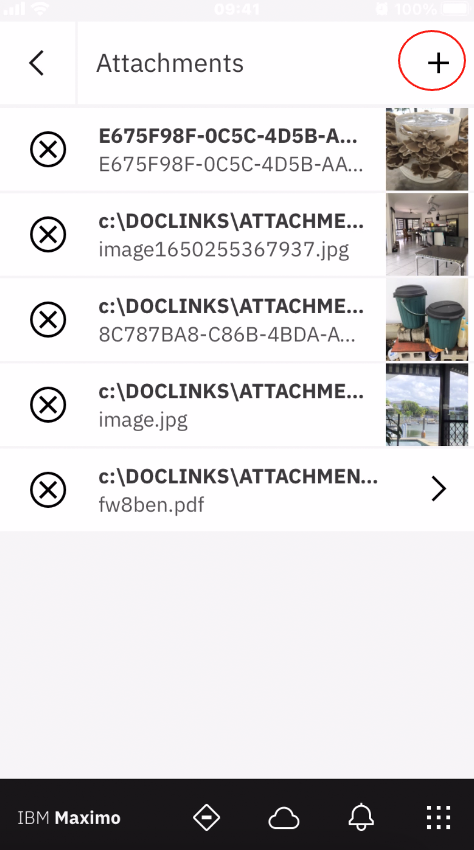
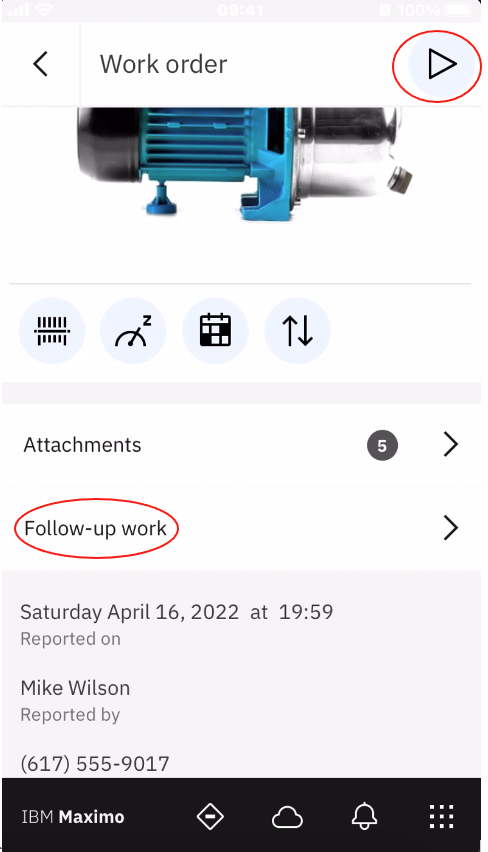
6) Click Attachments
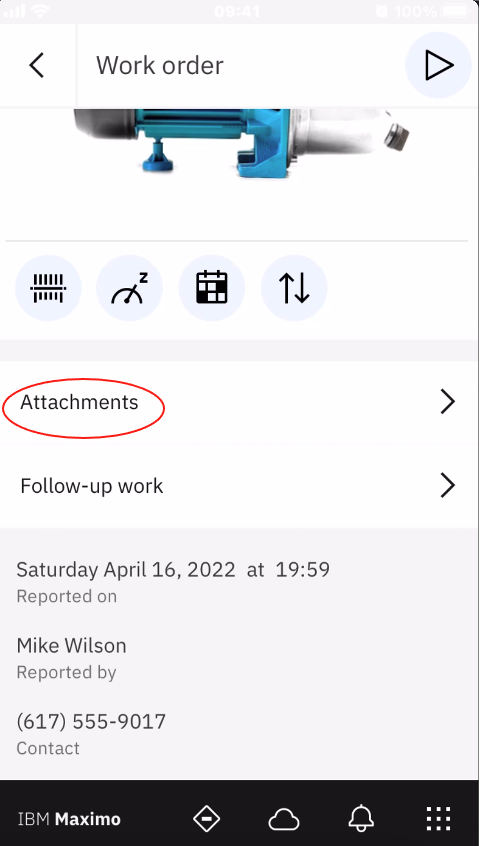
Click the + icon to attach photo from the Photo Library, or take Photo or Video, or choose a file to attach to the work order
7) Click the previous button to return to the work order details screen
8) Click Follow-up work to create a follow-up work order
9) Click the arrow to start the work order
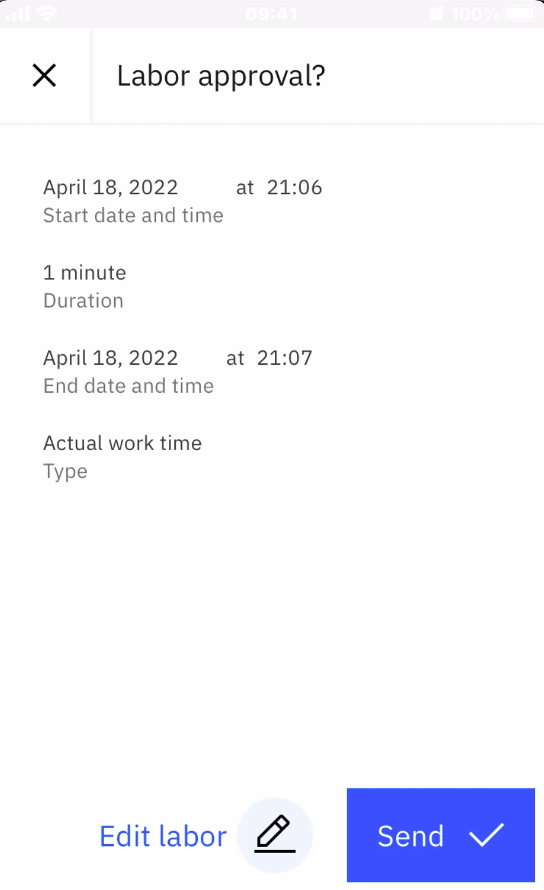
10) Click the stop button after completing work
- Click the Send button to send labor hours to Maximo (desktop) as actual labor hours
- Click the Edit labor to correct labor hours
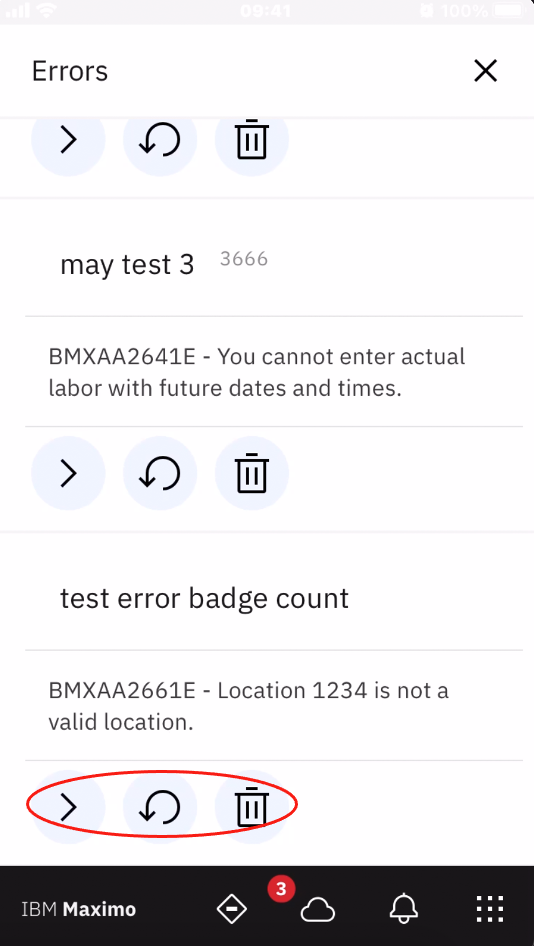
11) If there is any error with the transaction, error screen shows a badge count in the error screen
- Click the return icon to return to the problem record.
- Click the undo icon to undo the change.
- Click the trash can icon to delete the transaction
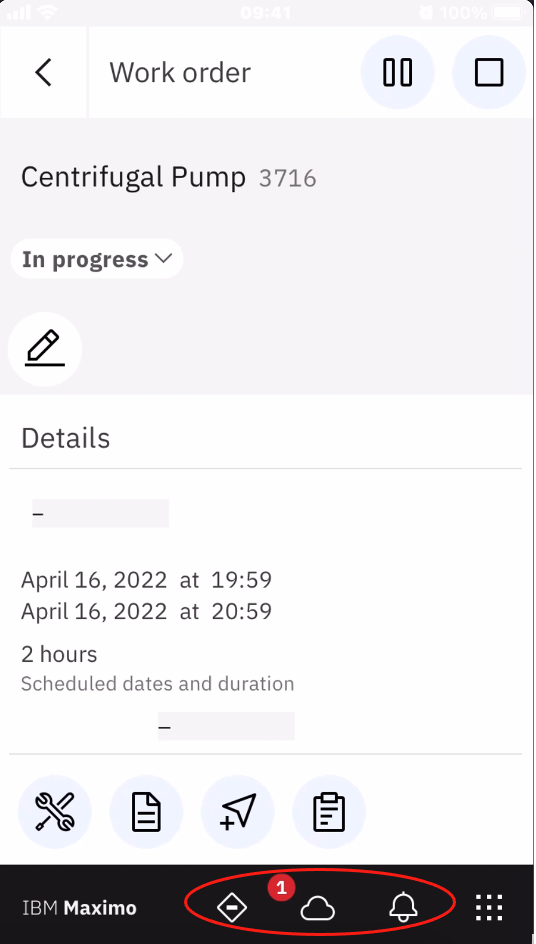
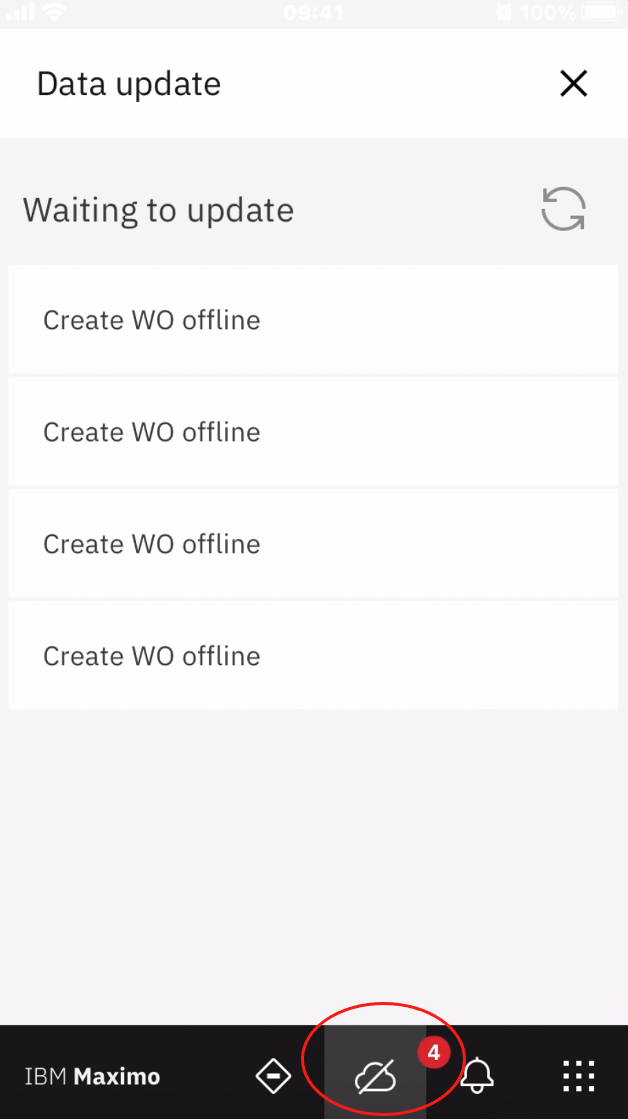
- Cloud symbol shows that the user is online
- Cloud symbol with a cross shows that the user is offline
Click the cloud symbol to view transactions queued up to be synchronized to Maximo
Troubleshooting
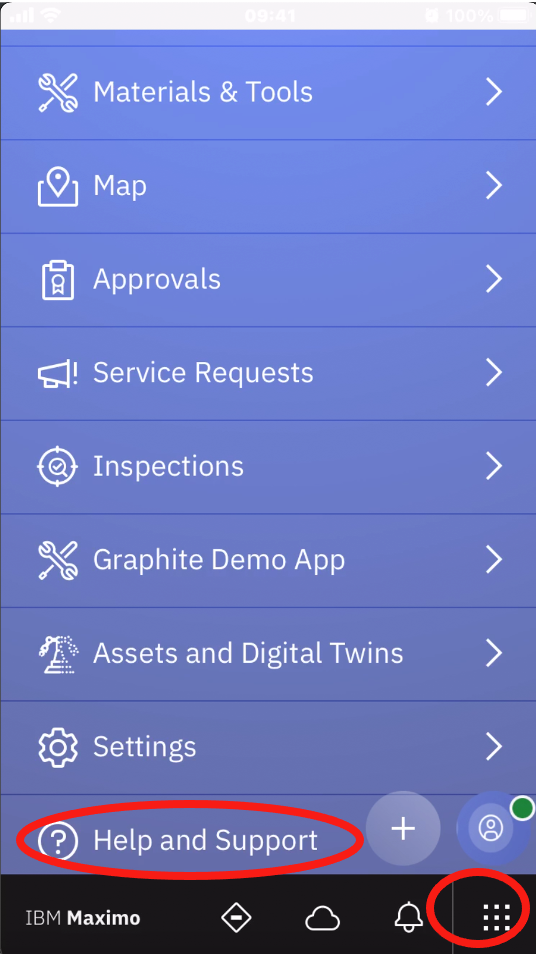
1) Click Navigator button
2) Click Help and Support
3) Click Log Data
4) Enable debug logging
5) Click the send button to share the debug log by email or any of the installed mobile applications

Role based Technician application
1) Go to Work Orders module
2) Select Role Based Applications
3) Select Technician application
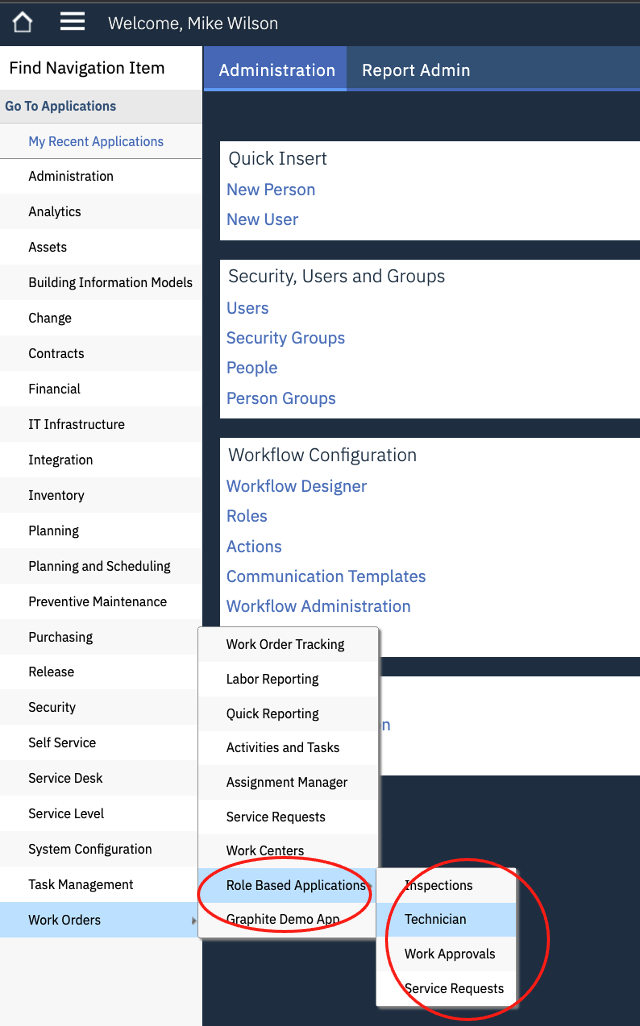
Technician application is web based version of mobile application
Related Information
Document Location
Worldwide
[{"Line of Business":{"code":"LOB59","label":"Sustainability Software"},"Business Unit":{"code":"BU059","label":"IBM Software w\/o TPS"},"Product":{"code":"SSRHPA","label":"IBM Maximo Application Suite"},"ARM Category":[{"code":"a8m50000000CbH1AAK","label":"Maximo Mobility"}],"Platform":[{"code":"PF025","label":"Platform Independent"}],"Version":"All Versions","Type":"MASTER"}]
Was this topic helpful?
Document Information
Modified date:
01 September 2022
UID
ibm16569187