How To
Summary
This document will cover how to capture backups, import, export, and restore VIOS config backups and VIOS server backups.
Objective
There are two types of backups on the HMC:
- The VIOS I/O configuration (Virtual I/O Server Configuration Backup)
- The VIOS image (Virtual I/O Server Backup)
Once a backup is taken, you may want to save the backup off the HMC or restore a backup for various reason.
Environment
HMC Version 9
HMC Version 10
Steps
Virtual I/O Server Backup
Capturing:
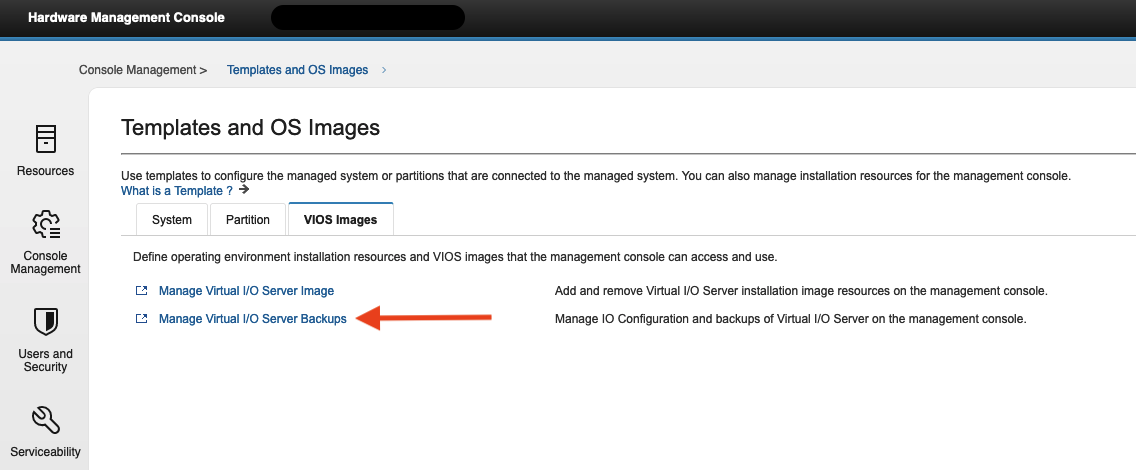
- In the navigation area, click the HMC Management icon, and then select Templates and OS Images. From the Templates and OS Images window, select the VIOS Images tab, and then click Manage Virtual I/O Server Backups.
- In the Manage Virtual I/O Server Backups window, click the Virtual I/O Server Backup tab. A table is displayed that list all the VIOS image backups that are on the HMC.
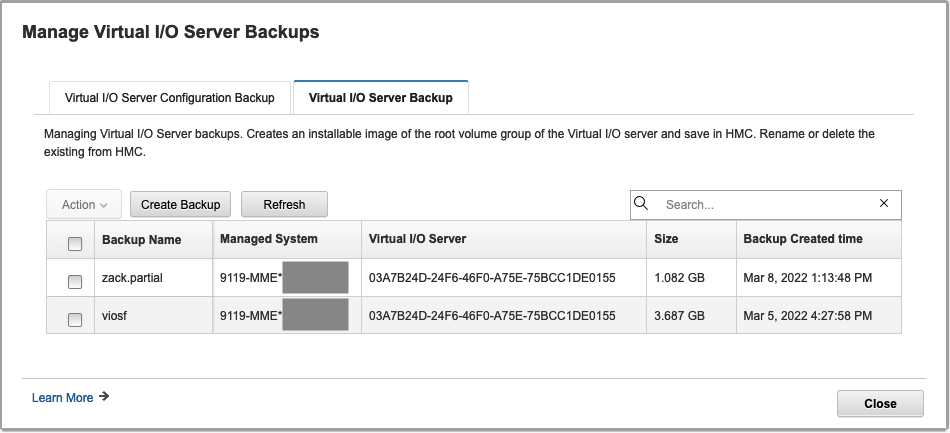
- To take the backup of the VIOS image, click Create Backup. In the Create Backup window, select the managed system and the VIOS for which the back up is created, and then specify a name for the backup file.
- The name you specify must consist of 1 - 40 characters including file extension .tar. You can use the characters A - Z and a - z, the numbers of 0 - 9, the dot (.), the dash (-) and the underscore (_) characters.
Renaming:
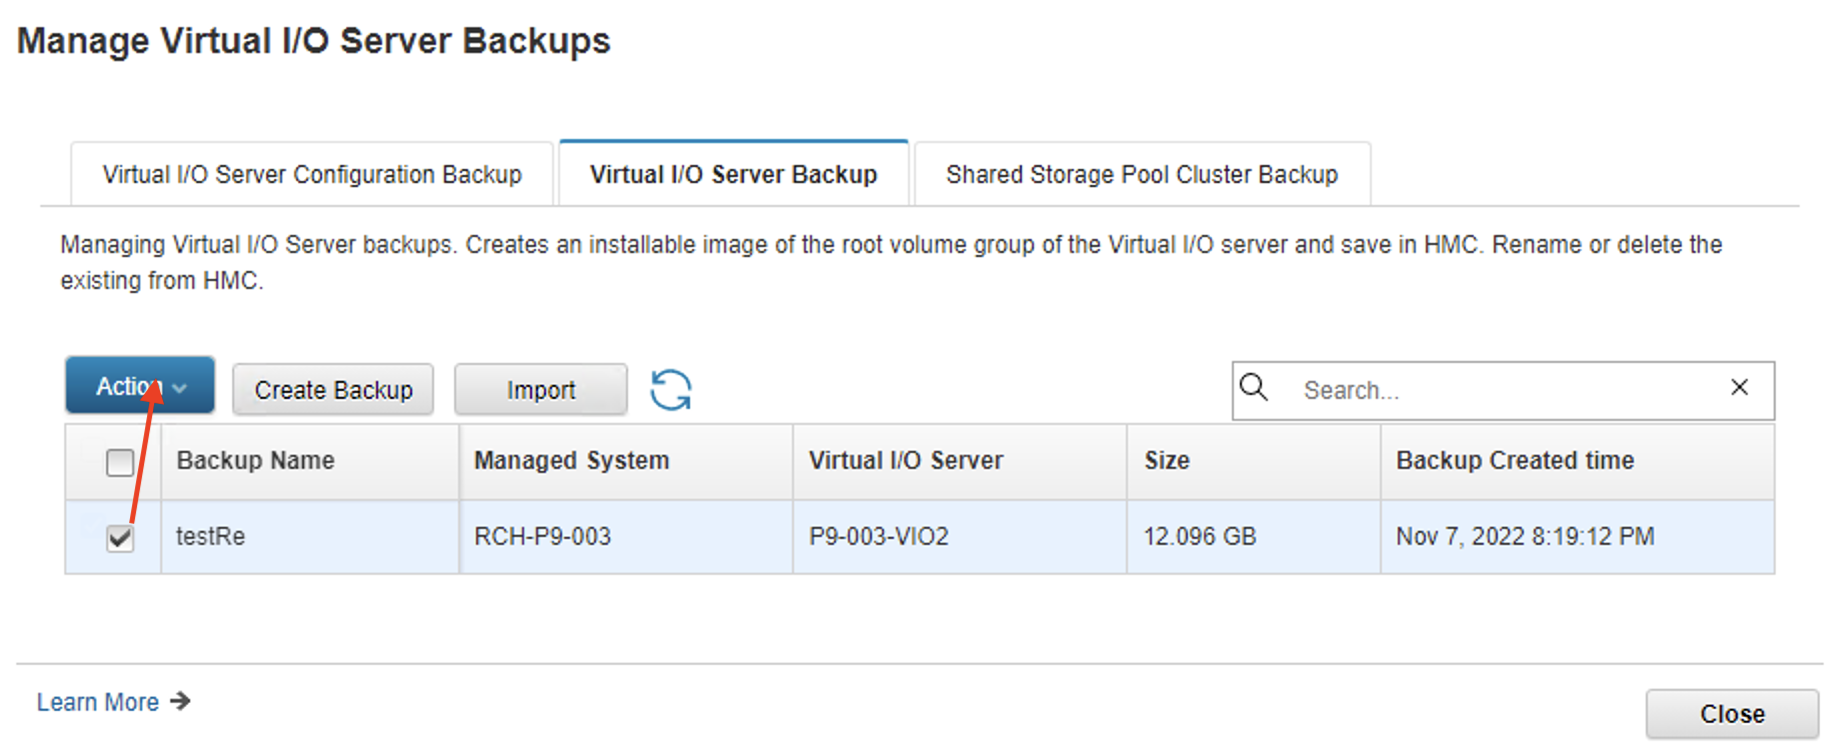
- To rename an existing backup file that is stored in the HMC, select a configuration file from the table and click Action > Rename.
Restoring:
- Restoring a Virtual I/O Server Backup from the HMC's backup menu is not supported at this time. The command installios can restore the .tar backups from the HMC. The syntax for the installios command to restore backups from the HMC is:
installios -p <VIOS name> -i <client IP> -S <subnet mask> -g <gateway> -d <path to backup> -s <managed system> -m <MAC Address> -r <Profile Name> -A <eth port> -V <vlan tag ID> -Y <vlan tag pri>
- Note* The VIOS will need to be created on the HMC before starting the installios operation so that a profile can be specified. This is similar to installing a VIOS from the GUI, the first step is to create the LPAR( which creates a default profile). Then install the vios using those resources selected for the profile.
- The options -V and -Y are optional.
- Example command:
installios -p vios1 -i 9.x.x.x -S 255.255.252.0 -g 9.x.x.x -d /data/viosbackup/8286-42A\*1234567/625A3262-8805-4AE2-95EB-5322C5BDA5CB/VIOS_3.1.2.21.tar -s mySystem -m 6c:ae:8b:01:ee:2c -r default_profile -A eth0 -V 0 -Y 0
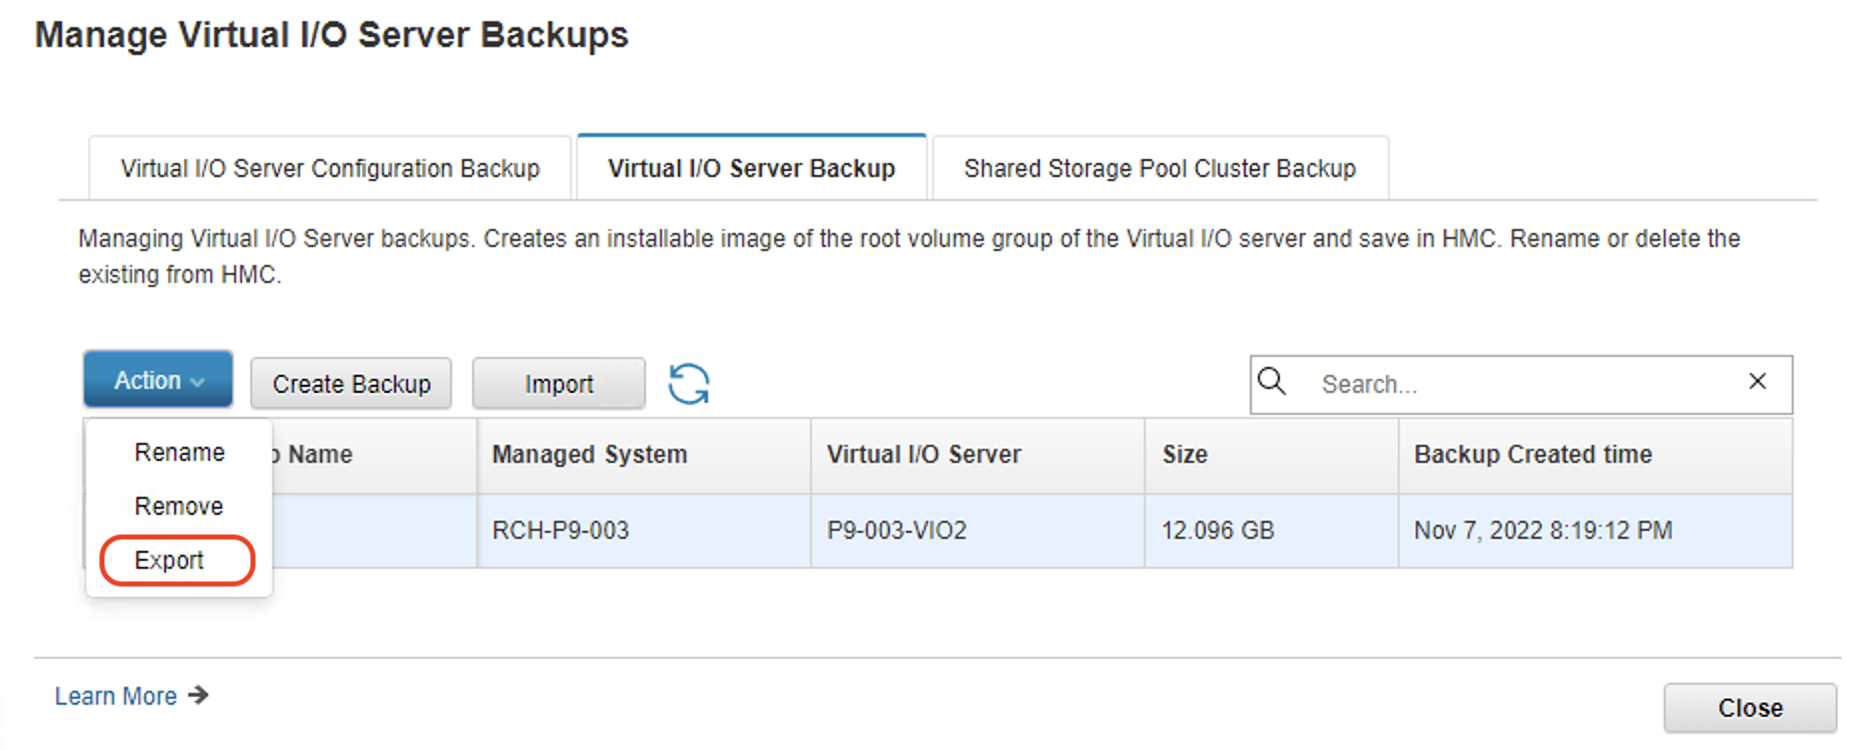
Exporting:
- To export the data first verify that there are files by opening an ssh session to the HMC as the hscroot user.
- In version 10, two commands were added with the addition of backups (lsviobk and cpviobk).
- The backups can be listed using lsviosbk.
- Use cpviosbk to send the file from the HMC to your own server.
- In v10 you can use the GUI to export the backup
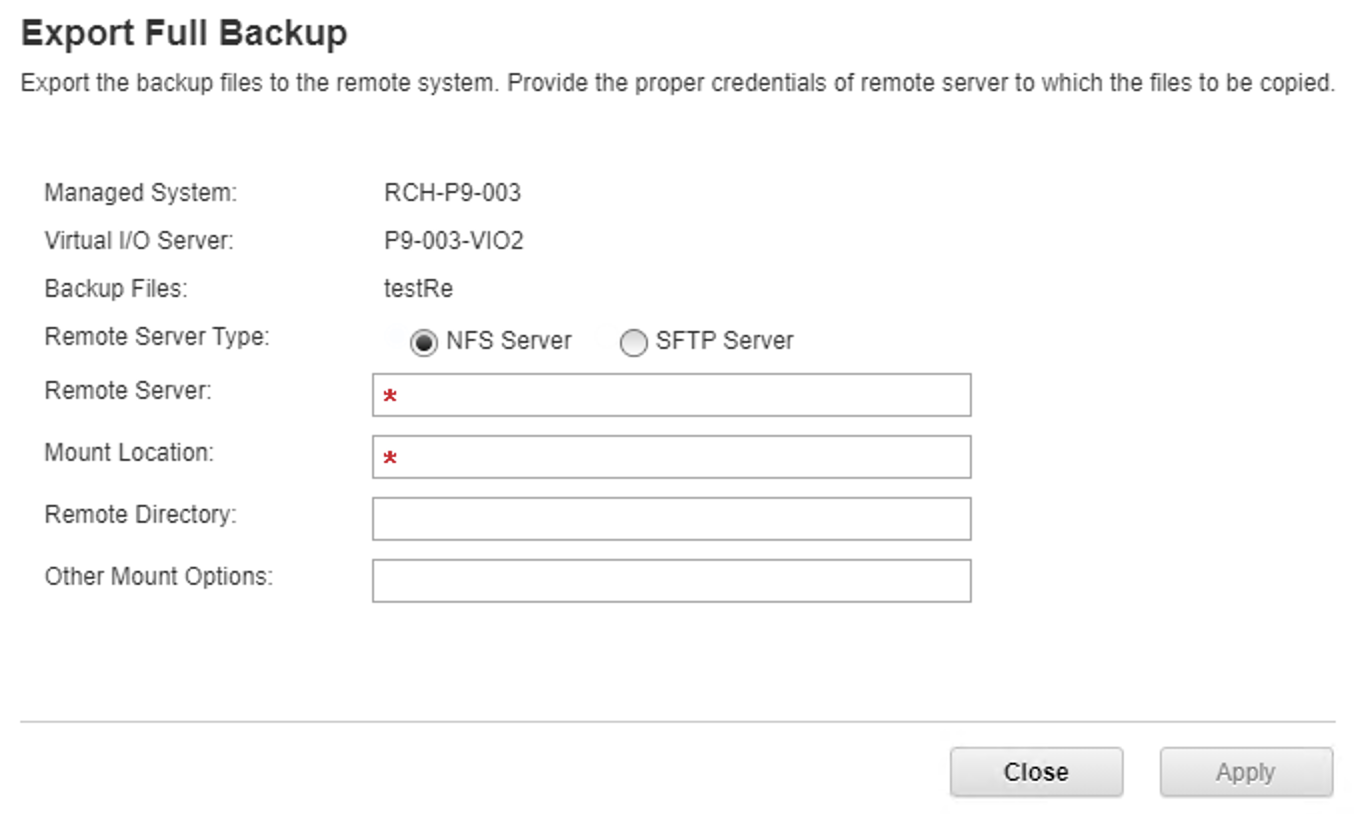
- The two supported methods are NFS and SFTP.
- Invalid inputs into remote directory may result in internal errors.
- If the file is no longer needed, remove it using the GUI or with rmviosbk
Importing:
- Starting in v10, the import option is avail in the GUI along with the command cpviosbk
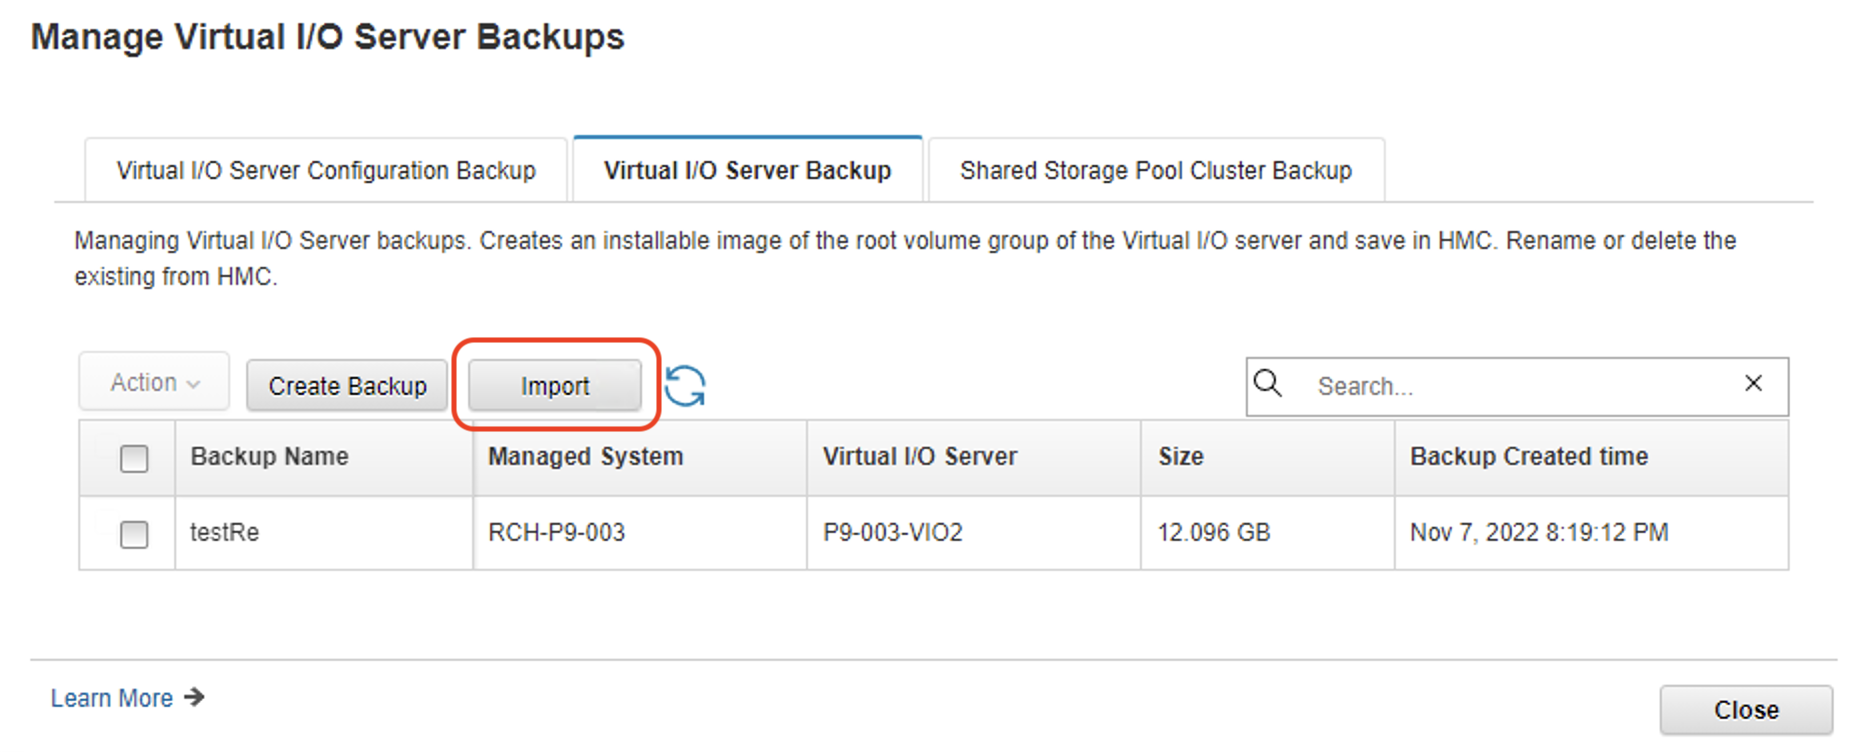
- The two supported methods are NFS and SFTP.
- Invalid inputs into remote directory may result in internal errors.

Virtual I/O Server Configuration Backup
Capturing:
- In the navigation area, click the HMC Management icon, and then select Templates and OS Images. From the Templates and OS Images window, select the VIOS Images tab, and then click Manage Virtual I/O Server Backups.

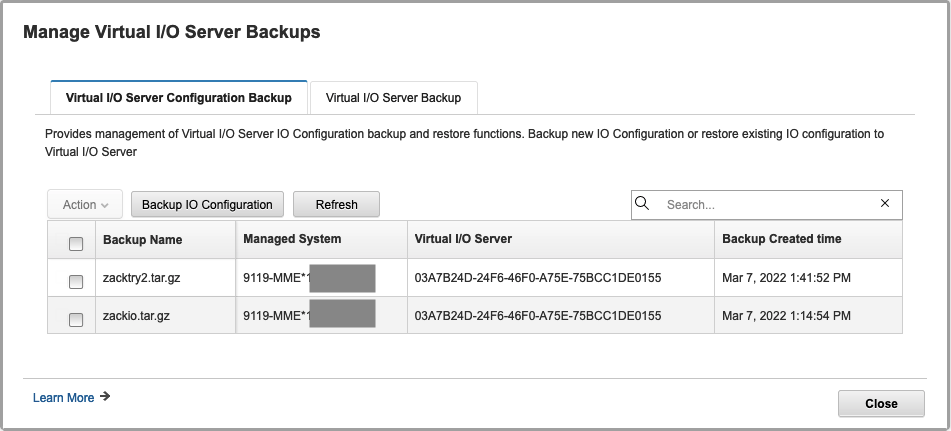
- In the Manage Virtual I/O Server Backups window, select the Virtual I/O Server Configuration Backup tab. A table is displayed that lists all the backup files of the VIOS configuration that is taken by the HMC.
- To take the backup of the input/output configuration of a VIOS, click Backup I/O configuration. In the Backup I/O configuration window, select the managed system and the VIOS for which the back up is created, and then specify a name for the backup file.
- The name you specify must consist of 1 - 40 characters including file extension .tar.gz. You can use the characters A - Z and a - z, the numbers of 0 - 9, the dot (.), the dash (-) and the underscore (_) characters.
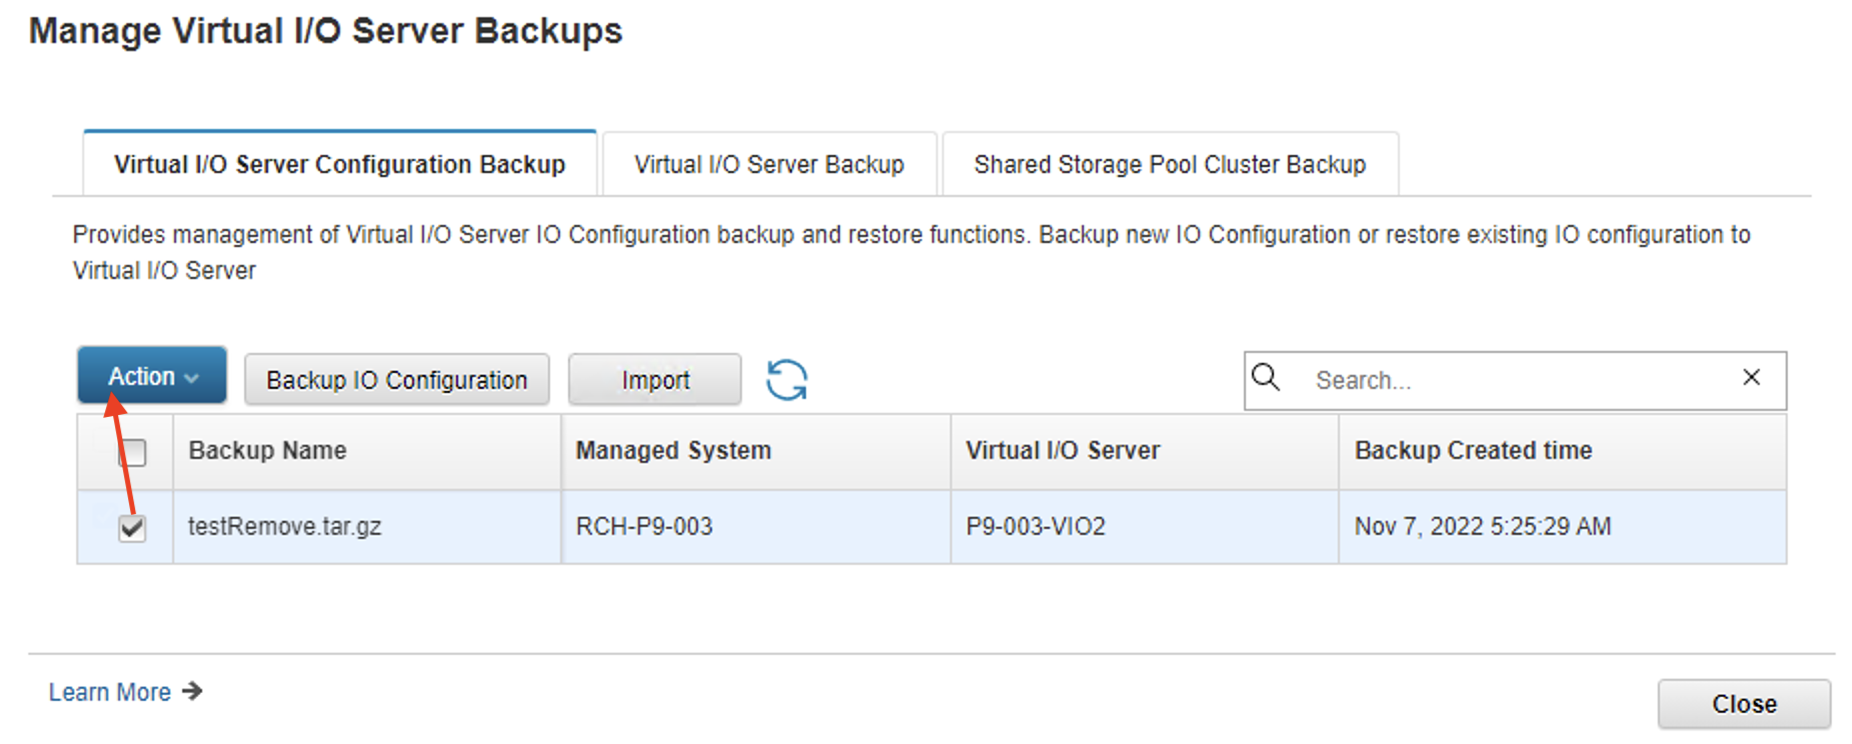
Renaming:
- To rename an existing backup file that is stored in the HMC, select a configuration file from the table and click Action > Rename.
Restoring:
- To restore the VIOS input/output configuration, select a backup file which contains the I/O configuration of the VIOS that you want to restore, and click Action > Restore.
- Use the cli command rstviosbk.
Exporting:
- To export the data first verify that there are files by opening an ssh session to the HMC as the hscroot user.
- In version 10, two commands were added with the addition of backups (lsviobk and cpviobk).
- The backups can be listed using lsviosbk.
- Use cpviosbk to send the file from the HMC to your own server.
- In v10 you can use the GUI to export the backup.
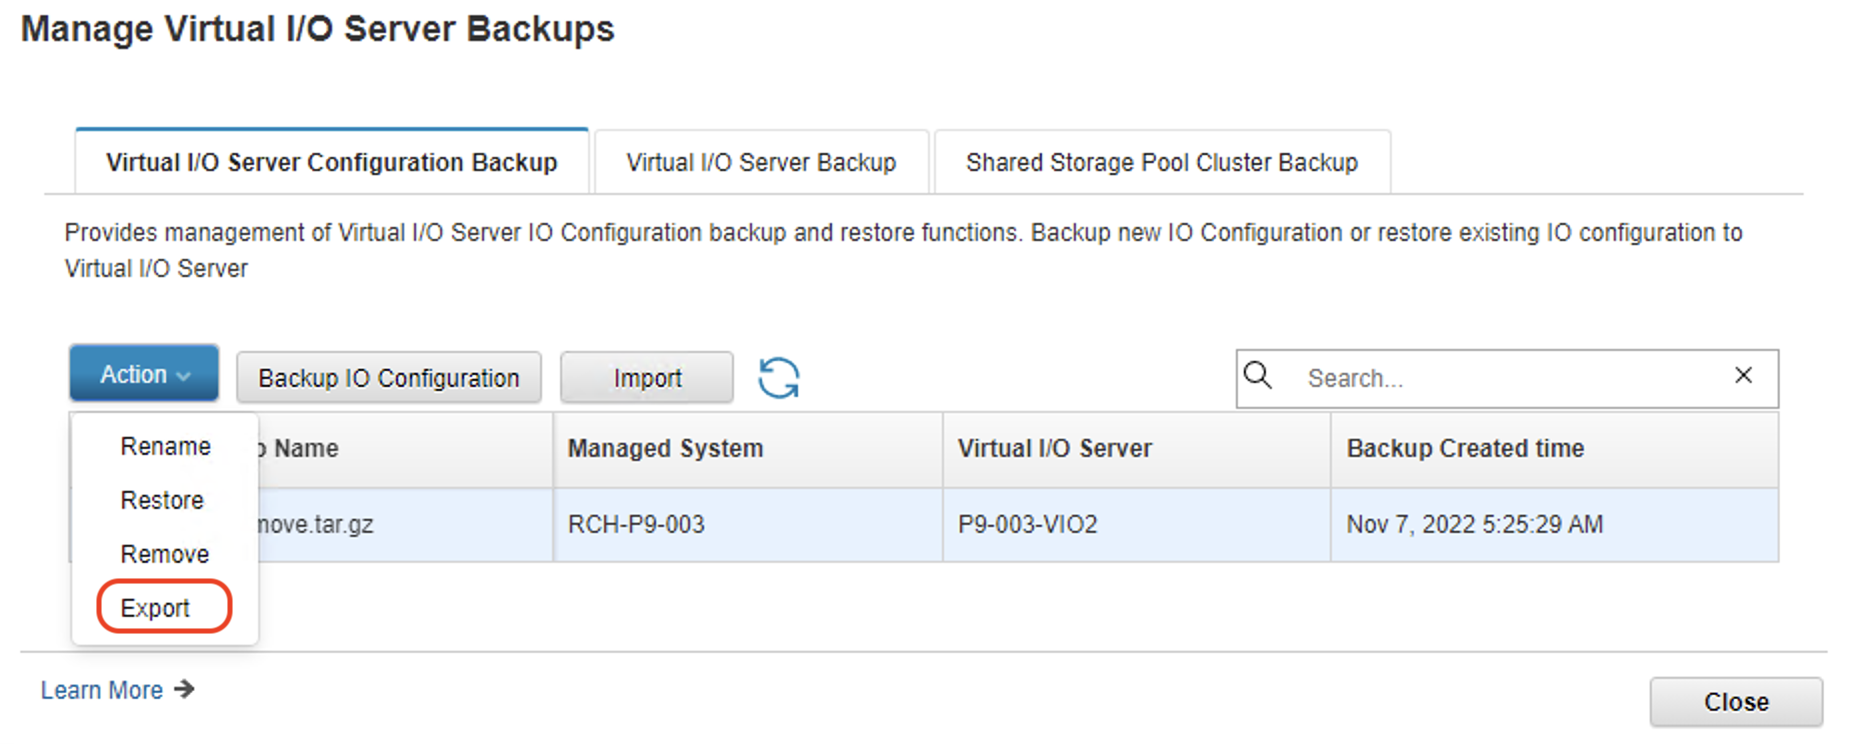
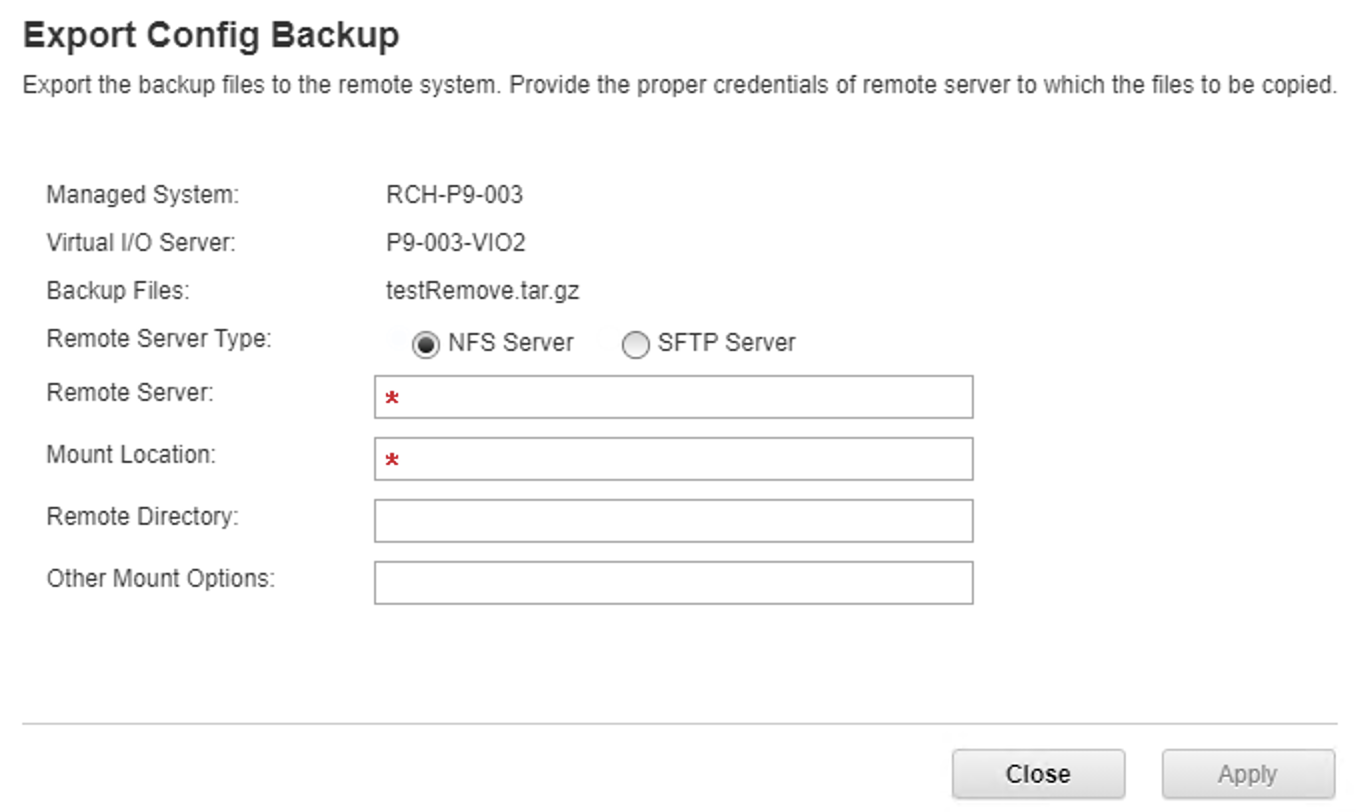
- The two supported methods are NFS and SFTP.
- Invalid inputs into remote directory may result in internal errors.
- If the file is no longer needed, remove it using the GUI or with rmviosbk
Importing:
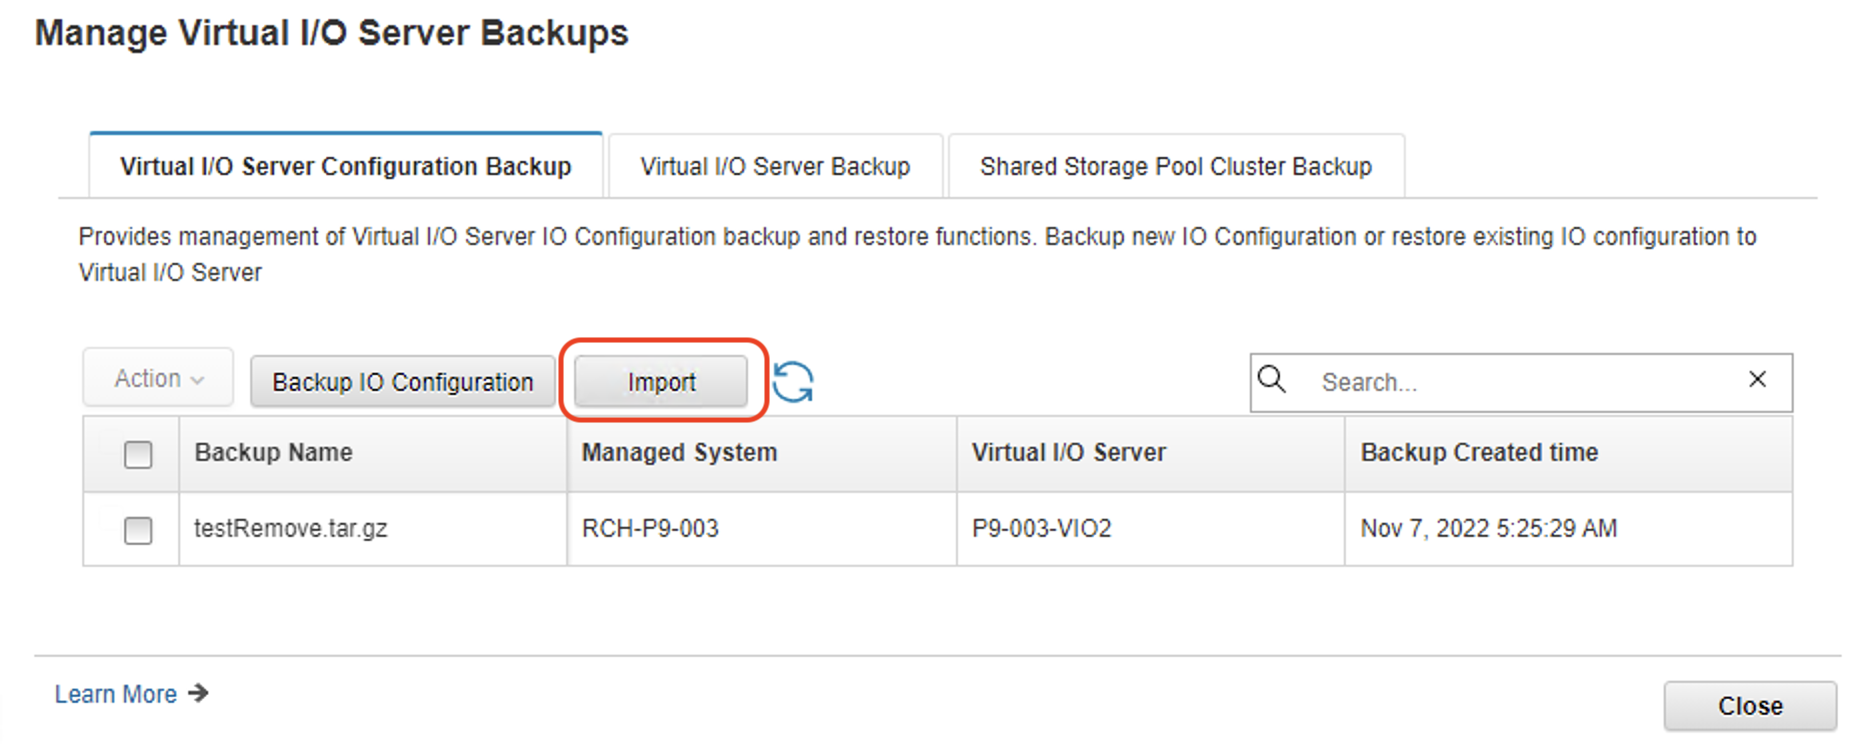
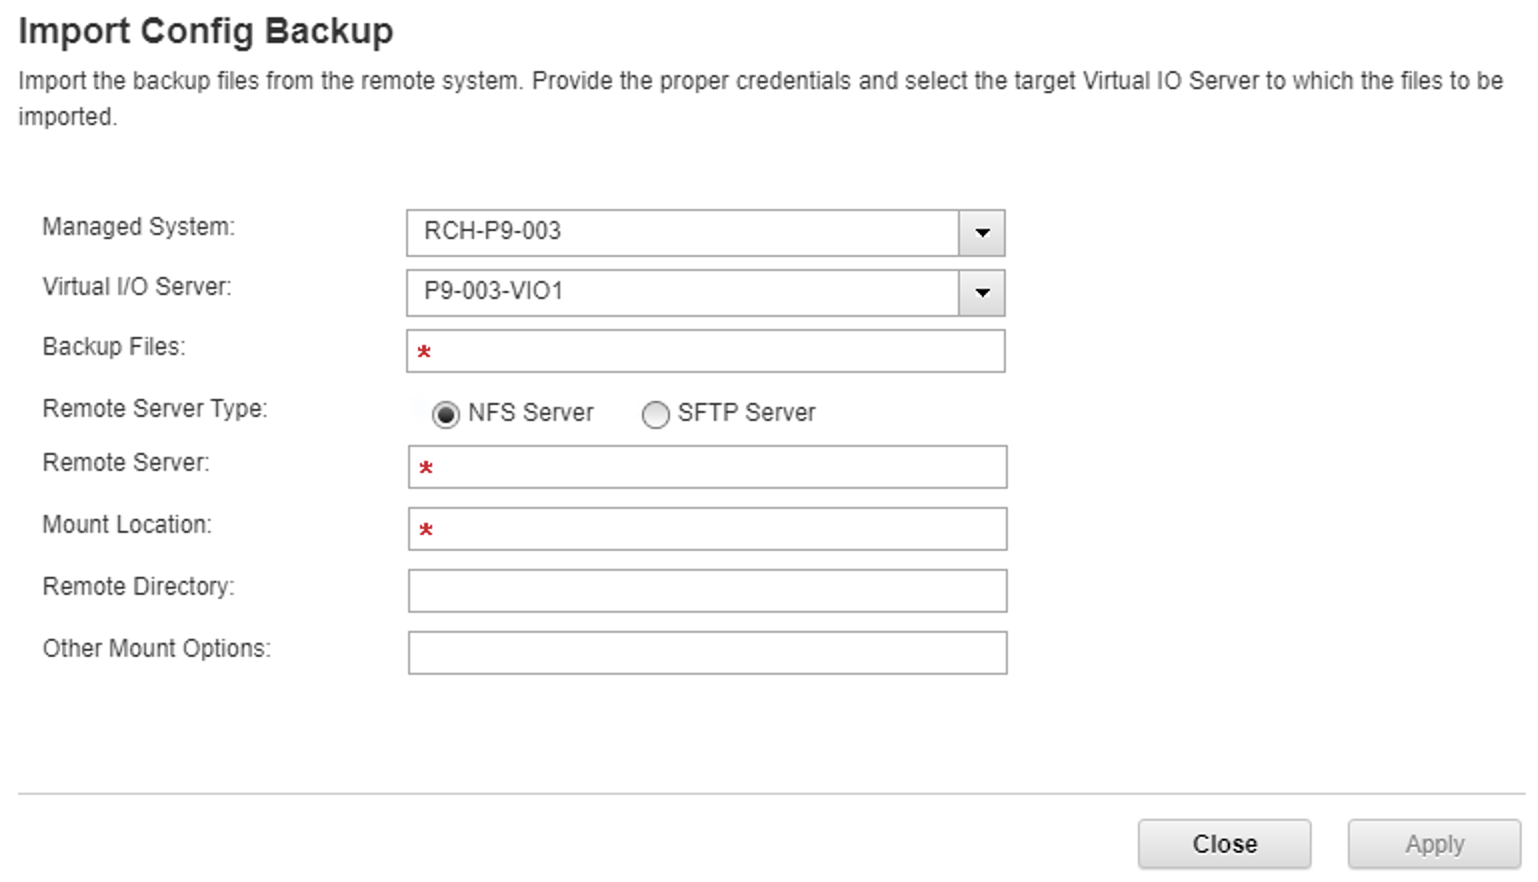
- Starting in v10, the import option is avail in the GUI along with the command cpviosbk
- The two supported methods are NFS and SFTP.
- Invalid inputs into remote directory may result in internal errors.
Additional Information
VIOS Maintenance Validation and Backup/restore: https://community.ibm.com/community/user/power/blogs/manjunath-shanbhag1/2021/04/16/vios-maintenance-validation-and-backuprestore
Document Location
Worldwide
[{"Type":"MASTER","Line of Business":{"code":"LOB57","label":"Power"},"Business Unit":{"code":"BU058","label":"IBM Infrastructure w\/TPS"},"Product":{"code":"SGGSNP","label":"Hardware Management Console V9"},"ARM Category":[{"code":"a8m0z000000bowEAAQ","label":"Hardware Management Console"}],"ARM Case Number":"TS008886221","Platform":[{"code":"PF025","label":"Platform Independent"}],"Version":"All Versions"},{"Type":"MASTER","Line of Business":{"code":"LOB08","label":"Cognitive Systems"},"Business Unit":{"code":"BU054","label":"Systems w\/TPS"},"Product":{"code":"SSOQ2E","label":"Hardware Management Console V10"},"ARM Category":[{"code":"a8m0z0000001jEzAAI","label":"HMC Enhanced UI"}],"Platform":[{"code":"PF025","label":"Platform Independent"}],"Version":"10.1.0"}]
Was this topic helpful?
Document Information
Modified date:
07 March 2024
UID
ibm16567231