News
Abstract
The Navigator interface is designed to provide a single place for a user to access, monitor, and manage many individual IBM i endpoint nodes.
Content
You are in: IBM i Technology Updates > Navigator for i > Managing Multiple Endpoint Nodes
The Navigator interface is designed to provide a single place for users to register many IBM i endpoint nodes to allow for easy access, monitoring, and management.
The dashboard is the starting place for registering specific endpoint IBM i nodes.
- Managing Nodes and the System Tray
- System Tray Usage Notes
- Multiple Node Best Practices
- Load group PTFs on endpoint nodes
Adding an Endpoint Node
There are two different views of the dashboard that you can choose to use:
- Tile view (default)
- List view

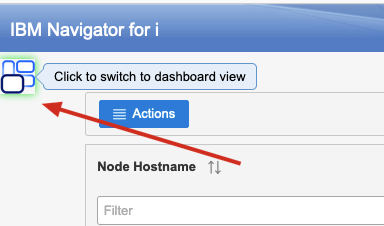
You can manually toggle between the two views by clicking the upper-left icon or setting the default in Connection Properties. To change the dashboard default view, hover over the serviceability menu list and select Connection Properties.
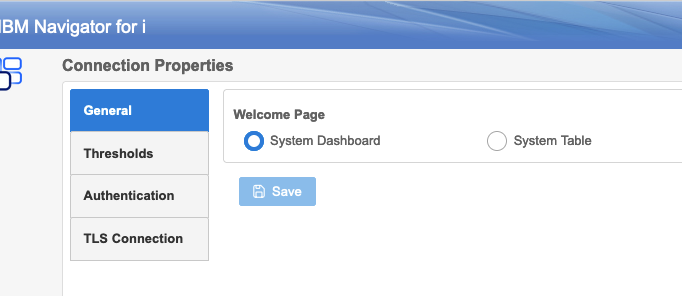
Select the 'General' tab on the left side to choose the dashboard view you would like to have for your (this signed-in user) default view.
Tile View
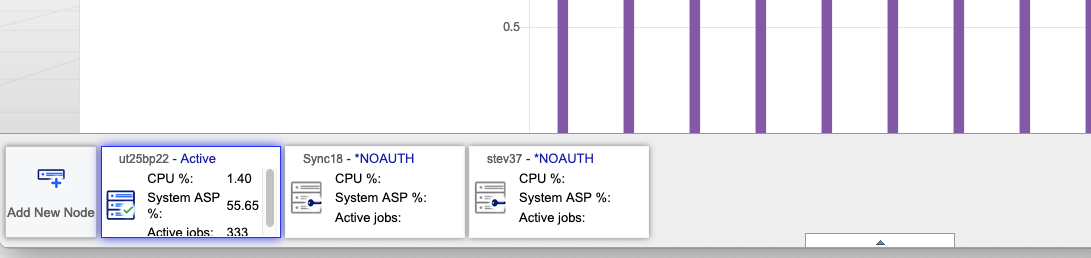
There are several ways to add new endpoint nodes to the dashboard. Right-click a tile and select the "Add New Node" action or click the "Add New Node" left menu action:

The order of the endpoint nodes on the dashboard can easily be changed by clicking and holding on a tile and then dragging it and dropping it to a new location.
List View
Another is from the dashboard list view. Click the "Actions" button and select the "Add New Node" action.
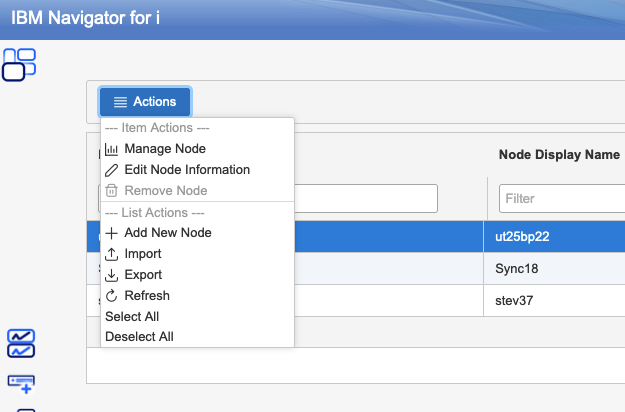
Note: Import and export are also supported from the list view as another way to add new endpoint nodes to the list.
Managing Nodes and the System Tray
Once you have a list of endpoint nodes defined, there are flexible ways to interact with these endpoints.
If you are managing a specific endpoint, you can easily change to a new endpoint in two ways: either by going back to the dashboard and clicking a different endpoint OR by opening the system tray and double-clicking another endpoint node.
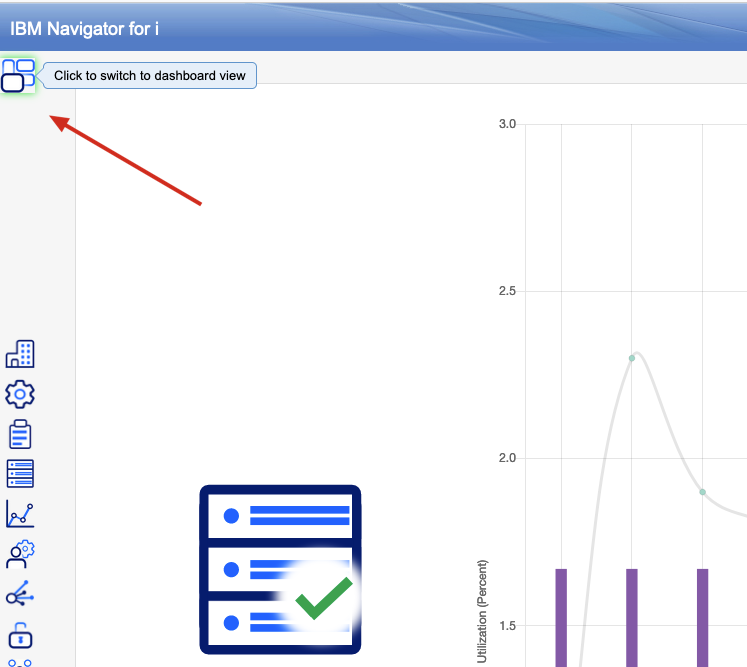
When you are managing a node, the dashboard can always be displayed by clicking the icon in the upper left.
The system tray is at the bottom of the manage node interface where you find a small gray arrow.

Either hover over OR click the icon to expand the system tray and see any already registered IBM i endpoint nodes
Double-click the system you want to manage. In the above example, we are using the prompt-on-first-touch authorization method. This prompting method means that you need to supply the user profile and password for the selected endpoint node when you double-click. If you are using one of the other authorization methods, double-click takes you directly to that endpoint.
For more information on authorization, see Access Authorization Options.
Note: the page displayed when you switch to a new endpoint remains the page in view. The data being shown is updated to reflect the data from that selected endpoint.
For example, if you first open the "Active Jobs" page to see data for node A, you will see the active jobs for node A. When you then double-click "node B" from the system tray, the Active Jobs page would remain in view, but the active jobs shown is now for node B.
Look at the selected system in the upper-right area of the title bar to determine which node is being displayed.

You can also add new nodes to manage from the system tray by clicking the "Add New Node" action on the far left.
System Tray Usage Notes
The order of the endpoint nodes in the system tray is the same order as they are displayed on the dashboard. To change the order, first open one of the dashboard views (Tile or List), then drag the system to change to the chosen order. New endpoints are always added to the end of the list.
If you hover over the "System Tray" icon, the system tray opens and stays open only while the mouse is focused in that location. Once you double-click a new node, or move the mouse outside of that focus area, the system tray closes.
Within the opened system tray, scroll left and right to see all the endpoint nodes registered.
If you click the system tray icon, the system tray toggles between closed and open. Clicking the system tray icon causes the tray to remain as toggled even if the mouse is not in the system tray focus area. To close the system tray, click the system tray icon again to toggle to the closed position.
Multiple Node Best Practices
For each endpoint node, it is best to have the latest HTTP and Db2 for i PTF groups loaded and applied on each node.
The Navigator interface leverages the latest IBM i Services support; and if an updated service is not available on the endpoint node, some functions will not work as expected. You may not see data returned that may be present on other nodes or you may receiver error messages indicating that support is missing.
Having the new Navigator PTF on an endpoint is also required for the Function Usage IDs.
The ADMIN1 server does not need to be running on an endpoint node for it to be managed using the IBM Navigator interface. You only need the ADMIN1 server running on the GUI node. From the managing GUI node, you can connect to all other nodes using the IBM Host Servers.
[{"Type":"MASTER","Line of Business":{"code":"LOB57","label":"Power"},"Business Unit":{"code":"BU058","label":"IBM Infrastructure w\/TPS"},"Product":{"code":"SWG60","label":"IBM i"},"ARM Category":[{"code":"a8m0z0000000CH1AAM","label":"IBM Navigator for i"}],"Platform":[{"code":"PF012","label":"IBM i"}],"Version":"7.3.0;7.4.0;and future releases"}]
Was this topic helpful?
Document Information
Modified date:
14 September 2021
UID
ibm16483555