How To
Summary
Customer would like to publish Controller data to Planning Analytics (PA - formerly known as 'TM1').
How do they do this?
Objective
Environment
- Controller 10.4.2
- Planning Analytics 2.0.8
- Microsoft SQL 2019
- Windows 2019 server
- The printscreens (shown below) assume that all components (Controller, PA and SQL) are installed on the same server
- This "All-in-one" server is not a recommended configuration for a production system. However, it is enough to demonstrate the general concepts related to installation/configuration of FAP.
- Using old (no longer supported) Controller 10.2.0 - see Technote 721265
- Oracle - see Technote 490785
Steps
- For example, users can logon using the Controller classic client.


- Make sure that your SQL login (for example 'fastnet' has db_owner rights to this database)
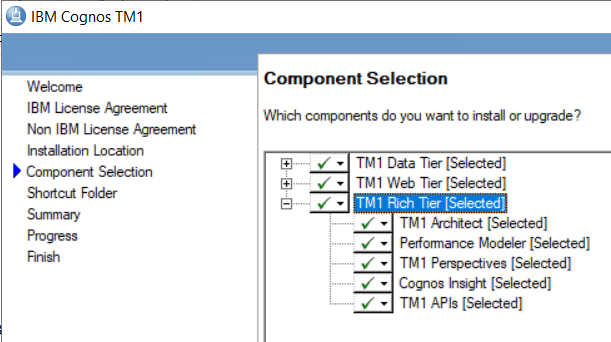
- Download and extract: PA_2.0.8_MICROSOFT_WINDOWS_ML.tar.gz
- Double-click on "issetup.exe"
- When asked, make sure you choose ALL the optional components:
- Create a folder to store your instance, for example: C:\TM1Data\FAP
- From the Start Menu, click "IBM Cognos TM1 - 64" then launch Cognos Configuration
- Create a new TM1 instance by right-clicking on ‘TM1 Server’ and choose ‘New resource – TM1 Server instances’:

- Call it ‘FAP’
- Change the configuration path to the correct path, for example: C:\TM1Data\FAP

- Press 'Save'
- Browse to the relevant folder, for example: C:\TM1Data\FAP
- Edit the following file in Notepad: tm1s.cfg
- Add the line (underneath the [TM1S] section): GroupsCreationLimit=1000
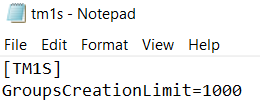
- Save changes
- Right-click on ‘FAP’ and choose ‘Start’:
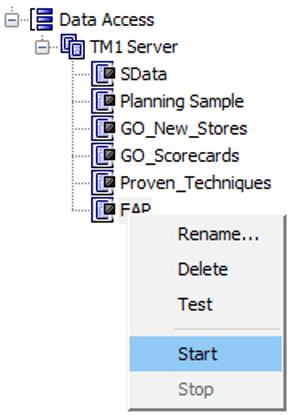
- After the TM1 server 'FAP' has finished starting, close ‘Cognos Configuration’
- Choose NO (when asked if you want to start the other services)
- For more details, see separate IBM Technote #6151713.
- Open "Windows Administrative Tools"
- Launch: ODBC Data Sources (64-bit)
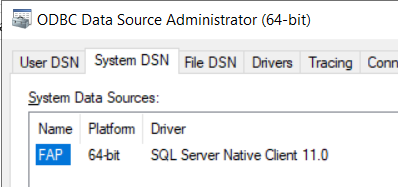
- Click tab ‘System DSN’
- Click "Add" and choose "SQL Server Native Client 11.0":

- VITAL: The name MUST be called: FAP
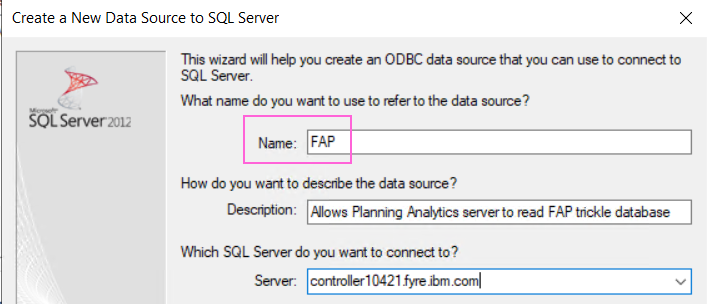
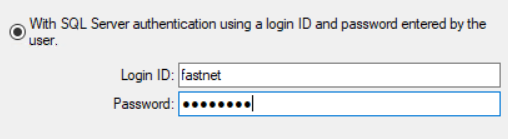
- Connect using your SQL login, for example:
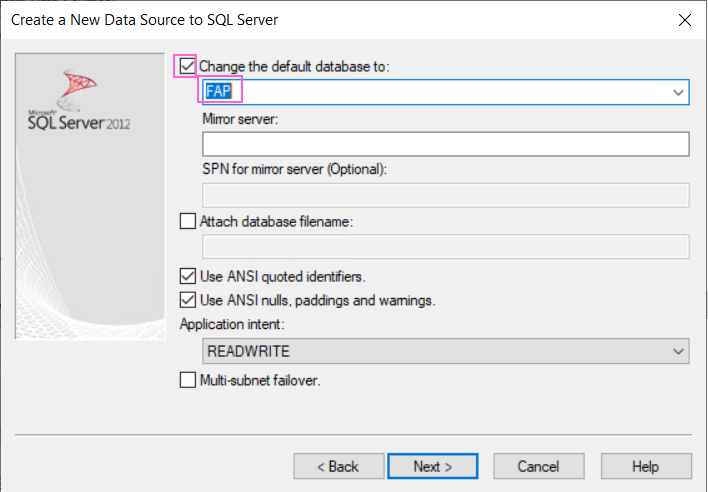
- Change from the default database to 'FAP':
- Test to make sure the connection is OK:

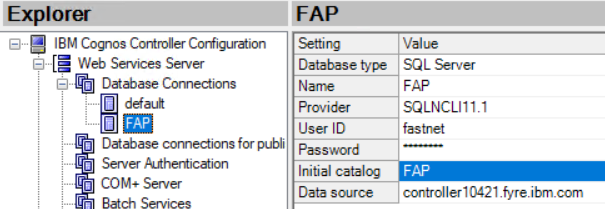
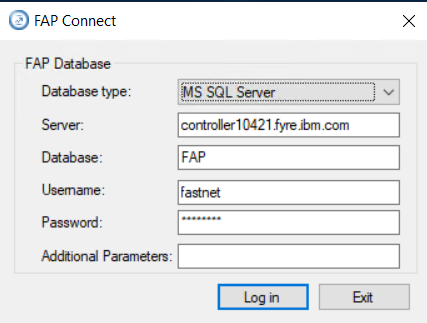
- Open "Database Connections" and create a new entry (for example called 'FAP')
- Choose your settings for the FAP database, for example:
- Click ‘Save’
Select this database connection (for example “FAP”) and click the “Play/Run” button (green triangle). This will launch the "Database Conversion Utility"
- IMPORTANT: Check that the "UDL File" is correctly pointing to your FAP database (sometimes by mistake it can be pointing to the wrong location)
- Click the "FAP DB" radio button
- Click "Connect"
- The 'Current Version' should say 0 (zero) because it is currently a blank database
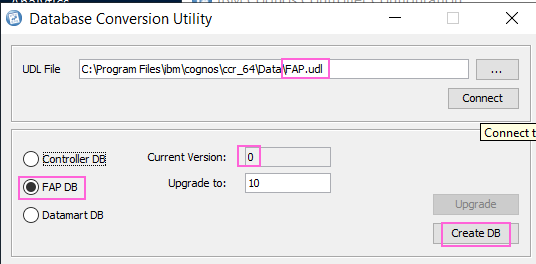
- Click “Create DB”
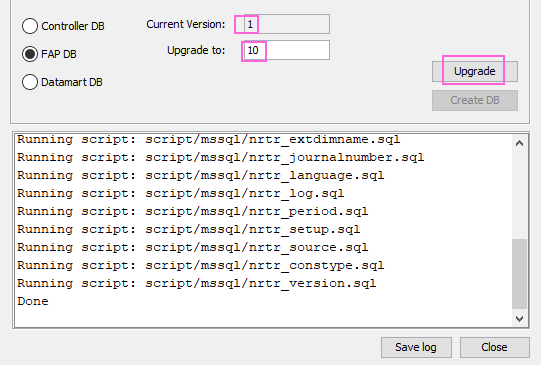
- Afterwards, if the "Current Version" is less than "Upgrade to" then click “Upgrade”.
IMPORTANT: After doing the above steps, you should ‘tidy up’ the new Database Connection by moving the UDL file from the current location (by default C:\Program Files\ibm\cognos\ccr_64\Data\) to a new folder (for example C:\Program Files\ibm\cognos\ccr_64\Data\FAP).

- Browse to this folder: C:\Program Files\ibm\cognos\ccr_64\server\FAP
- Open this file in NOTEPAD: FAPService.properties
- Change the values as appropriate, for example:
db=FAP
host=mysqlservername
dbType=sqlserver
user=fastnet
passwd=xxxxxx - Save and close
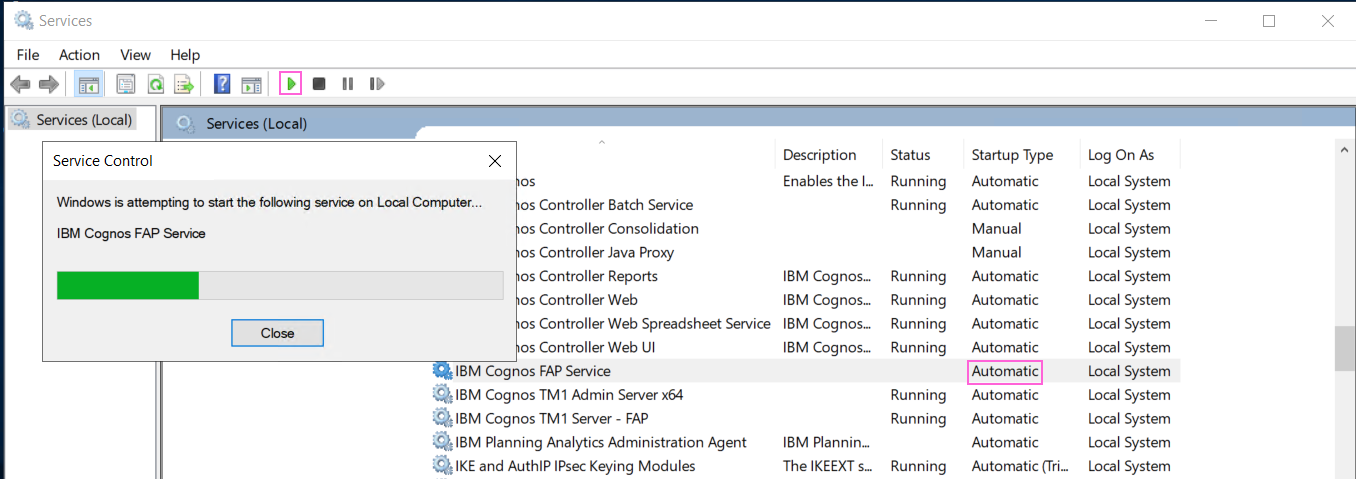
- Change the Windows service ‘IBM Cognos FAP Service’ to be ‘Automatic’, and start it:
- In other words, if you have already installed PA Server onto the Controller application server, then you can skip this step.
- Download and extract the relevant file, for example: PA_CLIENT_64-B_2.0.8_MS_WINDOWS_M.tar.gz
- Double-click on "issetup.exe"
- When asked, make sure you choose ALL the optional components:

- Right-click on My Computer, and select Properties
- Go to the Advanced (or Advanced system settings) tab
- Click Environment Variables
- Under System Variables, select Path, and click Edit
- Append this with an extra entry at the end, for the path to the TM1 bin64 directory, for example: C:\Program Files\ibm\cognos\tm1_64\bin64

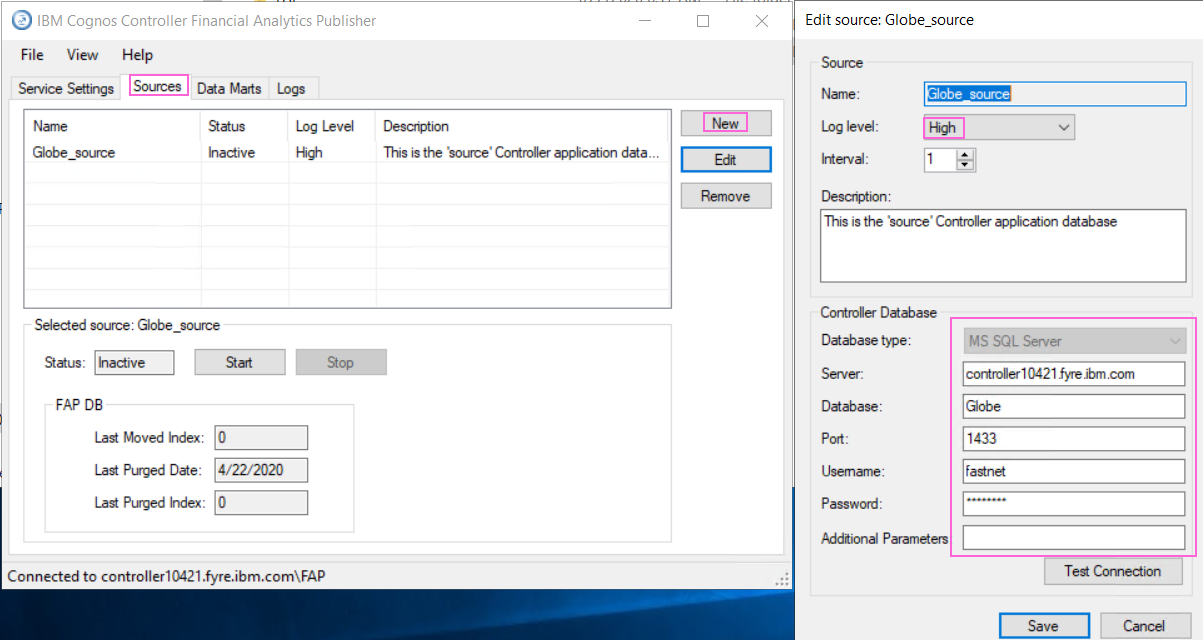
13. Inside ‘Sources’ create a new (or modify the existing) connection to the Controller ‘source’ database
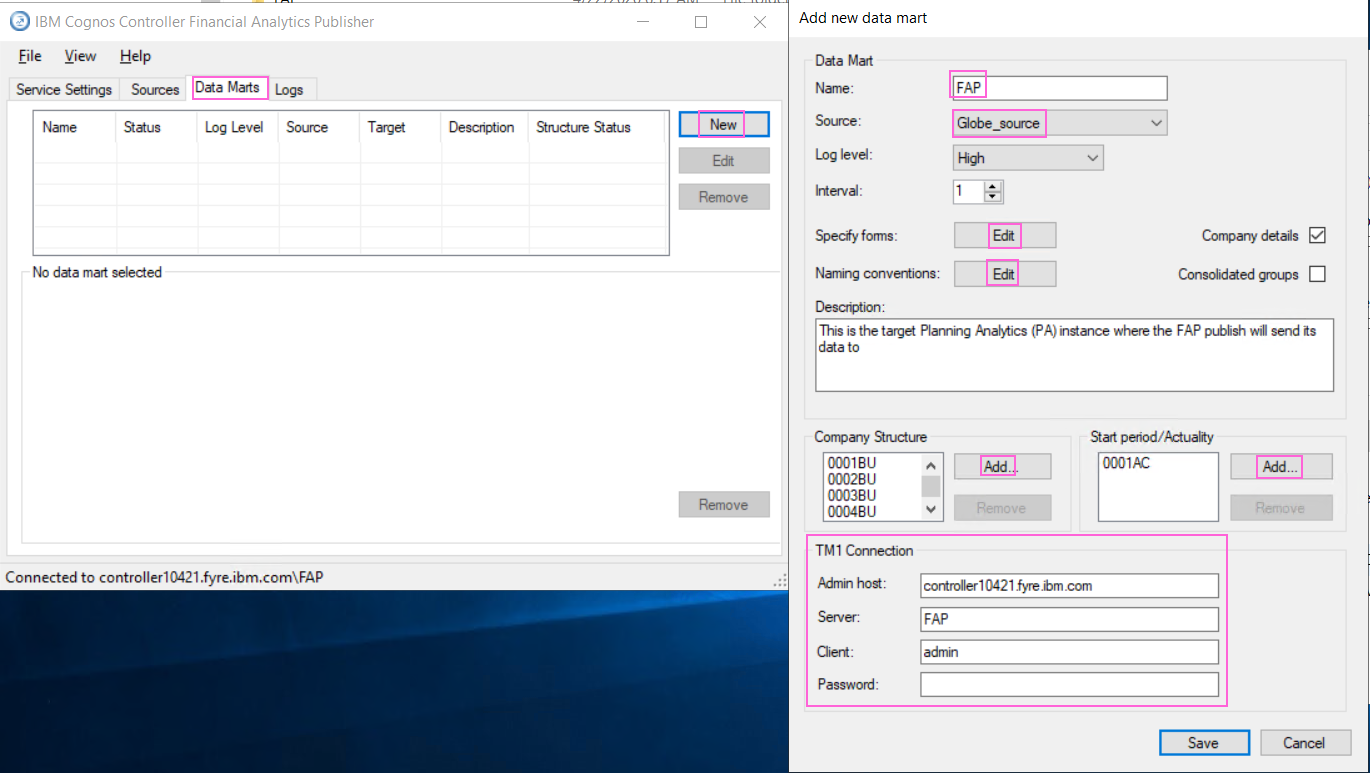
14. Inside ‘Data Mart’ create (or modify existing) cube (connection to TM1 server)

- Click tab 'Logs'
- Tick box 'Update automatically':
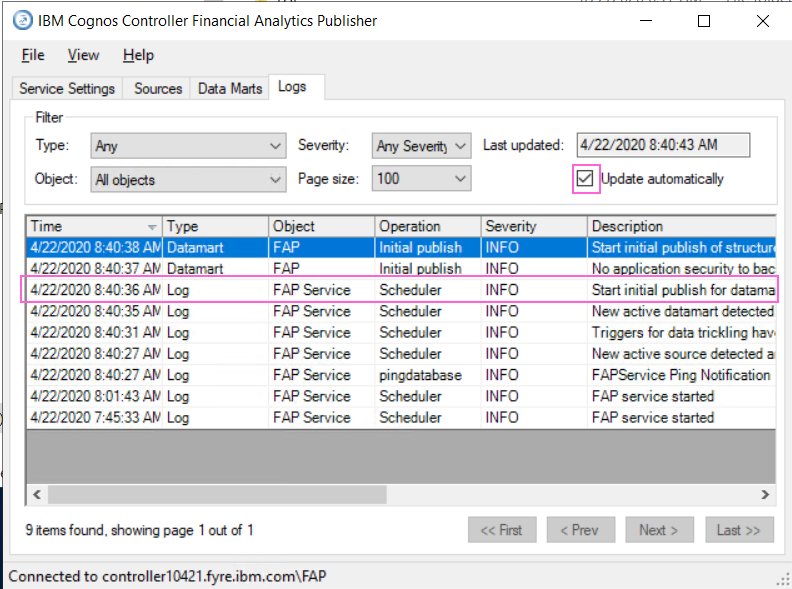
- Check that the initial publish progresses correctly.
- NOTE: If you upgrade to a later version of Controller server in the future, remember to upgrade this FAP client too!
Related Information
721265 - Installing IBM Cognos Controller FAP 10.2 with TM1, with appendix on i…
490785 - How to install/configure FAP when using Oracle
213339 - How to install/upgrade Controller server/client
Controller 10.4.2 - (Official Documentation) Installing Cognos Controller Finan…
163865 - How to install the FAP Client on an end-user's desktop PC
6151713 - "The 'SQLNCLI11.1' provider is not registered on the local machine" w…
Document Location
Worldwide
Was this topic helpful?
Document Information
Modified date:
22 April 2020
UID
ibm16195375