Question & Answer
Question
This article describes how to download and install the QRadar automatic update bundle that is posted every week to IBM Fix Central. The auto update bundle includes the latest RPMs for QRadar as a single tgz file. Administrators can follow the procedure in this technical note to manually install updates when a technical issue prevents you from receiving downloads from the IBM Cloud auto update server.
Answer
Quick links:

- About the QRadar weekly auto update bundle
- Configuring an auto update file on your local QRadar console
- How to install the auto update file
- Auto update log file locations
- Auto update server locations
About the QRadar auto update bundle
The QRadar® automatic update bundle is intended for administrators who block Internet access or air-gap access to the QRadar Console from external networks. The QRadar weekly auto update bundle can be found in the AUTOUPDATE section of IBM Fix Central.
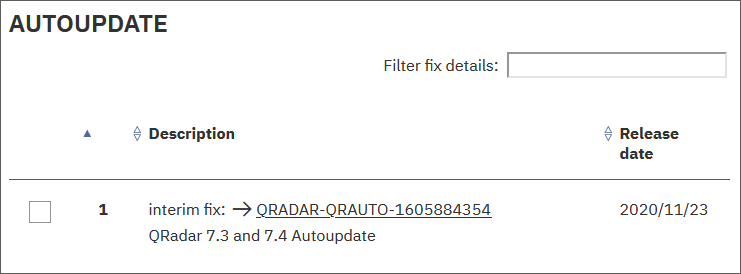
Fig 1: The auto update file download from IBM Fix Central.
The auto update bundle from IBM Fix Central contains the following content:
Fig 1: The auto update file download from IBM Fix Central.
The auto update bundle from IBM Fix Central contains the following content:
- Device support module (DSM) rpm files - New integrations and parsing/categorization updates for existing DSMs are provided for QRadar 7.3.x, 7.4.x, and 7.5.x versions.
- Protocol rpm files - New protocols and updates are provided to listen for or retrieve events from remote sources for QRadar 7.3.x, 7.4.x, and 7.5.x versions.
- Scanner rpm files - New scanner module releases and updates are provided for QRadar 7.3.x, 7.4.x, and 7.5.x versions.
- Vulnerability catalog updates - The vulnerability catalog update is a database file that includes CVE information, vulnerability descriptions, and signature information so scan results can display vulnerability information. Vulnerability catalog updates are delivered daily for administrators with QRadar Vulnerability Manager.
Configuring an auto update file on your local QRadar Console
Steps
- In a web browser, navigate to IBM Fix Central and log in with your IBMid.
- Select QRadar, provide your product version, and platform.
- Select Browse for fixes.
- Download the auto update file to your local workstation.
- Use SSH to log in to the QRadar Console as the root user.
- Check to see whether the /opt/qradar/www/autoupdates folder exists. If this folder exists, delete it before you create the symbolic link.
rm -d /opt/qradar/www/autoupdates - Create a new directory for the updates:
Note: the permissions are:mkdir -p /storetmp/autoupdatesdrwxr-xr-x 6 root root - Create a symbolic link between the /storetmp and the /opt/qradar/www/autoupdates directory.
ln -s /storetmp/autoupdates/ /opt/qradar/www/autoupdates - To verify there is enough space for the auto update, type:
Note: The size of the weekly auto update file is approximately 5 GB to 7 GB.df -h /opt/qradar/www/autoupdates - Copy the autoupdate-<version>.tgz file from your workstation to the QRadar Console. The file must be placed in /opt/qradar/www/autoupdates/ directory or the symlink directory you created in Step 7.
- On your QRadar Console, type the following command to extract the autoupdate package:
Resultstar -zxvf /opt/qradar/www/autoupdates/autoupdate-[timestamp].tgz -C /opt/qradar/www/autoupdates/
You are now ready to configure the QRadar user interface to install the local auto update file. If you have questions or concerns about changing your automatic update setting, you can ask a question in the forums before you make changes to your auto update configuration.
How to install the auto update file
- Log in to the QRadar user interface.
- Click Admin tab.
- Click Auto Update icon.
- Click Change Settings.
- Select Advanced tab.
- In the Webserver field, type https://localhost/ or https://Console_IP_address/ as either option can be used.
Note: The trailing forward slash (/) is required in the Webserver field. For example, if your IP address is 10.10.10.10, type: https://10.10.10.10/. - In the Directory field, verify autoupdates/ is defined and includes a trailing slash (/), which is the default value.
- Optional. If you are using a proxy for external Internet connections, configure the proxy parameters.
- If the Send feedback option is enabled, clear the check box to disable the feedback option.
- Click Save.
- The system attempts to contact the URL defined as your https address and displays a message that states that the remote webserver is unavailable. The message is expected and a benign error for local autoupdate configurations.
- Click Check for Updates in the navigation menu and click Get New Updates.
- Wait for the update to complete. A dashboard system notification is generated when updates are successfully installed or when an error occurs. If you have questions or concerns about an auto update status, you can ask a question in the forums.
Fig 2: A system notification is generated on the QRadar Dashboard when the update completes successfully.
After the auto update completes, the administrator can close the notification.
IMPORTANT: To receive automated updates in the future from QRadar Consoles that have Internet access, the administrator can set the Web Server field to https://auto-update.qradar.ibmcloud.com/. If you plan to manually update your Console appliance every week, the administrator can leave the Web Server field as https://localhost/.
Auto update log file locations
To view the auto-update log for QRadar, you must extract the AU-timestamp.gz file from /var/log/autoupdates directory.
Auto update server locations
Administrators who decide to enable QRadar weekly auto updates need to be aware of a new server location in the IBM Cloud. If you use IP-based firewall rules, update your firewall rules to ensure daily, and weekly updates continue without interruption. All QRadar® products and versions are impacted by this change.
IMPORTANT: Administrators who fail to update their corporate firewalls might experience an interruption in service after 30 November 2020. QRadar Support recommends that all administrators update their QRadar Console's auto update settings during a maintenance window and confirm that auto updates complete successfully.
For more information about the new IBM Cloud auto update server, see QRadar: Important auto update server changes for administrators.
| Server changes | Hostname | Static IP address | Location | Description |
| New server cluster | https://auto-update.qradar.ibmcloud.com/ | 169.47.251.244 | Global | New server active starting on 27 July 2020 |
| Legacy server | https://qmmunity.q1labs.com/ | 69.20.113.167 | United States | Active until 30 November 2020 |
| Legacy server | https://qmmunity-eu.q1labs.com/ | 212.64.156.13 | Europe | Active until 30 November 2020 |
IMPORTANT: Administrators who fail to update their corporate firewalls might experience an interruption in service after 30 November 2020. QRadar Support recommends that all administrators update their QRadar Console's auto update settings during a maintenance window and confirm that auto updates complete successfully.
For more information about the new IBM Cloud auto update server, see QRadar: Important auto update server changes for administrators.
Related Information
[{"Type":"MASTER","Line of Business":{"code":"LOB24","label":"Security Software"},"Business Unit":{"code":"BU048","label":"IBM Software"},"Product":{"code":"SSBQAC","label":"IBM Security QRadar SIEM"},"ARM Category":[{"code":"a8m0z000000cwtDAAQ","label":"Auto Update"}],"ARM Case Number":"","Platform":[{"code":"PF016","label":"Linux"}],"Version":"7.4.3;7.5.0"}]
Was this topic helpful?
Document Information
Modified date:
23 May 2024
UID
swg22003034