Troubleshooting
Problem
Create the Oracle OCI driver for IBM WebSphere Application Server.
Resolving The Problem
From the IBM WebSphere Application Server administrative console:
- Create the JDBC Provider.
- Expand Resources, then click JDBC Providers.
- Select the scope (Cell, Node, or Server) for the JDBC Provider, then click Apply.
- Click New to create the JDBC Provider.
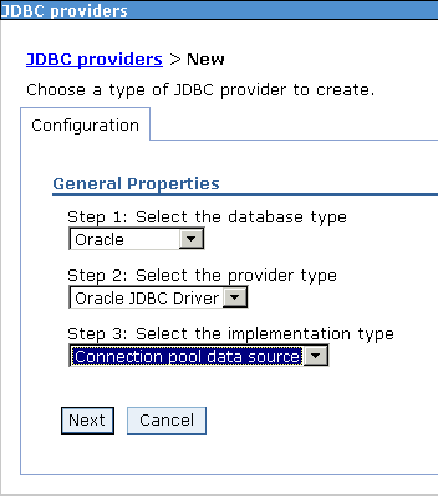
- In the Configuration tab, under General Properties,
- Select Oracle from pull-down list under "Select the database type".
- Oracle JDBC Driver from the pull-down list of JDBC Providers.
- Select Connection pool data source or XA data source from the pull-down list under Select the implementation type, and then click Next.

- Enter the database class path and native library path information as shown below:

Notes: - Oracle 9i JDBC driver is supported with Oracle 9i database server. The Oracle 10g JDBC driver is supported with both Oracle 9i and 10g database servers.
- ORACLE_HOME is the directory where Oracle Network client installed.
The WebSphere Application Server variables can be used in the Classpath and/or the Native Library Path.
For example, if ${ORACLE_JDBC_DRIVER_PATH}/ojdbc14.jar and ${ORACLE_HOME}/lib are specified for the Classpath and Native Library Path respectively, the variables ORACLE_JDBC_DRIVER_PATH and ORACLE_HOME must be defined to WebSphere Application Server under the Environment/Manage WebSphere Variables.
- Create WebSphere Application Server Data Source.
In the administrative console's left panel, expand Resource and navigate to JDBC providers > Oracle JDBC Driver for OCI > Data sources > New. - Enter the name for the data source.
- Enter the JNDI name for the data source.
- Select the data store helper class name that corresponds to the type of JDBC driver that you used.
- Select Component-managed authentication alias, and enter the database specific properties for the data source.
- Enter the URL for the data source. For example, enter jdbc:oracle:oci:@<tnsname_alias>.
Note: You must define <tnsname_alias> in the ${ORACLE_HOME}/network/admin/tnsnames.ora file.
- Click OK and save the configuration.


Related Information
[{"Product":{"code":"SSEQTP","label":"WebSphere Application Server"},"Business Unit":{"code":"BU053","label":"Cloud & Data Platform"},"Component":"DB Connections\/Connection Pooling","Platform":[{"code":"PF002","label":"AIX"},{"code":"PF010","label":"HP-UX"},{"code":"PF016","label":"Linux"},{"code":"PF027","label":"Solaris"},{"code":"PF033","label":"Windows"}],"Version":"9.0;8.5.5;8.0;7.0","Edition":"Base;Network Deployment","Line of Business":{"code":"LOB45","label":"Automation"}}]
Was this topic helpful?
Document Information
Modified date:
15 June 2018
UID
swg21269703