How To
Summary
How do I configure the Subject Alternative Name (SAN) Certificates in WebSphere Application Server?
Objective
What are Subject Alternative Name (SAN) Certificates?
Using Subject Alternative Name (SAN) Certificates can have multiple fully qualified domain names with a single certificate. You can define multiple DNS entries in the SAN option so that the certificate can be extended to use more than one fully qualified domain names.
Example you can define multiple domains and IP address
www.ibm.com
appserver.ibm.com
webserver.ibm.com
api.ibm.net
192.168.1.100
The following steps demonstrate for Standalone WebSphere Application server, but the process is the same for ND environment
Steps
High level Steps
Step 1: Backing up WebSphere Application Server Config or Entire WAS Profile
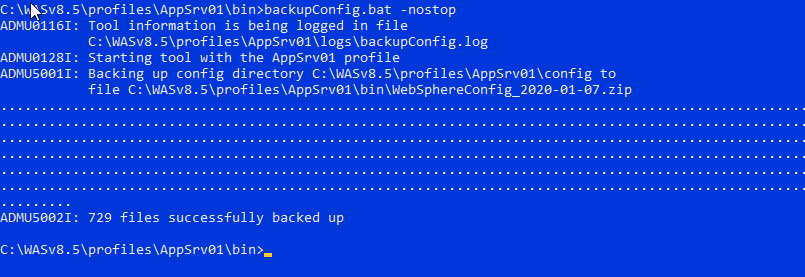
Before following steps, please take backup by running backupConfig on dmgr more detail check the following link
IBM Knowledge Center - backupConfig command
WAS has backupConfig command which will backup entire config directory
Tells the backupConfig command not to stop the servers before backing up the configuration
Example command
cd to was profile path (WAS_INSTALL_HOME>/profiles/<PROFILE_NAME>/bin)
backupConfig.bat -nostop
Backing up WebSphere Application Server Entire profiles
Open the command prompt. Browse to the WAS_INSTALL_HOME>/bin directory. For example, you can type the following: cd WAS_INSTALL_HOME>/bin
Use the WebSphere Application Server manageprofiles command with the backupProfile parameter.manageprofiles.bat -backupProfile -profileName -backupFile
For example:
Stand-alone Env:
manageprofiles.bat -backupProfile -profileName AppSrv01 -backupFile c:\backup\AppSrv01yymmdd.zip
Network deployment Env:
manageprofiles.bat -backupProfile -profileName Dmgr01 -backupFile c:\backup\Dmgr01yymmdd.zip
YouTube link How do I run the backupConfig and restoreConfig scripts in WebSphere Application Server?
https://www.youtube.com/watch?v=EXAfSx1gVwc
Step 2: How to generate a CSR with Subject Alternative Name (SAN) for IBM WebSphere Default KeyStore
Note: A Personal certificate request places a valid self-signed certificate in the KeyStore. This placeholder certificate is later replaced with the certificate that the Certificate Authority signs and returns. You must have a default certificate assigned to the SSL configuration. If a default certificate is not assigned, when multiple personal certificates exist in a KeyStore and no default certificate is selected, the selection of a certificate within the SSL configuration KeyStore is random, which might cause SSL handshake errors.
WAS Admin console doesn't have feature to generate a CSR with Subject Alternative Name (SAN) Therefore we need to use WAS ikeyman tool to generate a CSR with Subject Alternative Name (SAN) for IBM WebSphere Default KeyStore (WAS Default KeyStore for the Node is NodeDefaultKeystore --> WAS_INSTALL_HOME>/profiles/<NodePROFILE_NAME>/config/cells/cell_name/nodes/node_name/key.p12)
Perform the following steps using IBM WebSphere ikeyman tool.
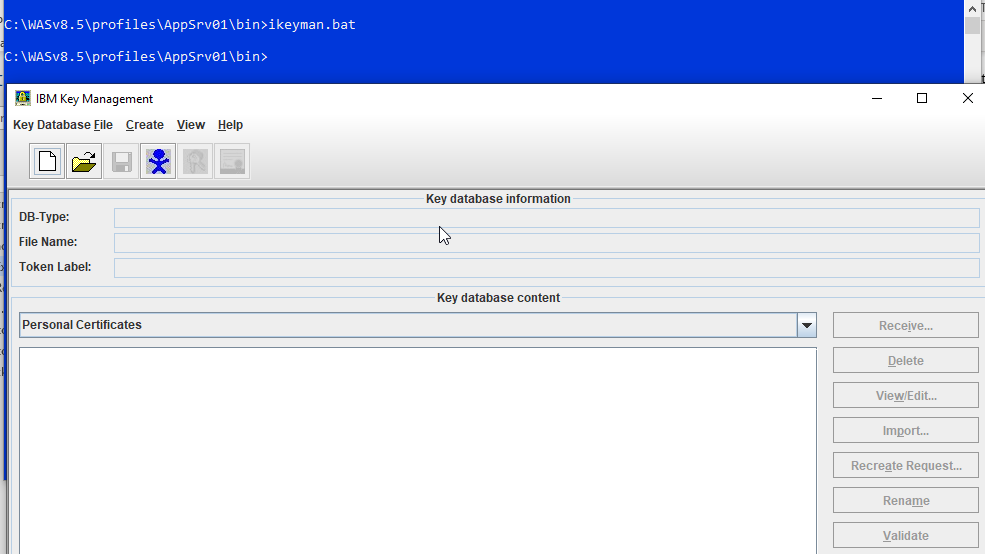
Start the key management utility (iKeyman) from WAS_INSTALL_HOME>/profiles/<PROFILE_NAME>/bin
IBM Key Management interface will start after running the command
1. Start iKeyman. ( Example C:\WASv8.5\profiles\AppSrv01\bin>ikeyman.bat )
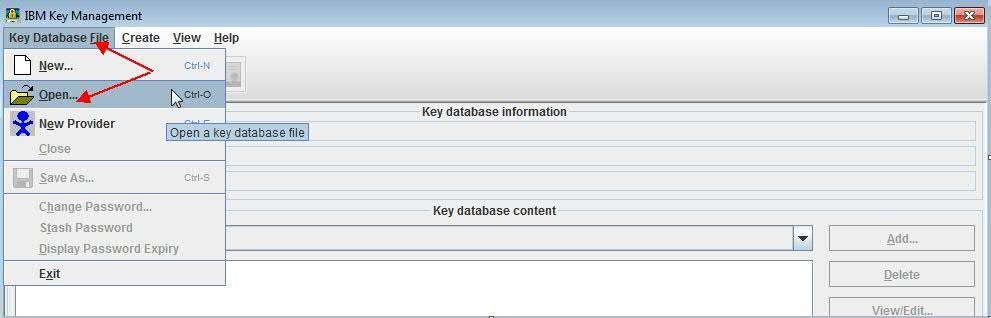
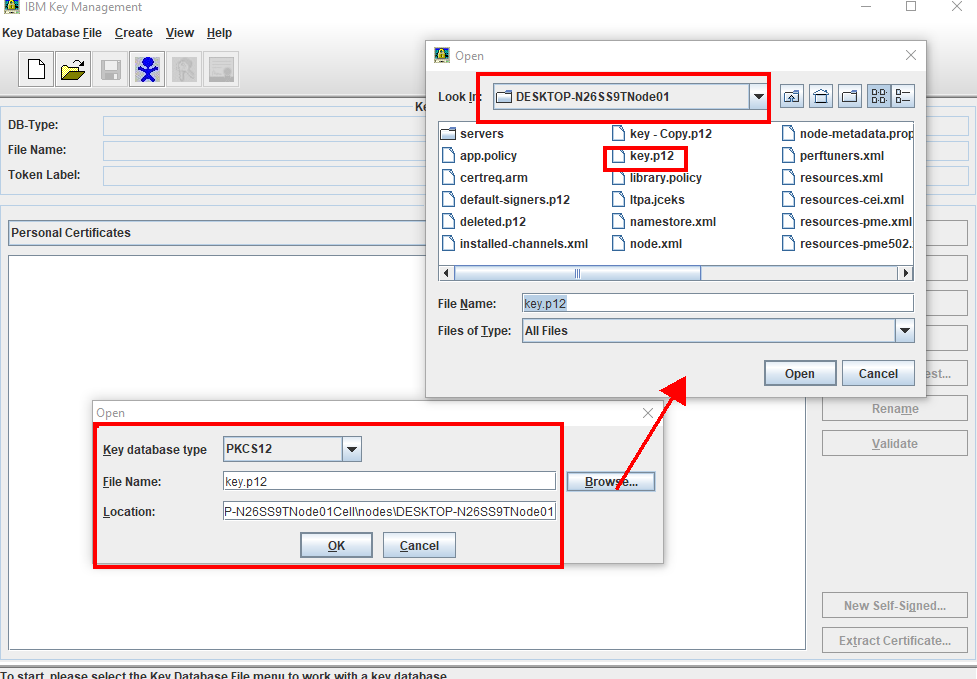
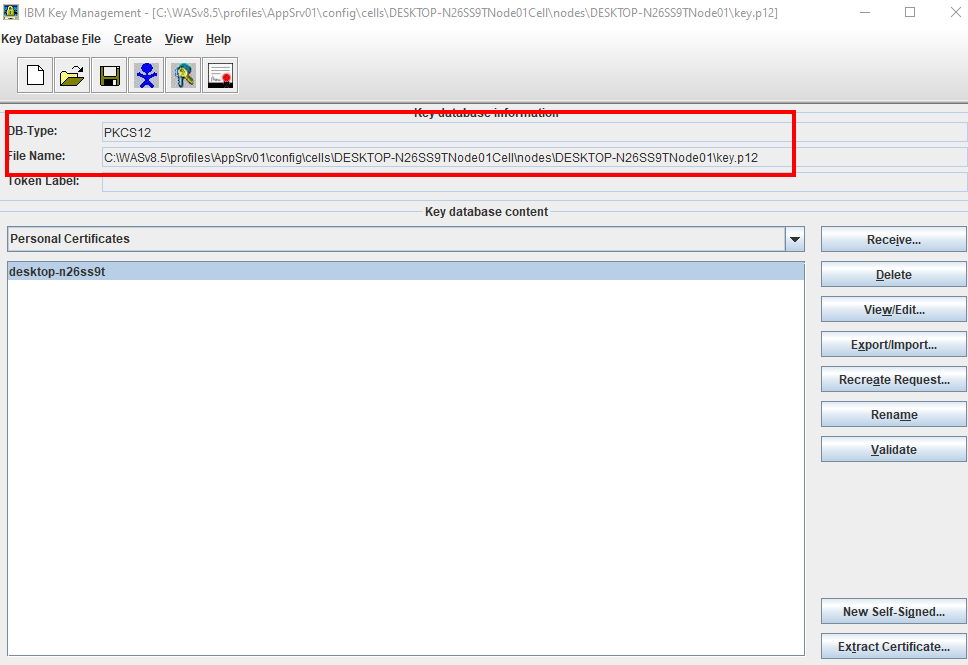
2. From the IBM Key Management window, Select for the Key database type (Available format JKS, PCSK12, CMS. Etc) > click Key Database File > Open.
specify the file name and location of the key database (Example WAS_INSTALL_HOME>/profiles/<NodePROFILE_NAME>/config/cells/cell_name/nodes/node_name/key.p12) from which you want to generate the CSR. Click on the browse button to locate & select the KeyStore. Then click, OK.
3. Type the current key database password in the Password Prompt window and click OK. The key database contents are shown in the IBM Key Management window.
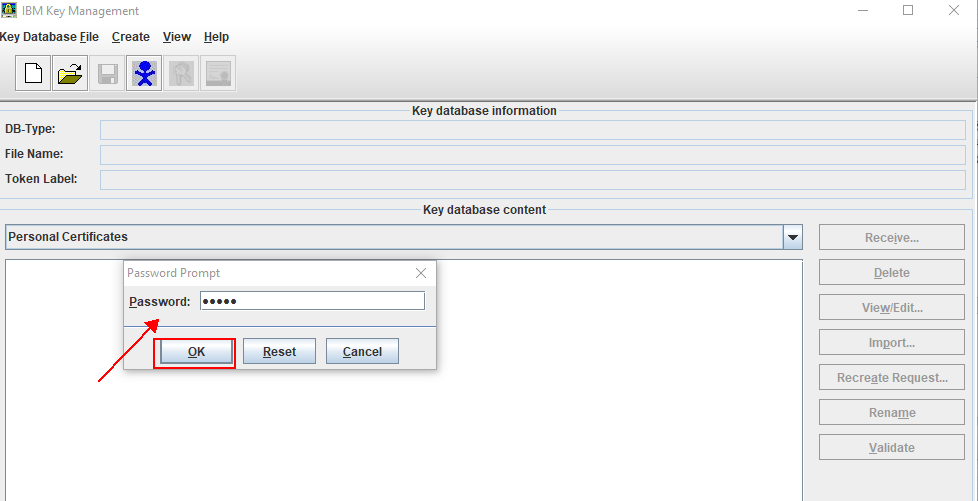
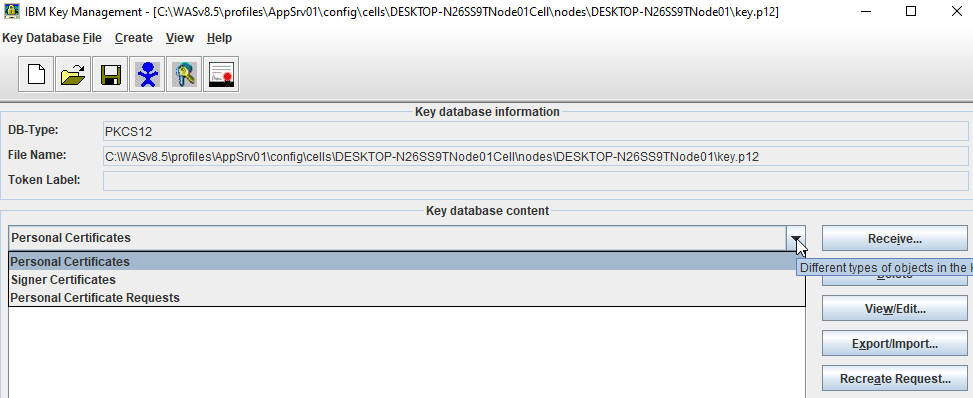
4. In the middle of the IKEYMAN GUI, you will see a section called "Key database content."
Click on the "down arrow" to the right to display a list of three choices
Select "Personal Certificate Requests" and From the Personal Certificate Requests section, click New
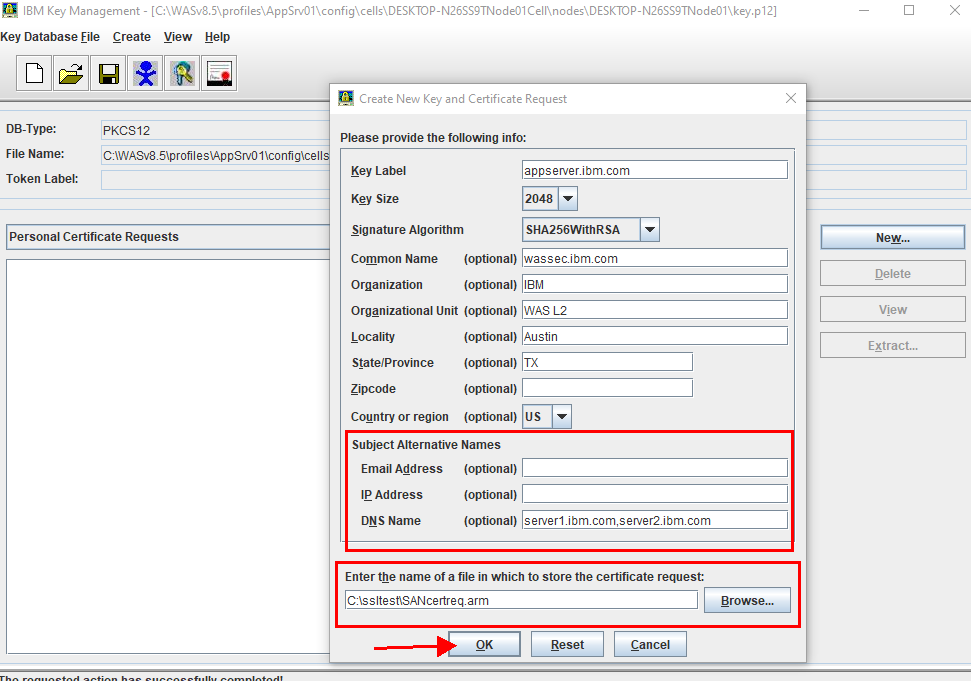
5. Fill out the required information as per your environment requirement.
Key Label is the name used to identify the certificate in the KeyStore database.
NOTE: Using the site name (for example, www.ibm.com or servername.ibm.com) as the label is a good practice.
In the Key Size list, select a key length for the certificate. The key size determines the strength of the encryption. Key Size must be at least 2048 bits (Depend on your requirement)
From the Signature Algorithm list, select an algorithm to apply to the certificate Example Sha256 (Depend on your requirement)
Common Name (CN): The Common Name is the Host + Domain Name. This value is the CN value in the certificate distinguished name (DN). (for example, www.ibm.com or servername.ibm.com or wildcard *.ibm.com)
Note: If you want to get wildcard certificates, then the Common Name should be in the format example: *.ibm.com, For example, you have the multiple servers with server1.ibm.com, server2.ibm.com, and server3.ibm.com or anything.ibm.com in this case Wildcards will secure any first-level subdomain of the domain
Depend on your requirement fill out the remaining information
Organization field, organization value in the certificate distinguished name.
organization Unit field, type the organization unit portion of the distinguished name.
locality Name stateName country
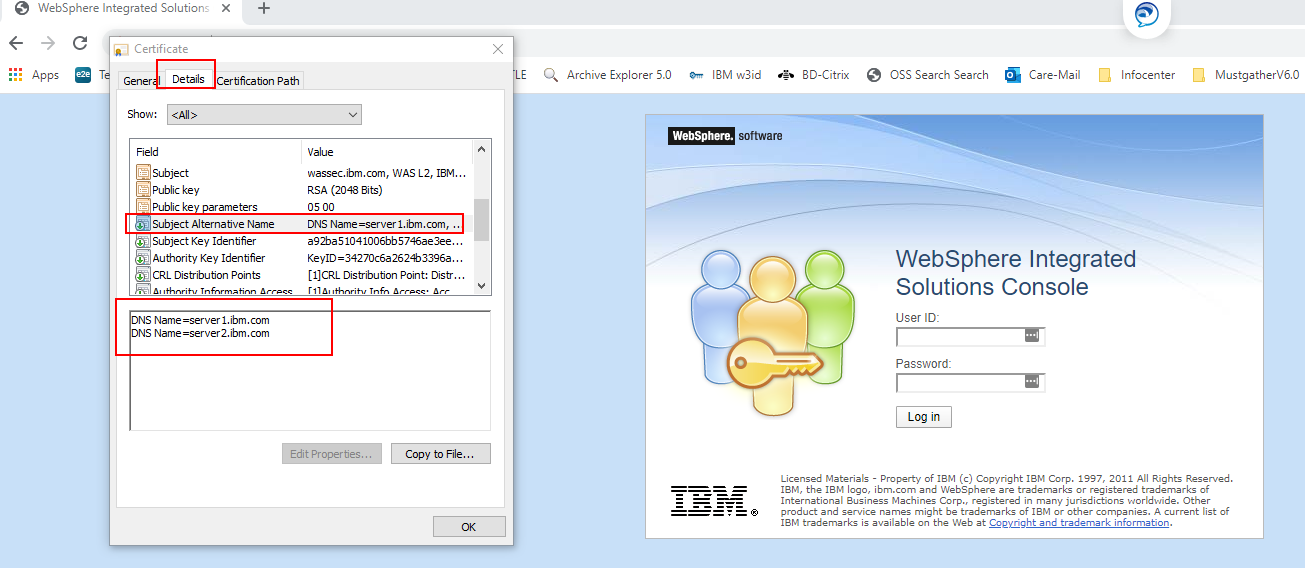
In the Subject Alternative Names section, the DNS Name field, all entries of the domains separated each with comma. Where it can contain multiple FQDNs examples server1.ibm.com, server2.ibm.com.etc, this setting allows for multiple domains to be used in SSL certificates.
Subject Alternate Name (SAN) extensions are fields in a certificate request that inform SSL Clients of alternate hostnames that correspond to the signed certificate. Normal certificates (issued without a wildcard string in their Distinguished Name) are only valid for a single hostname. For example, a certificate created for ibm.com is not valid on www.ibm.com unless a Subject Alternate Name of "www.ibm.com" or is added to the certificate.
Note: The request functions as a temporary placeholder for the signed certificate until you manually receive the certificate in the KeyStore.
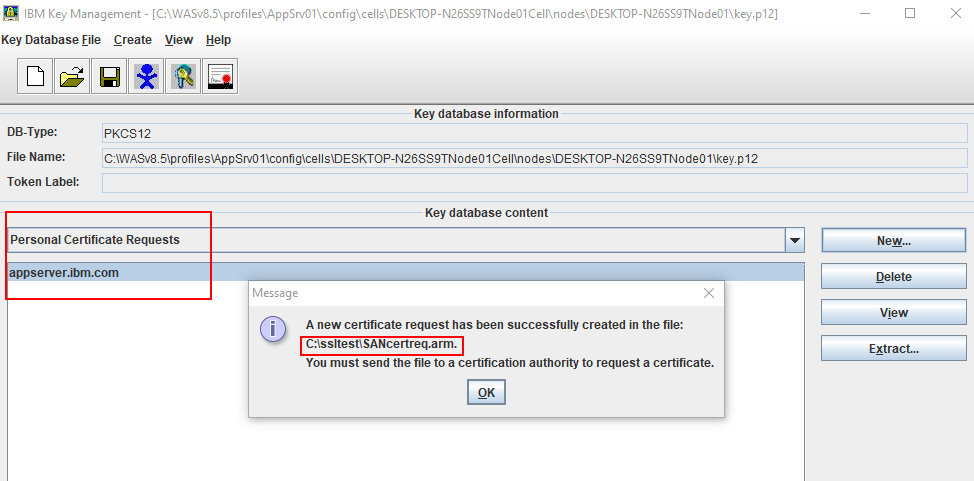
Note: You need to follow the instructions to submit your Certificate Signing Request file to an appropriate Certification Authority. Please check with your CA vendor
Step 3: Adding CA Intermediate and Root Certificates to the WAS KeyStore and Truststore
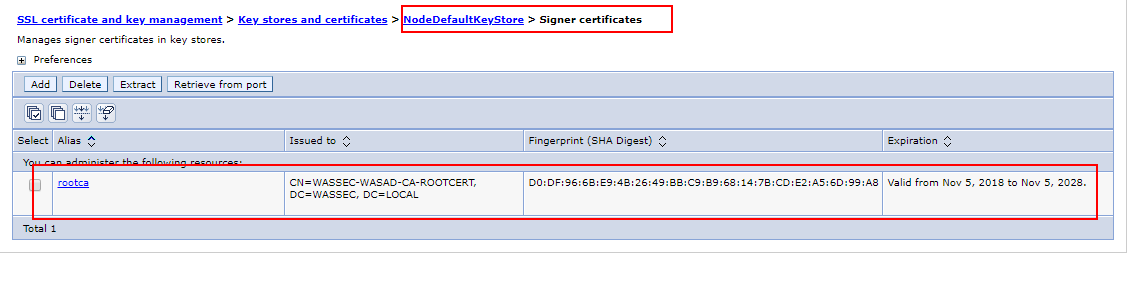
On the administrative console page, Add the CA Root certificate into WAS Nodedefaultkeystore and Nodedefaultruststore
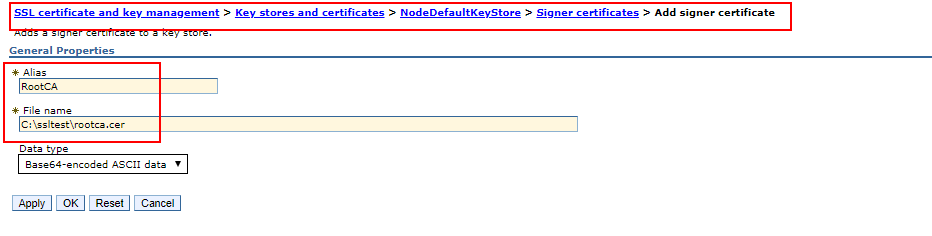
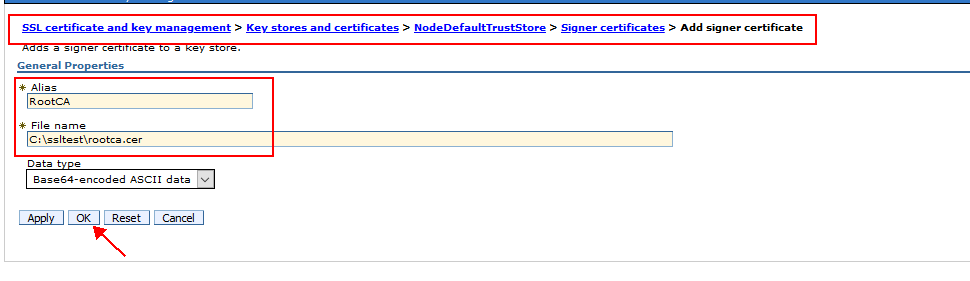
1. Click Security > SSL certificate and key management > Key stores and certificates > keystore ( Nodedefaulttruststore & NodedefaultKeystore > Signer certificates > Add.
2. Enter an alias for the signer certificate in the Alias field
3. Enter the full path to the signer certificate file in the File name field.
4. Select a data type from the list in the Data type field. Example Base64.
Alias. Enter the name used to identify the Root CA certificate in the keystore. Filename. Enter the full path to the Root CA certificate. Data type. Select Base64-encoded ASCII data from the list.
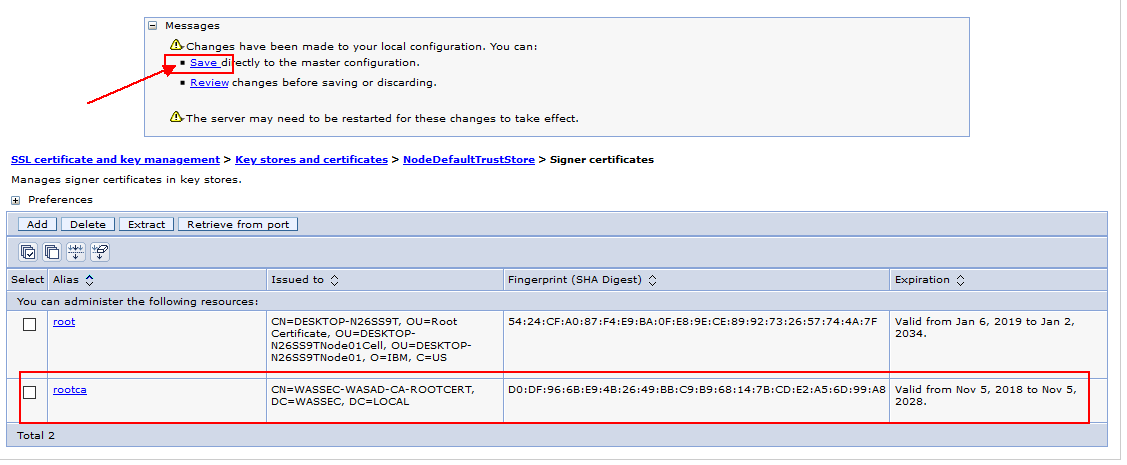
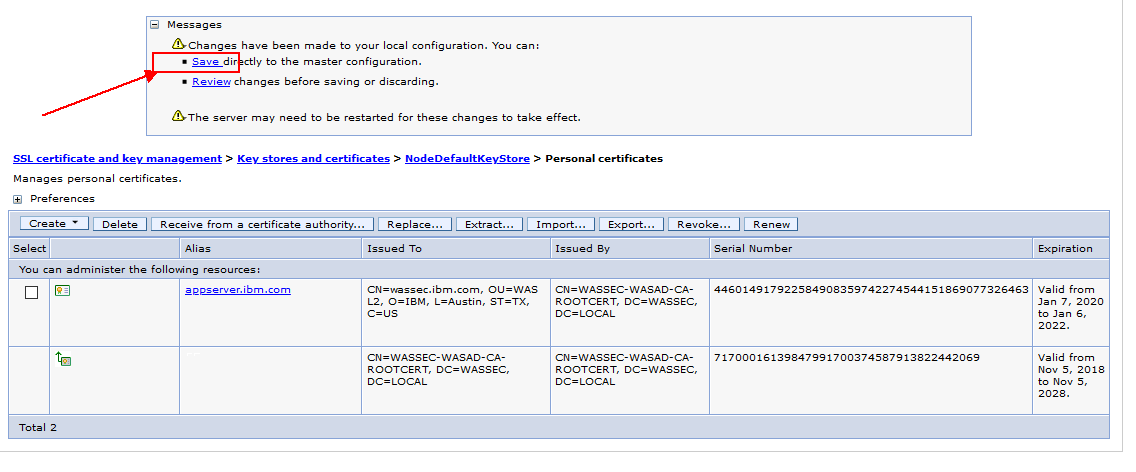
5. Click Apply and Save the changes.

Step 4: Receive the certificate issued by Certificate Authority into WAS KeyStore (NodeDefaultKeystore)
Note: These steps are the same for any WAS keystore ( CellDefaultKeystore or NodeDefaultKeystore)
1. Start iKeyman. (Example C:\WASv8.5\profiles\AppSrv01\bin>ikeyman.bat)
2. From the IBM Key Management window, Select for the Key database type (Available format JKS, PCSK12, CMS. Etc) > click Key Database File > Open.
specify the file name and location of the key database (Example WAS_INSTALL_HOME>/profiles/<NodePROFILE_NAME>/config/cells/cell_name/nodes/node_name/key.p12) from which you want to generate the CSR. Click on the browse button to locate & select the KeyStore. Then click, OK.
Type the current key database password in the Password Prompt window and click OK. The key database contents are shown in the IBM Key Management window
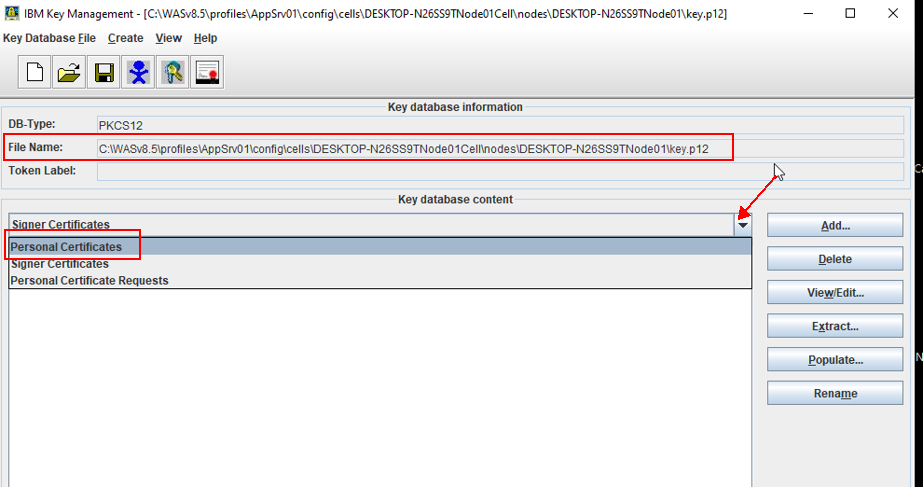
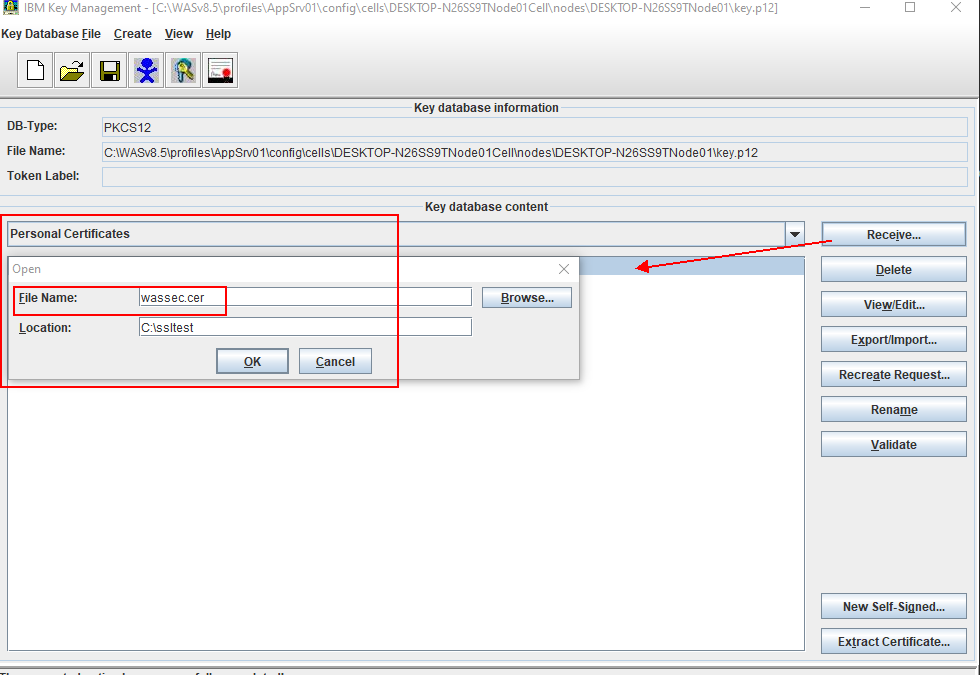
3. Click Personal Certificates in the Key Database content frame, then click Receive.
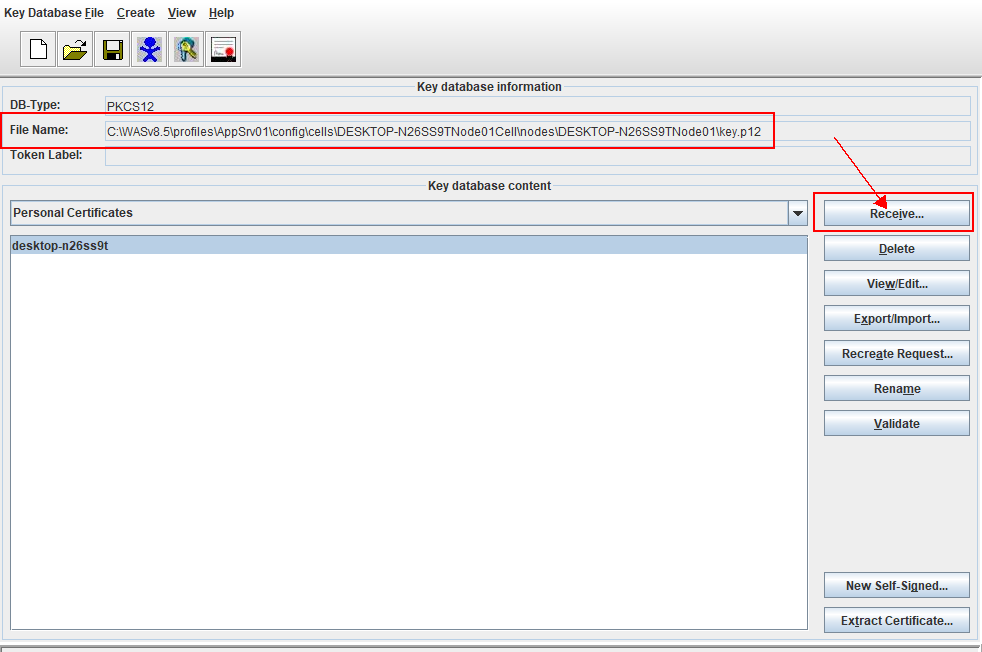
4. Select the Receive button. You are prompted for the location of the signed certificate and Enter the location of the signed certificate
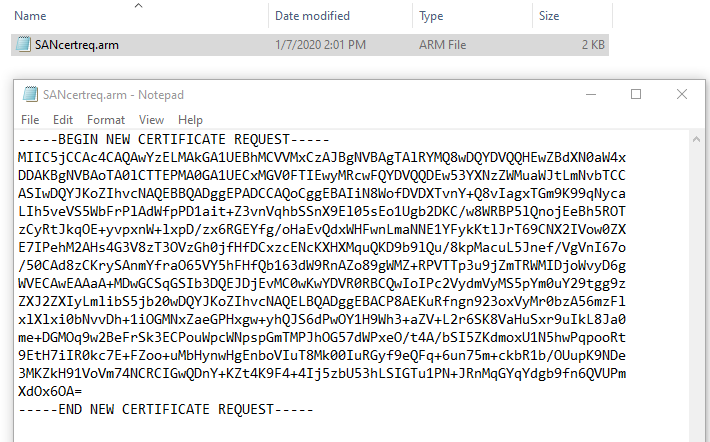
Certificate filename
Specify the name of the certificate file, typically in .arm format, or another acceptable format such as .cer or another format .p7b or another format .der, etc.
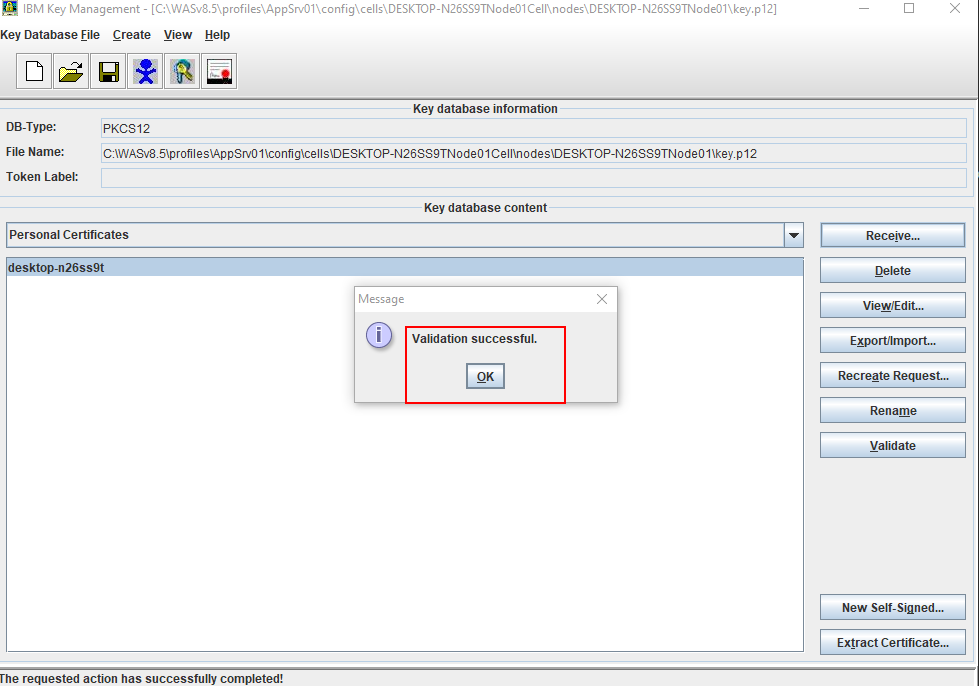
5. Click OK. You will see the new certificate displays under the personal certificate section

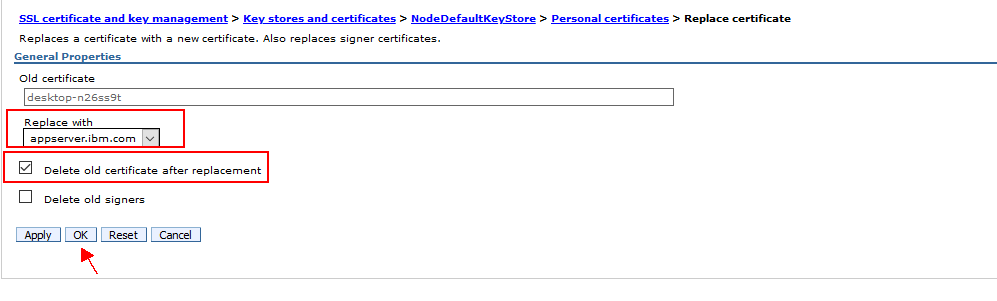
Step 5: Replace the default certificate with the CA certificate
Note: Once you received the CA certificate using ikeyman. You will see two certificates under NodeDefaultKeyStore
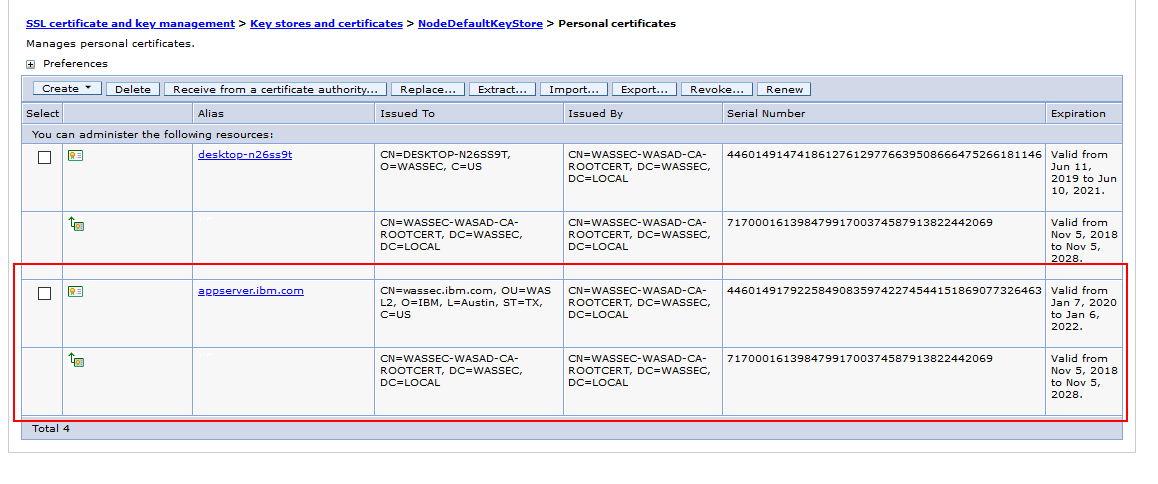
1. Click Security > SSL certificate and key management > Key stores and certificates > NodeDefaultKeyStore.
2. Under Additional Properties, click Personal certificates.
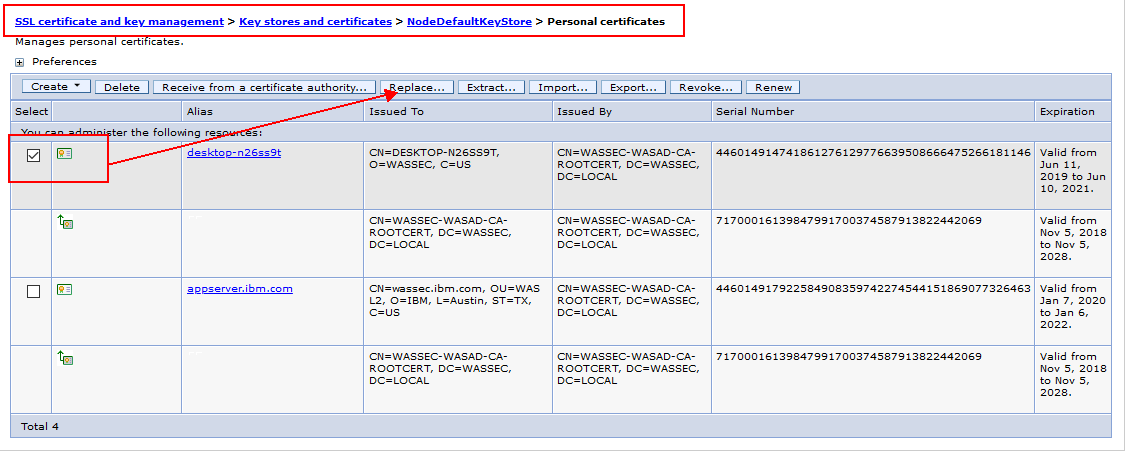
3. Select the certificate to be replaced. The alias list must include the certificate to be replaced and the certificate to replace it with.
4. Click Replace.
5. Select a replacement certificate alias from the list.
You can delete one of the following types of certificates:
6. Select Delete old certificate to remove the existing or expired certificate.
7. Click Apply and Save.
Your results depend on what you selected:
==> If you selected Delete old certificate, the new certificate alias replaces all of the references to the certificate alias in the configuration.
==> If the new certificate alias replaces the existing alias, the WebSphere Application Server runtime checks to make sure that:
All of the SSL Configurations objects reference the certificate o The Dynamic SSL Configuration Selections objects, and the SSL Configuration group objects reference the certificate.
==> If you selected Delete old certificate, the existing certificate will be deleted.
Step 6: Adding CA Intermediate and Root Certificates to the dmgr & node (unmanaged Truststore -- profile_root/etc/trust.p12) by retrieveSigners command
Note: Each profile has both an unmanaged keystore (profile_root/etc/key.p12) and an unmanaged trustore (profile_root/etc/trust.p12) which are used by clients connecting to WAS from outside of the WAS JVM, such as wsadmin, serverStatus, stopServer, syncNode, backupConfig and other WAS scripts. These keystores and truststores are outside of WAS configuration directory (profile_root/config/cells/cell name) and thus cannot be managed in the WAS admin console by default
Using this retrieveSigners command, you can extract the signer to a file.
For DMGR
cd WAS_INSTALL_HOME>/profiles/<DMGRPROFILE_NAME>/bin and execute the following command.
retrieveSigners CellDefaultTrustStore ClientDefaultTrustStore
It will attempt to add all Signer certificate from CellDefaultTrustStore (WAS_INSTALL_HOME>/profiles/<DMGRPROFILE_NAME>/config/cells/cell_name/trust.p12 ) to ClientDefaultTrustStore (WAS_INSTALL_HOME>/profiles/<DMGRPROFILE_NAME>/etc/trust.p12). If you have any one singer already existing in etc/trust.p12, then you will see this message in the output CWPKI0309I: All signers from remote keystore already exist in local keystore.
For NODE
cd WAS_INSTALL_HOME>/profiles/<PROFILE_NAME>/bin and execute the following command.
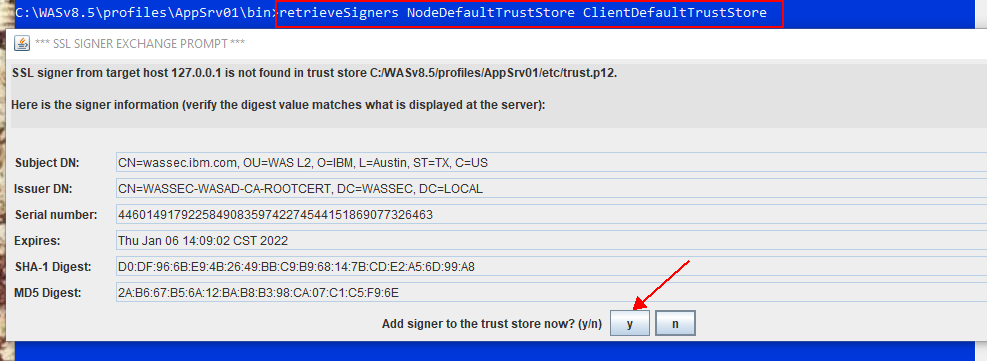
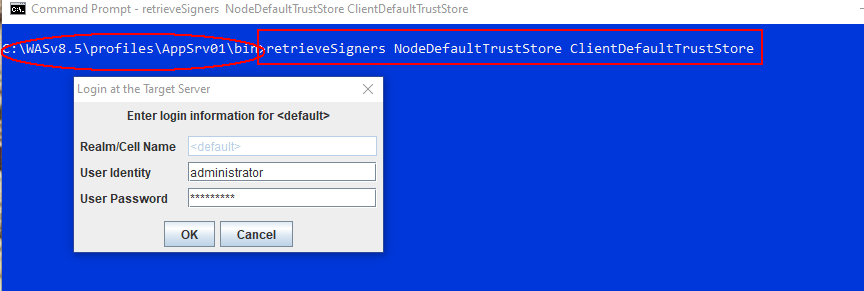
retrieveSigners NodeDefaultTrustStore ClientDefaultTrustStore
It will attempt to add all Signer certificate from NodeDefaultTrustStore (WAS_INSTALL_HOME>/profiles/<PROFILE_NAME>/config/cells/cell_name/nodes/Nodename/trust.p12 ) to ClientDefaultTrustStore (WAS_INSTALL_HOME>/profiles/<PROFILE_NAME>/etc/trust.p12). If you have any one singer already existing in etc/trust.p12, then you will see this message in the output CWPKI0309I: All signers from remote keystore already exist in local keystore.
More details please check the following infocenter link

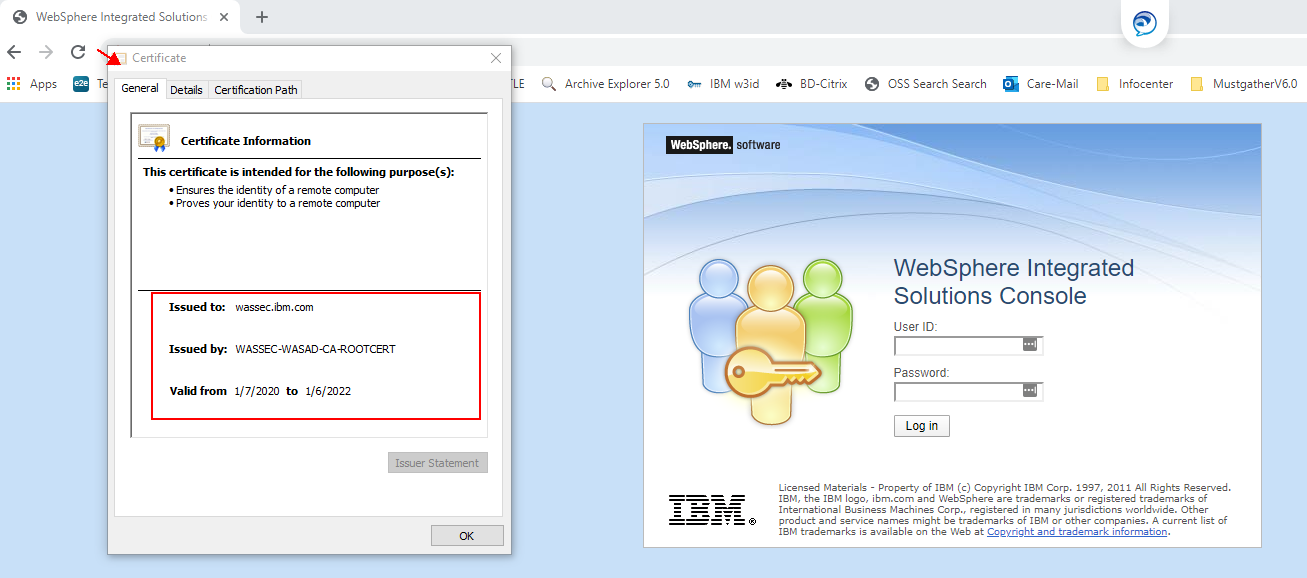
Step 7: How to verify the WAS using CA certificate with Subject Alternative Name (SAN)
Using Internet Explorer or Chrome, you can view the certificate. Example
https://Appserverhostname:9044/yourappcontext (Application example)
You will see the certificate in the browser.
Document Location
Worldwide
Was this topic helpful?
Document Information
Modified date:
24 January 2020
UID
ibm11168858