News
Abstract
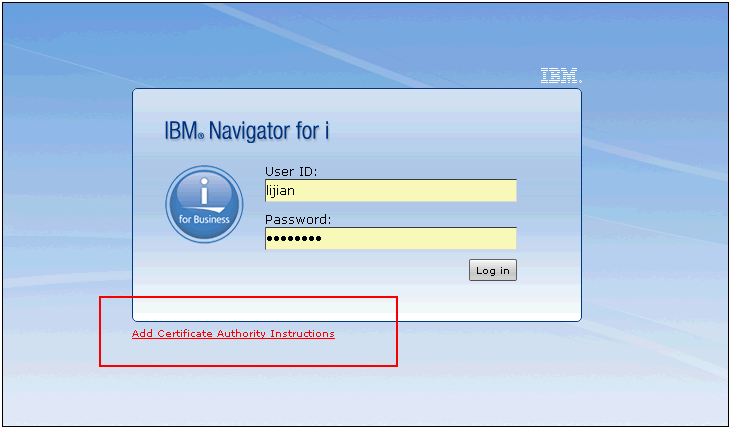
Since the IBM Navigator for i Web based application leverages HTTPS, the self-signed certificate needs to be correctly included into the Certificate Authority for the browser. Follow the instructions below so you can correctly access the IBM Navigator for i application.
Content
Add Certificate Authority Instructions
You will see a red link on the IBM Navigator for i logon page. This red link is important for the first time you want to use IBM Navigator for i to connect to a system AND you use Google Chrome as your browser. After the first time, the red link will still be shown, but you do not need to take action.
Why you should do these steps:
With of Google Chrome a IBM self-signed certificate needs to be added manually by the user into the Certificate Authority for Chrome once per client system.
This will avoid errors with the certificate authority while using IBM Navigator for i. The most notable problem will be the Chrome grey sad face: ![]() . If you skip the certificate authority instructions and see the sad face icon, please log out and return to the logon page. This time, be diligent to follow the steps provided at the link.
. If you skip the certificate authority instructions and see the sad face icon, please log out and return to the logon page. This time, be diligent to follow the steps provided at the link.
Select the "Add Certificate Authority Instructions" link and follow the steps. They are provided on this page for reference.
Since the IBM Navigator for i Web based application leverages HTTPS, the IBM self-signed certificate needs to be included into the Certificate Authority for the Chrome browser. Follow the instructions below to add the IBM self-signed certificate so you can access the IBM Navigator for i application. This needs to be done once per server/laptop.
Steps:
1. On the site you want to add, right-click the red lock icon in the address bar: ![]()
2. Click the tab labeled Connection, then click Certificate Information.
3. Click the Details tab, then click the button "Copy to File...". This will open the "Certificate Export Wizard", click Next to get to the "Export File Format" panel.
4. Choose "DER encoded binary X.509 (.CER)", click Next.
5. Click Browse... and save the file to your computer. Name it something descriptive and remember where it is stored. Click Next, then click Finish.
6. Open Chrome settings by clicking on the "Customize and Control Google Chrome" button in the browser header (3 horizontal lines: ![]() )
)
Scroll to the bottom, and click "Show advanced settings...".
7. Under HTTPS/SSL, click "Manage certificates...".
8. Click the "Trusted Root Certification Authorities tab", then click the Import... button. This opens the "Certificate Import Wizard". Click Next to get to the "File to Import" panel.
9. Click Browse... and select the certificate file you saved earlier, then click Next.
10. Select "Place all certificates in the following store". The selected store should be "Trusted Root Certification Authorities". If it isn't, click Browse... and select it. Click Next and Finish.
11. Click Yes on the security warning and click Close on the Certificates window.
12. Restart Chrome.
If your server is accessible via different names or additional IP addresses (perhaps via an external and internal IP address) then the URL may not match the internal server name and the browser will give a Mismatched Address error.One of the easiest ways to fix this would be to add an entry to your hosts file that maps the server's name to the IP address that you are using to access the server (on Windows, the hosts file is located at: C:\Windows\System32\Drivers\etc). That will enable the URL to match the certificate.
Was this topic helpful?
Document Information
Modified date:
28 January 2020
UID
ibm11163938