Technical Blog Post
Abstract
Maximo Anywhere 7.6.3 Installation on Windows
Body
I previously wrote a document for Maximo Anywhere 7.6.1 running through the installation from beginning to end, this document was still followed for Maximo Anywhere 7.6.2 as well. However with the latest release of Maximo Anywhere 7.6.3 there was a focus on improvements to the installation process which involves updated panels during the installation to streamline the installation and limit the amount of post installation configuration tasks. This document will go through the install on Windows, the screens are the same for Mac OSX so you can take the information below and follow my old document for the MAC OSX setup steps. I will create a specific document for installation on the Mac in the coming weeks.
Much of this content will similar if not the exact same as the previous blog (MobileFirst section). However the Anywhere 7.6.3 Installation section is where you will see the new content and want to focus on for this install if you have already implemented Anywhere or read my previous document.
Software and Hardware Requirements
For full details on the system requirements see the following WIKI before proceeding.
Required for all installations
The following can be found under the Maximo Anywhere entitlement on Passport Advantage.
1. IBM Maximo Anywhere V7.6.3 Launchpad Multiplatform Multilingual (CNTB8ML )
2. IBM Maximo Anywhere V7.6.3 Mobile First 7.1 Multiplatform Multilingual (CNTB9ML )
3. Java 1.7
*Java home is now detected by the installation, setting the environment variable is no longe rrequired.
Required for Android if building native applications ( applications can be downloaded from Google Play as well)
1. Android Studio and Platform Tools
http
*Note* Both 23.0.3 and 23.0.1 build tools are required
*Note* Android support repository is also required ( Downloaded via the SDK Manager)
Required for Windows
1. Microsoft Visual Studio 2013 or 2015
2. The windows applications must be built on a Windows 2012 R2 Server, Windows 8.1 or Windows 10.
3. Windows 8.1 and Windows Phone 8.0/8.1 tools must be selected during the install of Visual Studio (choose custom)
Required for iOS if building native applications ( applications can be downloaded from the Apple Play Store as well)
1. Applications must be built on a MAC OSX 10 or higher workstation
2. xCode 8.x (reccommeded 8.3.2) (can be downloaded from the app store)
3. Provisioning profile and apple developer certificate obtained through the Apple Developer program
Creating the required databases
For Maximo Anyw
Oracle
DB2
MySQL
For the installation to automatically create your databases SSH is required, as you may not always have an SSH server installed, especially when building Windows applications we will go over the manual configuration of the databases. MySQL does not require SSH, the installer will use the driver to make the connection and create the databases, so we will not outline that process here. Below are the schema's required and the statements to create them, WLREPORTS is no longer used in MobileFirst 7.1.
The APPCNTR schema will be used for the MobileFirst Application Center
The WLADMIN schema will be used for the MobileFirst Administration Services.
The WRKLGHT schema will be used for the MobileFirst runtime environment
Creating the Oracle Database and schema's.
1. Create a general purpose database using the Oracle Database Configuration Assistant, I called mine Anywhere.
2. Log in to SQL Plus using your SYS user as SYSDBA and run the following statements.
CREATE USER APPCNTR IDENTIFIED BY APPCNTR DEFAULT TABLESPACE USERS QUOTA UNLIMITED ON USERS;
GRANT CREATE SESSION, CREATE SEQUENCE, CREATE TABLE TO APPCNTR;
CREATE USER WLADMIN IDENTIFIED BY WLADMIN DEFAULT TABLESPACE USERS QUOTA UNLIMITED ON USERS;
GRANT CREATE SESSION, CREATE SEQUENCE, CREATE TABLE TO WLADMIN;
CREATE USER WRKLGHT IDENTIFIED BY WRKLGHT DEFAULT TABLESPACE USERS QUOTA UNLIMITED ON USERS;
GRANT CREATE SESSION, CREATE SEQUENCE, CREATE TABLE TO WRKLGHT;
Creating the DB2 Database and schema's.
1. Create a user on the database server for the DB2 database ( will call our user mobilefirst) and add to the DB2USERS group
2. Open DB2CMD and run the following statements to create the database.
DB2 CREATE DATABASE anywhere COLLATE USING SYSTEM PAGESIZE 32768
DB2 CONNECT TO anywhere
DB2 GRANT CONNECT ON DATABASE TO USER mobilefirst
DB2 QUIT
3. Create the required schema's
DB2 CREATE SCHEMA APPCNTR authorization APPCNTR
DB2 CREATE SCHEMA WLADMIN authorization WLADMIN
DB2 CREATE SCHEMA WRKLGHT authorization WRKLGHT
Application Server prerequisites
For your application servers being used ensure a JVM\Server is created for MobileFirst before starting the install. If using WebSphere ND add that servers port to the default_host virtual host to prevent having to manually change the virtual host after the deployment.
Preparing the installation files
Before we can open the launch pad and install MobileFirst we need to ensure the files are extracted correctly, from Passport Advantage you should of downloaded the packages above, which result in the following zip files.
Max_
MaxA
You will notice that there is no more support for Maximo 7.5, Maximo Anywhere 7.6.3 is supported on 7.6.0.2 and higher, however some features require 7.6.0.8 and higher.
The first file
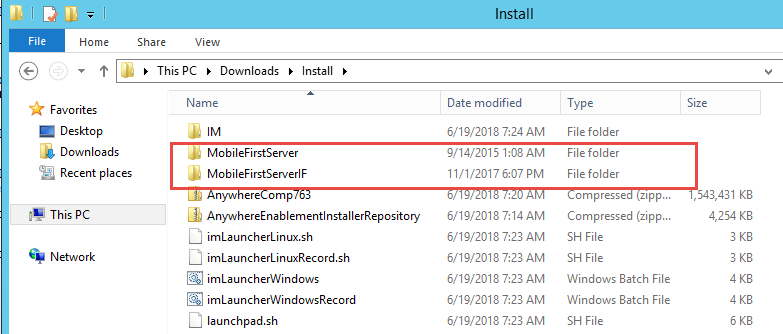
Installation of Maximo Anywhere Required Components
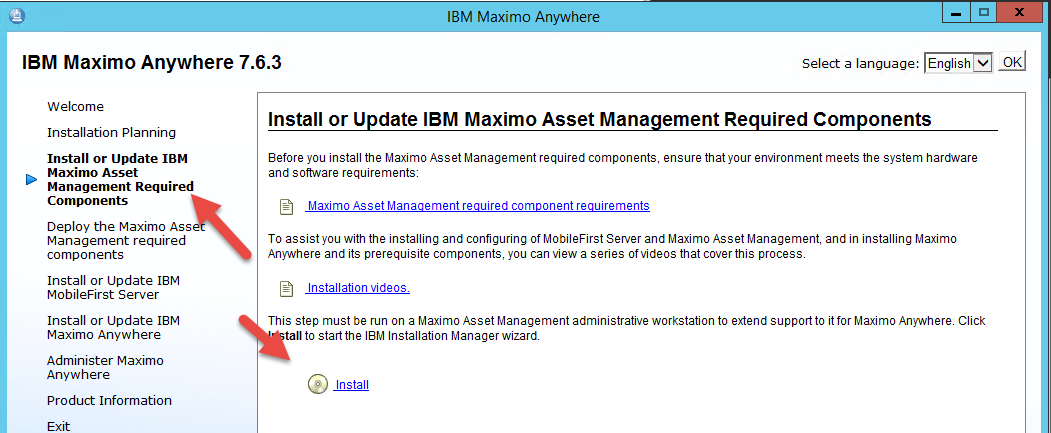
Looking at the screenshot above you will see a launchpad64 executable int he parent folder, click on this to open the launchpad. The launchpad will present you with a set of options, the first option we need to use is the 'Install or Update IBM Maximo Asset Management Required Components'. This will install and run the required updates to the core Maximo product including the OSLC components and Anywhere Administration., click Install to start the process as you see below.
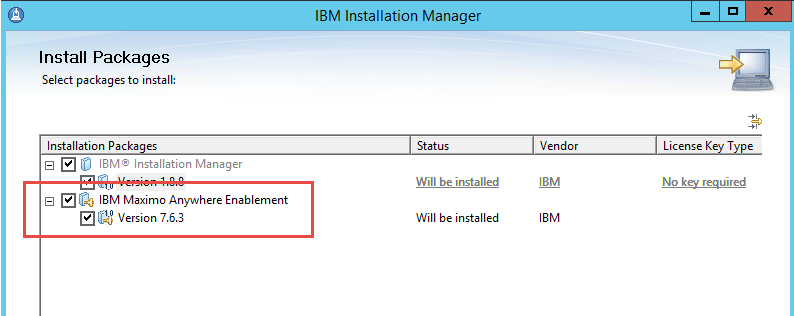
You will be prompted after to select your product, this will show the Maximo Anywhere Enablement option, select both boxes as seen below and click on 'Next'.
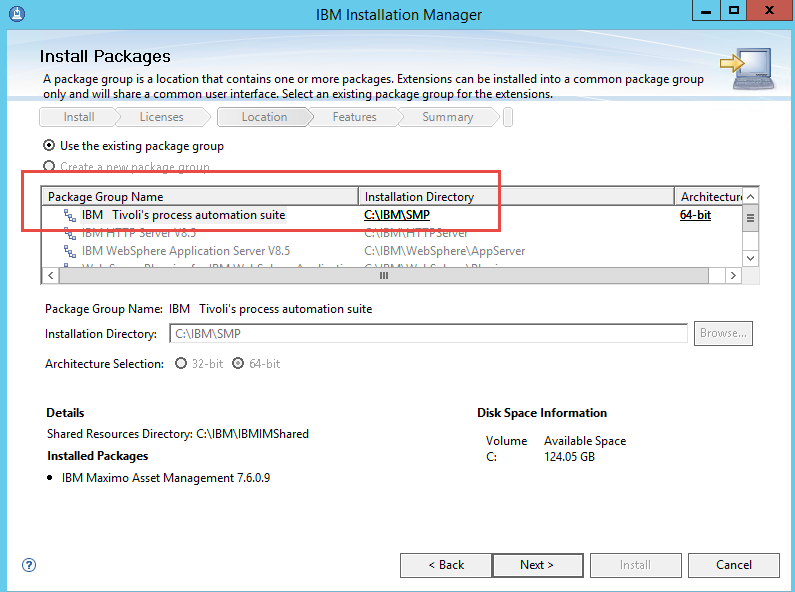
Select the Installation Package for Maximo 7.6, you will install the components to it's directory. Once selected as you see below click 'Next'
Now this is the first of the new panels and the only new one in the enablement process. The field is completely optional but to remove some extra steps at the end of installation and get set up for initial testing you can define a test user here. The user entered here will be added to each of the 9 out of the box Anywhere groups during the install. This will lower the amount of configuration steps needed to test your initial login to the application, other users can be added to the groups through the traditional process after.
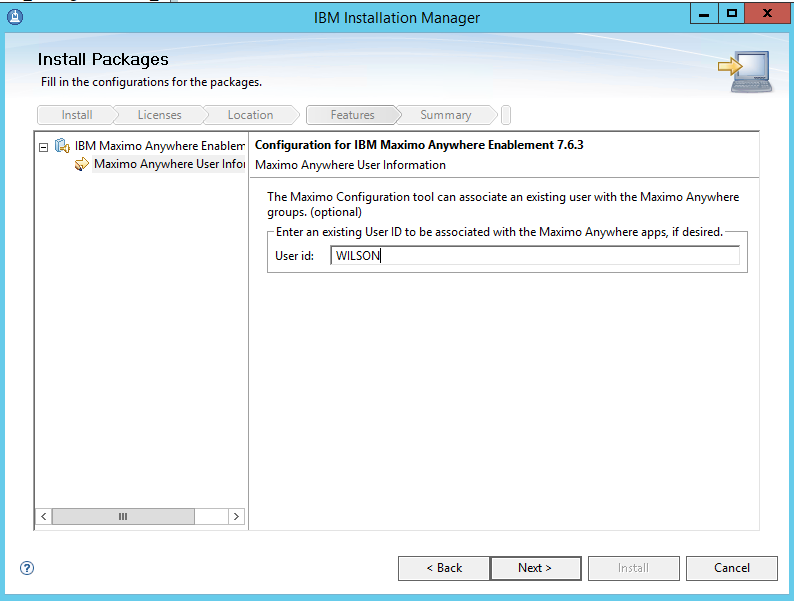
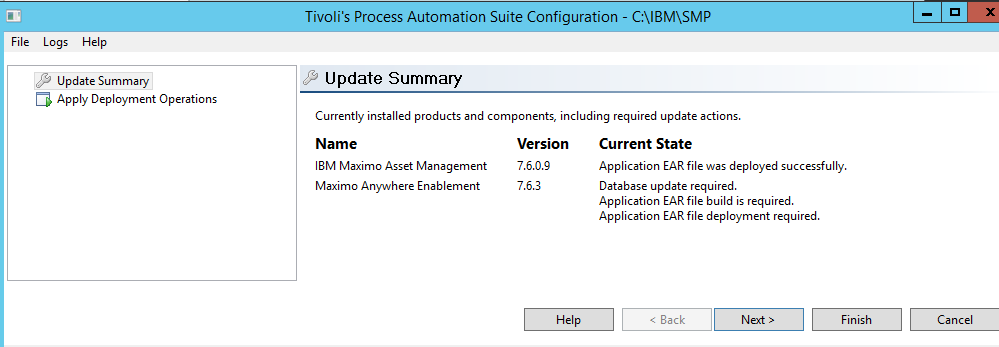
Click next then on the final panel click 'Install', once the installation is complete click to launch the 'IBM Tivoli process automation engine configuration utility'. Doing the step at this point allows you to skip the 'Configure IBM Maximo Asset Management Required Components' on the launchpad as they both link out to the ConfigTool in Maximo. Once the Config Tool launches select the option 'Update Database and Build and Deploy Application EAR files' You will see your Anywhere Enablement product shown with the required updates. Click 'Finish' to complete the database updates, build and deploy.
Alternatively if you don't use the configuration tool, you can run the updatedb from ibm\smp\maximo\tools\maximo and then build and deploy your ear files manually. This concludes the enablement portion of the install, we will now move on to the MobileFirst Platform Server Installation.
Installing the IBM MobileFirst Server
The MobileFirst server is required Middleware that will exist between the Maximo Anywhere application and the Maximo server. It consists of the following components.
Application Center : This acts as an application store to allow users to log in and download the apk, ipa or appx files required to run the application on the device.
MobileFirst Server Administration : This is the MobileFirst Administration component, it contains the MobileFirst console application as well as Administration services, all runtimes will be deployed to this server.
Maximo Anywhere Runtime : This is a runtime specific to the Maximo Anywhere application with the Anywhere specific settings defined, multiple runtimes can exist for different applications on a single MobileFirst server. We build the runtime using the Anywhere build scripts.
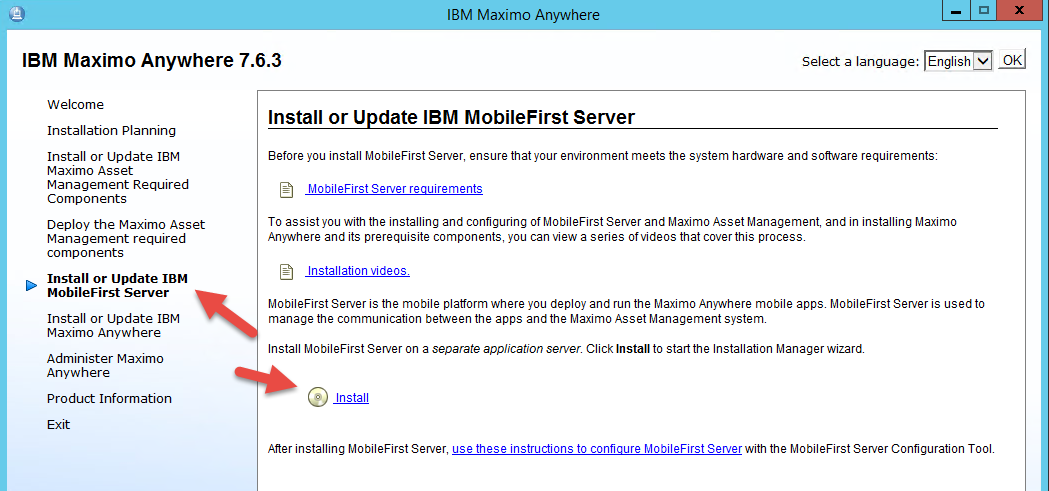
To start the MobileFirst portion of the install, head back to the main launchpad and click on the 'Install or Update IBM MobileFirst Server'. The right panel will now change and provide the link to install the product, click on 'Install'.
Like the previous installations, we want to select an install folder for the MobileFirst Platform Server I put this in c:\I

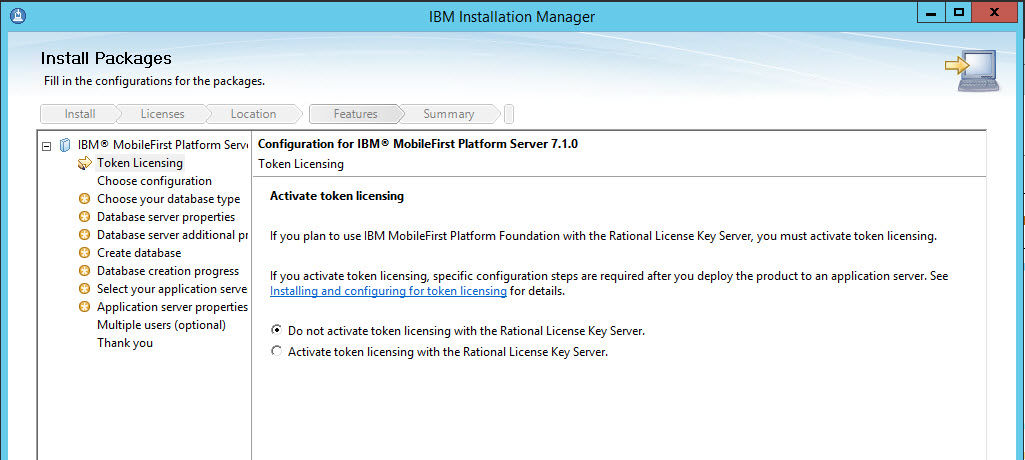
The first install options panel is for Rational Token Licensing, if you select to Activate this option and do not have the license server key or finish the specific rational configuration your runtime will fail to start. Select 'Do not activate the token licensing with the Rational License Key Server'. Click 'Next'
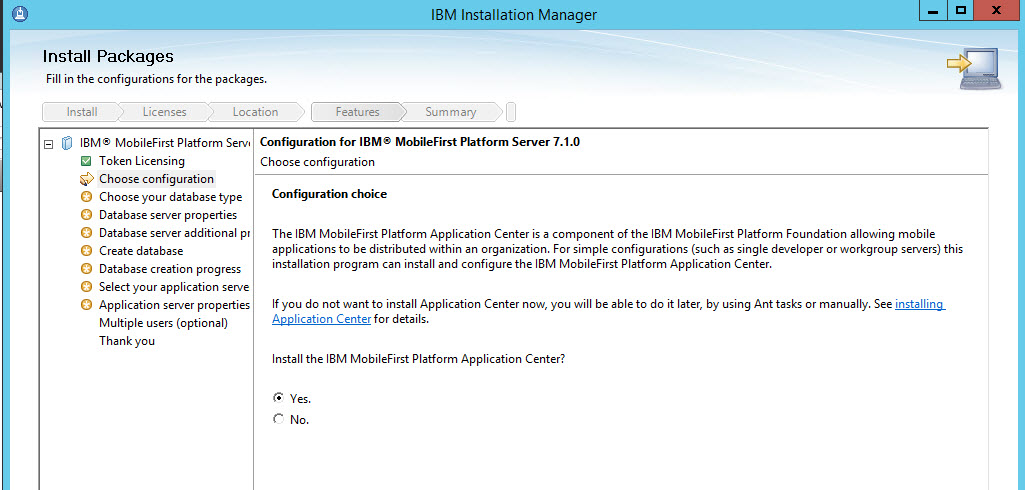
The next installation panel asks whether you want to install the IBM MobileFirst Platform Application Center, this is used as a place to publish your application files for download to the device. The Anywhere build process will upload the APK, IPA and APPX files to the Application Center which can be accessed from the device to download and install the applications. Although the Application Center is not required if you are pushing out your application files with other MDM software or side loading, it is recommended. Select 'Yes' and click on 'Next'.
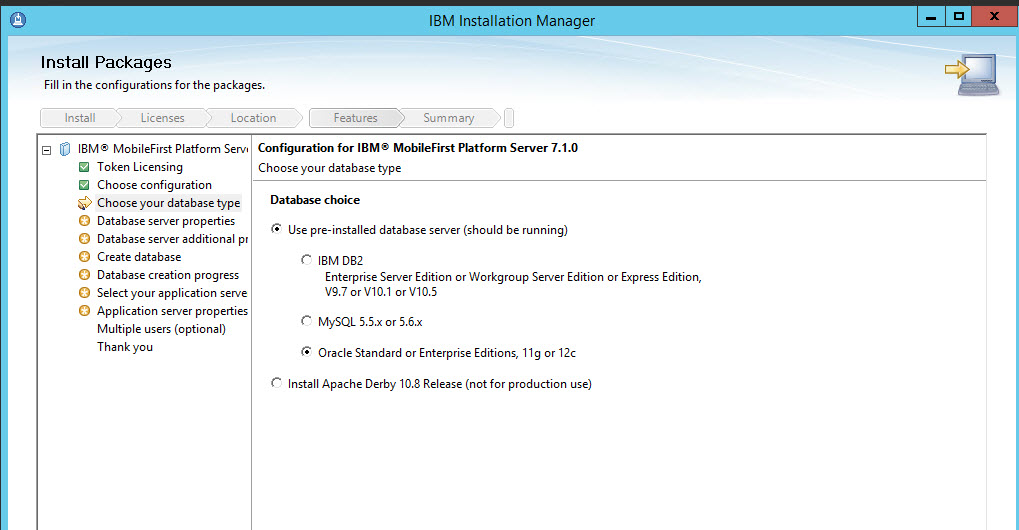
Our next panel provides a list of options asking for the database vendor being used, for the guide here we used Oracle and created our schema's as we did in the database section at the top of the blogs. If not using Oracle select the database option which applies to you and click 'Next'.
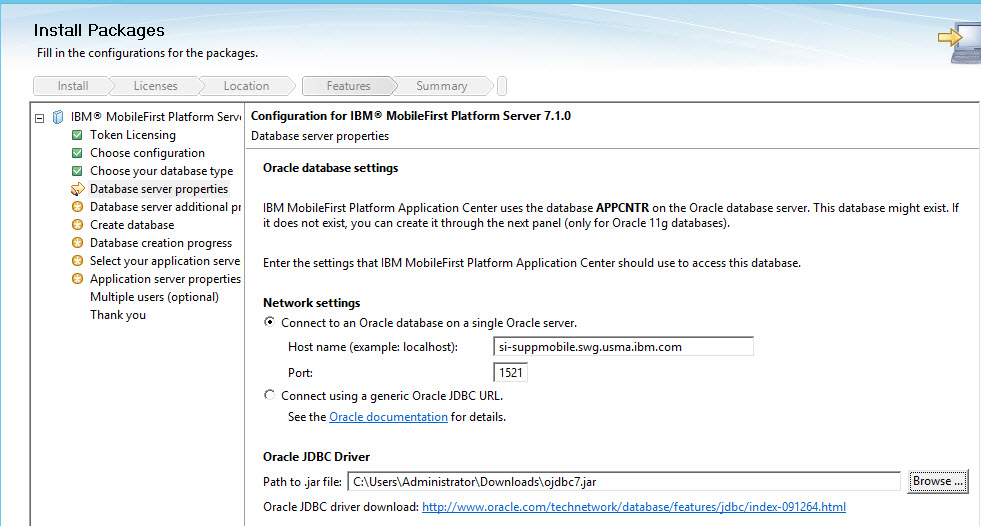
The next screen prompts for your database server properties. You will need to enter the host name and port of your database server as well as point to your JDBC driver for the database. Regardless of the database you are using this screen will appear the same, links to the download site for the JDBC driver is available on the install panel for each database type. Once complete click 'Next'.
The next page will prompt you for additional database properties, which require you to enter the database name as well as the username to access. We created a database called 'anywhere' and under it we created three schema's, the first of which was called APPCNTR. Enter your database created for MobileFirst as well as the schema owner created for the APPCNTR and it's password as seen below. Click 'Next'.

The next couple of panels I've left out of this guide, they will show that the Oracle database already exists (as we created it manually) and to continue on. If you did not create the databases manually you would be prompted with a panel asking for your system user to create the database and then the database creation output.
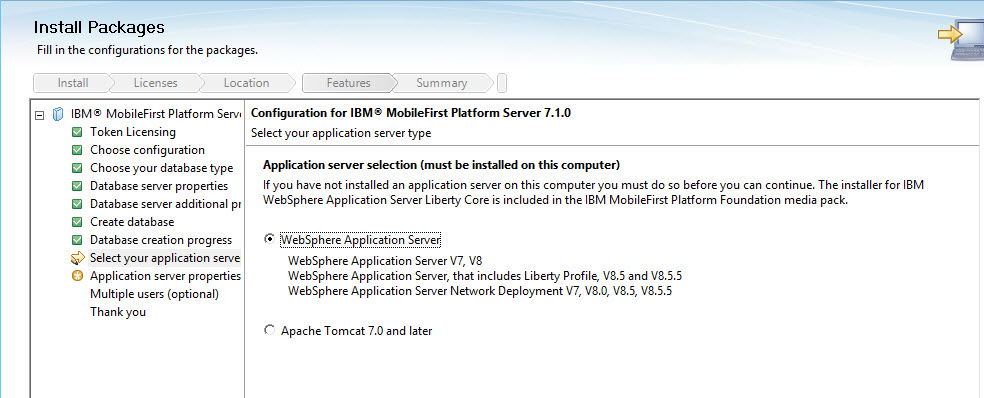
The next step on the install is to select our application server, we are using WebSphere Network Deployment so the first option is selected, this same option would be used for WebSphere Liberty. If using Apache Tomcat select the second option and proceed to select it's installation folder. There are no extra configuration options in the install panels for Apache Tomcat or Liberty as there is with WAS ND, once your option is selected click 'Next'.
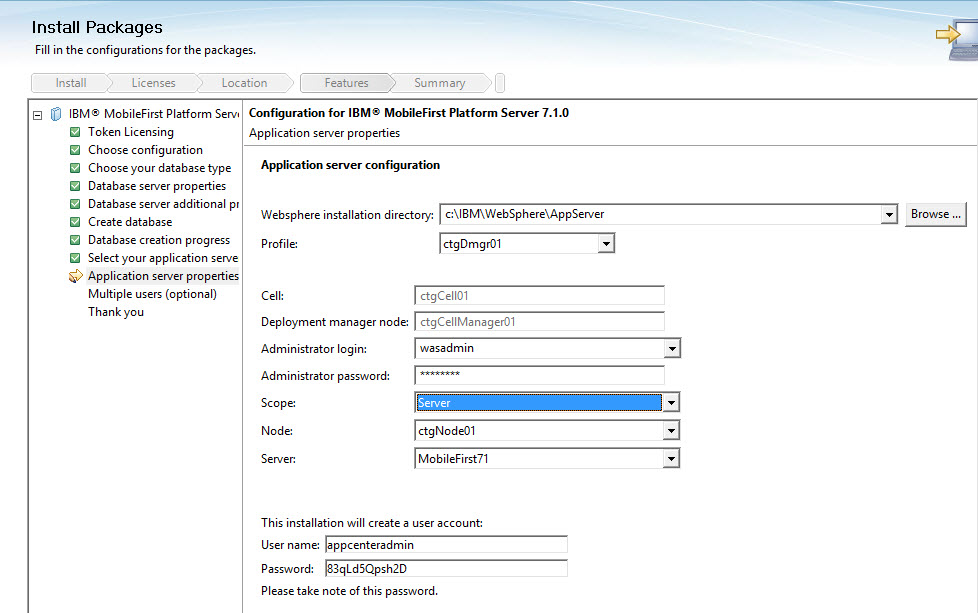
As we are using WebSphere Network Deployment we have to provide information on the profile as well as scopes being used. If using a federated node you also need to select the DMGR profile instead of the APPSRV profile to deploy the applications. At this point you also want to take the scope in to consideration, if your plan is to cluster MobileFirst the scope should be set to the cluster level or higher. If you select the server at the bottom level of the scope the data source configuration will be done at that level, so when adding a new JVM for MobileFirst the data sources would need to be reconfigured to a scope that both JVM's can see. I am doing this on a single JVM, so I selected down to the MobileFirst71 scope.
The username and password for appcenteradmin are stored in WebSphere's file repository, the password for this can be changed any time from there. For more information see the following blog on managing the admin users in WebSphere.
Maxi
Another thing to note, the MobileFirst71 server is not created by the installer, it must be created in WebSphere beforehand manually. The install also deploys using the default_host virtual host, so ensure your ports are defined in there, others you will manually have to change the virtual host in WebSphere after the deployment.
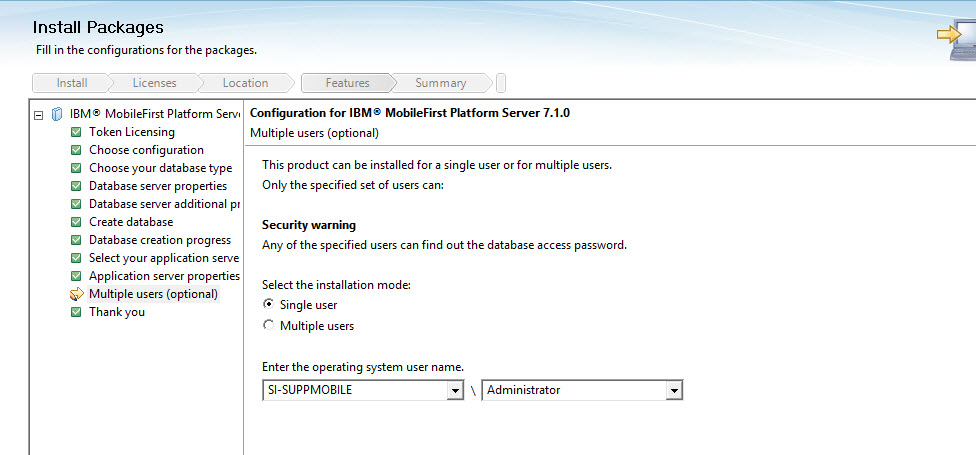
Select whether you are installing for Single or Multiple Users and click 'Next'
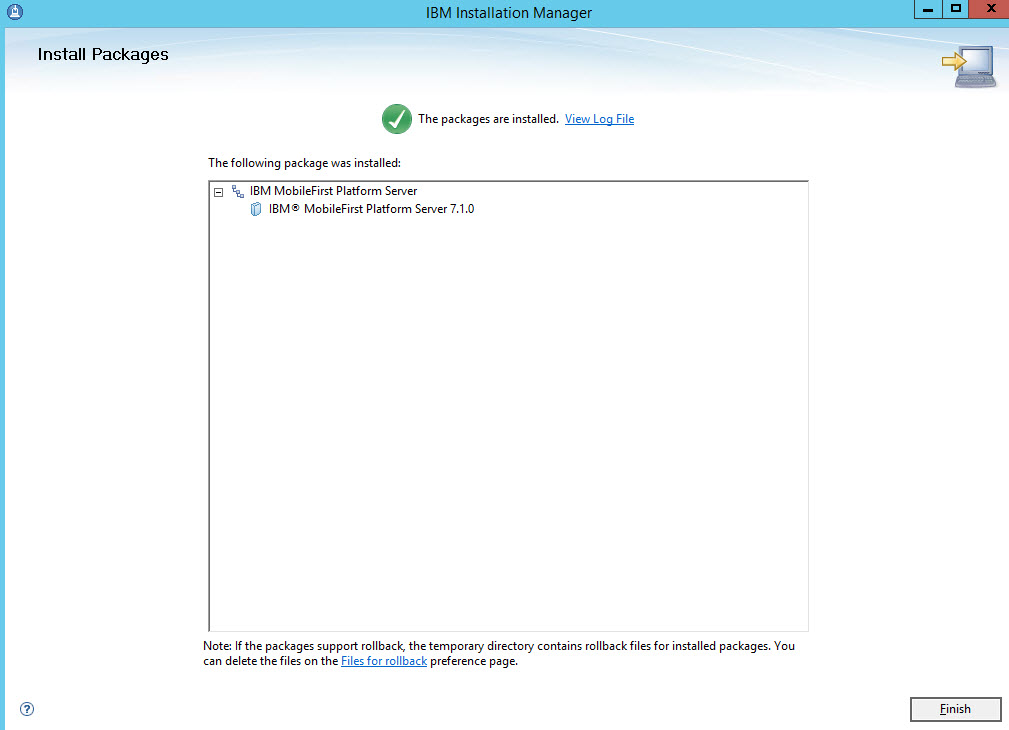
Click 'Install' on the last panel, once finished you will see the following screen with a green check mark if everything was successful.
Installing the MobileFirst Adminstration Component.
Now that the Mobi
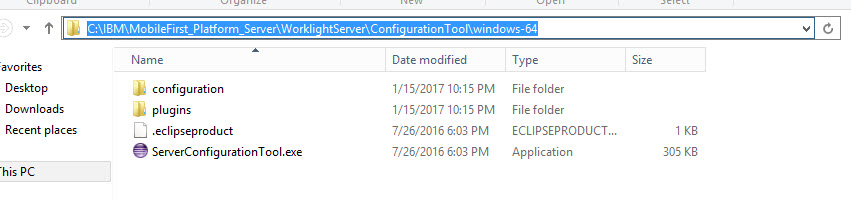
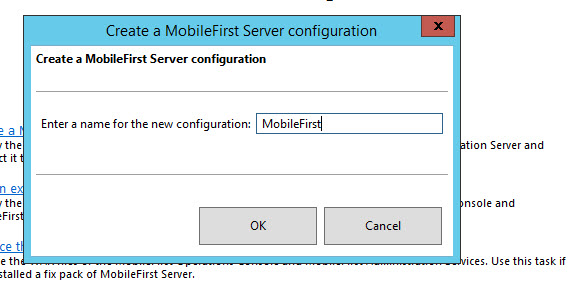
This will launch the MobileFirst Server configuration application, you will see a list of options. The first one we want to choose is the 'Create MobileFirst Server configuration' option.

After selecting the above option you will be prompted to enter a name for the new configuration, the name itself does not matter, it is referenced as the environment id in case there are multiple deployments of MobileFirst on the same cell. I called mine 'MobileFirst', once defined click 'OK' as seen below.
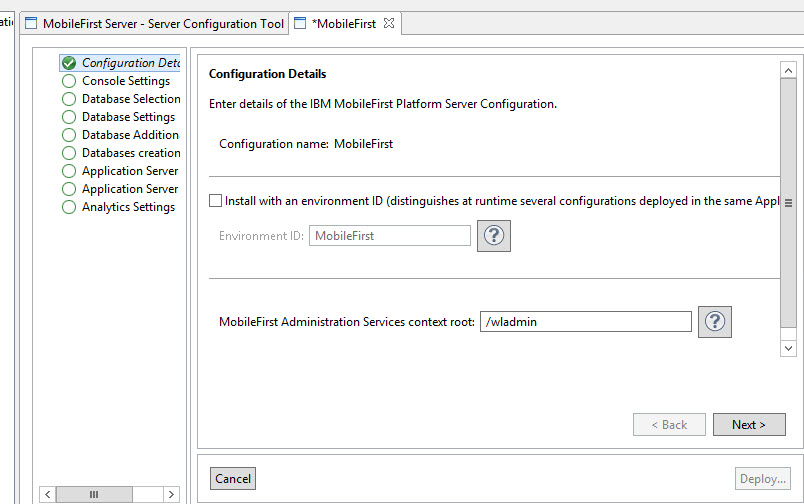
You will now be brought to a set of configuration panels that look very similar to the ones you went through previously on the initial install. The first panel shows your environment id which is the name we provided when prompted. We did not choose to install with an environment ID as there will only be one deployment of MobileFirst on this server. If you are planning to install multiple deployments, such as sandbox, dev etc you would select to install with the environment ID. This allows the runtime application to distinguish which administration components it should be associated to. It will be preventing issues with devices connecting and showing under the wrong administration configuration.
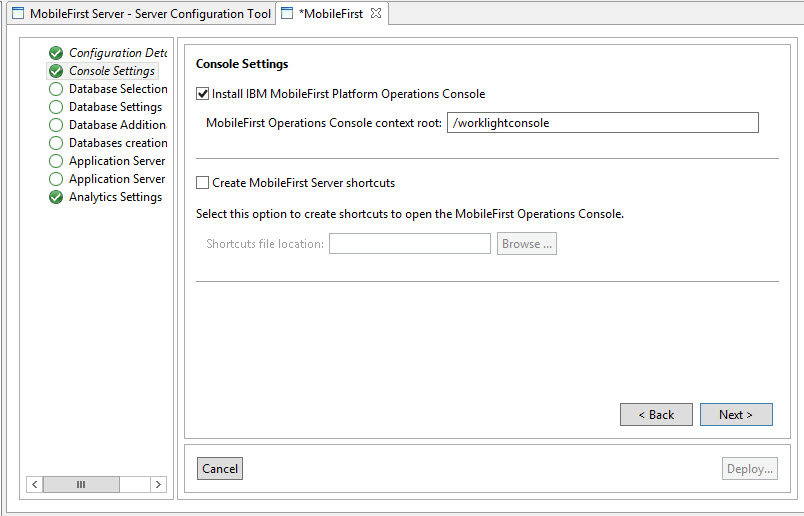
The next panel defines the context used to access the MobileFirst console, by default this is worklightconsole, we will leave this the same. If you wish to create icons to acccess this console from your desktop you can click the 'Create MobileFirst Server shortcuts' box and choose the location to put the shortcuts. Click 'Next'
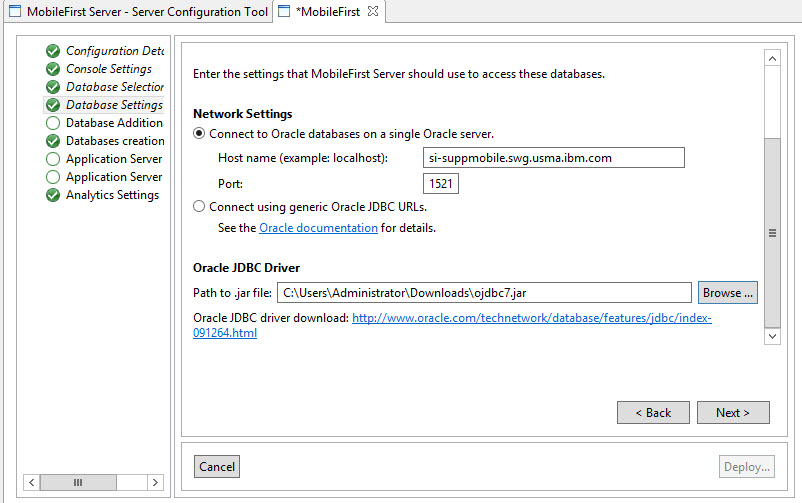
As we did before we will select the Oracle database options, choose the vendor that corresponds to your database.

This panel will be the same as the initial install panel, enter your host name and database server port and then point to the database driver you had downloaded previously.
We will now point to our anywhere database again, this time we are using the schema that was created for the MobileFirst administration component which was WLADMIN. Enter this schema owner and it's password in to the username and password fields. Once you received the status 'Database exists' click 'Next'.
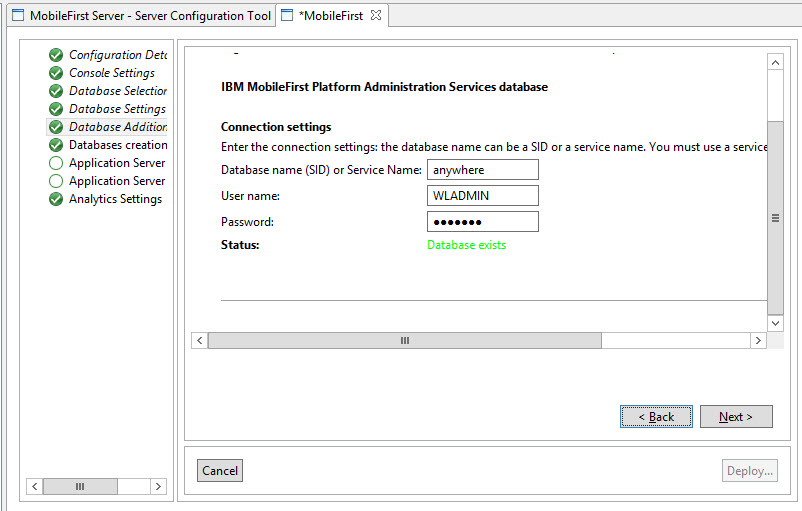
We will skip the next screen as it just says our database exists once more. Click 'Next' to move on to the Application Server configuration.
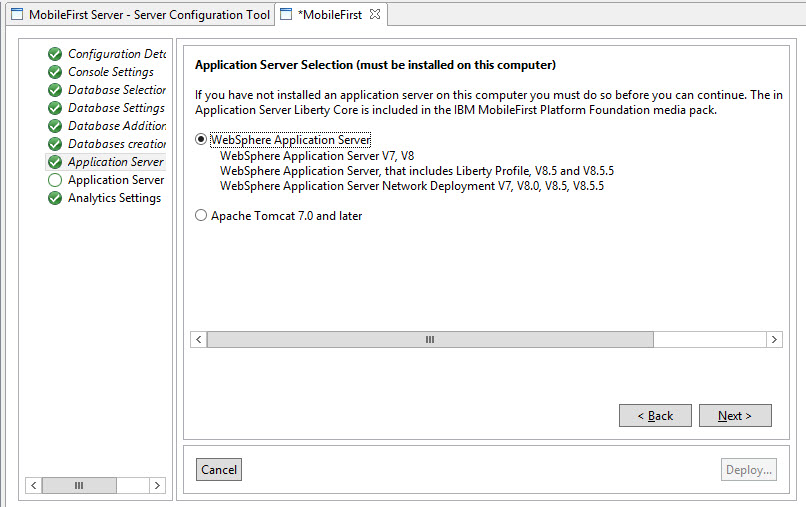
Again the panels are similar to what you previously saw, select the option that corresponds to your application server. We are using WebSphere Network Deployment so the first option was selected. The same option is used for WebSphere Liberty. If using Tomcat choose the second option and enter the installation folder.
We are not using the Analytics Server so ensure the 'Enable the connection to the Analytics server' is unchecked and click 'Save' then 'Deploy'
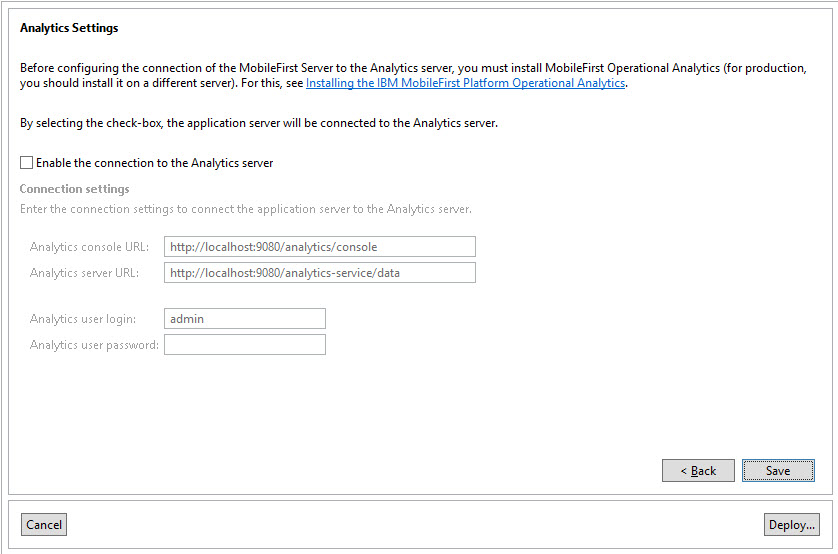
The console below will show you once the task has been completed and the application deployed.

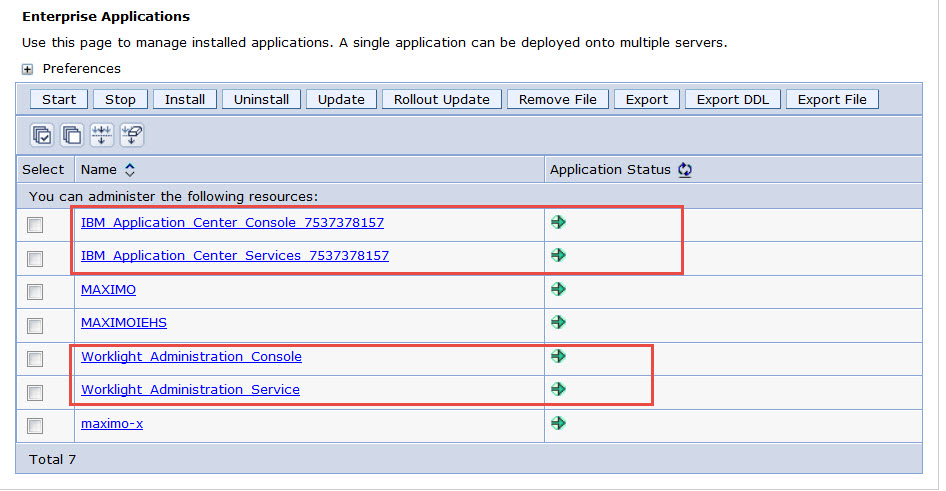
Log in to WebSphere and you should now see 4 new applications deployed for the Application Center Console\Services and the MobileFirst Administration Console\Services. Start your MobileFirst JVM and the new application should start up as you see below.
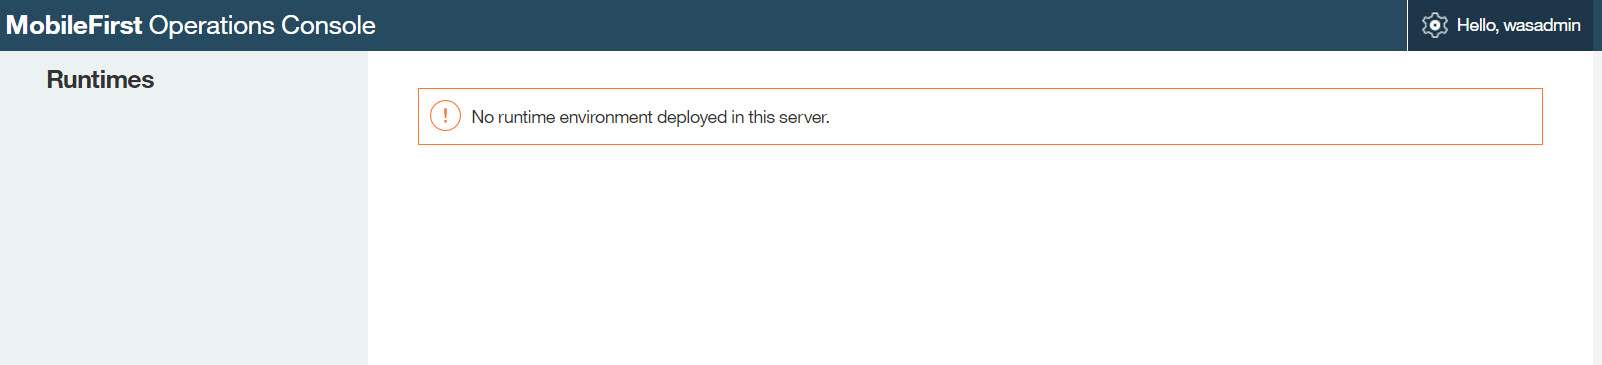
To verify the MobileFirst Console is running you can access the console at the following address and log in with your wasadmin user. your host and port may differ.
http
On logged in the console should show 'No runtime environment deployed to this server' . This portion will be deployed after the Maximo Anywhere 7.6.1 component is installed.
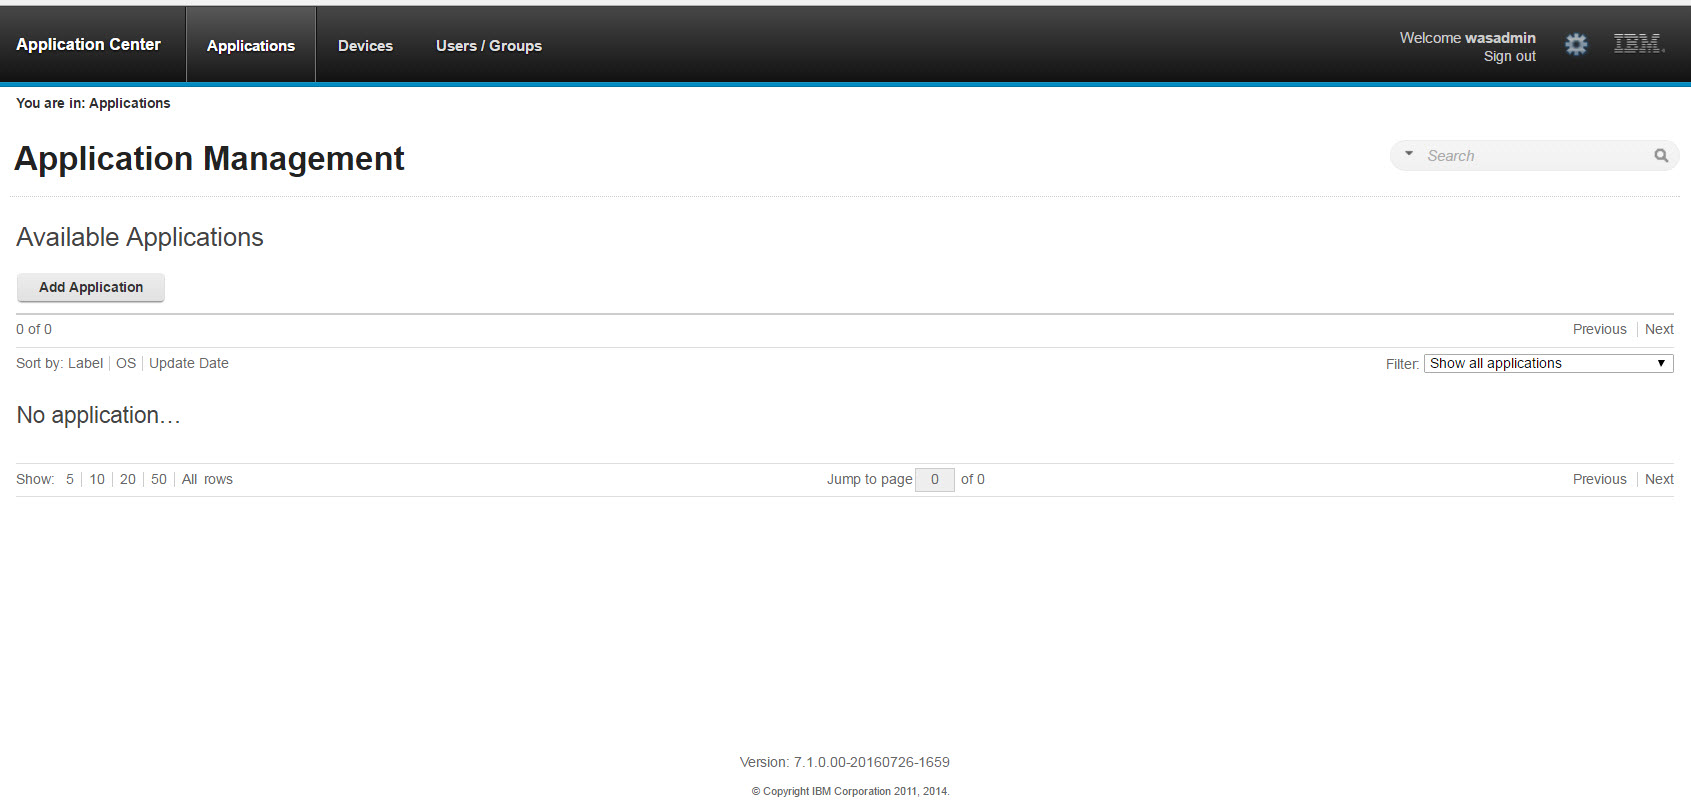
The Application Center would be available on the same host using the /appcenterconsole context.
http
You can use your appcenteradmin user created previously to log in or use the wasadmin user. The console should appear as you see below with no applications deployed.
Installing Maximo Anywhere 7.6.3
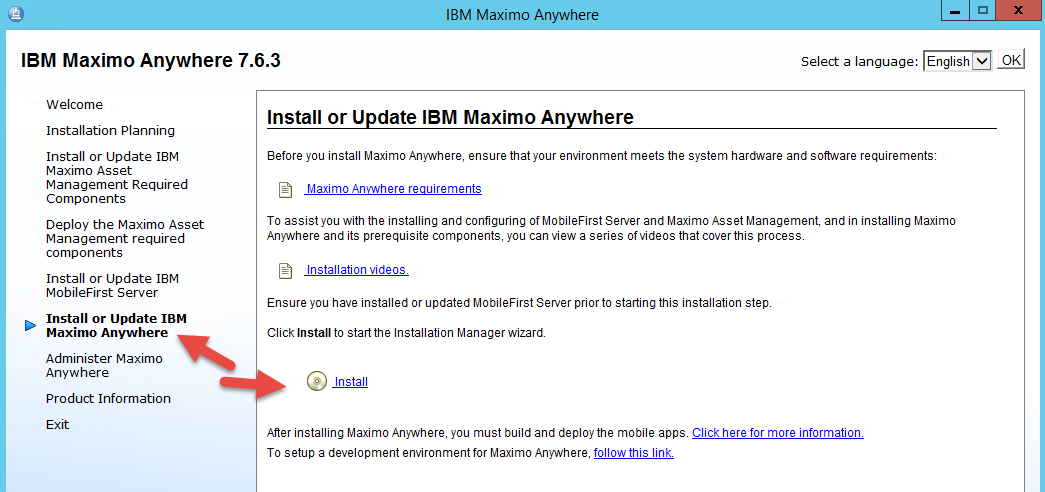
Our last option on the launchpad is 'Install or Update IBM Maximo Anywhere'. Once selected you will see the option to Install on the right panel, click this to launch the Installation Manager. You can install this on a separate machine from the MobileFirst server if required. I'm doing it on the same Windows 2012 R2 server, however you can do it on a Windows 8.1 or 10 workstation as well which will allow you to build both Android and Windows at the same time.
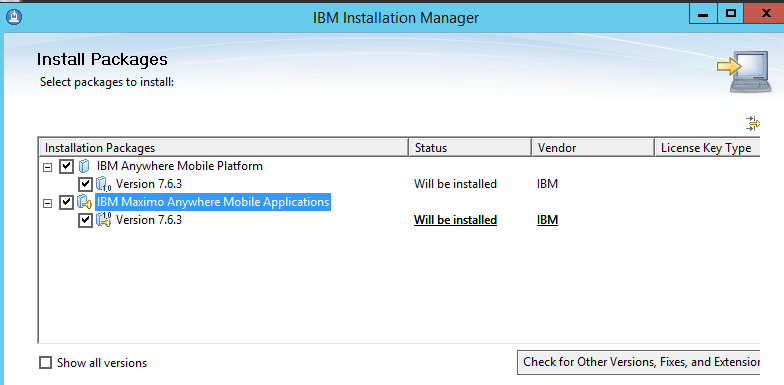
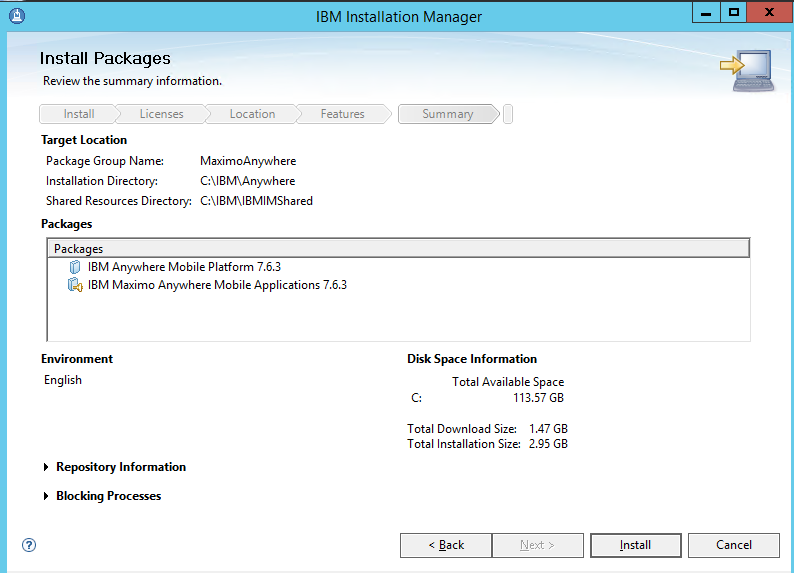
Select all of the components on the 'Install Packages' as well as the versions, click 'Next'.
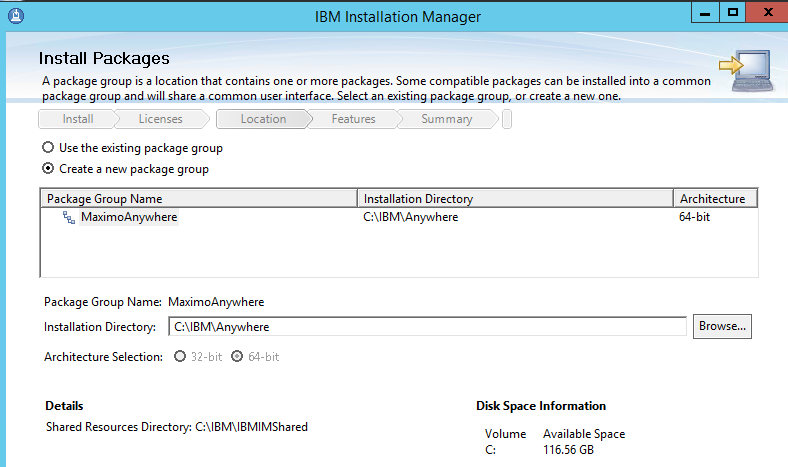
Choose the Installation folder, I selected IBM\Anywhere when the install completes there will be a MaximoAnywhere folder contained within. Click 'Next'.
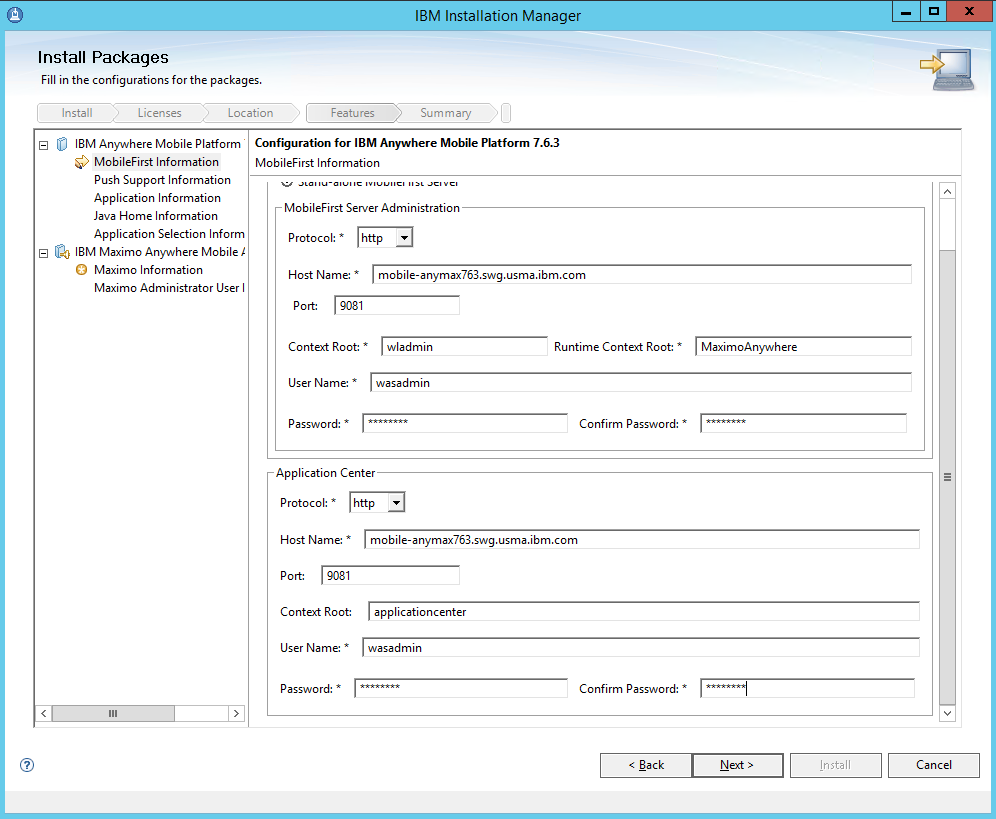
As you can see in the right frame there are many more panels to the 7.6.3 installation then previous versions. The goal is to prevent the user from having to do manual edits to the build.properties post installation and before using the application. On the first screen you will want to enter your MobileFirst Information for both the Application Center and MobileFirst console. Accept the defaults for the context root boxes unless they were changed previously.
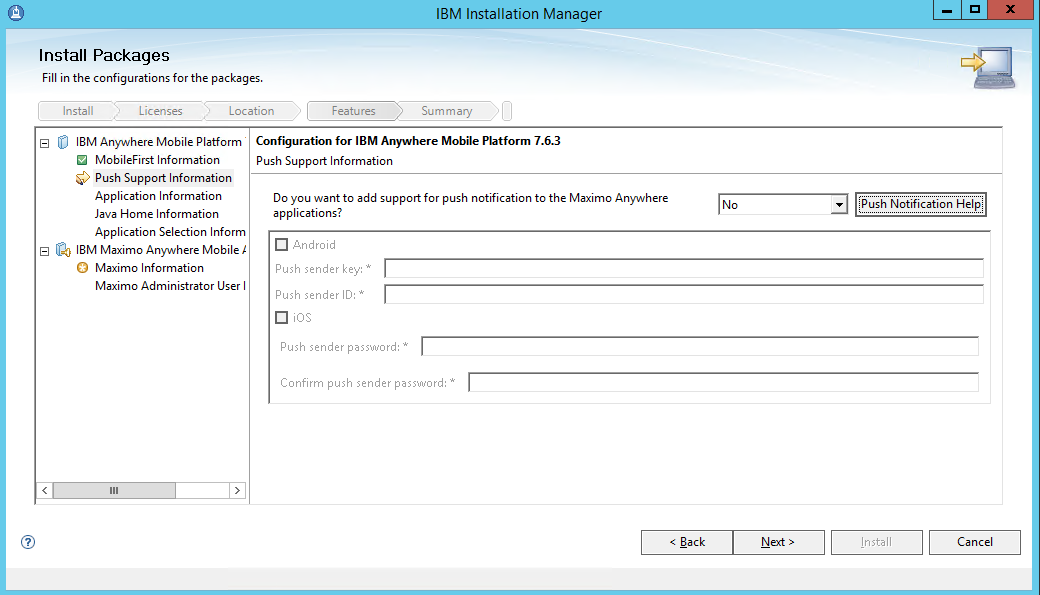
If you have set up your push notifications in google firebase or apple developer you can provide the information now during the install. You can still configure push notifications later if you choose no here. Click Next
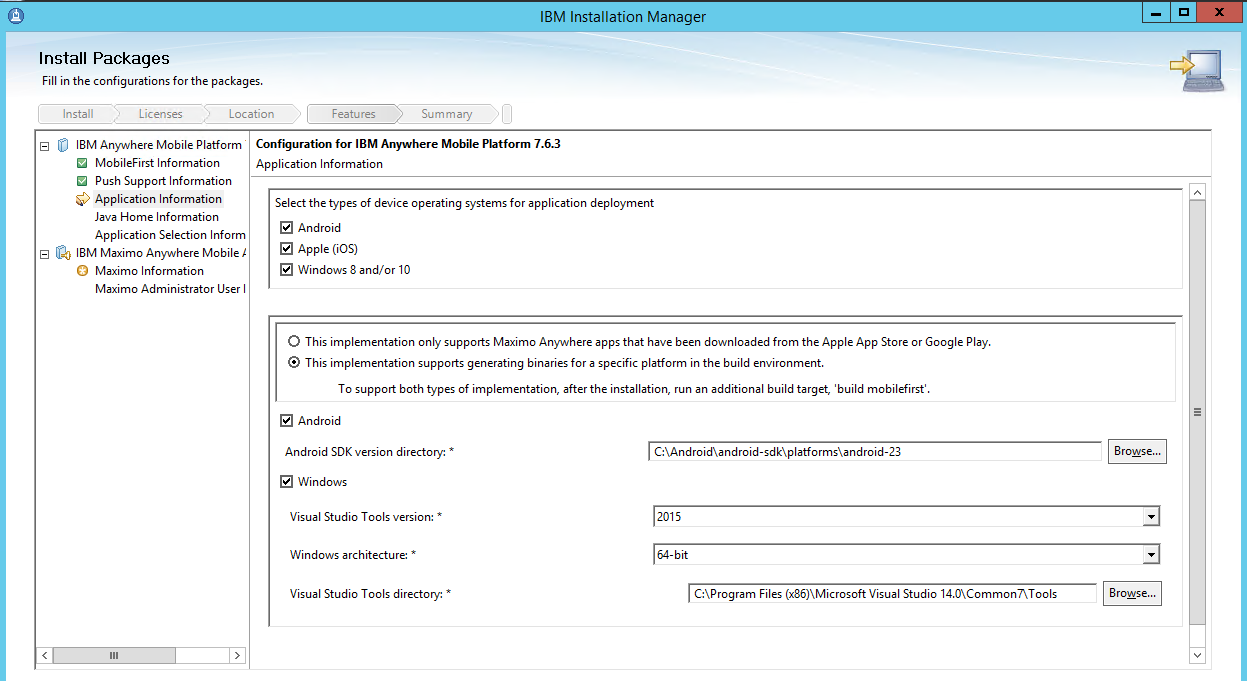
On the next panel we are selecting the platforms we wish to build for. If you are installing on a Windows Machine you can still choose iOS however you will only be able to build the artifacts that are deployed to MobileFirst and connect the applications from the App store.
In the bottom section if you select the first option there will be no validation on your Windows Visual Studio install or Android SDK, this would be selected if you are using the Google Play store. Windows store is not currently supported so you would need to define the visual studio path.
Once you have decided which platforms you are using and how you are going to create the applications click next.
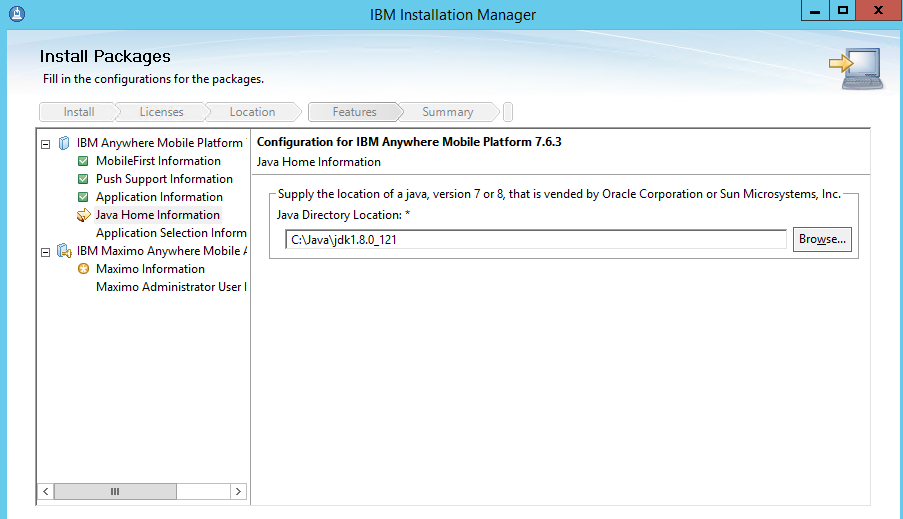
The next panel will auto detect your java version if it can find it, if not point to the java path and click next. This prevents the JAVA_HOME from having to be set in the environment variables.
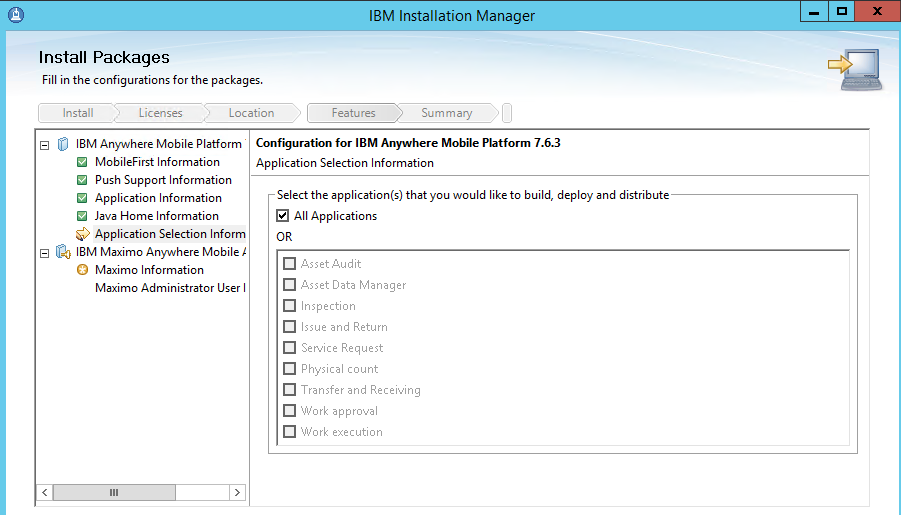
On the next panel choose the applications you wish to build. You can choose all 9 applications or just the ones you will be using. This will decrease initial build times by removing the unwanted applications.
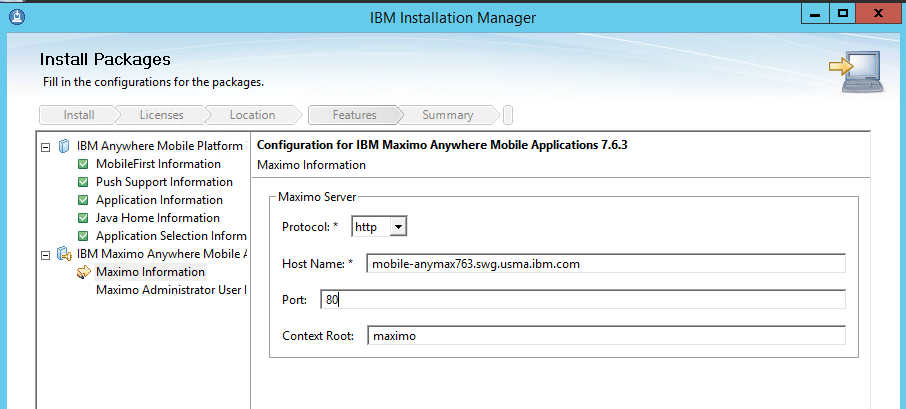
On the next screen enter your Maximo information
If you wish to use Anywhere Administration in Maximo you can define the user that will import the applications here, this will also update the adapter username and password in the build.properties
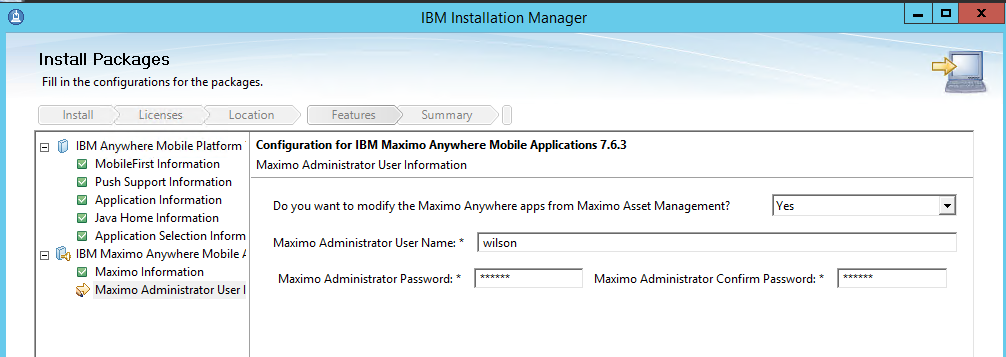
Click next and install
Once the install is complete we want to build our runtime, we will do this separate from the build all command. If you run build all the anywhereAttachment servlet will not be added initially which is required to use attached documents on the device. To build the runtime open a command prompt and go to the IBM\
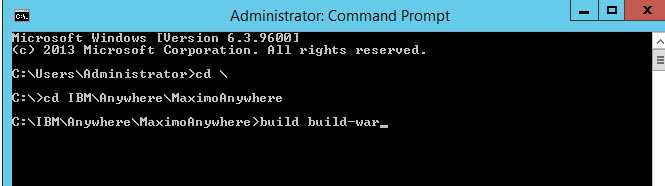
Creating the runtime war should only take a few seconds, once complete you will get the output you see below.

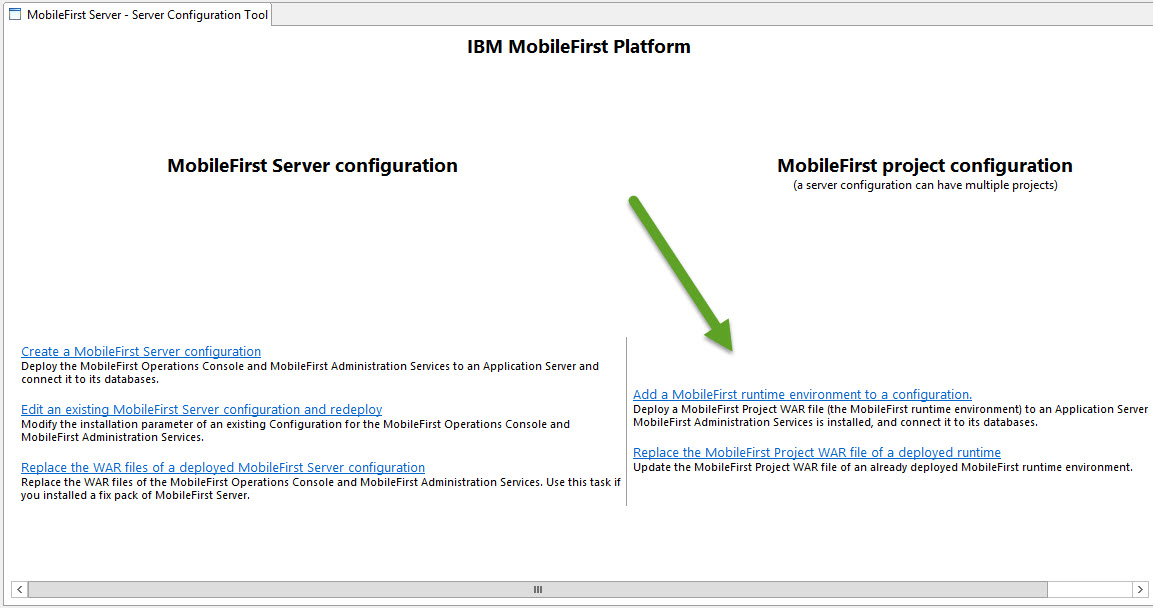
Now we want to go back and deploy this runtime to the MobileFirst server. We do this by going back to our MobileFirst configuration tool and clicking on 'Add a MobileFirst runtime environment to a configuration'.
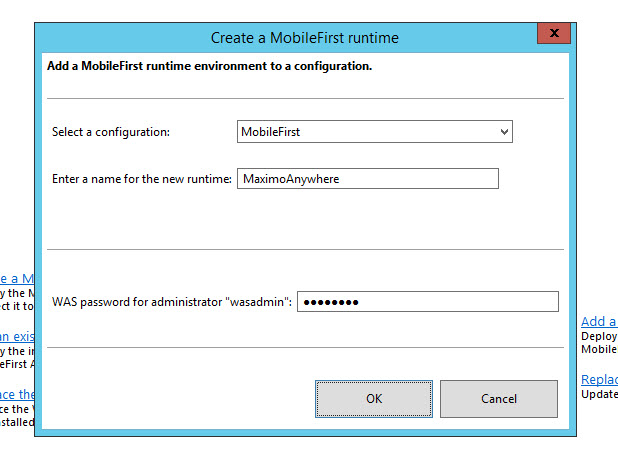
You will be prompted to select the environment id of your MobileFirst configuration, we called it 'MobileFirst'. After you have selected the ID, enter in a unique runtime name as well as the wasadmin user name that will be used to deploy the runtime. We called our runtime 'MaximoAnywhere', click 'OK'.
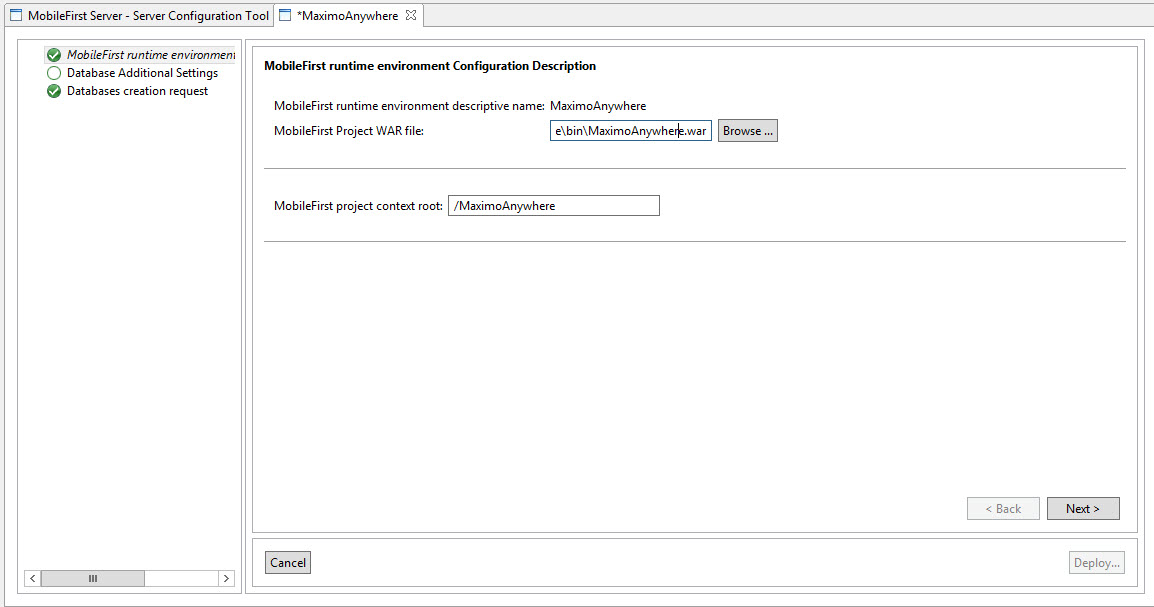
On the next panel we want to browse to the MaximoAnywhere.war file we created with the build build-war command. This is located in the IBM\
As we gave the Anywhere installer the runtime context of 'MaximoAnywhere' we will want to update the context on this screen to match. Initially it is called worklight. Having these out of sync will cause build issues as the build script won't be able to find the Anywhere runtime. This can be updated in the build.properties if defined incorrectly.
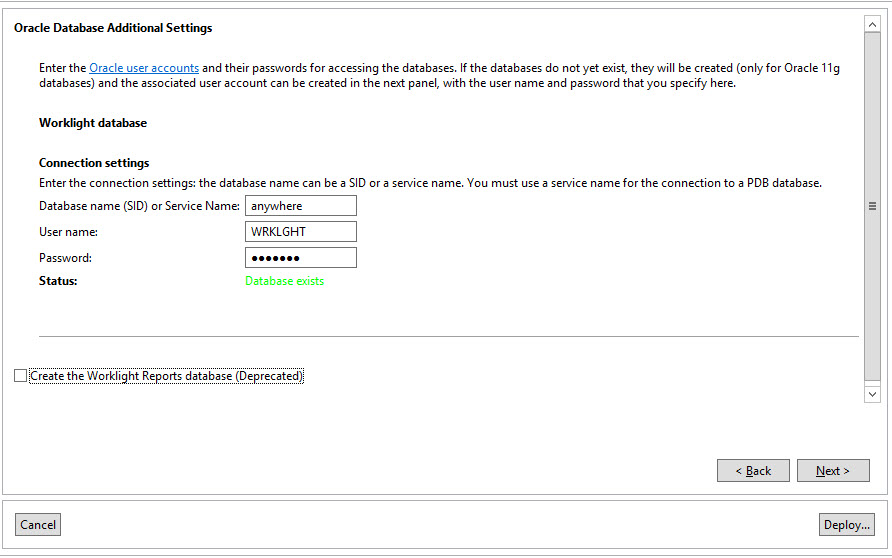
On the next screen we are going to provide our last schema that was created. Enter in your database name of 'anywhere' and the schema owner of WRKLGHT as well as it's password. You can see in the screenshot that Worklight Reports has been deprecated so we do not have to create this schema. Click 'Deploy'.
You will again see a console output showing the deployment is successful once complete.
Now log back in to the WebSphere console and you will see your runtime war deployed. 'IBM Worklight project runtime MaximoAnywhere'. Start the runtime and ensure the status shows green.

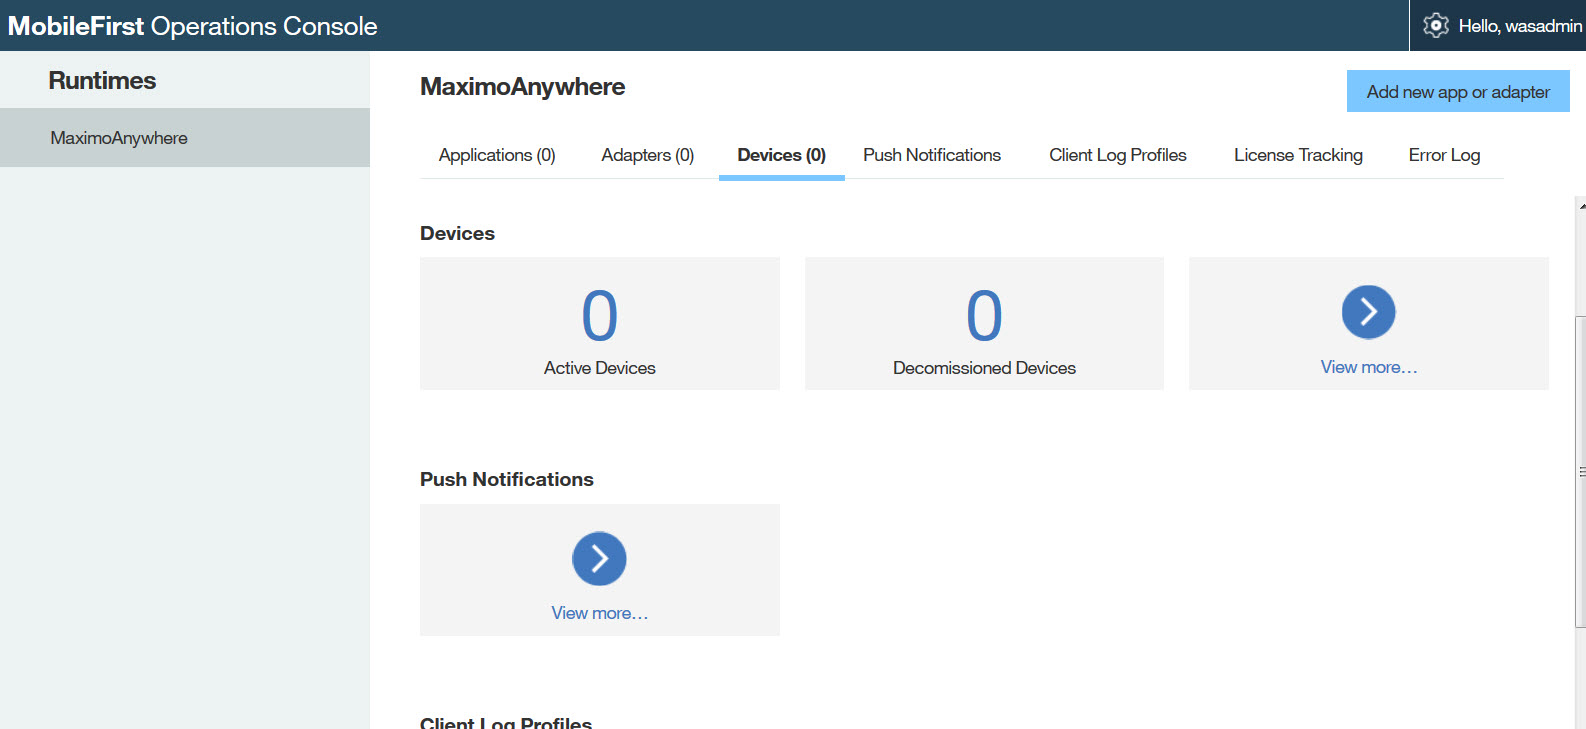
Now when you log in to the MobileFirst console you will no longer get a message about the runtime not existing, but a screen showing the runtime name, it's applications, devices etc.
Now that are runtime is configured, we can head back to our launchpad now and use the post installation admin tasks to build our applications and import the administration . Click on 'Administer Maximo Anywhere' then choose 'Reload the installation directories'
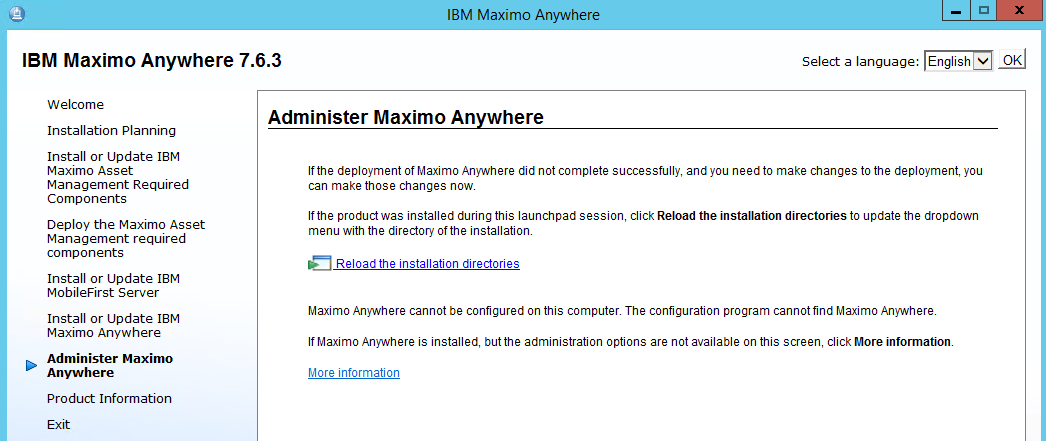
You will now see the directory as well as the Administration tasks that can be completed. You do not have to use the launchpad to complete these tasks, the admin-config-loader and build all commands can be run manually if your choose to go that route or delete the launchpad after the install. First we will import the Anywhere Administration, click ' Load the Anywhere administration capability'
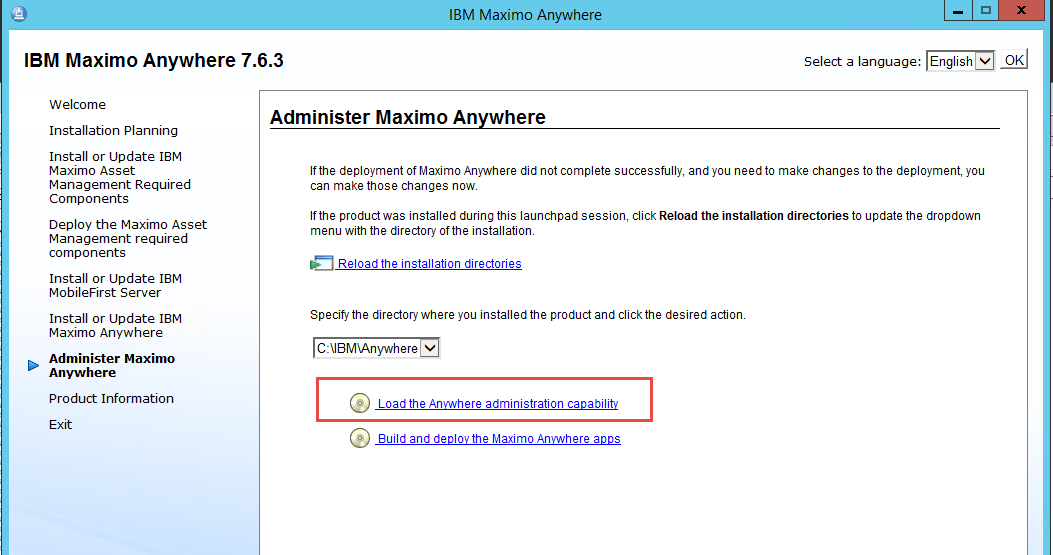
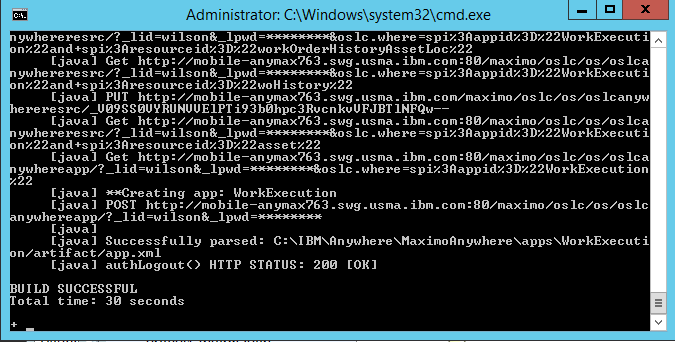
A command prompt will launch and the Anywhere applications will be imported in to Maximo for Administration. You can find these applications under the Integration section of the Goto menu.
Next you can either build and deploy your applications the traditional way From IBM\Anywhere\MaximoAnywhere by running build all in a command prompt. Or you can go back to the launchpad and build and deploy the applications from there.
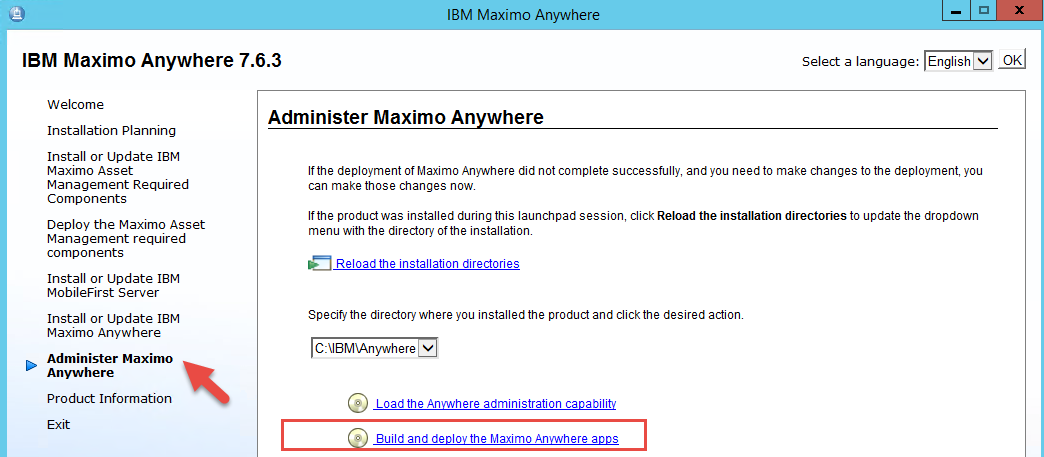
The command window will pop up, run through the build\deploy process and close once complete.
If you just want to build the artifacts for application store use, you would run the build mobilefirst command (unless you selected that option via the installer) which sets the default build target in the build.properties.
You should now see your applications in the MobileFirst\Application Center consoles ready for install and use.
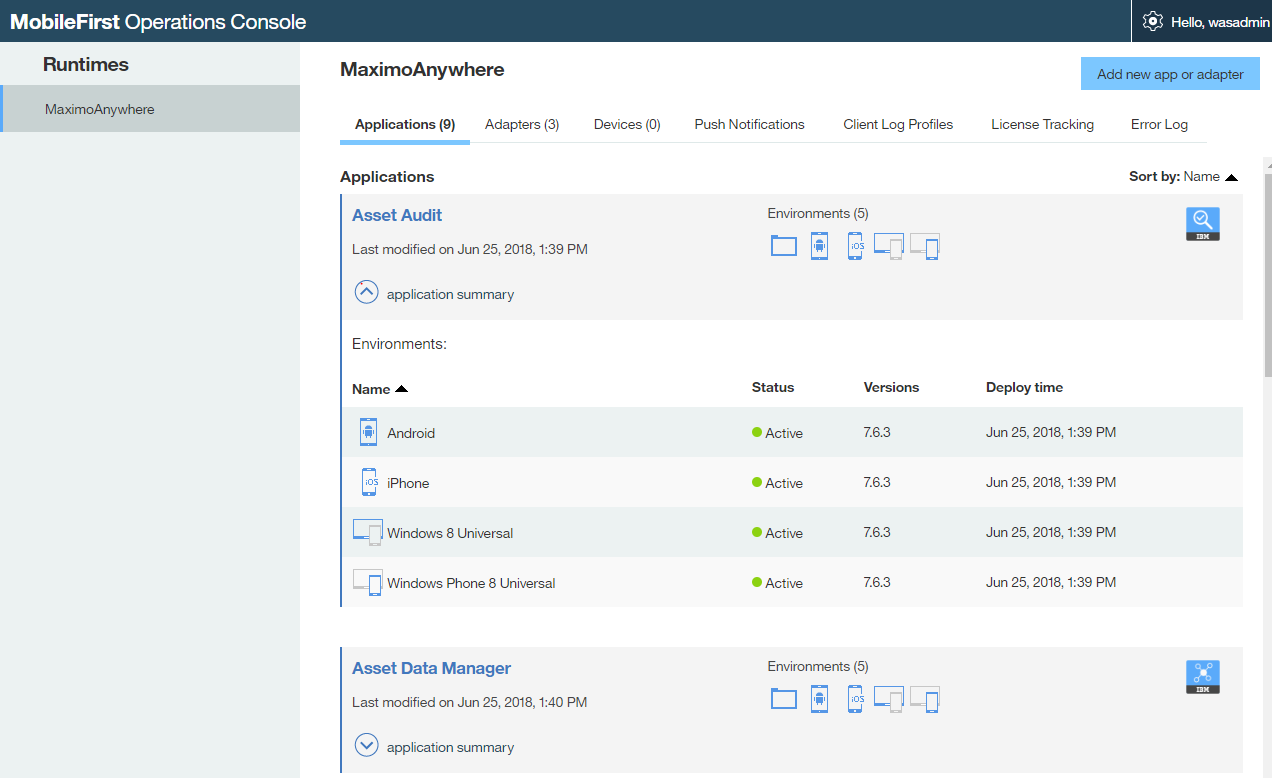
At this point you can go to your Application Center, download the APK or APPX file ( Or use the App Store\Play Store with updated connection settings) and install to the device and run the application and login if you provided a user during the enablement install.
As mentioned before I will run through this on a MAC in the coming weeks for those that still wish to do native builds for iOS as well as blogs on other new features of Anywhere 7.6.3. Any questions, comments or concerns or if you see anything missed please let me know below and I will respond as soon as possible.
UID
ibm11129017