Technical Blog Post
Abstract
Welcome to Maximo 7.6 again! This post is a compilation and update of a series of posts I made just after Maximo 7.6 came out at the end of 2014 and revised in 2017. It is updated through December 2019.
Body
Index
Part 1. Download and installation
Part 2. Initial WebSphere Application Server Configuration
Part 3. New Deployment Configuration
Let's start stepping through the installation, screen by screen.
First, download the product from Passport Advantage. (See Maximo Asset Management 7.6 and Maximo Asset Management Multitenancy 7.6, too.) Make sure you extract each download into the same directory. When finished, it looks something like this:

Double-clicking launchpad64.exe brings up the Welcome screen.
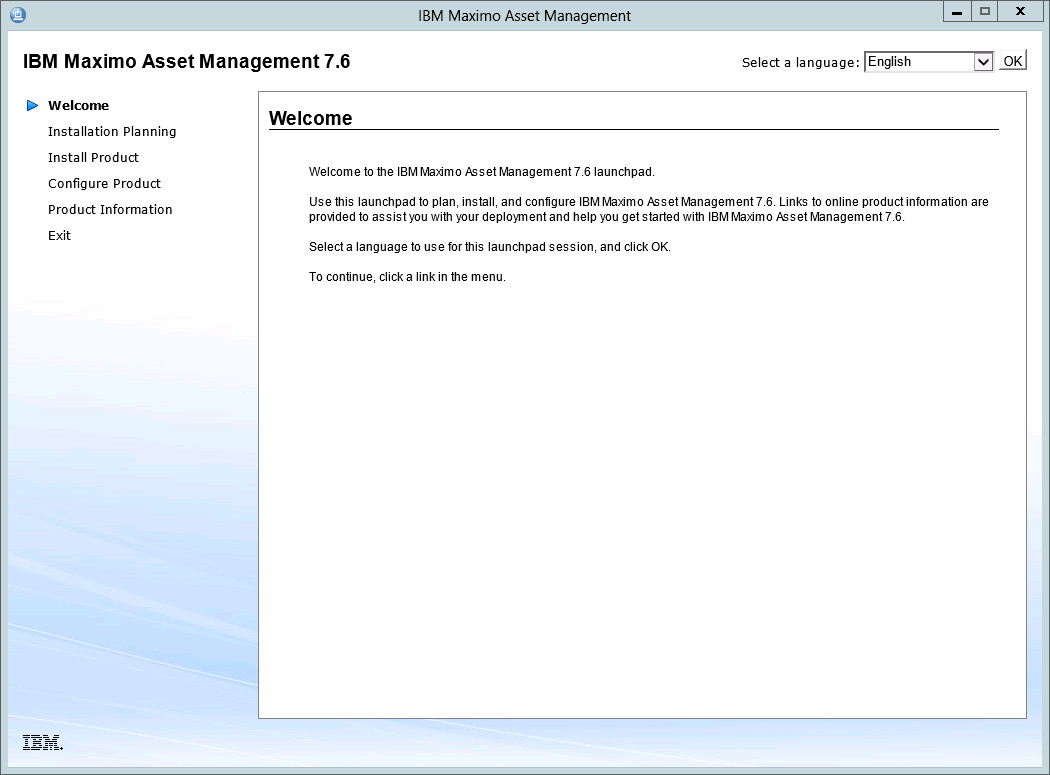
Looking at the left side, click Installation Planning.
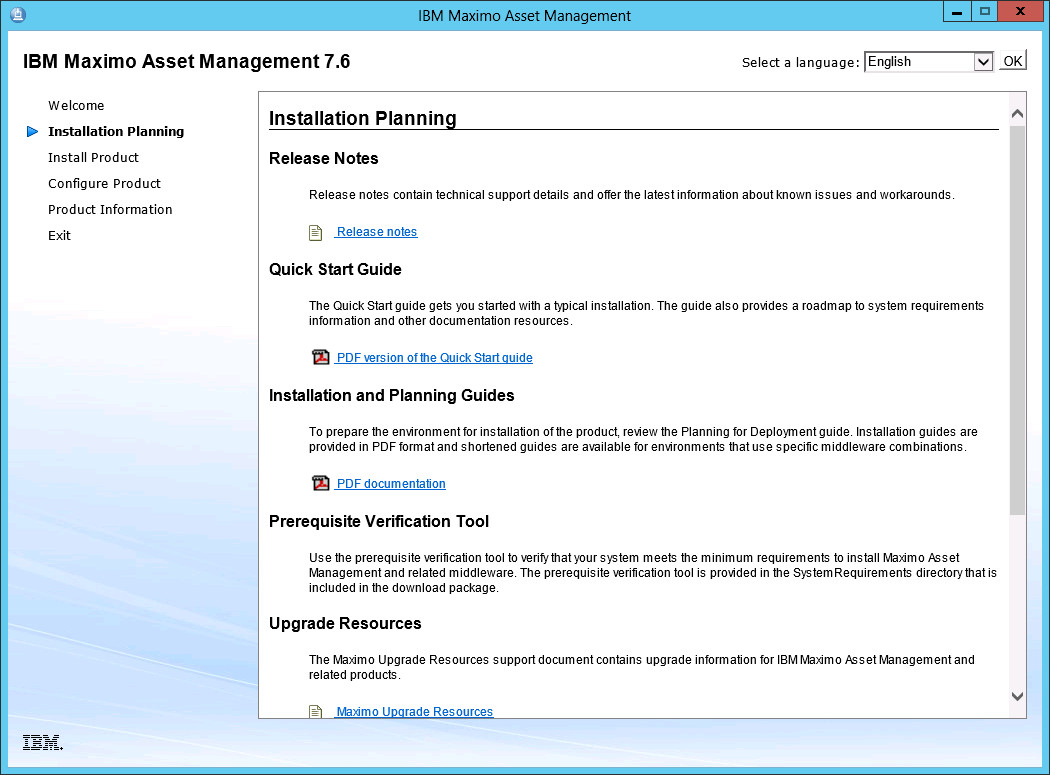
Here you can access the installation documentation directly from the IBM website. You need this documentation to install the middleware and Maximo properly. I strongly recommend that you download it.
The prerequisite verification tool is a command-line interface (CLI) tool that helps you ensure that you have the proper OS versions and resources available on your target server. (The product installer performs some of these tests as well.)
Click Optional components.
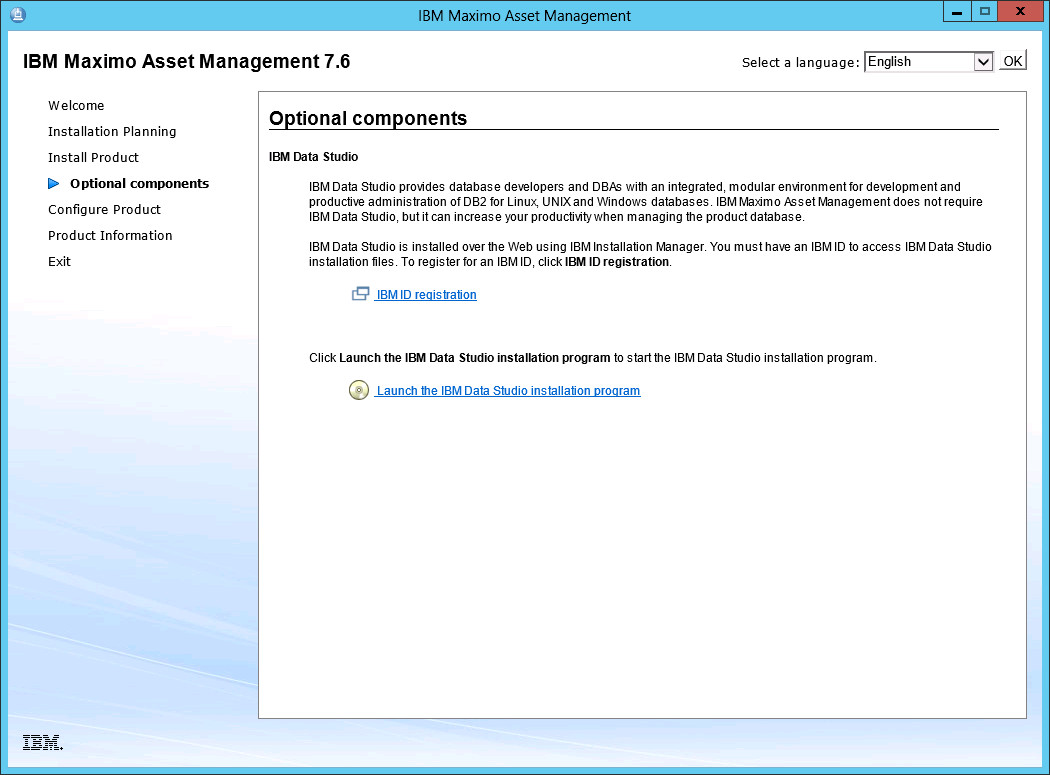
From here, you can install the IBM Data Studio, which is used to manage DB2. On the left side, click Install Product.
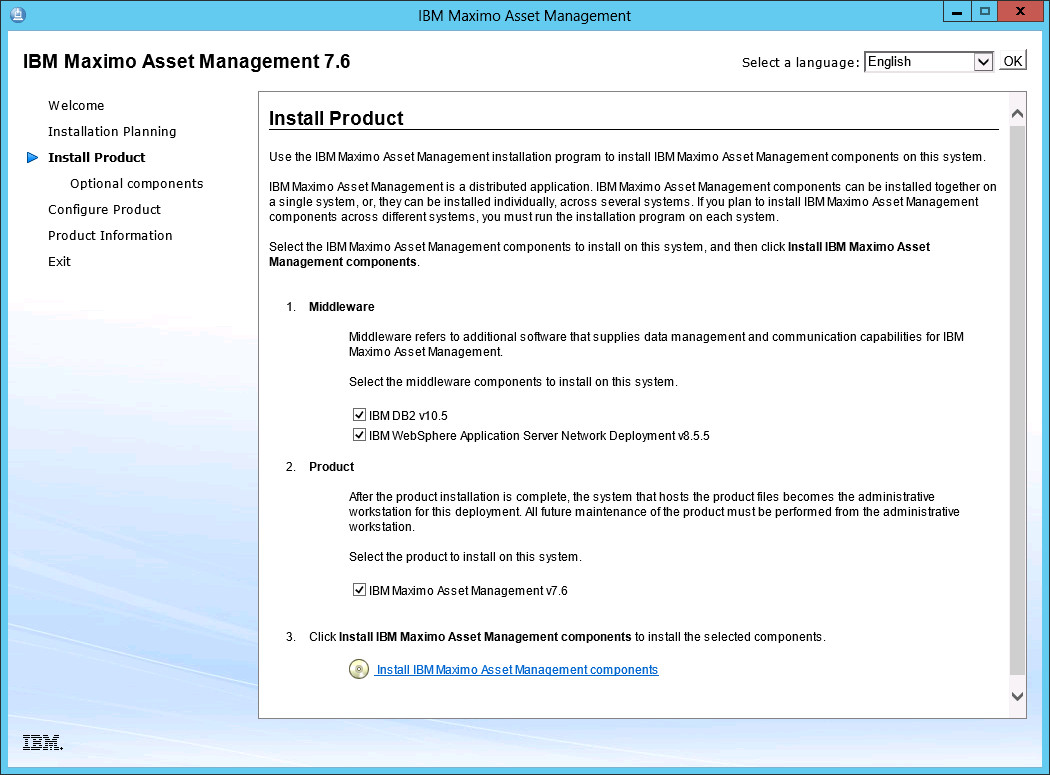
This screen is where you select whether you install WebSphere and DB2 and Maximo, and from where you launch the installer. Depending on how you choose to install the product, you can download and run the installer from as many as three machines: one each for the WebSphere server, DB2 server, and administrative workstation. You can combine one or more of these installations to a single server. Make sure you have enough resources (CPU, RAM, drive space) available to your server before installing DB2 and WebSphere to it.
From this screen, you can also install a second instance of these products.
I'm going to install WebSphere, DB2, and Maximo 7.6 on a single Windows 2012 server, so I make sure all three items are selected, and click Install IBM Maximo Asset Management components.

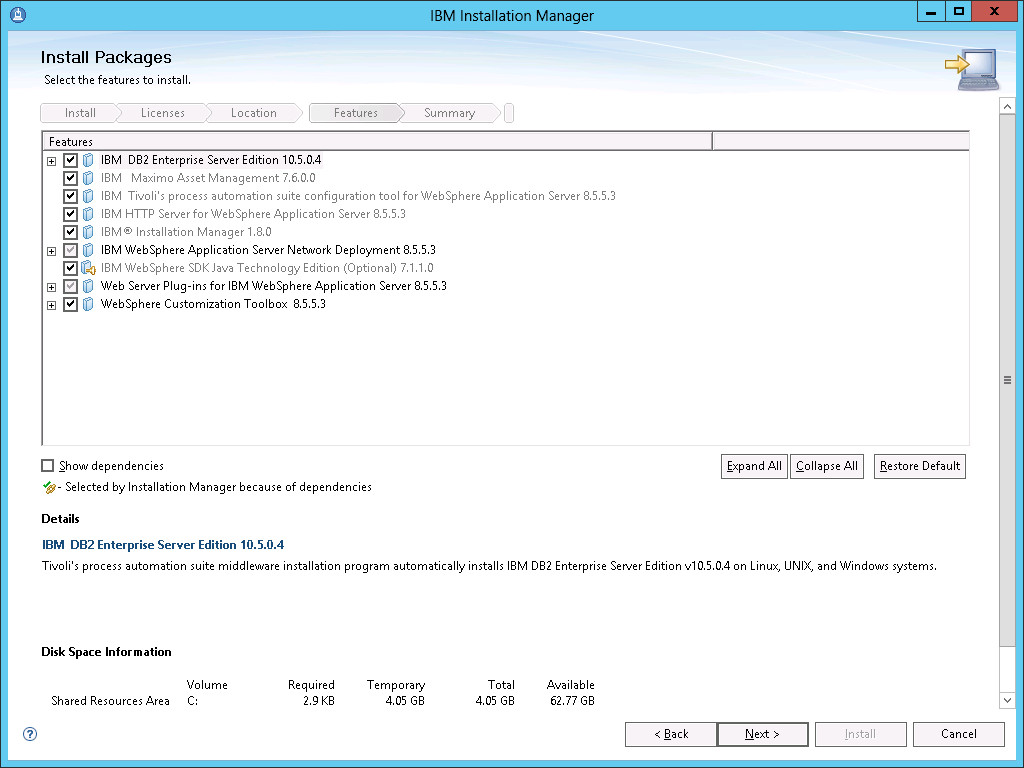
This screen capture shows all of the packages to be installed. There are four products it is installing:
1. IBM Installation Manager 1.8.0. It "runs in the background" to install WebSphere and Maximo. DB2 uses its own installer, which we repackaged into an Installation Manager installation.
2. Maximo 7.6, in two parts (Maximo and Tivoli's process automation engine configuration tool)
3. DB2 10.5.0.4
4. WebSphere 8.5.5.3. The installation includes IBM HTTP Server and web server plug-in, the customization toolbox, and IBM WebSphere Java SDK. Maximo 7.6 requires JDK 1.7. Maximo Feature Pack 7.6.0.6 adds JDK 1.8 support, which is downloaded separately.
Once that is completed, then on to the license page.
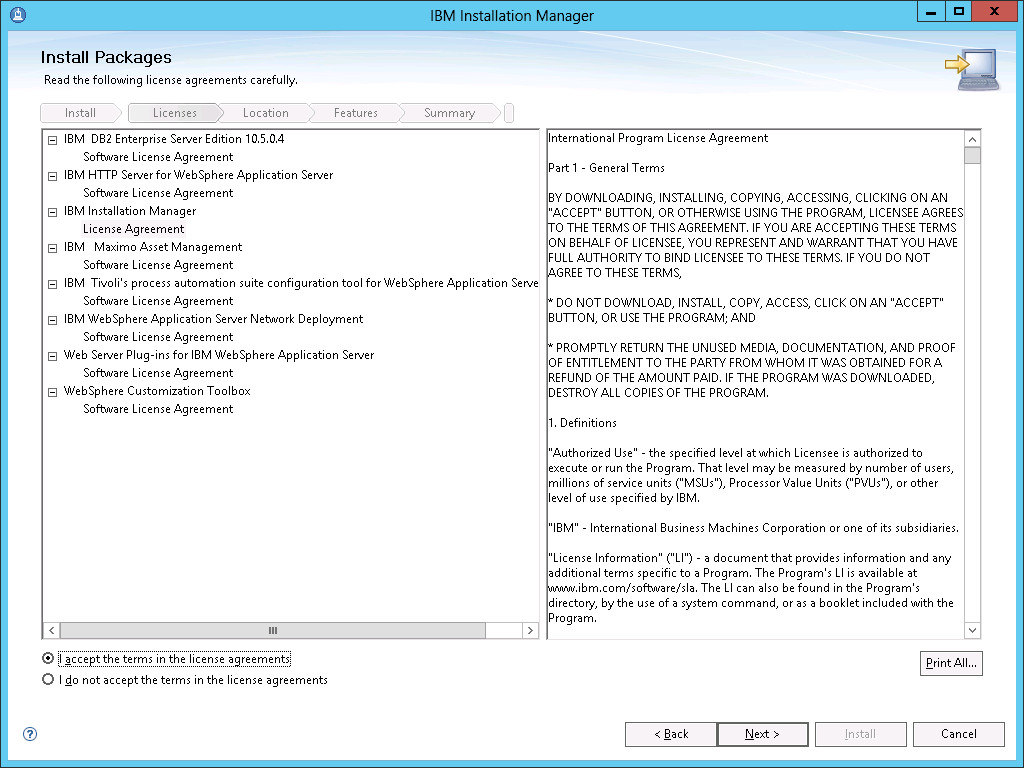
I accept the terms, and click Next.
Note: My recommendation is to change the directory to (for example) C:\IBM\IMShared.
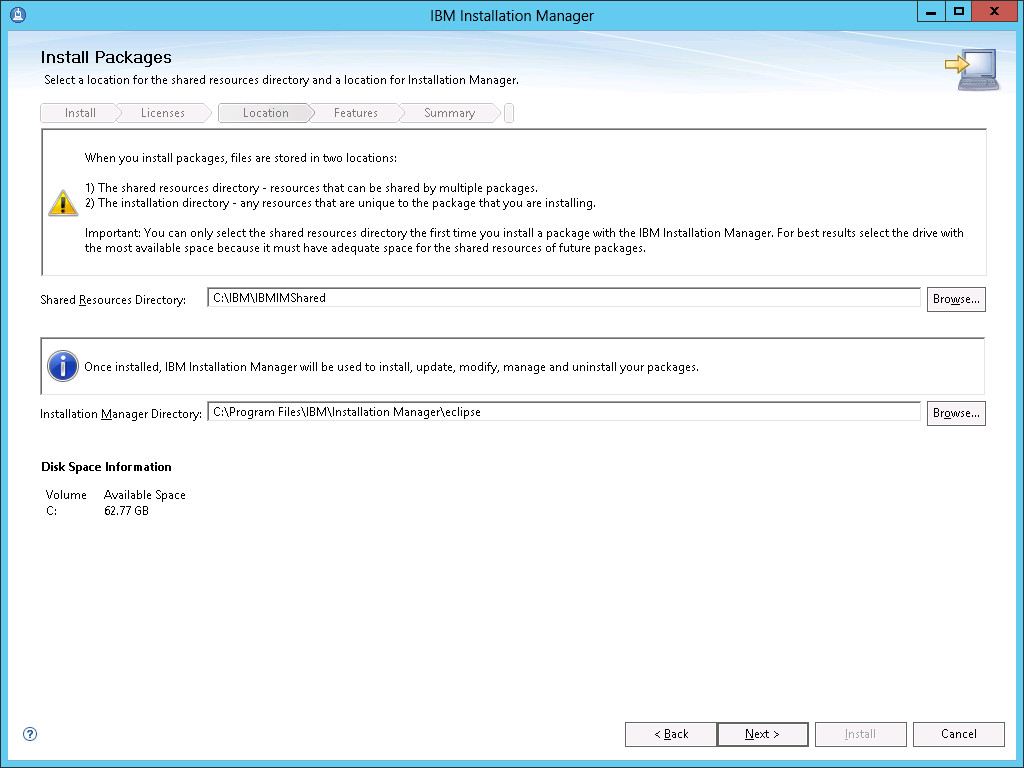
The next screen lets us change where Installation Manager installs the products. I accept the defaults, and click Next.
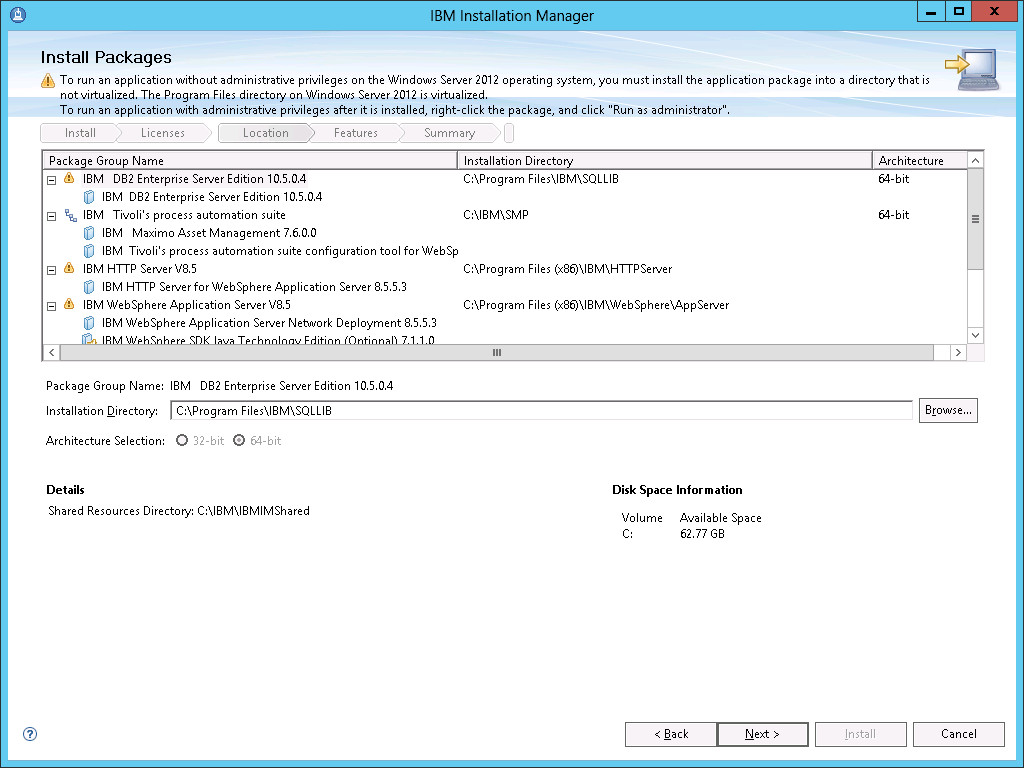
This screen shows and lets me change where the products are going to install. While the WebSphere version being installed is 64-bit, it is installed to the Program Files (x86) directory.
Note: My recommendation is to change the directory location so there are no spaces in the file path, for example, C:\IBM\SQLLIB, C:\IBM\WebSphere\AppServer, C:\IBM\HTTPServer, and so on.
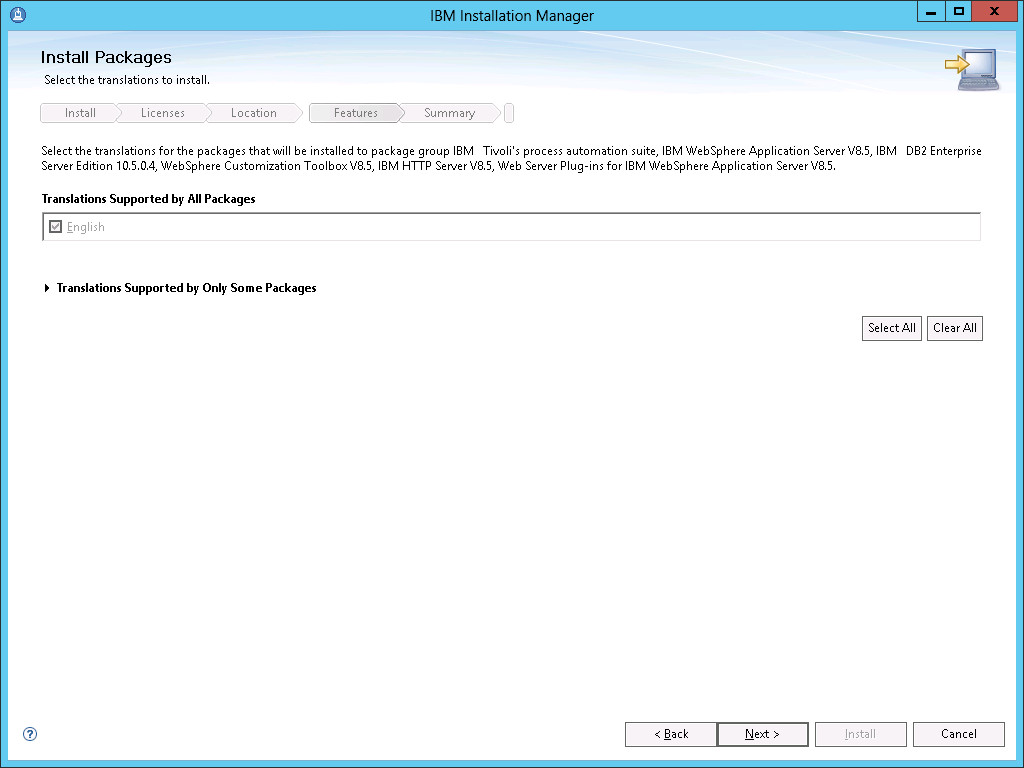
On this page, select languages. This example uses English language only. Click Next.
Here is the summary of packages to be installed. Click Next.
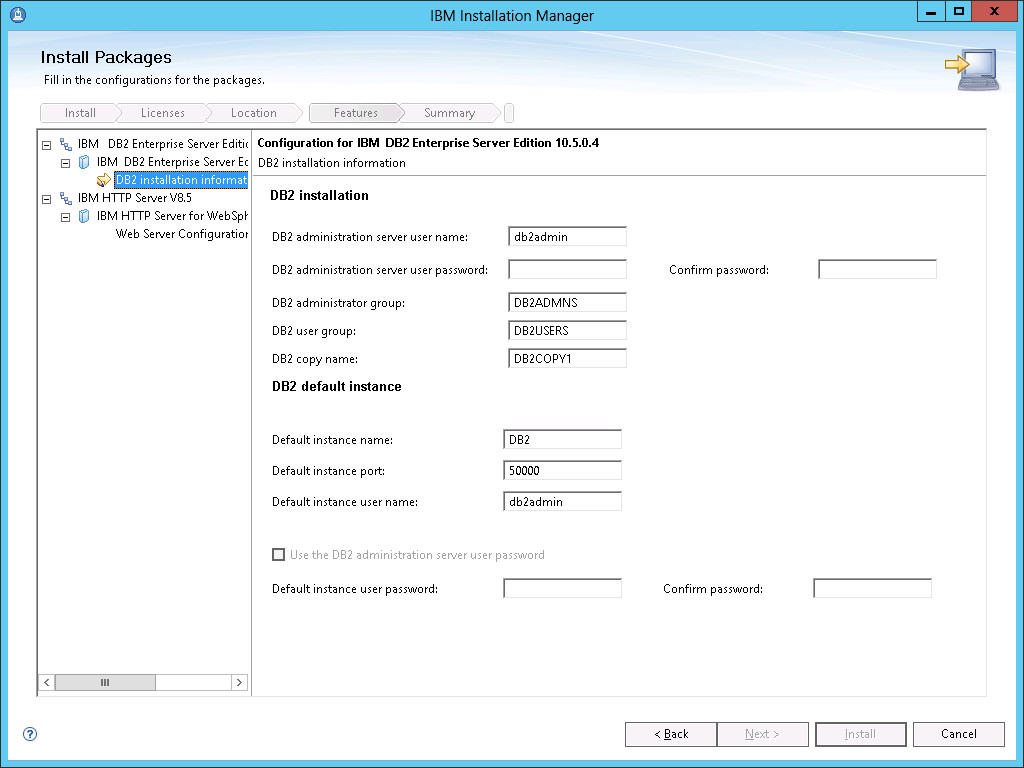
On this page, we enter configuration information for DB2 and WebSphere. The next screens illustrate the way IBM Installation Manager can be used. On the left side, select items to modify. Screens that must be filled modified have an asterisk (*). Alternatively, click Next to go for each page to be configured. The Install button is not active until data entry is completed.
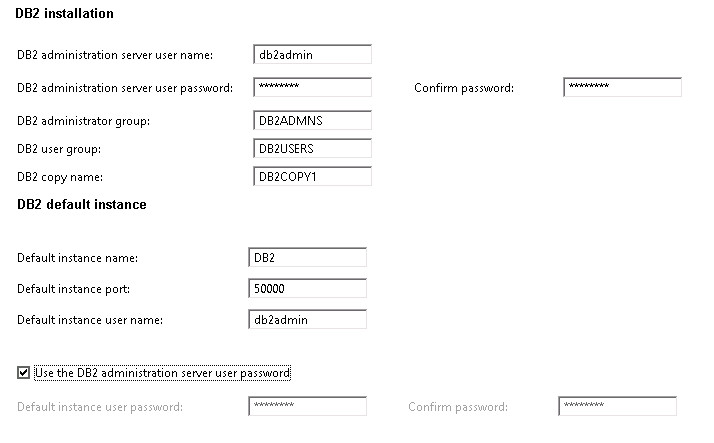
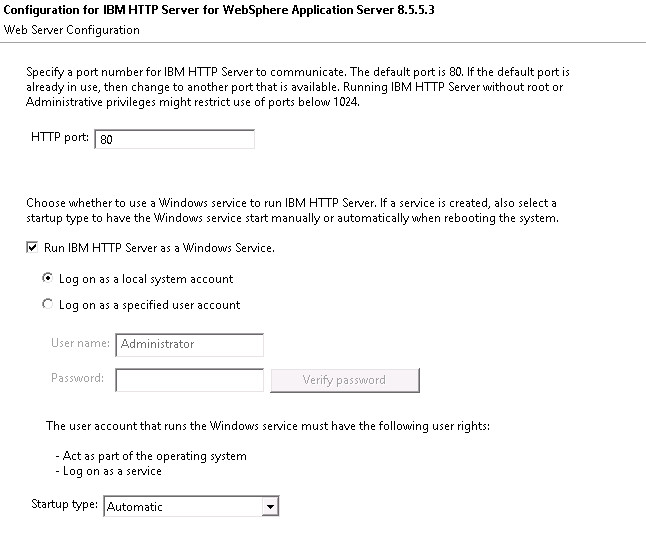
I enter the DB2 password information, and accept the defaults for IBM HTTP Server for WebSphere Application Server.
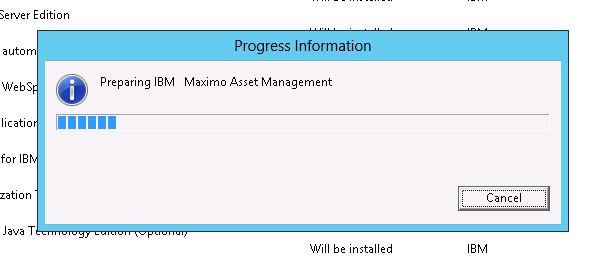
Click Next. The Installation Manager checks to see that all files are available, and whether there are any blocking processes.
When complete, this screen comes up.
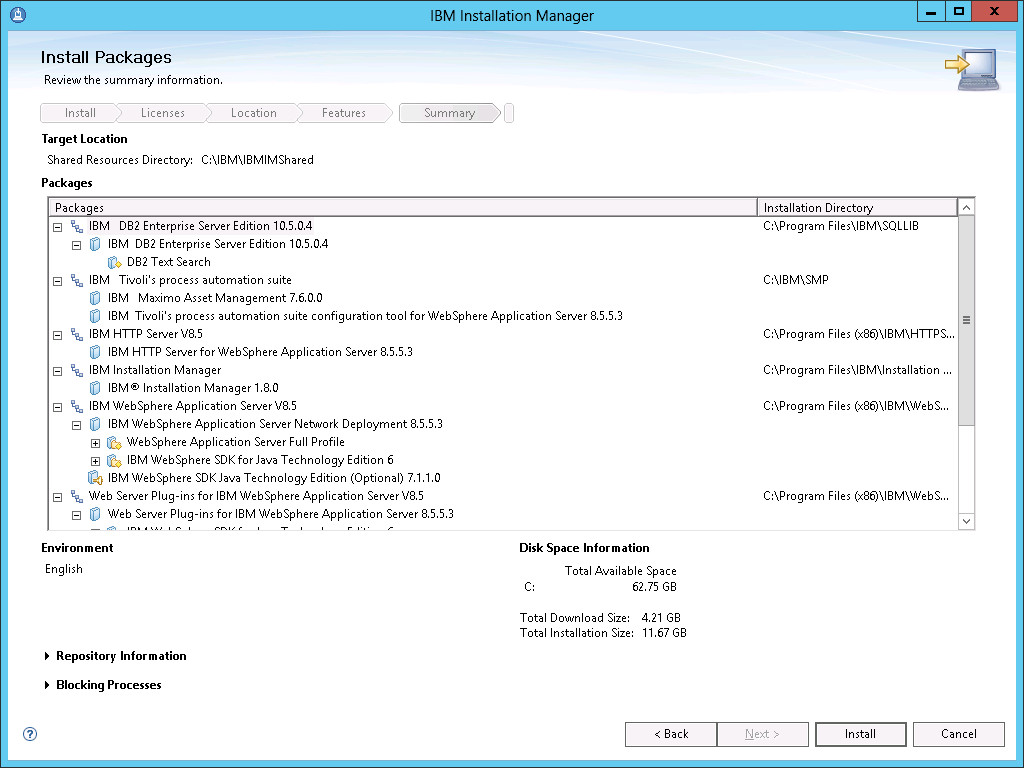
Now the Install button is enabled, so click Install.


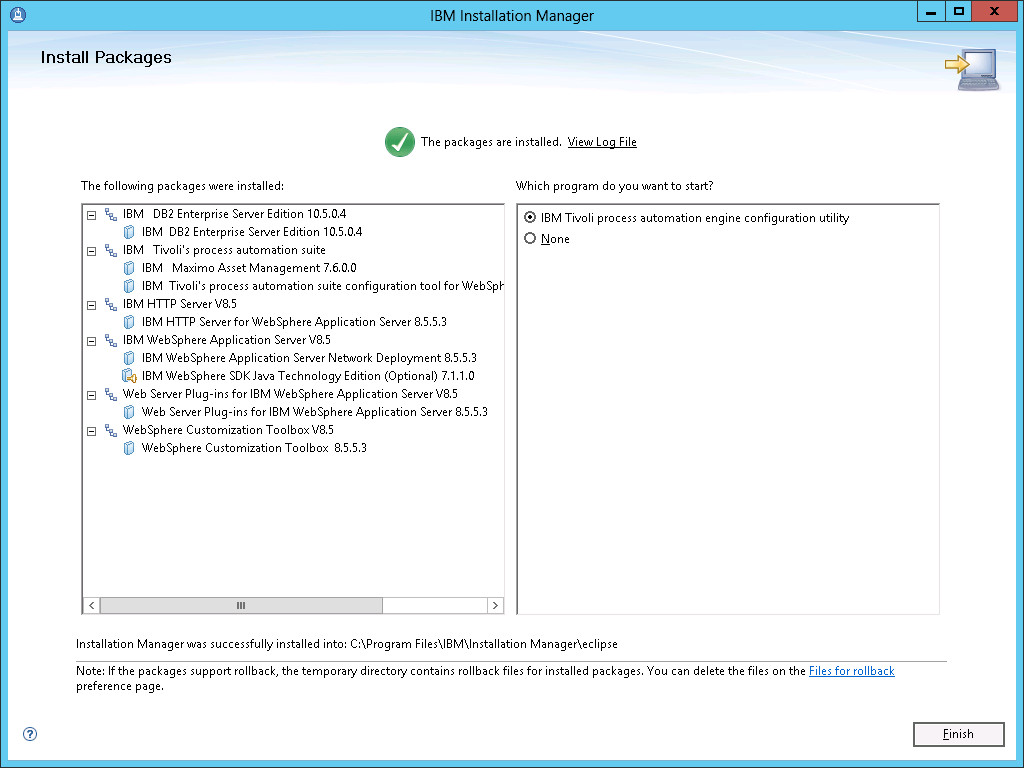
At completion, all files are installed, and this screen appears.
Part 2. Initial WebSphere Application Server Configuration
Starting with Maximo Feature Pack 7.6.0.6, the Config Tool screen has more options.
These two parts of the configuration - Middleware product installation and configuration - used to be handled by the Middleware Installer (MWI) tool in Maximo 7.5. In Maximo 7.6, they are separate. This separation permits skipping WebSphere configuration. This new feature is important when you need to configure WebSphere manually, or have configured WebSphere, and don't need the Config Tool to do.
However, in this case you are installing it for the first time and do need the Config Tool to do the configuring.
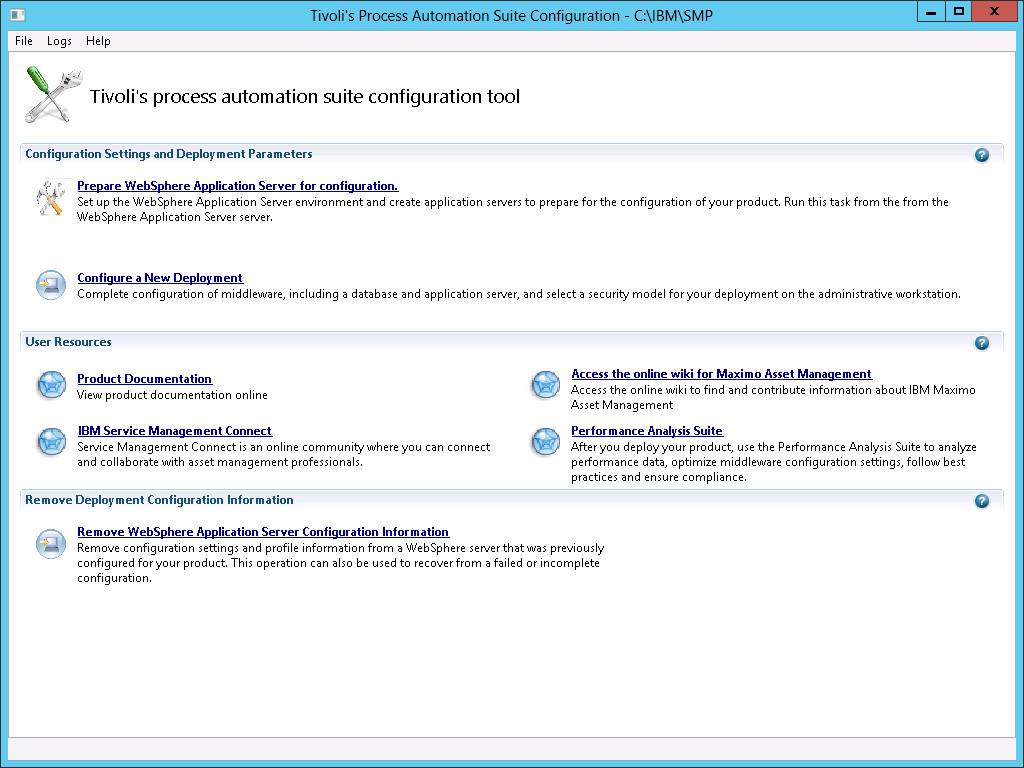
Here we prepare the WebSphere instance for use with Maximo. That includes setting up application servers, creating profiles, configuring IBM HTTP Server, and setting the administrative security mode. Since the Config Tool is a direct descendant of the Reconfiguration tool, you can automate configuration for deployment into a clustered environment.
From this screen, you can also configure a new deployment and access the Maximo documentation. There is also a WebSphere cleanup option. Configuring a new deployment will be the subject of a future blog entry or two.
DB2 configuration is done in a later step, when you configure a new deployment.
For my installation, I am accepting all defaults.
On this screen, you can see that most functions are handled by using a wizard interface. You have several options: you can go through all of the configuration screens, entering or modifying information and clicking the next button. You can also navigate on the left side between different screens. The interface has field indicators (validation) to find and correct problems more quickly. Error and progress messages are written to the console area on the lower part of the window.
Most fields and controls have hover help. In addition, there are icons that indicate item help and section help, depending on where they are placed. Clicking the help text opens contextual assistance without leaving the panel. For page level context help, Click for More Information, which opens up access to more help pages. It is available by pressing F1, going through the Help menu, or clicking the Help button.
This screen also gives you the option to configure the system for clusters.
Click Next.
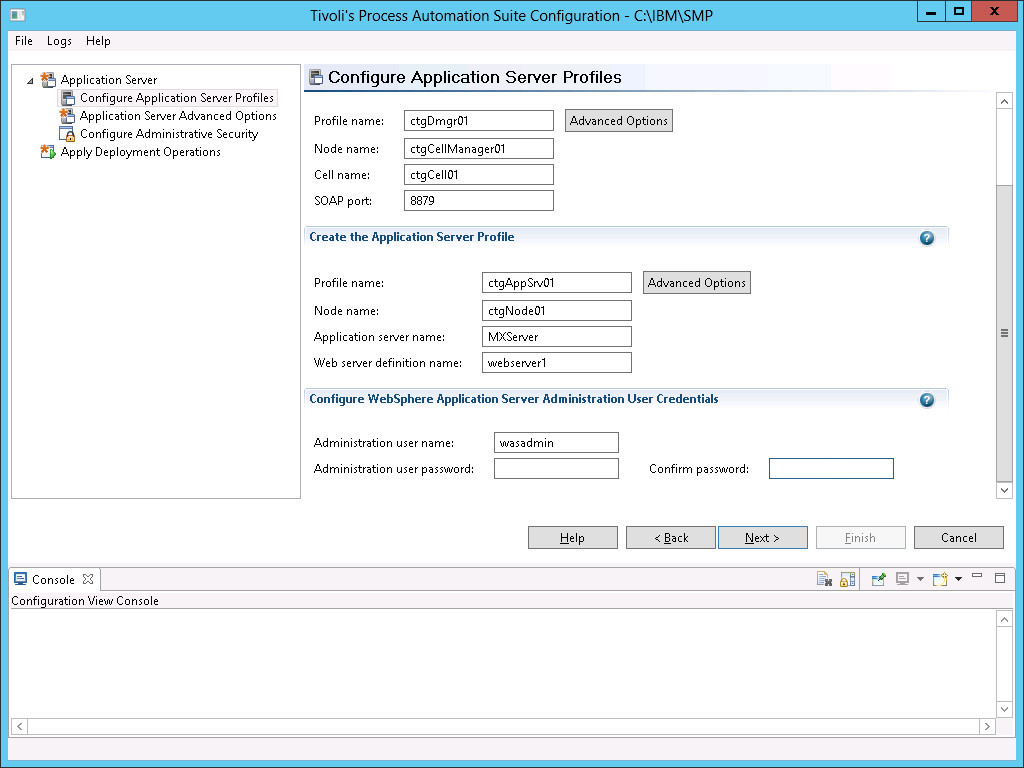
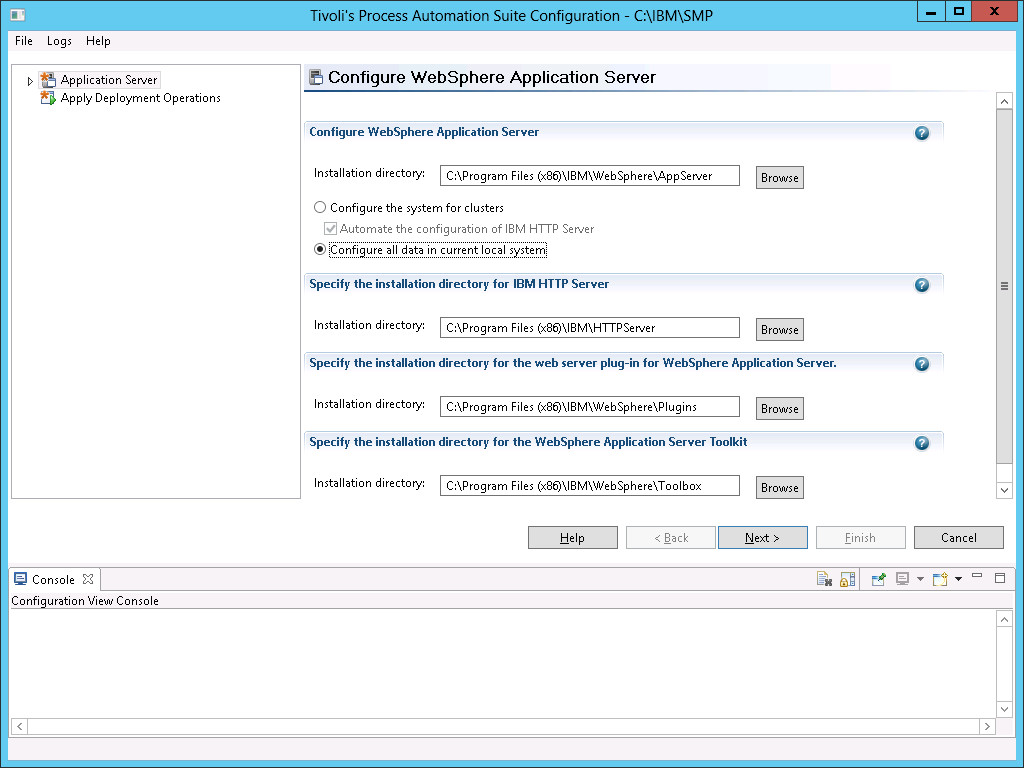
This screen is for configuring the application server profiles. The application servers are both the web application server (default name is MXServer) and the web server (default name is webserver1). You also configure WebSphere Application Server server security here, providing a username (defaults to wasadmin) and password for access into the WebSphere administrative console. Click Next.
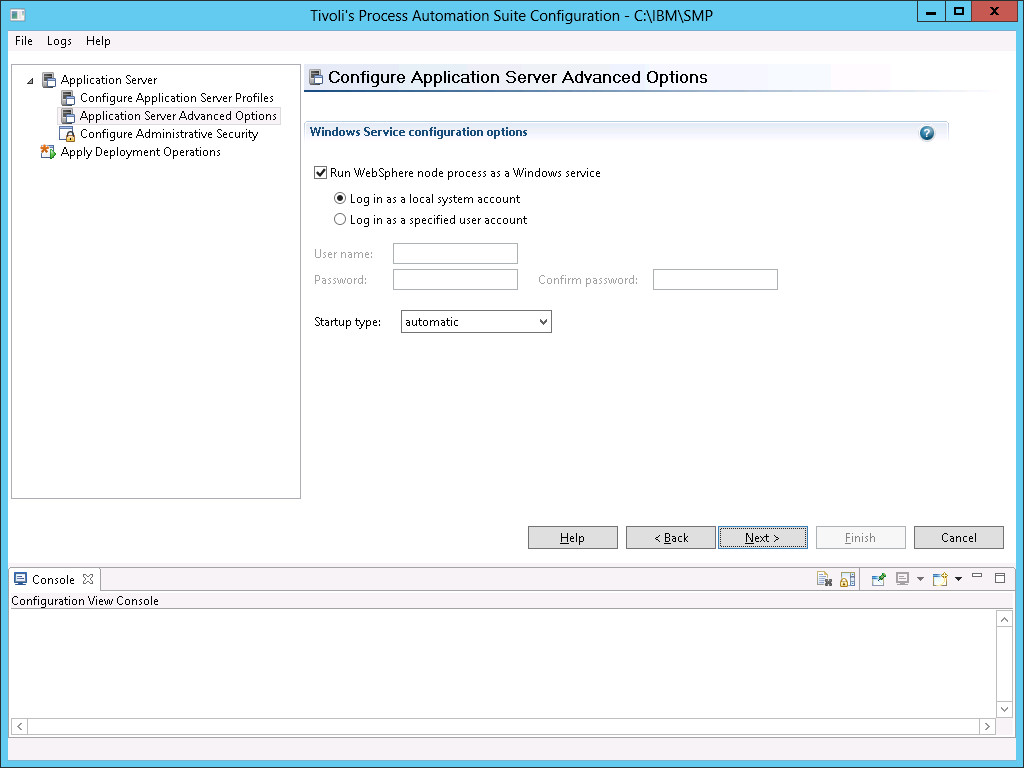
For Windows installations, here you indicate whether the services are run as Windows services, and the account used to run the services. This example uses the default values. Click Next.
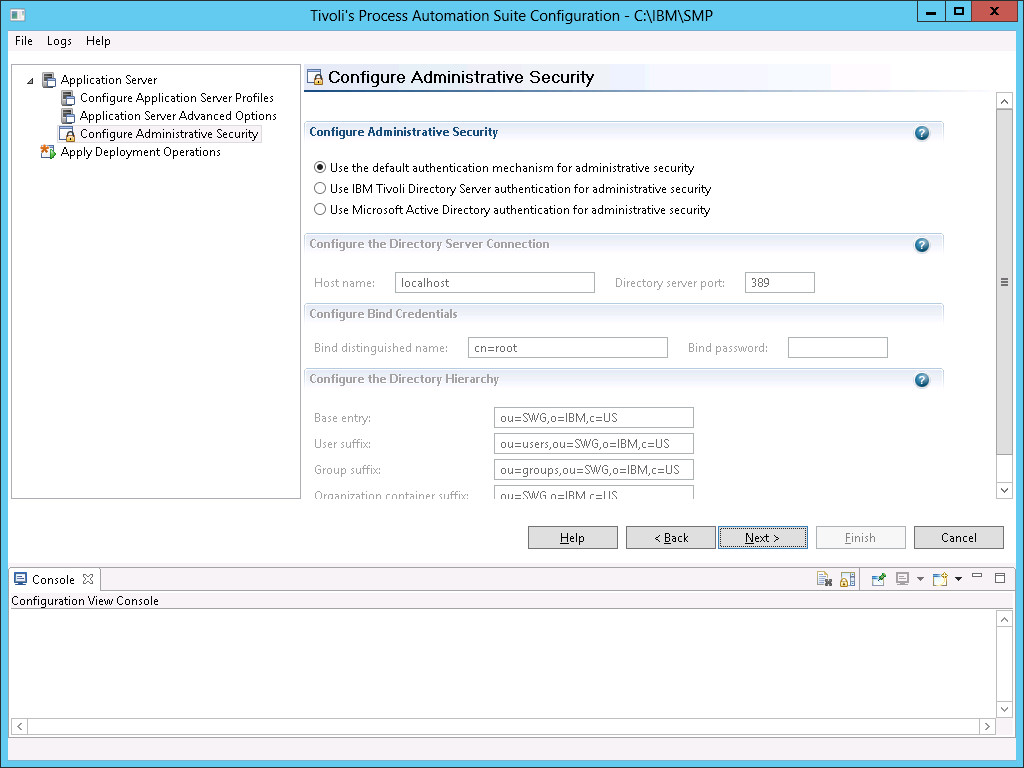
This screen shows options to configure Administrative security. If an IBM Tivoli Directory Server or Microsoft Active Directory server exists, configure the connection and directory hierarchy here. If you already have users and groups ready to bring into Maximo, you enter the hostname, bind credentials, and the base entry, user suffix, group suffix, and organization container suffix here. (Setting up the VMMSync or LDAPSync cron task is done in the Maximo Cron Tasks application.)

On this screen, validate changes by clearing the second and third check boxes. Click Finish.
After the Config Tool validates changes, then complete the configuration.
WebSphere is now prepped and ready to be installed to by the Config Tool.
When WebSphere configuration and deployment tasks are completed, the Configuration looks different - Prepare WebSphere Application Server for configuration is gone.
Click Configure a New Deployment. It brings up the following screen.
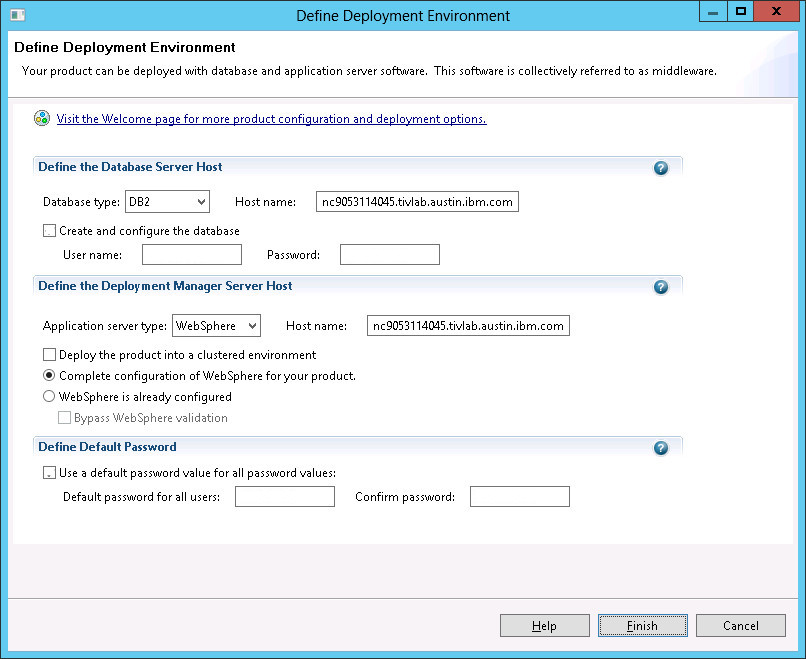
From the Database type drop-down, select DB2, Oracle database or Microsoft SQL Server, and provide a hostname.
Exactly what does Create and configure the database do?
Ticking this checkbox has the Config Tool create the database, users, and schema. Enter the user name and password of a user with administrative permissions to the server you put into the hostname field. If site security roles separate Maximo installation from database administration, before running this configuration step, the database administrator needs to create the users. Instructions for the database administrator to do so are in the installation documentation, found here.
Exactly what does Define the Deployment Manager Server Host mean?
The default value is Complete Configuration of WebSphere for your product. Click to direct the Config Tool to create JMS queues and the maximo_host Virtual Host, and to tune MXServer. Tuning sets starting and maximum memory values, set the thread pools and generic JVM arguments following Maximo 7.6 best practices.
Checking off Deploy the product into a clustered environment deploys Maximo after one or more clusters are created, either through the Configuration tool (during Prepare WebSphere Application Server), or manually. The default value is to complete configuration, which builds and deploys the application ear files.*
If you are performing these tasks manually, select WebSphere is already configured and optionally, Bypass WebSphere Validation. Selecting these options is necessary if you have an existing WebSphere installation or are installing a second Maximo instance to an existing WebSphere installation.
On this screen, you can also define a default password for all users. When setting up a demo or preview Maximo instance, using a default password helps with administration.
I am going use default values. I enter in the password for the Administrator account on the Windows server to which I am installing Maximo, and use a default password for everything, and click Finish.
Once the Config Tool validates the database parameters, it brings you to this screen. Here, you set your database, application server, and security and base and extra language options (and whether you want to populate the database with demo data) and click Next.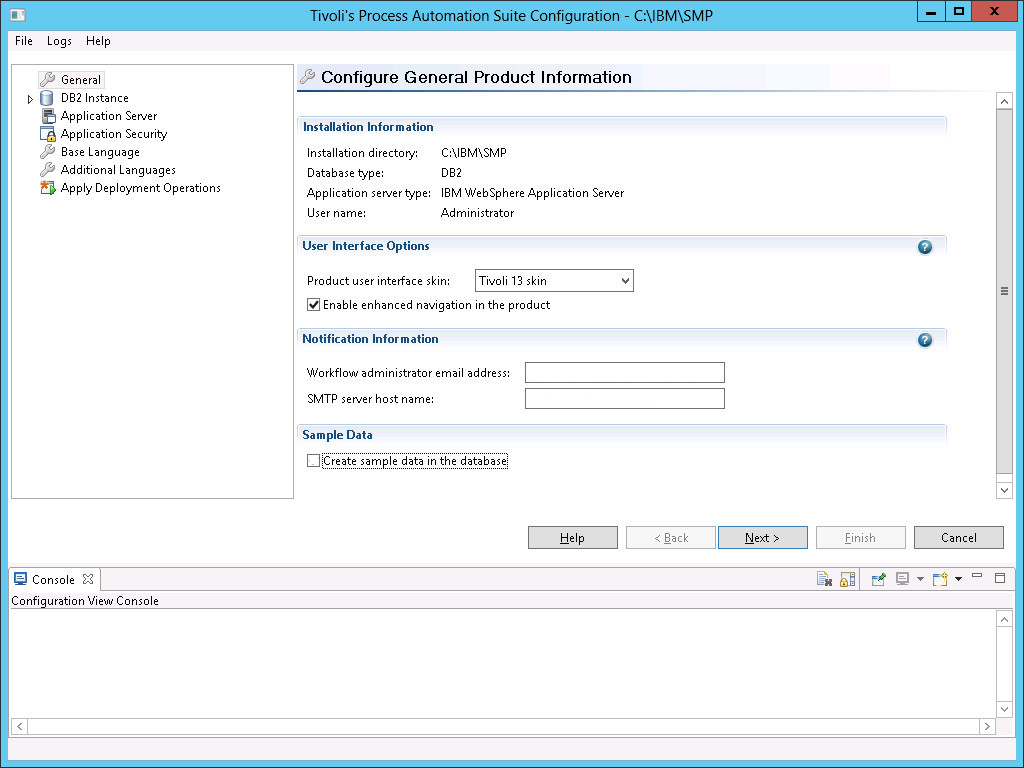
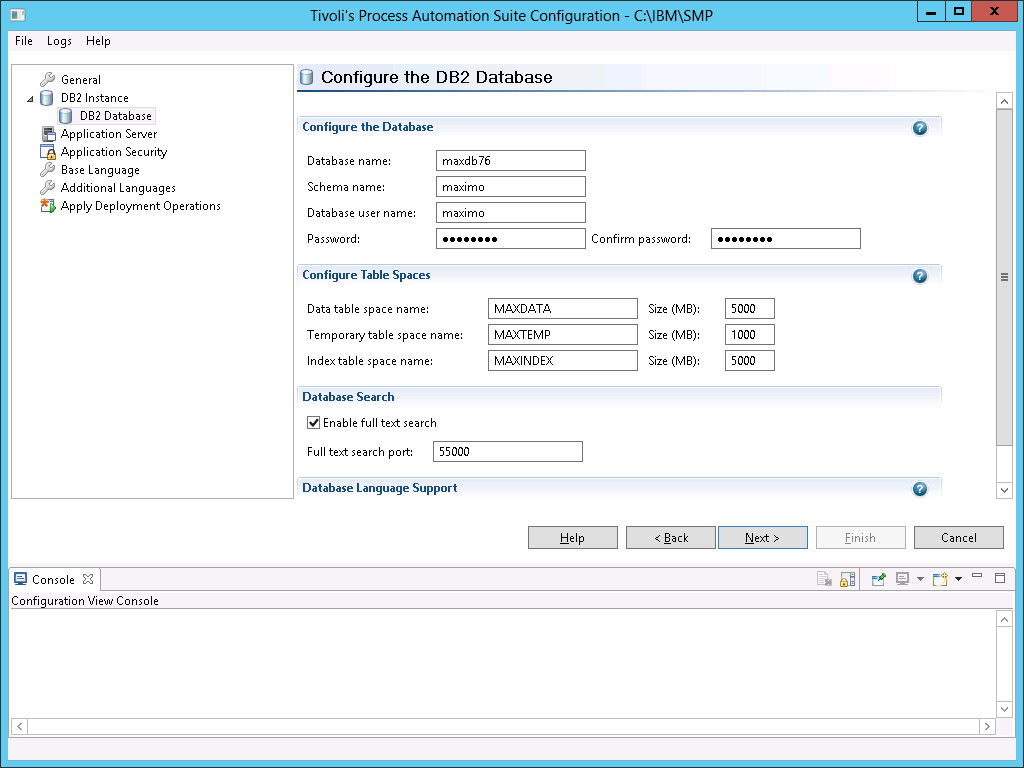
The next two screens are for configuring the database. Options are different for each database (DB2, Oracle database, or Microsoft SQL Server).
DB2:
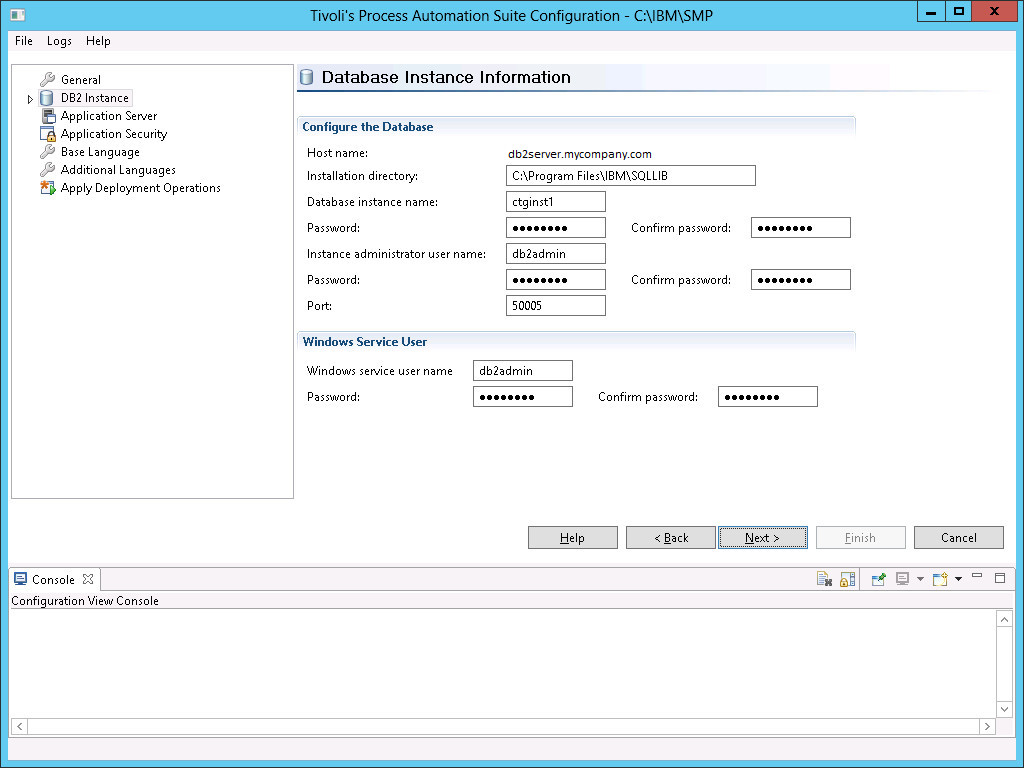
Once complete, click Next.
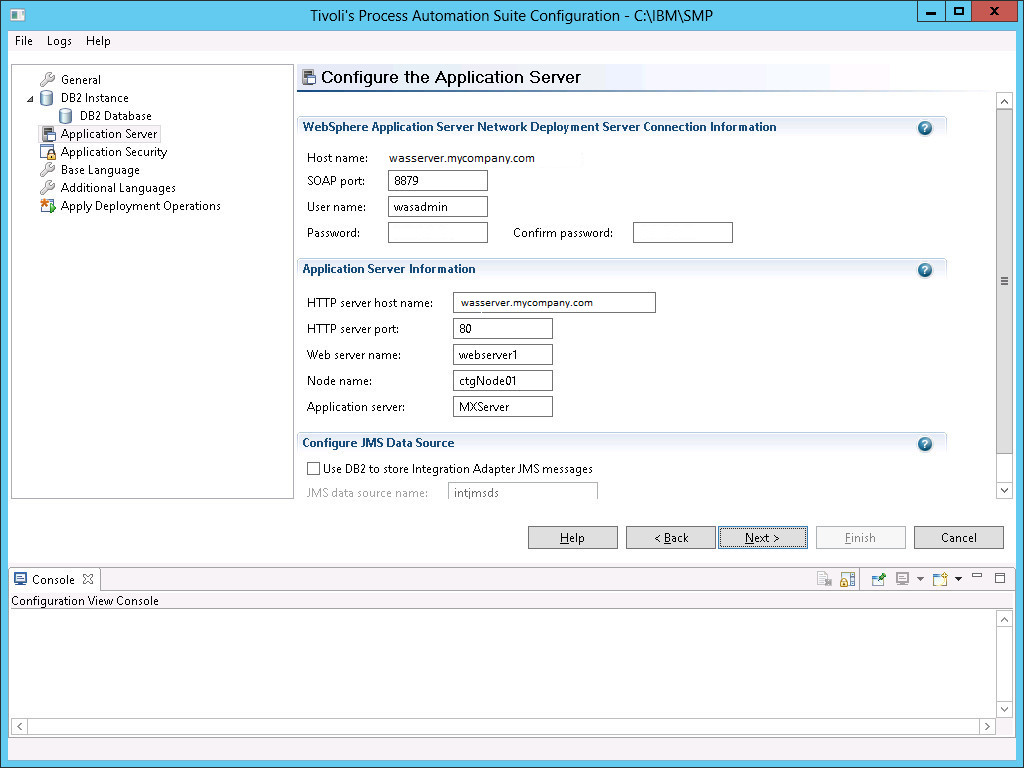
In the next screen, enter the passwords for the application server (WebSphere only). Once complete, click Next.
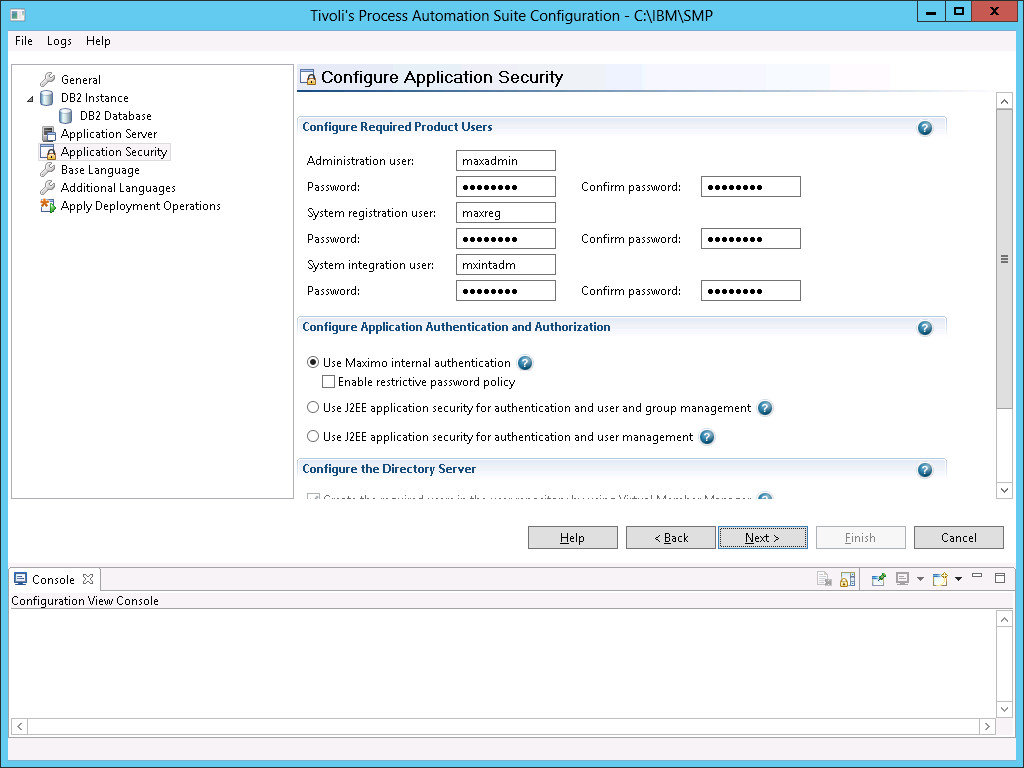
Here you configure WebSphere Application Server security. If you are using application server security, indicate so here, and configure the directory server as well. I am going with native Maximo authentication. Click Next.
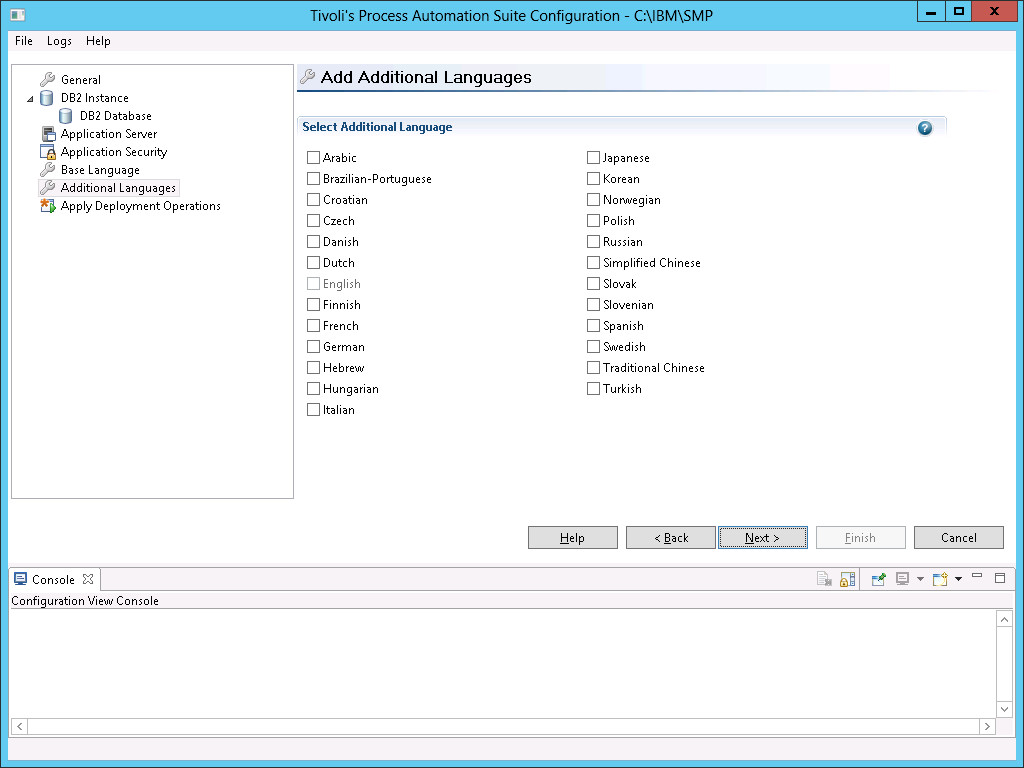
In these two following screens, you indicate your base language and extra languages you want to install. With English-only, I click Next and Next.
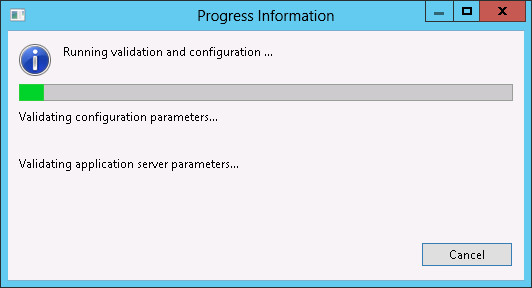
Once completed, the Apply Deployment Operations screen comes up. Again, one of the great things about the Configuration Tool is that you can validate everything before you commit it. So, I cleared everything, leaving Validate the configuration properties selected, and clicked Finish.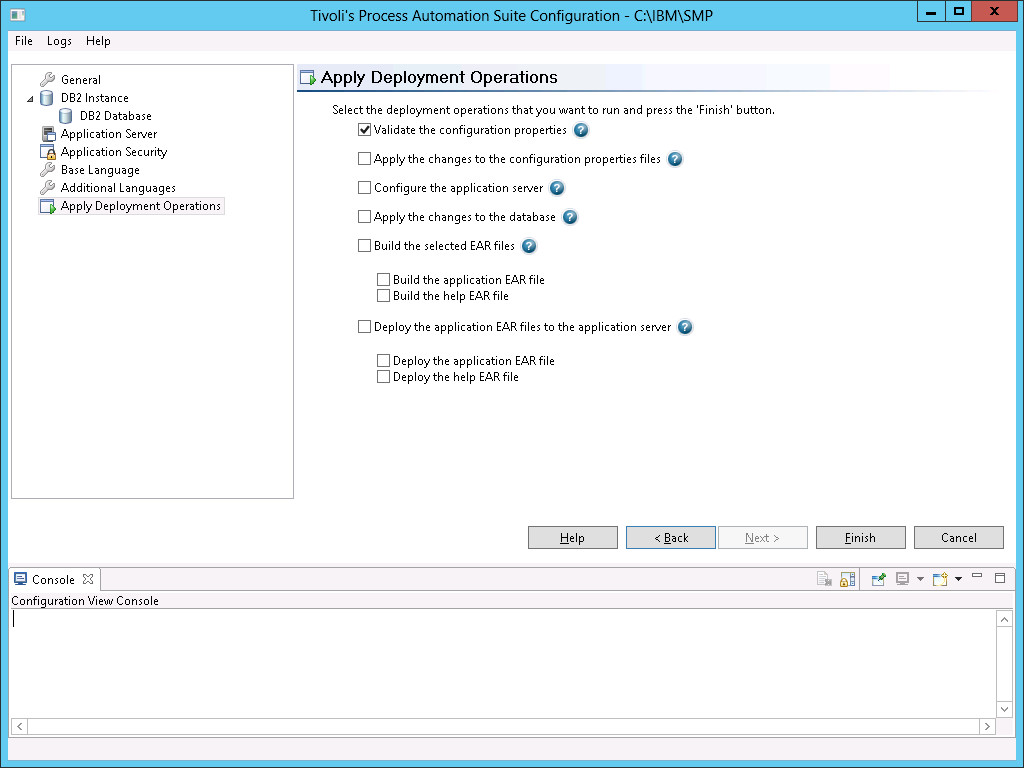
So it is validating away...
Once Validation is complete, since the deployment operation did not complete, you get the option to continue the configuration.
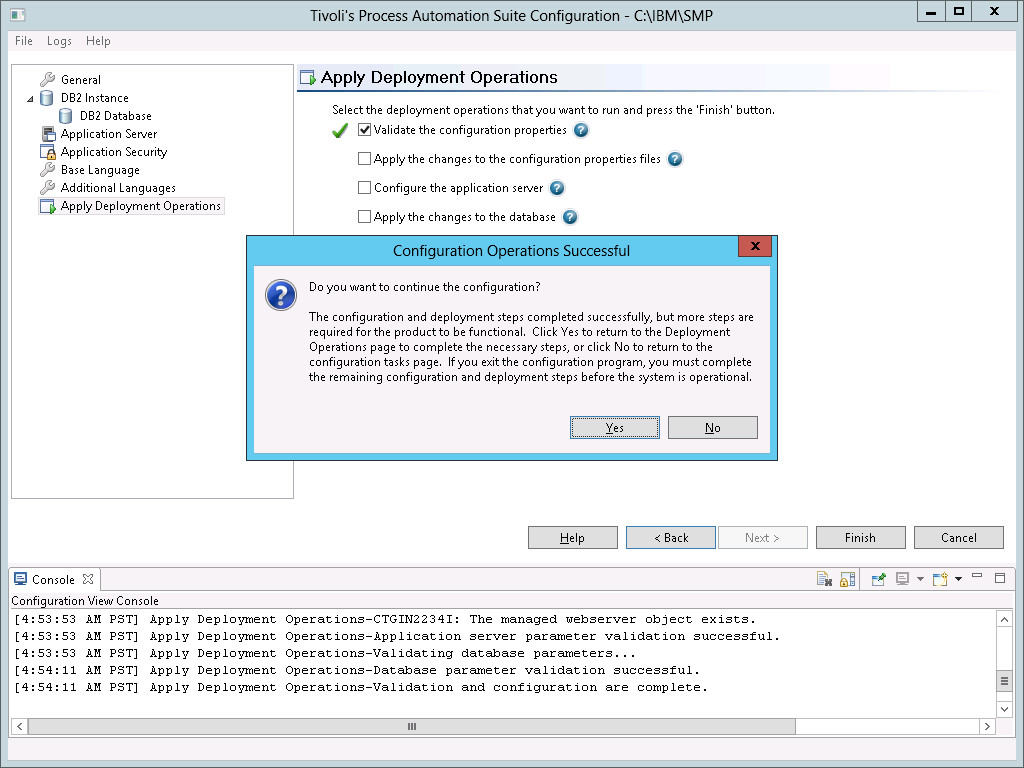
I click Yes, and select every configuration option.
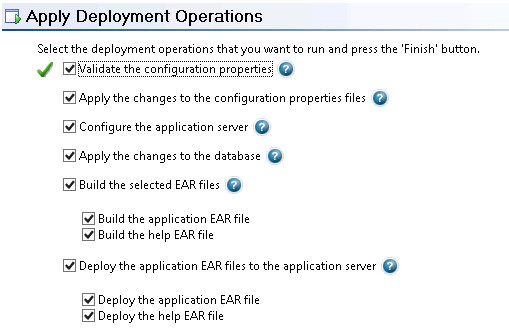
For my configuration, I am creating the Maximo database and populating it with demo data. Then, the Configuration tool builds the Maximo and Maximo Help ear files, start the Maximo application server (MXServer), then deploy the application EAR files and start the applications.** All of these tasks take a while.
![]()
Note the information messages as the scroll in the console underneath.
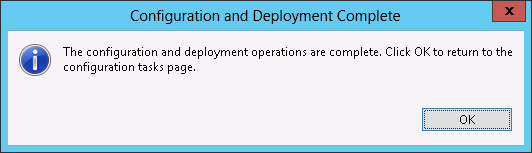
And it's complete!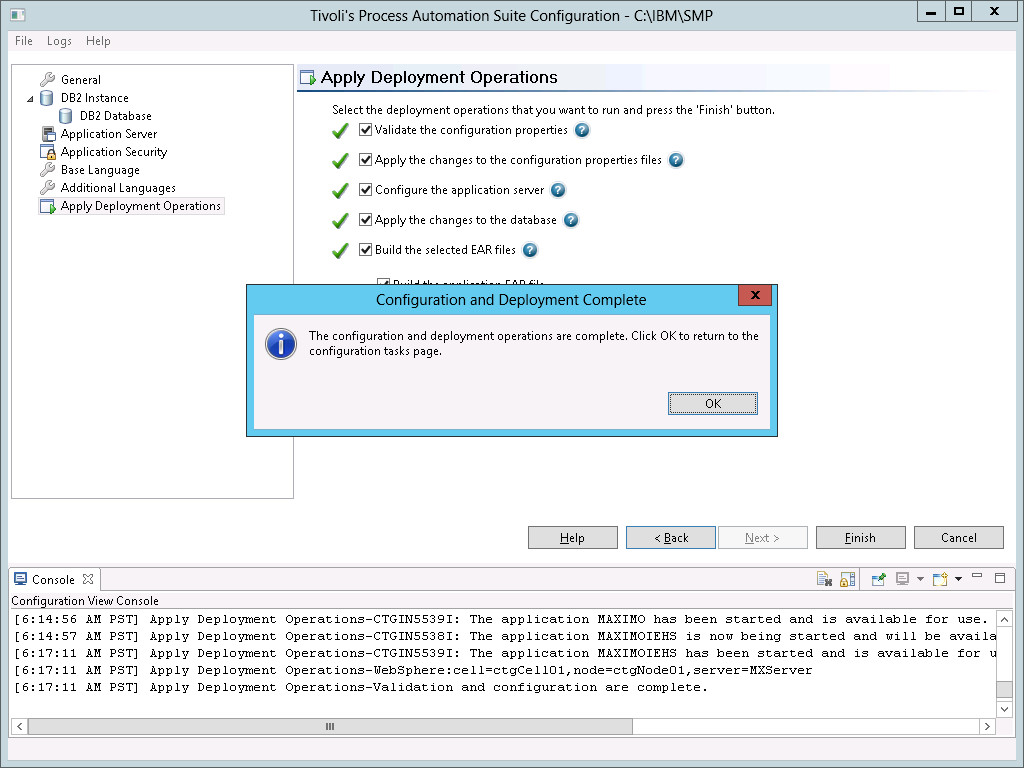
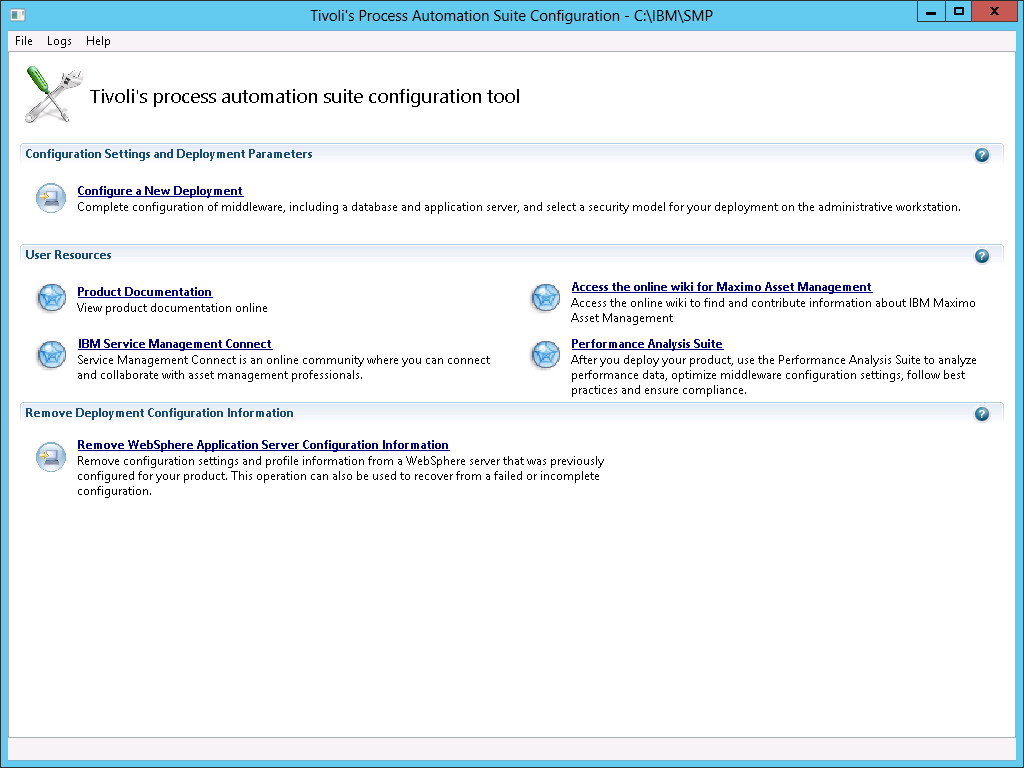
Once you click OK, you're brought back to the Configuration Tool screen. Now that Maximo is installed,you can see that the dialog box has changed again.
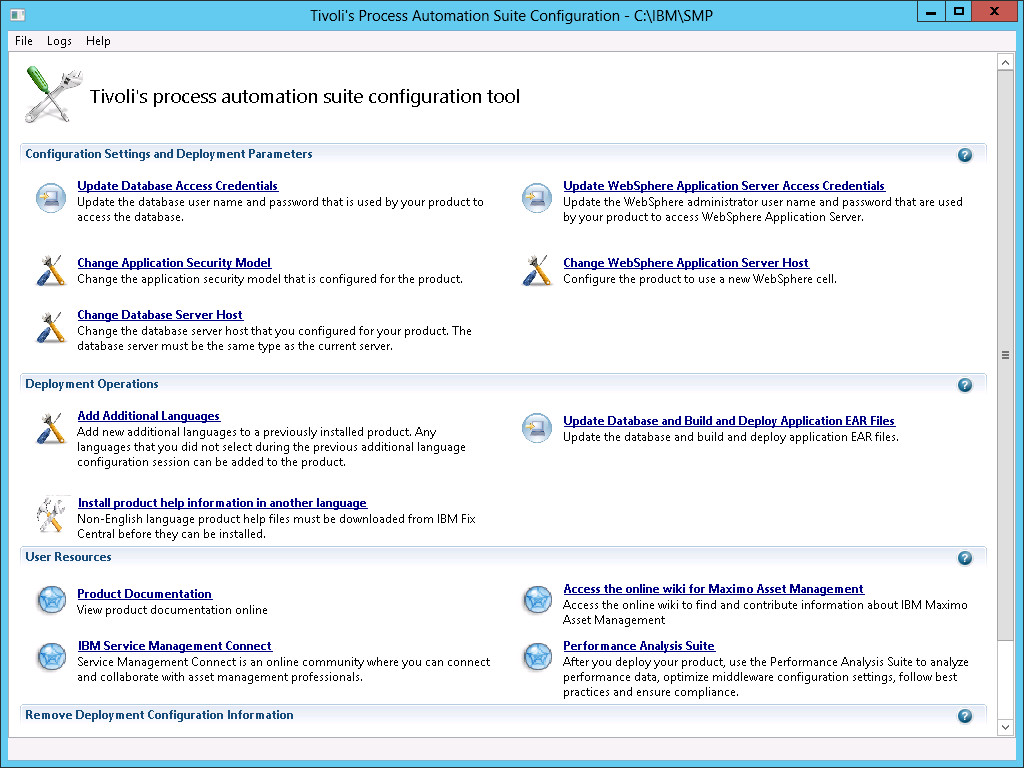
Installation is now complete!
**The Configuration Tool starts the Application server (MXServer) and deploys the application EAR file, then starts the application. When installing application EAR files manually, do not do it that way. Shut down MXServer before uninstalling and installing application EAR files.
What to download for Maximo Asset Management
Maximo Asset Management 7.6.0. feature Packs
Installing a Feature Pack in Maximo 7.6
Installing an Interim Fix in Maximo 7.6
Maximo Best Practices for System Performance 7.6.x
Maximo Asset Management Wiki on developerWorks
Maximo Asset Management Support Forum
Maximo Request for Enhancement (RFE) Community
Clearing WebSphere temporary file caches for Maximo Asset Management
1. I discovered that not all WebSphere Application Server packages downloaded from Passport Advantage are the same. This blog assumes that WebSphere was installed by using the packages including in Maximo Asset Management.
This blog assumes WebSphere was installed by using the packages supplied with Maximo. Still, WebSphere Application Server is WebSphere Application Server. The changes the installer and configuration tools make are all by the book. To get an idea of what to do if you are configuring manually, see Installing and Configuring WebSphere 9.0.0 for Maximo 7.6.0.6+ (WebSphere 9).
The Configuration Tool allows Maximo to be installed to existing WebSphere environments. It does not configure or deploy to that environment, but it is "aware" that environment is being used.
2. Before launching Tivoli's process automation suite configuration tool for the first time, can I download and install Feature or Fix Pack updates? Working that way avoids repeating steps of rebuilding and redeploying the EAR files and updating the database.
Generally, yes. When installing many Industry Solutions and Add-ons, testing can show that it is necessary to install them in two or more steps, rather than all at once.
3. The DB2 Fix Pack 9 update installed without using IBM Installation Manager. I finished the update, but Installation Manager still reports DB2 is at 10.5.0.4. Is it a known issue? Or, is there some other method I missed to update DB2 with Installation Manager?
Yes, it is a known issue. DB2 has its own installer. We created a package for Installation Manager. It installs the product and license for DB2 10.5 FP4 silently. Then Installation Manager configures DB2 for use with Maximo.
Only packages installed and updated natively by Installation Manager are tracked in the Installation Manager database. Installation Manager does not query a previous package installation when it loads. It checks and changes values when it does the updating. Therefore, when you update DB2 with a Fix Pack downloaded from IBM, the Installation Manager database does not change.
4. Can I use Java 8 with Maximo 7.6?
Yes, beginning with Maximo 7.6.0.6 Feature Pack, together with 8.5.5.10: WebSphere Application Server V8.5.5 Fix Pack 10 or later.
If you like this blog post, I'm sure you will also like Maximo and LDAP - Configuration from Start to Finish and Clustering with Maximo and WebSphere 8.5.5.x.
UID
ibm11113891