Technical Blog Post
Abstract
Using WebSphere 8.5.5 Migration Tool with Maximo 7.5 (part 1)
Body
Continuing from my last blog post, I'm assuming you have installed WebSphere 8.5.5. I'm going to do a simple migration: out-of-the-box Maximo 7.5.0.5 from WebSphere 7.0.0.29 to WebSphere 8.5.5.0.
Prerequisites for using Migration Tool:
1. WebSphere Application Server Network Deployment 8.5.5.0
2. A Maximo Asset Management instance currently running on WAS 7.0
2a. MAM Fix Pack 7.5.0.5 or later installed
Configuration Migration Tool - what is it? It is one of several WebSphere wizards that use a graphical interface that generate and execute WebSphere administration commands to perform complex operations in WebSphere Application Server.
Why use Migration Tool? Because WebSphere Application Server Network Deployment 7.0 software cannot be upgraded to version WAS 8.5.5 in the traditional sense. All profiles, including servers and applications, must be recreated and migrated from WAS 7.0 using the Migration Tool. The goal of migration is to reconstruct, not copy, your earlier version of WebSphere Application Server in a Version 8.5 environment.
First, I'll need to create a new Deployment Manager (Dmgr) profile in WAS 8.5.5.0. This new Dmgr will execute all of the commands for Migration Tool.
1. Launch WebSphere 8.5 Profile Management Tool
1a. Start Menu > IBM WebSphere > IBM WebSphere Application Server 8.5 > Tools > Profile Management Tool
 1b. Click Create
1c. Select Custom Profile and click Next

2. Select Advanced profile creation and click Next

3. Enter new Profile name. It should not be the same as existing WAS 7.0 profile. In this example, I'm going to call it ctgDmgr02
3a. Accept the default Profile directory location and click Next

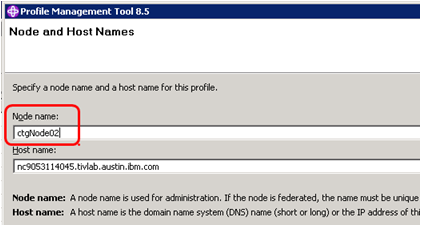
4. Create Node. It should not be the same as existing WAS 7.0 Node. In this example, its name it ctgNode02
4a. Check that Host name is correct and click Next
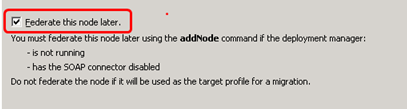
5. This node will not be federated, because I will be migrating ctgNode01 from WAS 7.0. So, select the check box next to Federate this node later.
5a. Click Next.
6. Security Certificates - accept the defaults, and click Next
7. Accept default distinguished names
7a. Enter and confirm the default keystore password and click Next

8. At the summary screen click Next.

9. Once it has completed, uncheck Launch the First steps console. Close the profile Management Tool Window, and close the WebSphere Customization Toolbox 8.5.
Next time: using the Migration tools!
UID
ibm11113795