Technical Blog Post
Abstract
Clustering with Maximo and WebSphere 8.5.5 - Part 1 - Configuration
Body
I'm back again, changing things up a bit this week from the usual LDAP blog. Today we are going to talk about clustering and go into a detail step by step guide to configuring WebSphere 8.5.5 in a horizontal cluster. Unlike a vertical cluster which is built up on the same server, a horizontal cluster spans multiple servers/nodes to allow for another layer of fail over.
Clustering is appropriate for implementations with a large user load, as you add more users you may need to add additional JVM's to either the existing nodes or new nodes that are created.
In this scenario we are going to keep it simple, our configuration will use 2 nodes in a horizontal cluster, 1 UI on each node and a single integration\cron JVM on the second node. Our servers are going to be 'mxcluster1' and 'mxcluster2' and will be set up as follows.
mxcluster1
- DMGR
- IHS
- Node 1 w/ MAXIMOUI1
mxcluster2
- Node 2 w/ MAXIMOUI2, MAXIMOIF
As we are using WebSphere IHS for load balancing we will only have one DMGR as a node can not be federated multiple times. If your using an external hardware or software to load balance instead of a single web server, you could have multiple DMGRs configured, one for each node. The load balancer would then balance to each of the web servers on the nodes and continue on from there.
There will be three parts to this first blog, if you already have WebSphere 8.5.5 installed on a single node and currently running Maximo skip to part 2 which is the configuration of the second node, part 3 will be creating the cluster from the admin console. Then there will be a follow up blog (Part 2) to go over the queue configuration as well as cron task configuration and deployment
Part 1 - Installing WebSphere 8.5.5 on mxcluster1
*Note* some panels have been excluded from the screenshots, these are license agreement panels or panels with no configuration.
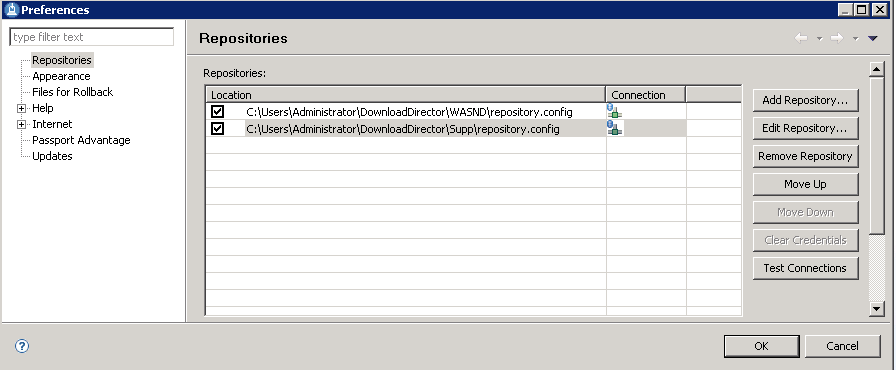
1. We will start assuming the WebSphere Network Deployment and Supplemental packages have been downloaded and extracted. Once that is done before you start the install you must configure your repositories for the Installation Manager.
From the IBM Installation Manager Menu, choose file - > preferences then add the repository.config for each of the packages. Once done click OK.
After clicking OK choose Install from the ISM menu.
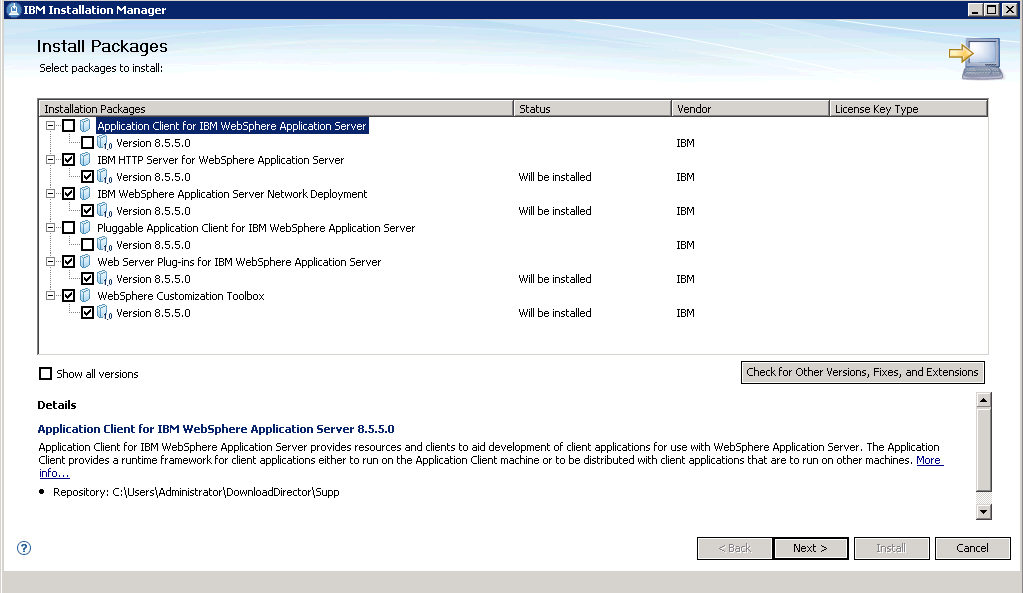
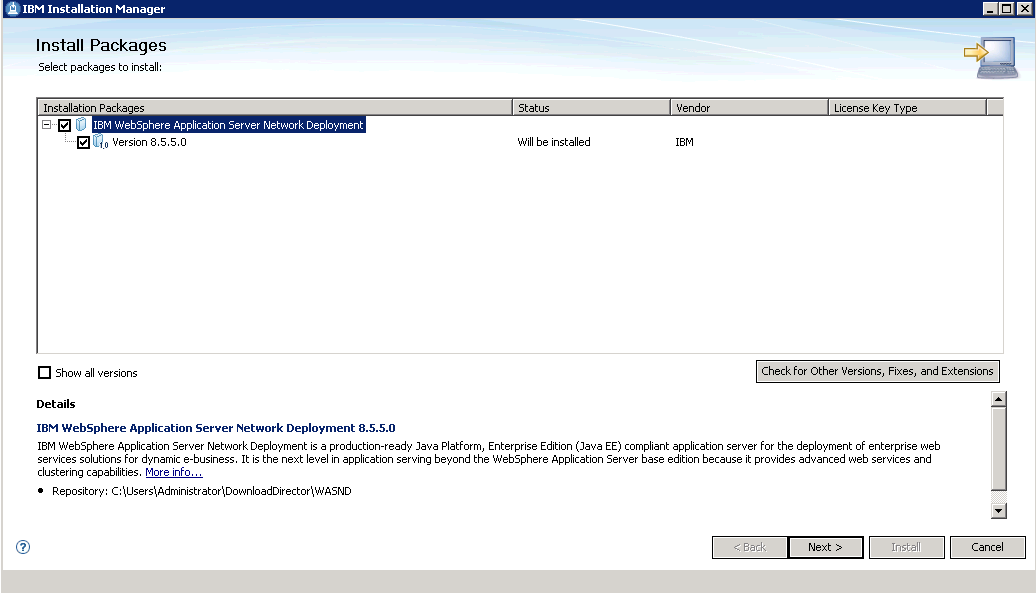
2. For the purpose of a basic cluster we will need the following packages selected from the install packages screen. Click next.
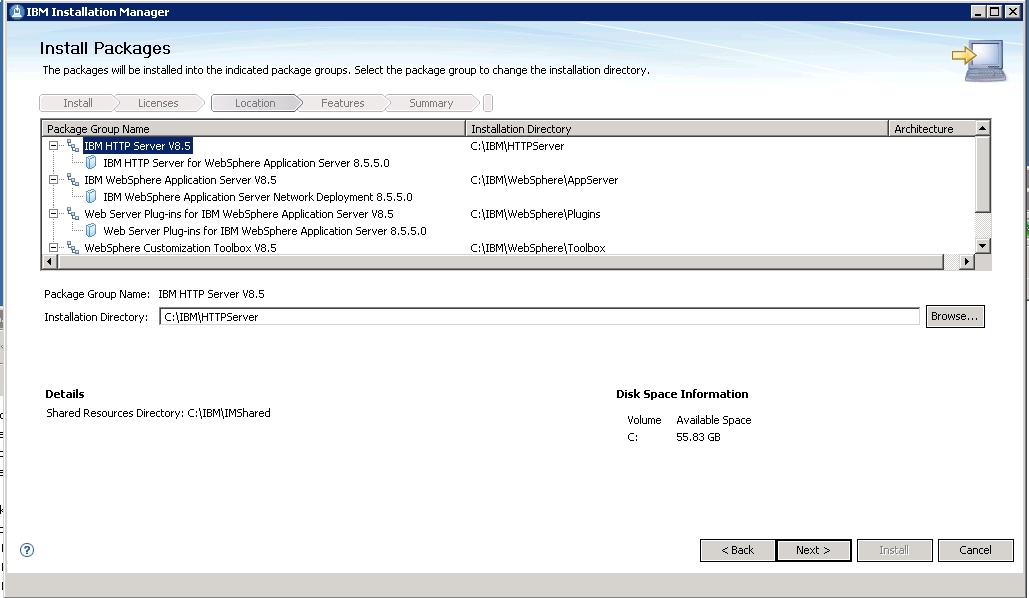
3. On the next install packages screen you are prompted for installation paths for each of the components, each component needs to be changed individually by clicking on its package group name.
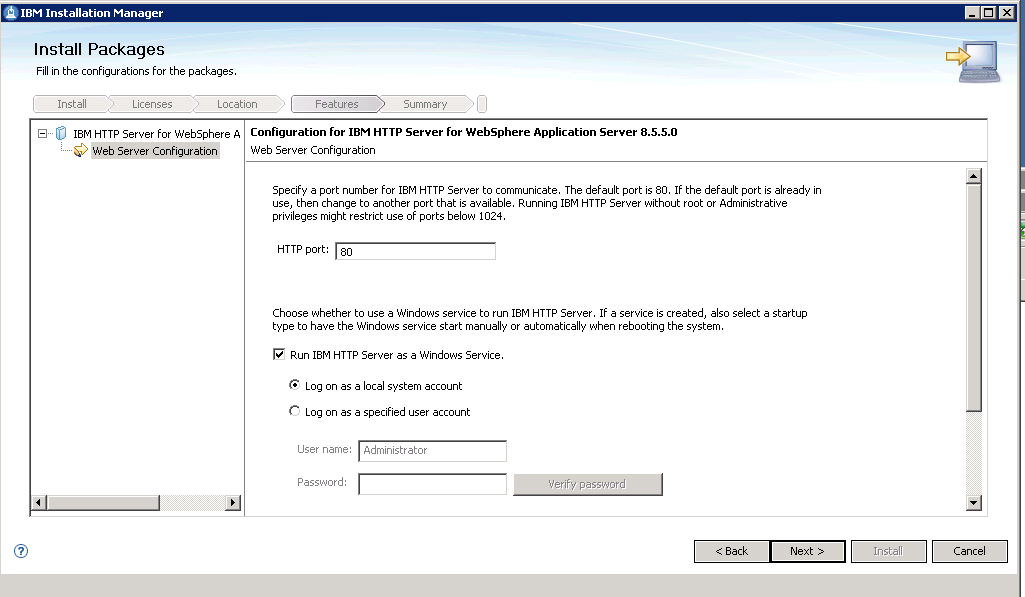
4. For the IHS configuration, choose the port you want to have configured for your web server. This is the port users will access Maximo on that load balances between the two nodes. For our scenario we will not be installing a web server on the second node. The log on account is the account used to start the HTTP Server service, this can be the logged on local system account, or an account specified. Click Next.
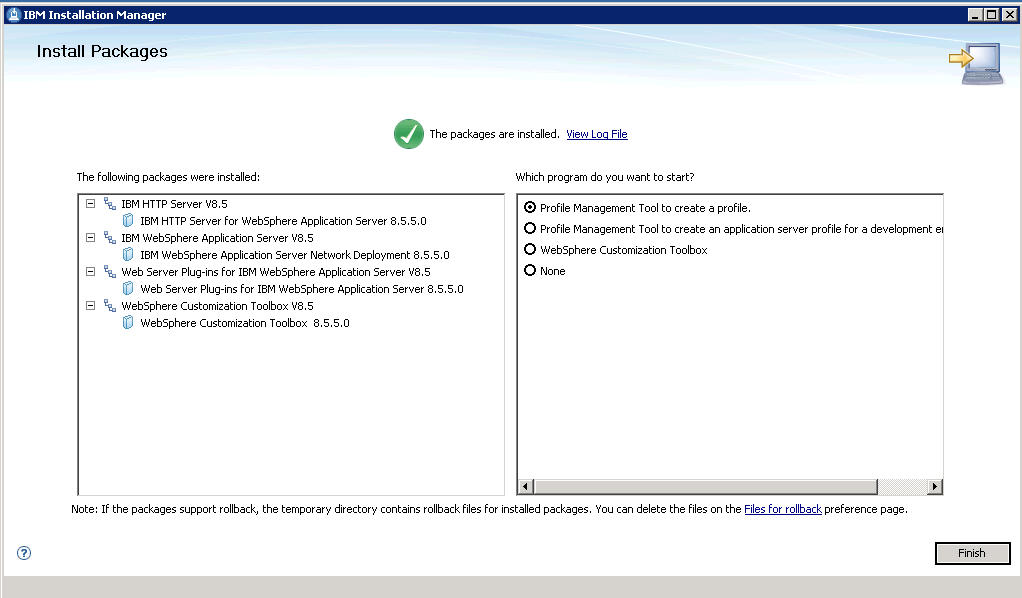
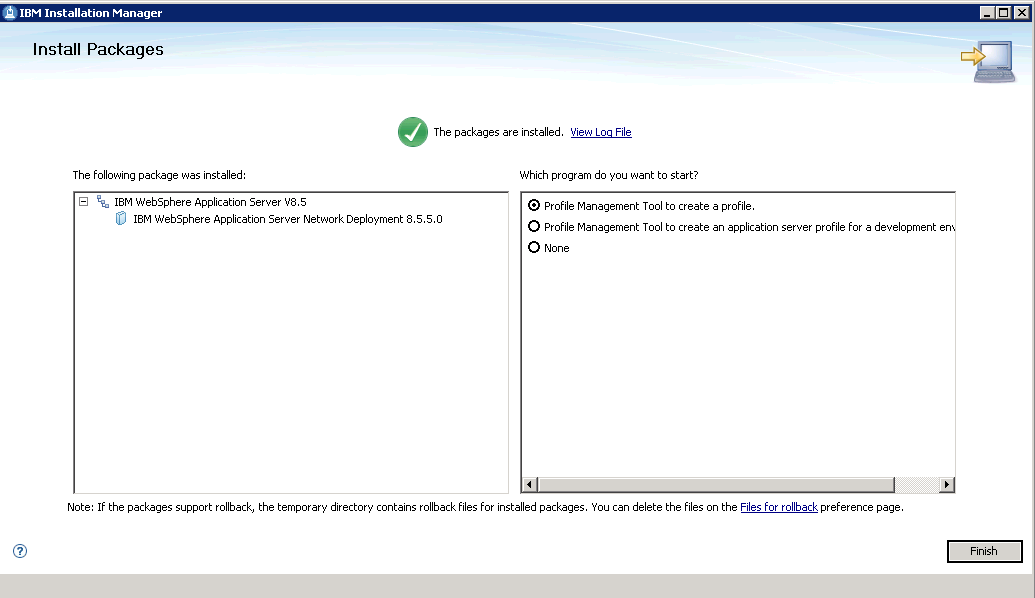
5. The IHS is the only initial configuration from the install. Once the install completes you will then need to create your Deployment Management and Application Server profiles. To do this click on the circle beside 'Profile Management Tool to create a profile' Then click finish.
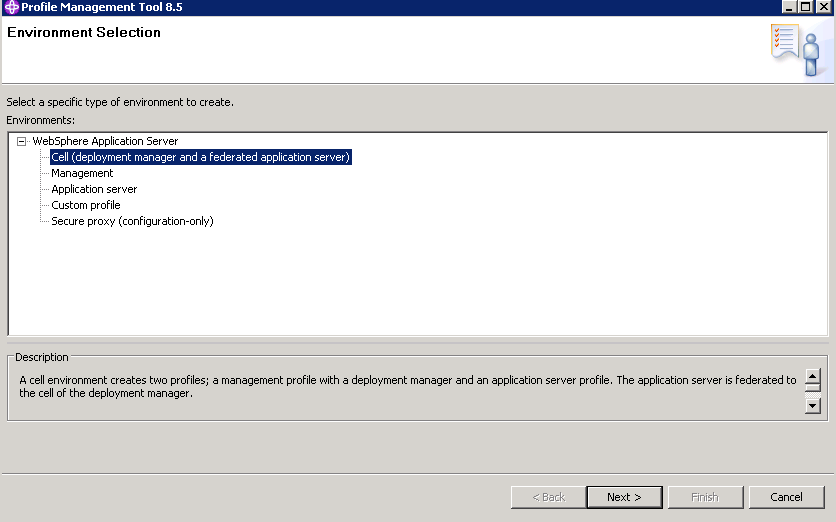
6. Once the Profile Management Tool launches click on 'Create'. Your next screen will prompt you to choose your type of environment, as this server hosts our DMGR we want to choose the cell option. This will create our DMGR profile as well as a profile for the application server on this Node (DMGR01, APPSRV01). Click Next.
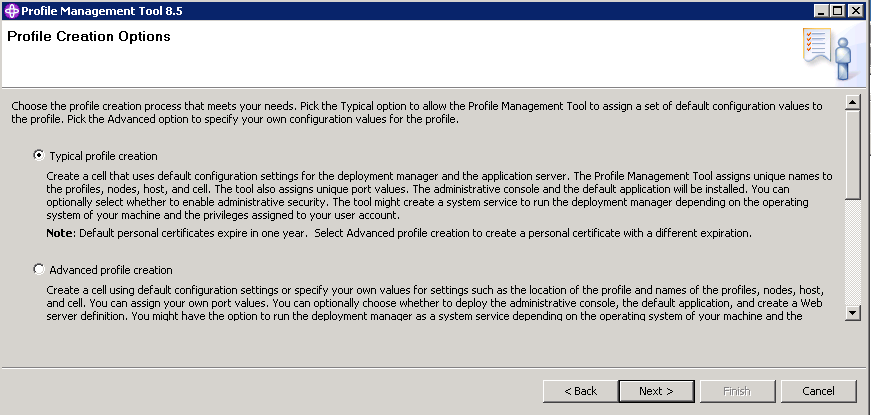
7. Choose Typical profile creation, if you wish to change the names of your profiles as well as location change advanced. For the purpose of this tutorial we are choosing typical. Click Next.
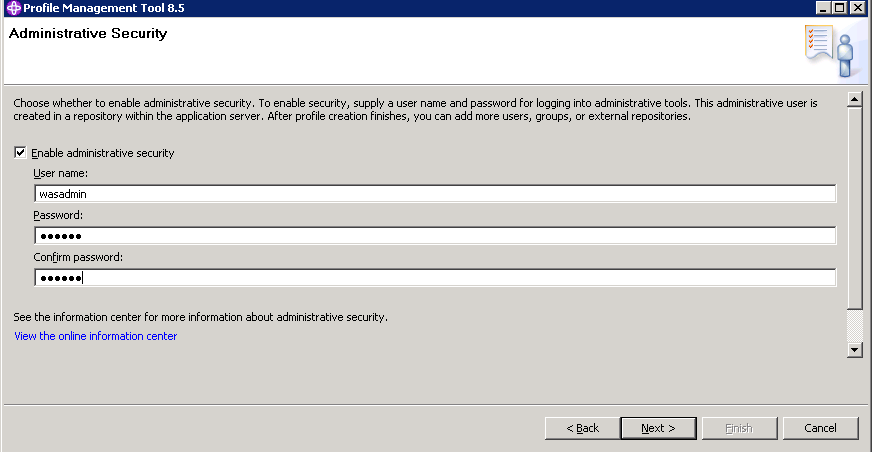
8. Now enable WebSphere security, this is the username and password you will use to access the WebSphere Administrative Console. If you uncheck the box you will be able to log in as a guest. Click next and create.
9. After your profile creation is finished you will be able see the profiles and their configuration in the WebSphere Customization Toolbox as seen below.
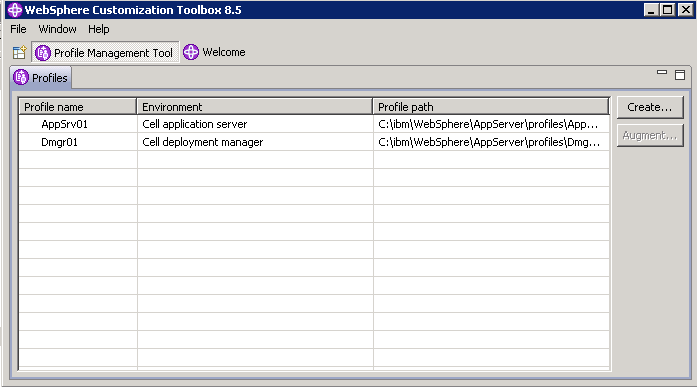
Now we have our main server configuration with a Deployment Manager, Application Server and an IHS\webserver. Our next steps is to create another node on a separate box and federate that node to the Deployment Manager on 'mxcluster1'
Before continuing ensure you have configured your IHS Plugin, if you haven't please see one of my previous blogs for these steps.
Maximo and Websphere 8.5.5 - Did you forget the plug-in configuration?
Part 2 - Installing a single node for WebSphere 8.5.5 on mxcluster2
1. As we are just installing the node on mxcluster2 we can follow pretty much the same steps as above but with some minor changes. As we are not installing an IHS or webserver on this machine, we will not need the supplemental repositories added to our installation manager as we did previously. This can be removed so only the WebSphere Network Deployment repository exists.
After removing the supplemental repository click install and you will be brought to the screen where the Network Deployment is your only install option. Click Next.
2. Continue through the install screen, specifying the path you wish to install WebSphere to then click install. As there is no IHS, no other configuration options are provided at this point. Once the install finishes you will again be prompted to create a profile. 'Click on the Profile Management to create a profile' again.
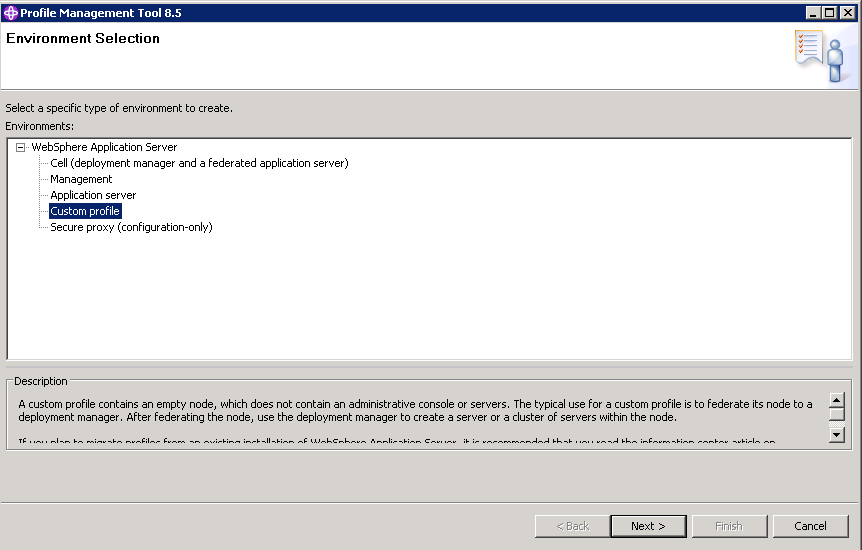
3. This time our profile is going to be created a little differently, instead of choosing cell, we want to choose 'Custom profile'. The reason for this is because we will not be hosting a deployment manager on this machine, and a the node can only be federated to a single deployment manager, which we want to exist on mxcluster1. Click Next.
4. After clicking next in the screen above you will be brought to the federation screen. From here you will want to point to your deployment manager, in our case it's on mxcluster1. After entering the username and password and clicking next the wizard will create the custom profile and federate the node to the deployment manager. Click Next.
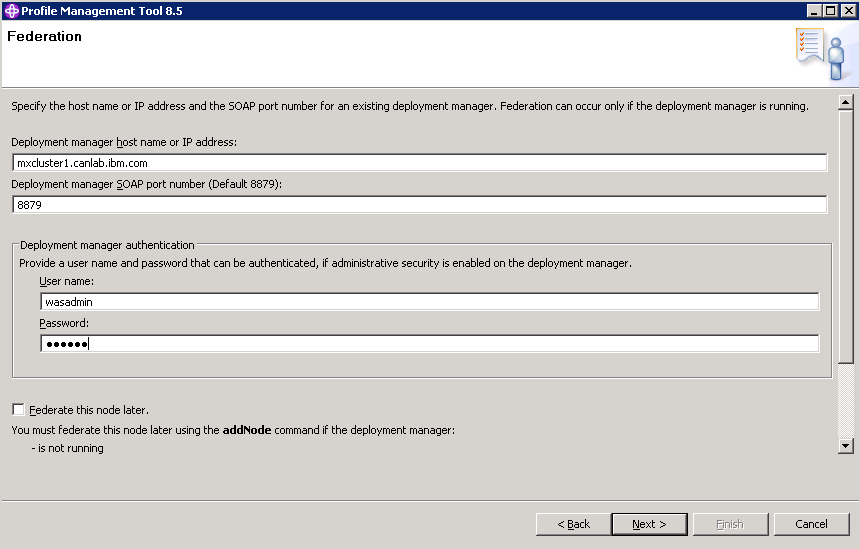
If you choose to federate the node after the profile is created you can use the addNode command from ibm\WebSphere\AppServer\profiles\bin
At this point both nodes will be accessible and we have the configuration stated below without our application servers.
mxcluster1
- DMGR
- IHS
- Node 1
mxcluster2
- Node 2
So lets move on to the next part, creating the cluster from the WebSphere console.
Part 3 - Creating the cluster in WebSphere.
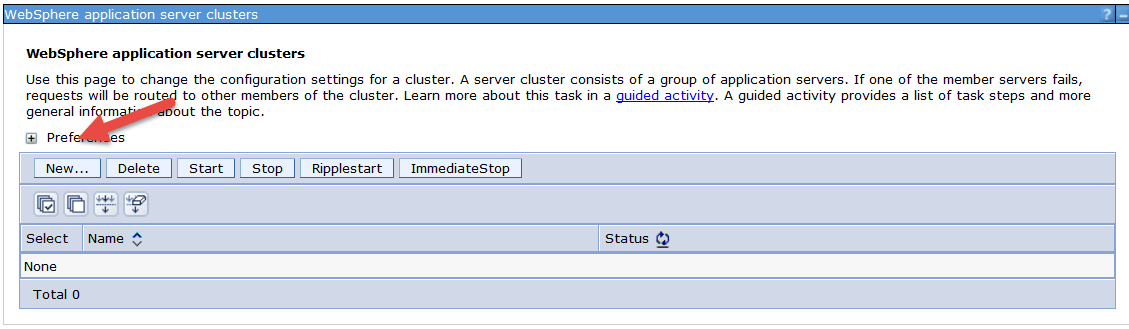
1. From the WebSphere Administrative console, on the server were your deployment manager is, expand Clusters and click on 'WebSphere application server clusters'

2. From the 'WebSphere application server clusters' page click on new to create your new cluster.
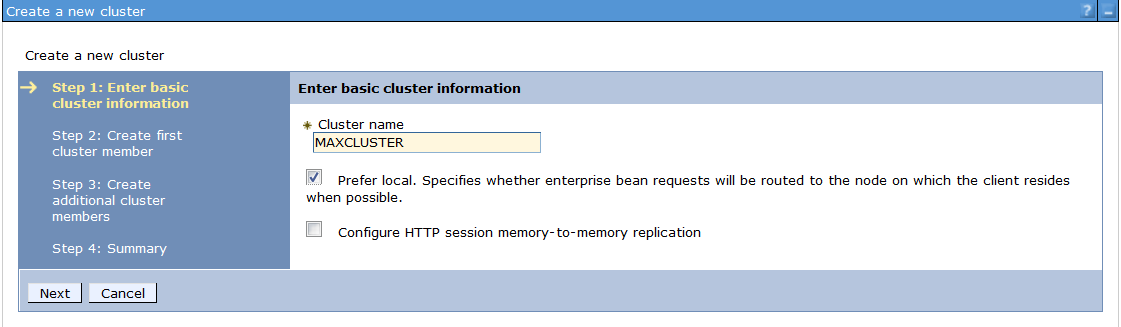
3. Create your cluster, we have called ours MAXCLUSTER.
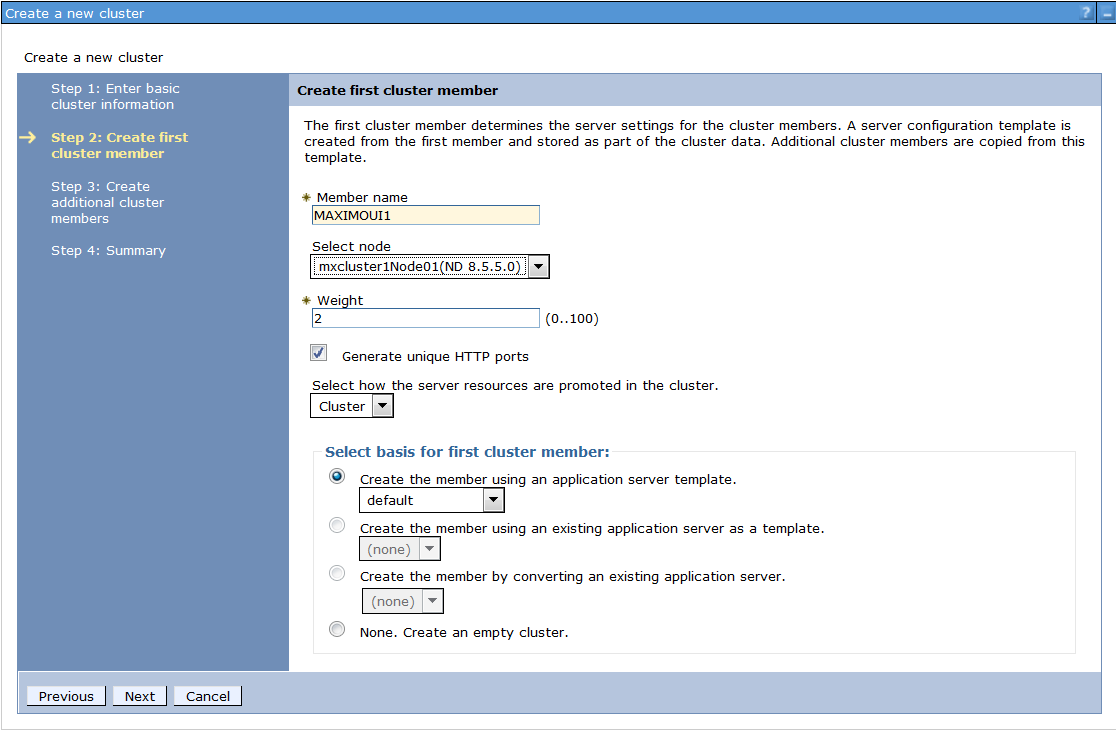
4. On this screen we will specify our first cluster member, MAXIMOUI1 in the node drop down both of our nodes will exist. MAXIMOU1 will exist on mxcluster1Node01, leave the rest of the fields defaulted, click next.
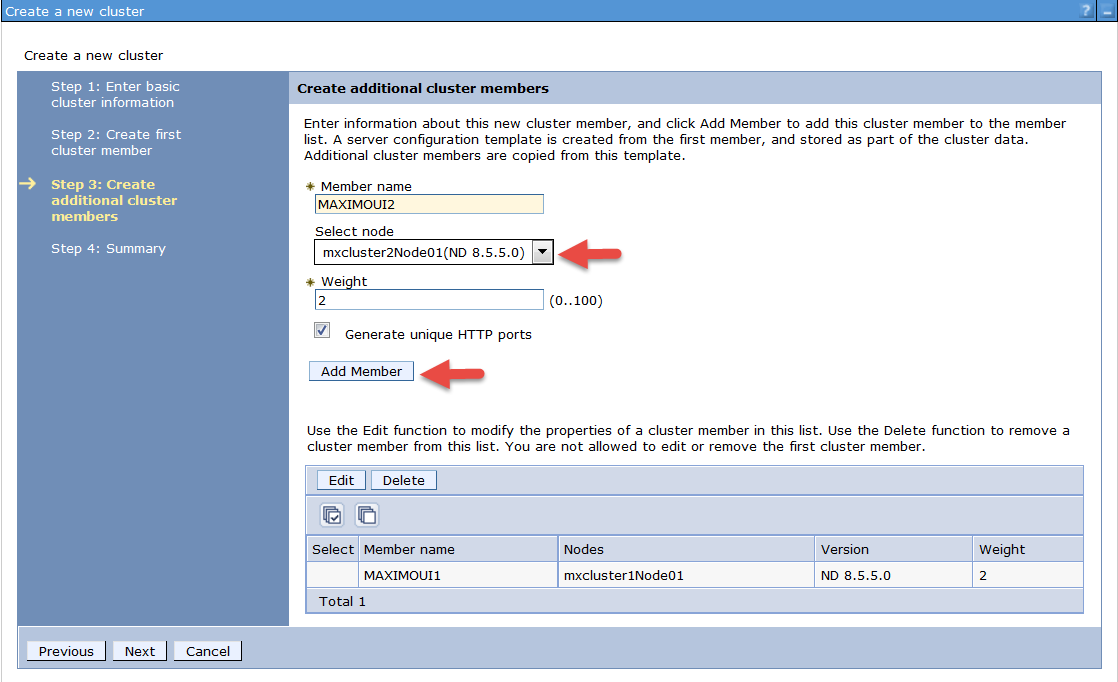
5. On the next screen you will add the rest of your cluster members. As the MIF server will exist outside the cluster ( we don't want users load balancing to it) we will create it separately. Type in MAXIMOUI2, select mxcluster2Node01 from the node drop down this time and click add member then next.
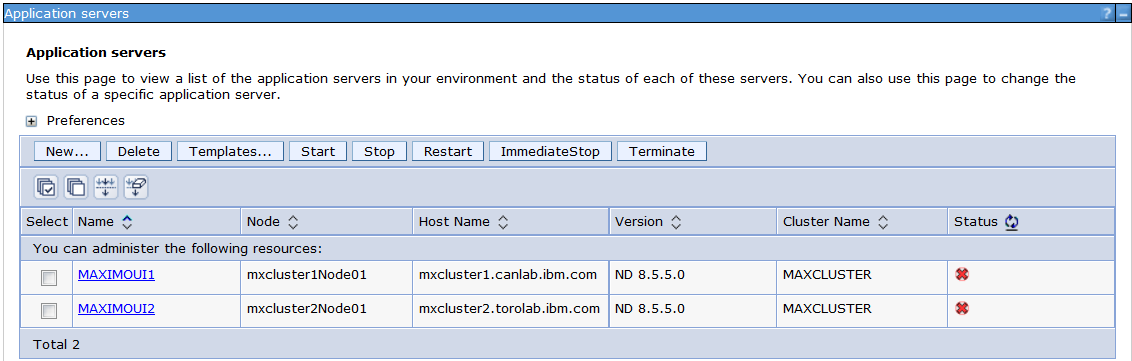
6. Click back to Application servers now and you will see both of our UI servers, one exists on each node. After deploying the ear to the cluster the web server will load balance users between the two servers. Now we will add you Integration server, click on 'New'
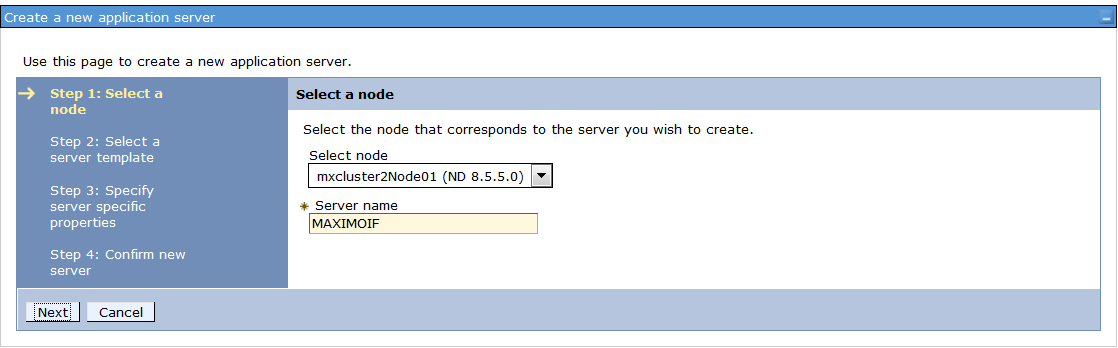
7. Select mxcluster2Node01 from the drop down and enter the server name MAXIMOIF, click next through the screens choosing the defaults to create the Integration Framework server.
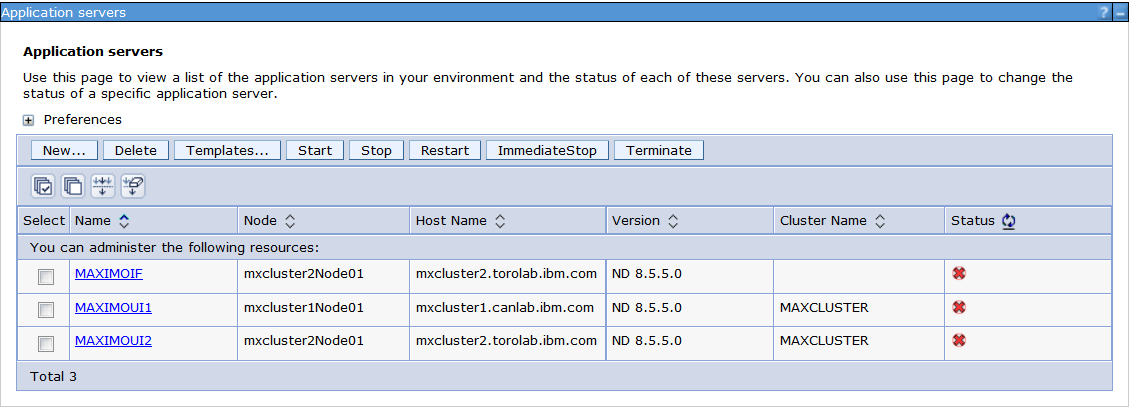
Now the configuration of your cluster from a WebSphere perspective is done as we have multiple UI load balancing over multiple nodes.
mxcluster1
- DMGR
- IHS
- Node 1 w/ MAXIMOUI1
mxcluster2
- Node 2 w/ MAXIMOUI2, MAXIMOIF
In Part 2 of this series (which should be posted in one week's time), we will discuss the queue creation, building multiple maximo ears, deployment of the application to the cluster and separating out crontasks to run only on a specific server. If you have any questions related to the topic, or on the configuration above please comment below.
Series
Clustering with Maximo and WebSphere 8.5.5 - Part 1 - Configuration
Clustering with Maximo and WebSphere 8.5.5 - Part 2 - JMS Configuration
Clustering with Maximo and WebSphere 8.5.5 - Part 3 - Isolating Functionality and Deployment
UID
ibm11113735