Technical Blog Post
Abstract
ITM Agent Insights: A Command Return Code agent using Agent Builder
Body
The following post will help you create a Command Return Code agent using Agent Builder. The following guide will provide you the step-by-step instructions needed to create the agent using the exact options captured using screenshots. The agent created in the example was on a Windows server but the same logic can be used to create an agent on a Unix based platform.
Creating A Command Return Code Agent in Agent Builder
- Run Agent Builder as Administrator
- Select create new agent.
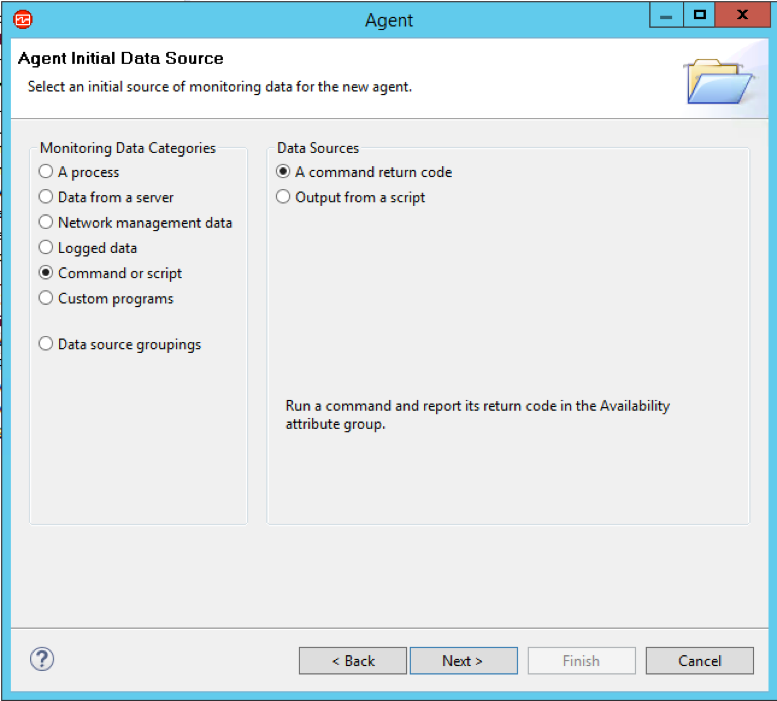
- Once at the Data source selection screen go to Command or Script and select A command return code
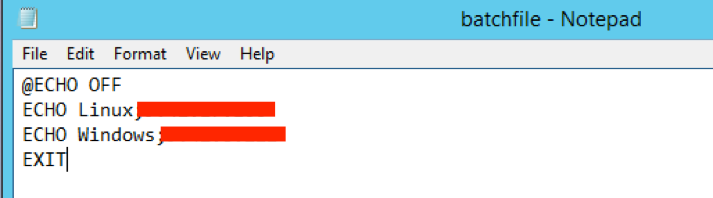
- Once on the next screen you will want to have a .bat file ready to use. For this example, we will be using batchfile.bat. For this case I have created a bat file which just echos a couple of servers and provides the output. The hidden piece includes the IP Addresses for the servers used in this example.
Once created go back to agent builder put a proper display name. In this example batchfile.bat is used for the display name. Next click add under the commands header.

From here you want to add the file into the command files and put the name of .bat file in the command line bar. Lastly add the return codes. You can use pretty much any numbers you want but just follow example just in this case.

Click OK and Finish- Now if you have Agent Test already running then you will not need to do this next part
- If its not up then go to the top right corner of your agent builder screen there should a bar that you can type in that says Quick access. Type agent test in there.

- Select the one that says Views is the correct one.
- Then a screen should pop up on the left hand side.
- If its not up then go to the top right corner of your agent builder screen there should a bar that you can type in that says Quick access. Type agent test in there.
- The screen should be on the left had side and look something like this screen shot. Click on your Agent you want to start and click the green arrow to start it.

- In this example start A Command Return Code Agent. Then click on the cylinder that says Availability.
- At the bottom of the screen you should see Attribute Group Test. With the attributes filled out like the screen shot below.
NOTE: If it’s not at the bottom of the screen go to the Agent information tab and click test agent

- From here in the Attribute Group Test it should look like the screen shot below

- After this step click complete and save.
- You can go on and create the agent files along with the application support files and install the agent and application support on the TEMS/TEPS server.
The steps listed above should help you create the required agent.
Additional ITM Agent Insights series of IBM Tivoli Monitoring Agent blogs are indexed under ITM Agent Insights: Introduction.

Subscribe and follow us for all the latest information directly on your social feeds:
 |
| Check out all our other posts and updates: |
| Academy Blogs |
| Academy Videos |
| Academy Google+ |
| Academy Twitter |

UID
ibm11084875