Technical Blog Post
Abstract
Sending Status data from TDI to a DASH widget
Body
Being able to control status icons in a DASH widget is a very useful feature when creating a dashboard. In this post I'll show how you can use TDI to populate a DASH List Widget with status values from a .csv file.
Step 1. Create a data file
I have a .csv file that looks like this:
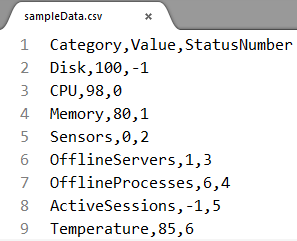
The final column represents a status value that will be interpreted by a DASH widget. The following chart is a reference for mapping this number to the Status object that DASH will receive from TDI.
| Label | Number | Color/Icon |
|---|---|---|
| Fatal | -1 | Black X |
| Critical | 0 | Red X |
| Warning | 1 | Yellow Exclamation |
| Inactive | 2 | Grey Question Mark |
| Information | 3 | Blue “i” icon |
| Warning Major | 4 | Orange Exclamation |
| Unknown | 5 | Grey Question Mark |
| Normal | 6 | Green Check |
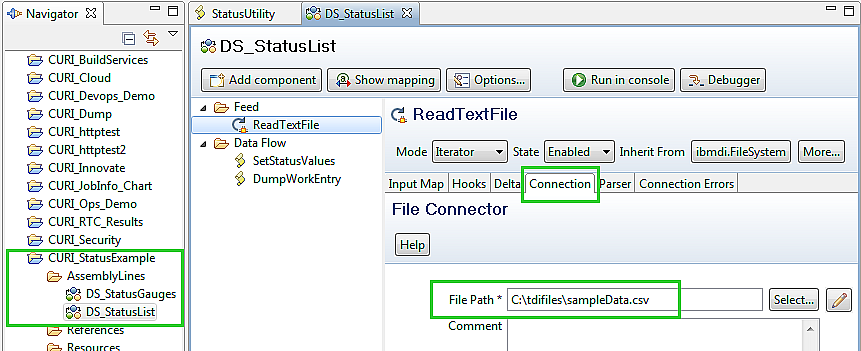
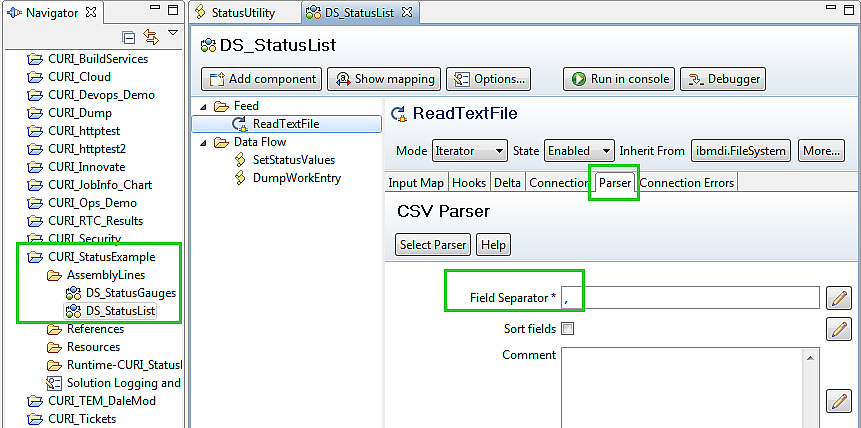
Step 2. Configure TDI to read the data file
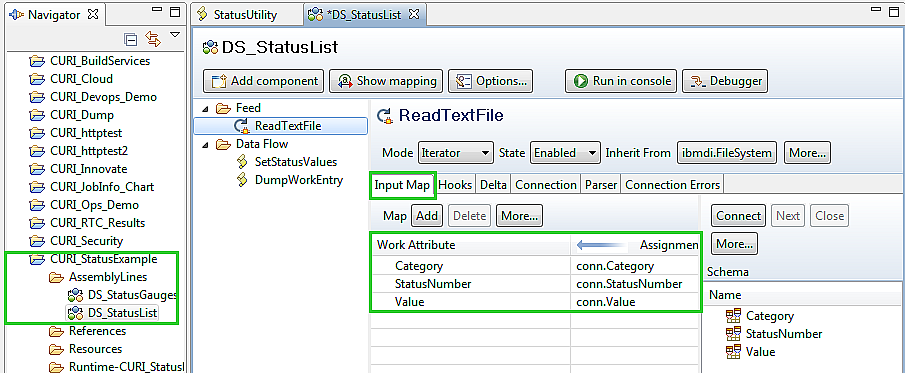
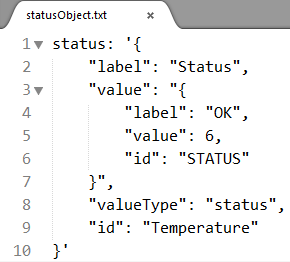
Step 3. Define a status object in TDI
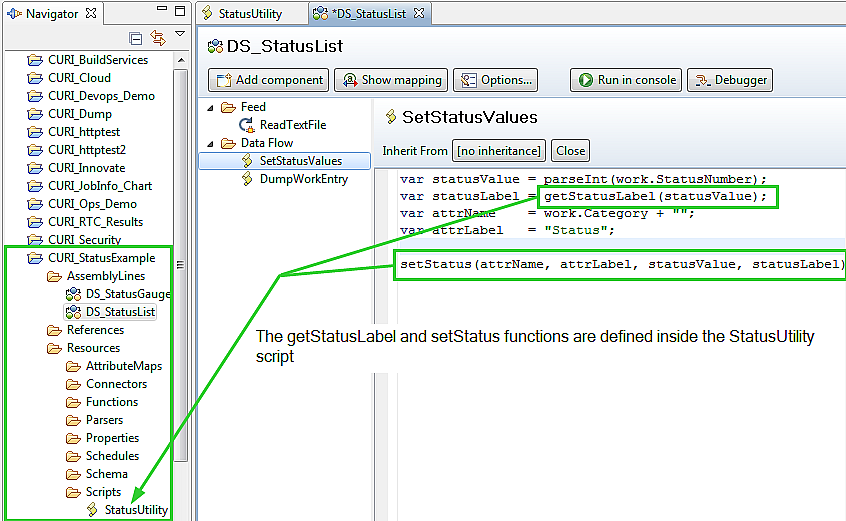
f you run this assembly line in the console and look at the detailed output ( by including the DumpWorkEntry component) you can see that TDI creates a status object to send to DASH that looks like this:
Here's a TDI statusUtility script that can help send status data to a DASH widget.
// Fatal = -1 (black X) // Critical = 0 (red X) // Warning = 1 (yellow exclamation) // Inactive = 2 (question mark) // Information = 3 ("i" icon) // Service = 4 (orange exclamation) // Unknown = 5 (question mark) // Normal = 6 (green check) function getStatusLabel(statusValue){ if(typeof(statusValue) !== 'number'){ statusLabel = "UnknownStatusLabel"; } else { switch(statusValue) { case -1: statusLabel = "Fatal"; break; case 0: statusLabel = "Critical"; break; case 1: statusLabel = "Warning"; break; case 2: statusLabel = "Inactive"; break; case 3: statusLabel = "Information"; break; case 4: statusLabel = "Service"; break; case 5: statusLabel = "Unknown"; break; case 6: statusLabel = "OK"; break; default: statusLabel = " "; } } return statusLabel; } function setStatus(attrName, attrLabel, statusValue, statusLabel) { if(typeof(attrName) === 'undefined' || attrName === "" || !attrName){ attrName = "Status"; } if(typeof(attrLabel) === 'undefined' || attrLabel === "" || !attrLabel){ attrLabel = "Status"; } if(typeof(statusValue) === 'undefined' || statusValue === "" || statusValue === "NaN"){ statusValue = "5"; //Unknown } if(typeof(statusLabel) === 'undefined' || statusLabel === "" || !statusLabel){ statusLabel = " "; } // Thanks to Bjorn Stadheim for the example below // Create a CURI Property type object var st = system.newEntry(); st.id = attrName; st.label = attrLabel; st.valueType = "status"; // Create the status value object var stvalue = system.newEntry(); stvalue.id = "STATUS"; stvalue.value = statusValue; stvalue.label = statusLabel; st.value = stvalue; work.status = st; }
Once you have this code in the Scripts folder of any TDI project then you can easily send a status value to DASH by calling
getStatusLabel(statusValue) //optional
setStatus(attrName, attrLabel, statusValue, statusLabel)
or just
setStatus(attrName, attrLabel, statusValue, statusLabel)
When you create the StatusUtility script, make sure to click on the Configuration tab and select the “Implicitly Included” check box as shown below.

Step 4. Point a DASH widget to your TDI assembly line

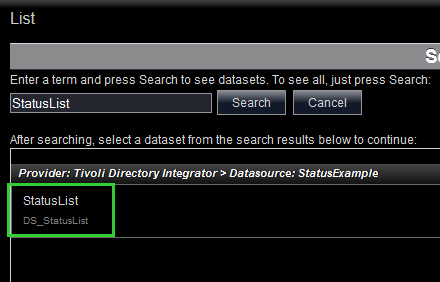
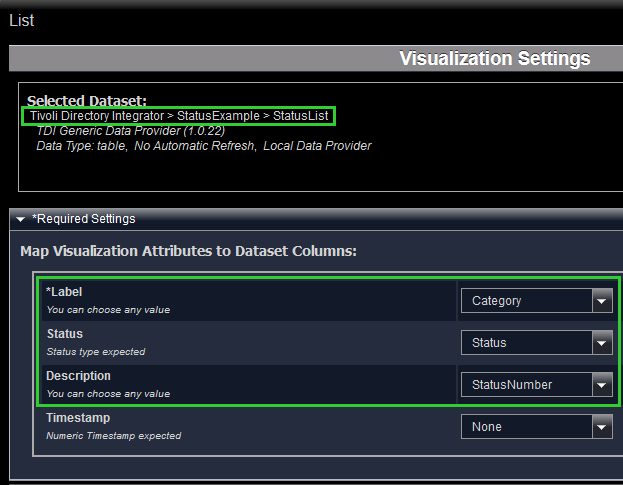
The List widget will show the contents of your csv file and apply the correct status icon that matches up with the StatusNumber column.
You can now modify the StatusNumber column of .csv file and refresh your browser to see the changes reflected in the DASH widget.

UID
ibm11080135