Fix Readme
Abstract
This document provides the instructions for migrating IBM® Case Manager to IBM Business Automation Workflow on Cloud Pak® for Business Automation 22.0.2 or 23.0.1.
Content
Table of Contents
- Migrating IBM Case Manager to IBM Business Automation Workflow on Cloud Pak for Business Automation 22.0.2 or 23.0.1
- Assess your readiness
- Frequently asked questions
- Prepare
- Migrate
- Optional post-migration steps
- Verify your installation and migration
- Additional information
- Trademarks and service marks
Migrating IBM Case Manager to IBM Business Automation Workflow on Cloud Pak for Business Automation 22.0.2 or 23.0.1
You can move an on-premises IBM Case Manager environment to IBM Cloud Pak for Business Automation and still keep the databases and LDAP of your on-premises environment. The IBM Case Manager system comprises the IBM FileNet® Content Platform Engine, IBM Navigator, and IBM Case Manager. To move IBM Case Manager from on premises to cloud, you must also move the IBM FileNet Content Platform Engine and IBM Navigator to Cloud Pak for Business Automation.
Before you migrate to any Cloud Pak for Business Automation capability, it is important to understand what you need, what options you have, and your license entitlements.
Assess your readiness
Versions supported
For IBM Case Manager 5.3.3 Interim Fix 10 and later development environments, migration is supported by the following versions:
- Cloud Pak for Business Automation 22.0.2 and later
- Cloud Pak for Business Automation 23.0.1 and later
- Cloud Pak for Business Automation 22.0.2 and later
- Cloud Pak for Business Automation 23.0.1 and later
Before you migrate IBM Case Manager to IBM Business Automation Workflow in IBM Cloud Pak for Business Automation, be aware of the prerequisites for the migration process.
- Production or development environment
- It is recommended that you install IBM Case Manager 5.3.3 interim fix *10* or later with a development environment deployment or production environment deployment. For more information about creating a development or production deployment, see Configuring IBM Case Manager.
- When you configure the IBM Case Manager profile, select the development environment or production environment and deploy IBM Case Manager with the default configuration tasks.
- Prerequisites for the production environment:
Before the migration, ensure that the following conditions are met for all the IBM Case Manager on-premises environment case solutions that you might want to work with.- The case solutions are imported to the Design Object Store.
- The case solutions are deployed to the required target area or areas.
- Security manifests are applied to all the target areas where the solutions are deployed.
- Databases and object stores
- The database that has the Global Configuration Database, IBM Content Navigator, Design Object Store, and Target Object Store is the same database that is used after the migration. Ensure that the database is available after the migration. If you use file storage object stores, take a backup.
- The same LDAP is used in on-premises and container environments.
-
The DOCS (Documents) Object Store must be created in the on-premises environment before the migration. If data persistence is configured in Cloud Pak for Business Automation, you will need to create AEOS (Application Engine object store) as well.
When you migrate the IBM Case Manager production or development environment to IBM Business Automation Workflow in IBM Cloud Pak for Business Automation, you might have the following limitations and restrictions.
- Solutions that use forms do not work as expected in container environments because forms are not supported.
- Migrated object stores from the on-premises environment are not used after migration. The IBM Content Navigator URL of the on-premises environment no longer works.
- The traditional Content Platform Engine cannot be used along with the container Content Platform Engine after migration.
- (Production Only) Case solutions must be deployed and the audit or security manifest applied to the required target areas before migration. After migration, the on-premises solutions cannot be redeployed and the audit or security manifest cannot be modified.
-
Case widget plugins have to be refactored before deploying them in Cloud Pak for Business Automation. The IBM Case Manager path must be an absolute URL, and not a relative URL.
Frequently asked questions
For 23.0.1
Prepare
This section describes the Content Platform Engine (CPE) and IBM Content Navigator (ICN) sections required for IBM Case Manager migration. If you require any other capabilities of FileNet Content Manager, see "FileNet Content Manager."
For 22.0.2
For 23.0.1
Migration planning sheet
Use the migration planning sheet to gather the on-premises environment configuration data that you must have available when you migrate. After you generate the CR, you must check that all the values listed in the migration planning sheet are correctly filled in. See the "Migration planning sheet."
For 22.0.2
For 23.0.1
The databases of CPE and ICN will be used after migration, so make sure that the databases are online. The Lightweight Directory Access Protocol (LDAP) server that is used in the on-premises environment will be used after migration, so make sure that the LDAP server is running. When you are ready to start migration, stop the CPE, ICN, and IBM Case Manager applications that are hosted on the IBM WebSphere or Oracle® WebLogic server.
- On the CPE server, create and initialize the required object stores, with the default add-ons.
One object store is used for DOCS and the other for AE. If data persistence is configured in Cloud Pak for Business Automation, you will need to create AEOS (Application Engine object store). This is required upfront as you cannot add new object stores until the whole migration process is complete. - Export all on-premises solutions of the development and production environments.
- Export the security manifest and audit manifest, if any.
- Take a backup of the custom widgets.
- Take a backup of the CPE and ICN databases.
- Prune CPE audit events and workflow event logs.
Before migration, the size of the CPE Event and workflow event log tables should be pruned as a best practice to reduce their size as much as possible.
Audit Event table pruning
Workflow event log pruning - For a production environment only:
Before migration, ensure that the following conditions are met for all the IBM Case Manager on-premises environment case solutions that you might want to work with:- The solutions are imported to the Design Object Store.
- The solutions are deployed to the required target area or areas.
- Security manifests are applied to all the target areas where the solutions are deployed.
- To prepare for installation, see "Installing a CP4BA multi-pattern production deployment."
For 22.0.2
For 23.0.1 - Log in to the cluster with the cluster administrator that you used in "Option 1: Preparing your cluster for an online deployment."
For 22.0.2
For 23.0.1
or log in as a non-administrator user who has access to the project.
For example, using the Red Hat OpenShift CLI, enter:oc login https://<cluster-ip>:<port> -u <cluster_admin> -p <password> -
View the list of projects in your cluster to see the target project before you run the deployment script.
oc get projectsNote: If you used the All Namespaces option to install the Cloud Pak operator, then you must have another project in addition to
openshift-operatorsin the cluster before you create the deployment. Change the scope to the project that you created for your deployment (cp4ba-project).oc project <project_name>The specified project is used in all later operations that affect project-scoped content.
-
Optional: Download the cert-kubernetes repository to an amd64/x86 Linux® based VM/machine. For more information about downloading cert-kubernetes, see "Option 1: Preparing your cluster for an online deployment."
For 22.0.2
For 23.0.1
Migrate
After you prepare the cluster, you can generate and run a custom resource (CR) file. The CR file acts as a template of what you will be installing, and can be customized according to the components that the operator supports for installation.
Generate the CR
Generate the CR for deploying Cloud Pak for Business Automation on the OpenShift Container Platform. The time required to run the CR file depends on the information that you provide.
- Under /cert-kubernetes/cert-kubernetes/scripts folder, run the ./cp4a-prerequisites.sh script.
Running the prerequisites script gives you the instructions to follow../cp4a-prerequisites.sh Usage: cp4a-prerequisites.sh -m [modetype] Options: -h Display help -m The valid mode types are: [property], [generate], or [validate] STEP 1: Run the script in [property] mode. Creates property files (DB/LDAP property file) with default values (database name/user). STEP 2: Modify the DB/LDAP/user property files with your values. STEP 3: Run the script in [generate] mode. Generates the DB SQL statement files and YAML templates for the secrets based on the values in the property files. STEP 4: Create the databases and secrets by using the modified DB SQL statement files and YAML templates. STEP 5: Run the script in [validate] mode. Checks whether the databases and the secrets are created before you install CP4BA. - Run the script in property mode to generate the properties files:
This mode displays the different capabilities../cp4a-prerequisites.sh -m propertySelect the Cloud Pak for Business Automation capability to install: 1) FileNet Content Manager 2) Operational Decision Manager 3) Automation Decision Services 4) Business Automation Application 5) Business Automation Workflow (Selected) (a) Workflow Authoring (Selected) (b) Workflow Runtime 6) Automation Workstream Services 7) IBM Automation Document Processing (a) Development Environment (b) Runtime Environment 8) Workflow Process Service Authoring Info: Note that Business Automation Workflow Authoring (5a) cannot be installed together with Automation Workstream Services (6). However, Business Automation Workflow Runtime (5b) can be installed together with Automation Workstream Services (6). Info: Business Automation Navigator will be automatically installed in the environment as it is part of the Cloud Pak for Business Automation foundation platform. Tips: After you make your first selection you will be able to make additional selections since you can combine multiple selections. ATTENTION: IBM Automation Document Processing (7a/7b) does NOT support a cluster running a Linux on Z (s390x)/Power architecture. Tips: Press [ENTER] when you are done Enter a valid option: [1 to 4, 5a, 5b, 6, 7a, 7b, 8]:- If you are migrating from IBM Case Manager development environment, enter 5a. This option enables migration to Workflow Authoring environment.
- If you are migrating from IBM Case Manager Production environment, enter 5b. This option enables migration to Workflow Runtime environment.
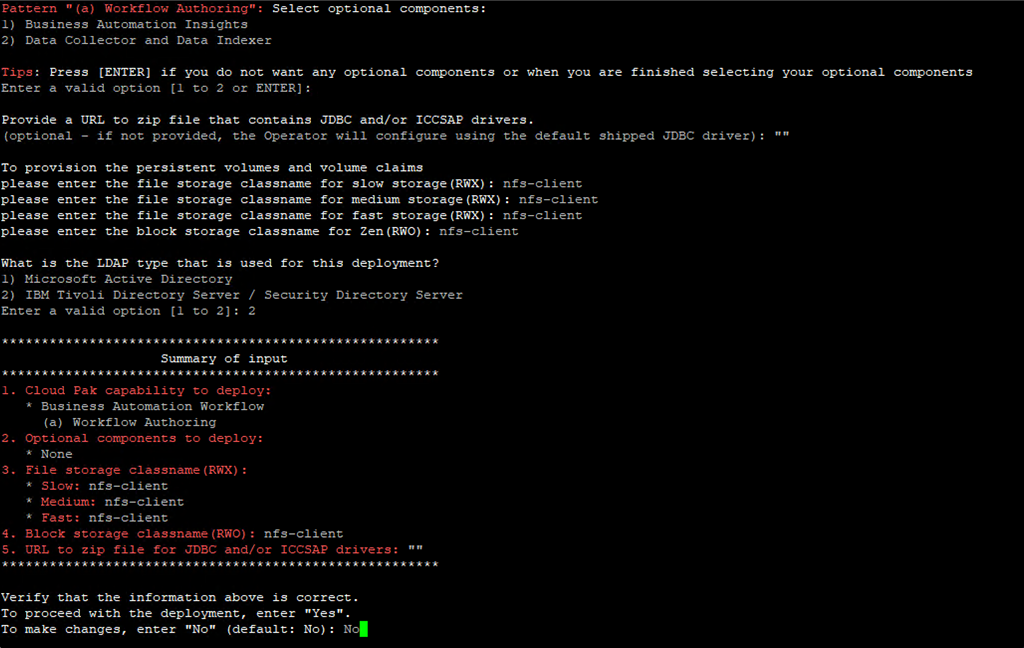
- Select the LDAP that you use in the on-premises environment.
What is the LDAP type that is used for this deployment? 1) Microsoft Active Directory 2) IBM Tivoli Directory Server / Security Directory Server Enter a valid option [1 to 2]: - Enter the storage class name. See "Storage considerations."
To provision the persistent volumes and volume claims please enter the file storage classname for slow storage(RWX): nfs-client please enter the file storage classname for medium storage(RWX): nfs-client please enter the file storage classname for fast storage(RWX): nfs-client please enter the block storage classname for Zen(RWO): nfs-client - Select the database type.
Note: PostgreSQL is not supported for migration.What is the Database type that is used for this deployment? 1) IBM Db2 Database 2) Oracle 3) Microsoft SQL Server 4) PostgreSQL - Enter an alias name for the database server.
Enter the alias name(s) for the database server(s)/instance(s) to be used by the CP4BA deployment. (NOTE: NOT the host name of the database server, and CANNOT include a dot[.] character) (NOTE: This key supports comma-separated lists (for example, dbserver1,dbserver2,dbserver3) The alias name(s): - View your results.
-
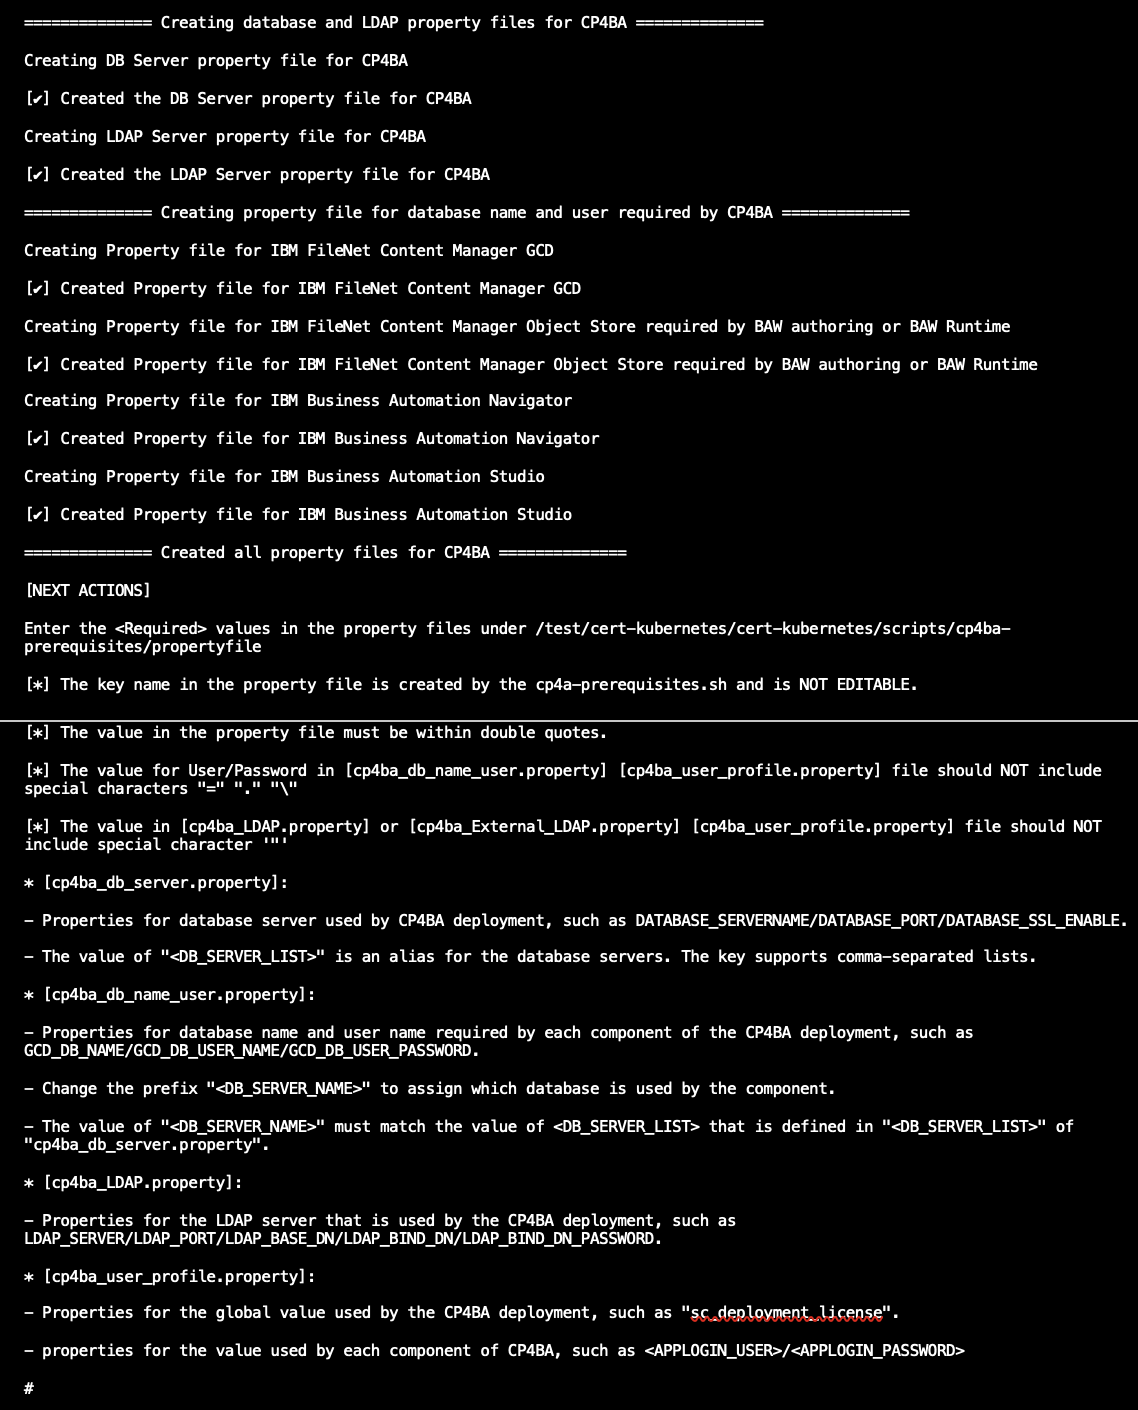
Under /test/cert-kubernetes/cert-kubernetes/scripts/cp4ba-prerequisites/propertyfile, the following files are created:
- cp4ba_user_profile.property
- cp4ba_LDAP.property
- cp4ba_db_server.property
- cp4ba_db_name_user.property
-
Update the cp4ba_user_profile.property file with the license, admin user (as in the on-premises IBM Case Manager), and keystore passwords.
-
Update the cp4ba_LDAP.property file with the same LDAP details as in the on-premises IBM Case Manager.
-
Update the cp4ba_db_server.property file with the same database details as in the on-premises IBM Case Manager.
-
Update the cp4ba_db_name_user.property file with the usernames and passwords of the GCD Database, DOCS database, DOS Database, TOS Database, ICN Database, BAStudio Database (for authoring) or BAW Database (for runtime)
-
After you update all the properties files, run the ./cp4a-prerequisites.sh file in generate mode using the following command:
./cp4a-prerequisites.sh -m generate - Run the scripts for the databases. (The CPE databases are already available.)
- For authoring, run the scripts under /root/cert-kubernetes/scripts/cp4ba-prerequisites/dbscript/bas
- For runtime, run the scripts under /root/cert-kubernetes/scripts/cp4ba-prerequisites/dbscript/baw
-
View your results.
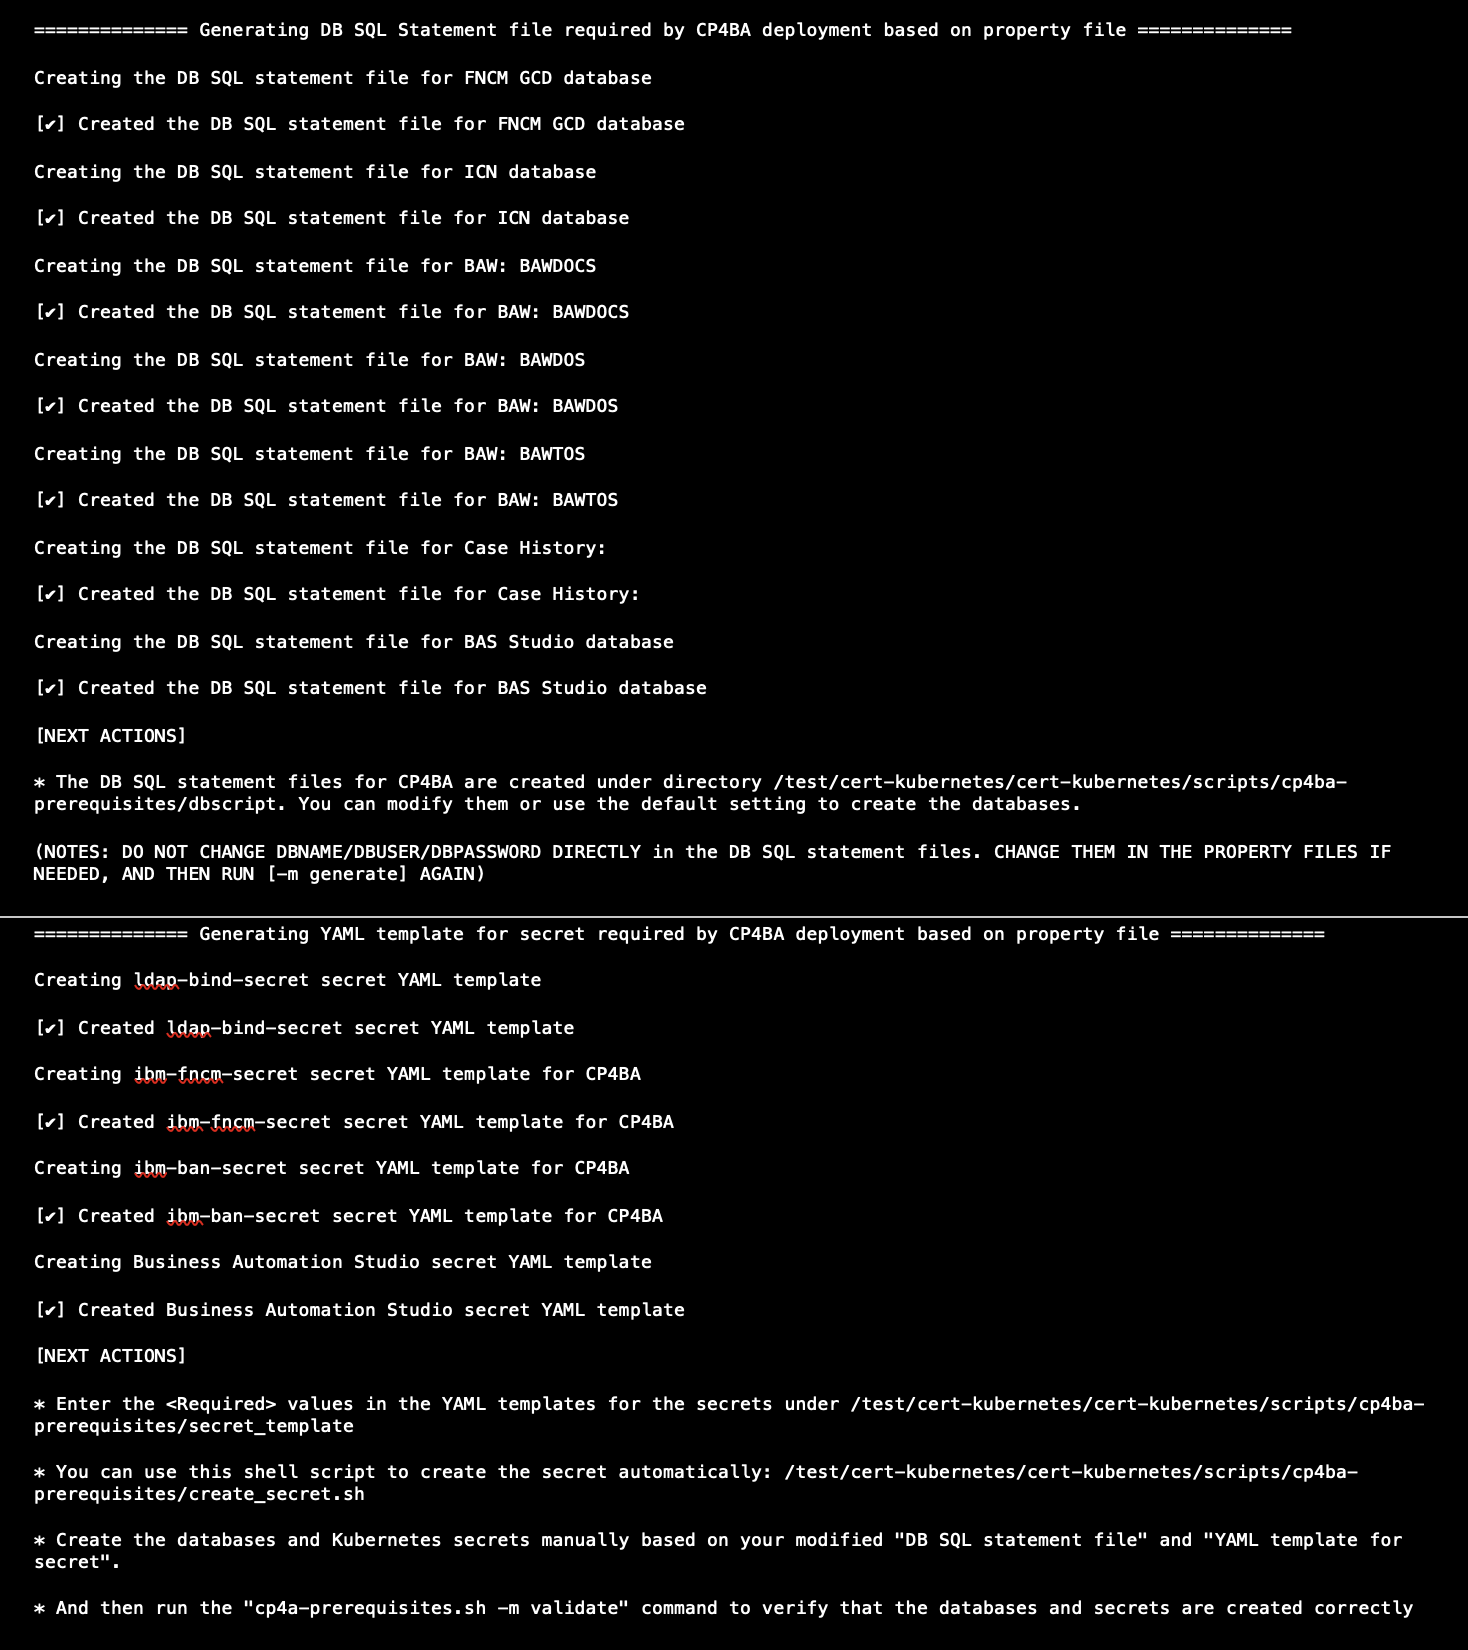
- Run the create_secret.sh file under the ./cp4ba-prerequisites folder:
create_secret.sh dbscript propertyfile secret_templateView the results.
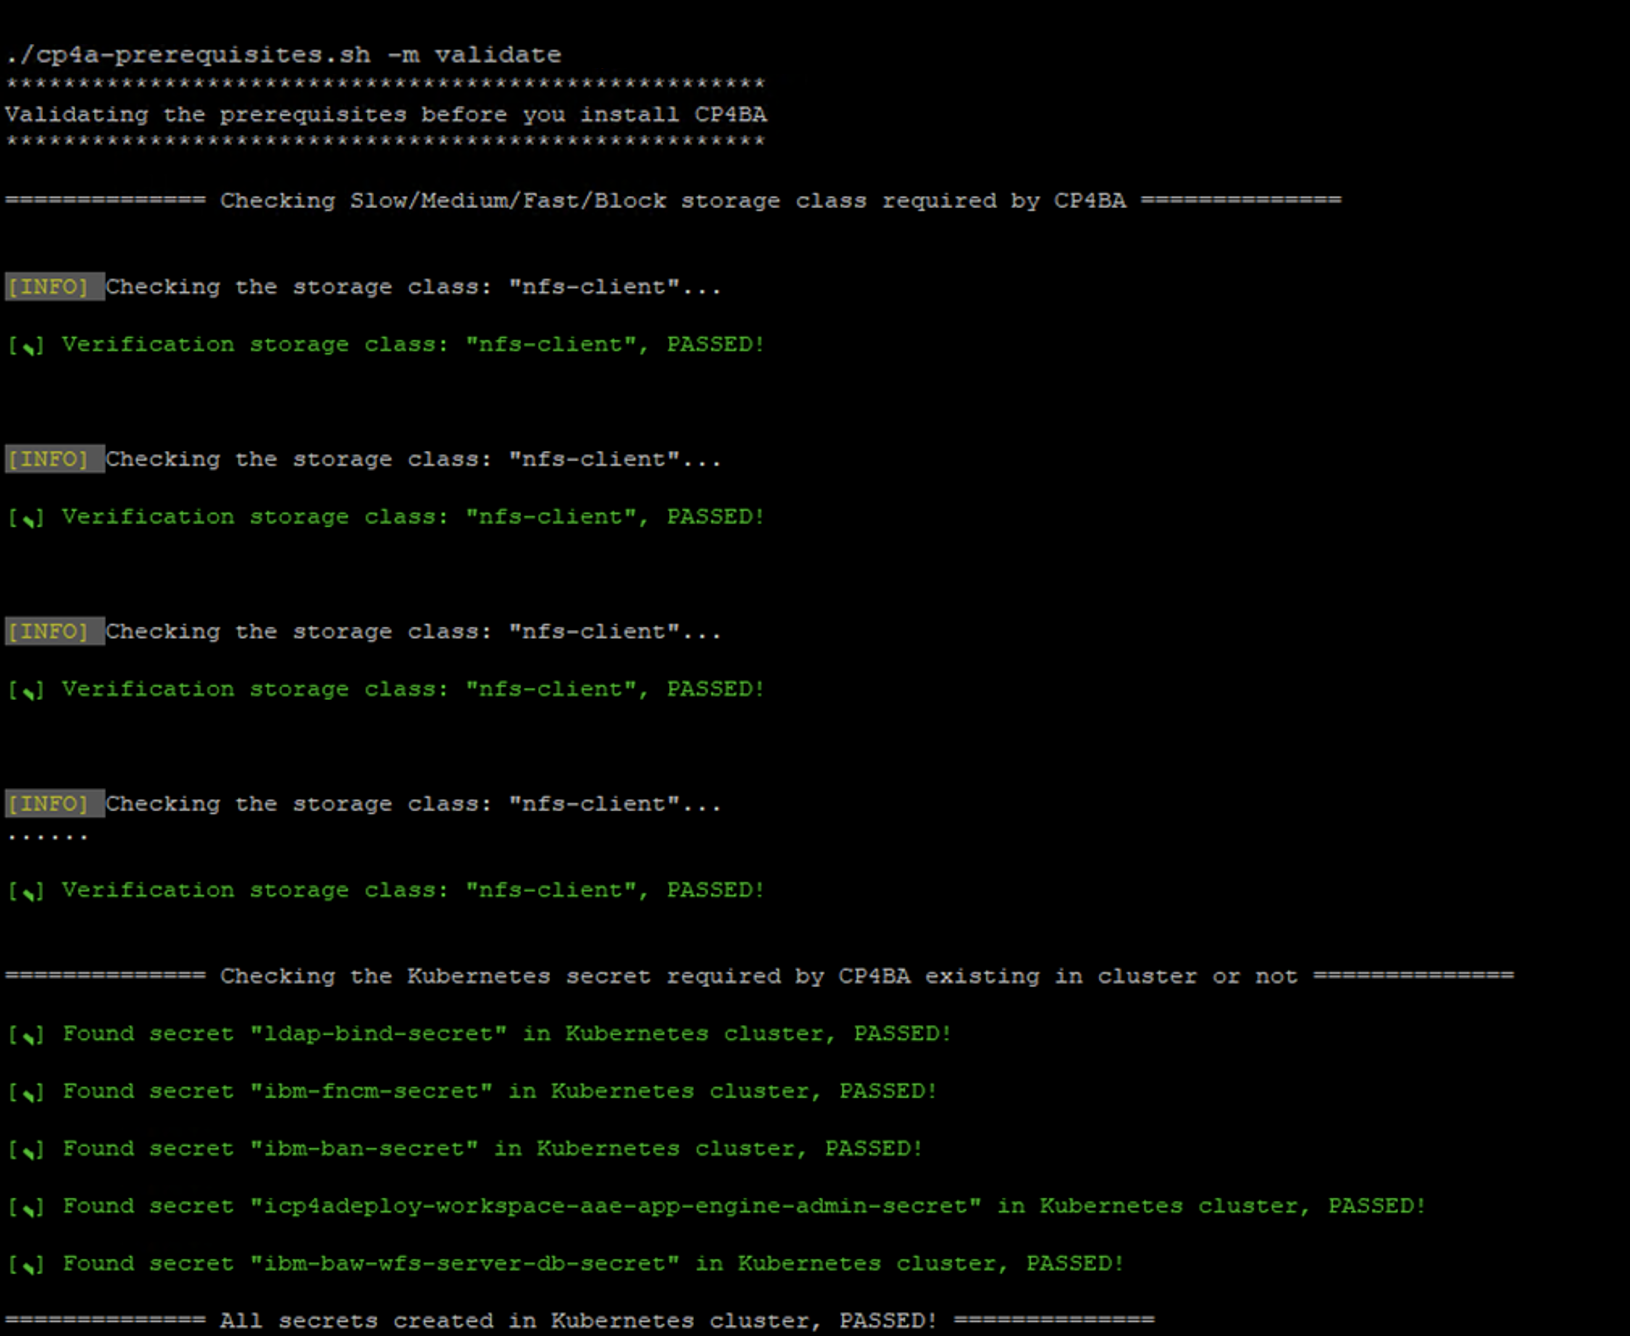
**************************************************************************** ******************************* START ************************************** [INFO] Applying YAML template file:/root/cert-kubernetes-master/scripts/cp4ba-prerequisites /secret_template/ibm-ldap-bind-secret.yaml secret/ldap-bind-secret configured ******************************** END *************************************** **************************************************************************** **************************************************************************** ******************************* START ************************************** [INFO] Applying YAML template file:/root/cert-kubernetes-master/scripts/cp4ba-prerequisites /secret_template/fncm/ibm-fncm-secret.yaml secret/ibm-fncm-secret configured ******************************** END *************************************** **************************************************************************** **************************************************************************** ******************************* START ************************************** [INFO] Applying YAML template file:/root/cert-kubernetes-master/scripts/cp4ba-prerequisites /secret_template/ban/ibm-ban-secret.yaml secret/ibm-ban-secret configured ******************************** END *************************************** **************************************************************************** **************************************************************************** ******************************* START ************************************** [INFO] Applying YAML template file:/root/cert-kubernetes-master/scripts/cp4ba-prerequisites /secret_template/ae/ibm-aae-app-engine-secret.yaml secret/icp4adeploy-workspace-aae-app-engine-admin-secret configured ******************************** END *************************************** **************************************************************************** **************************************************************************** ******************************* START ************************************** [INFO] Applying YAML template file:/root/cert-kubernetes-master/scripts/cp4ba-prerequisites /secret_template/baw-aws/ibm-baw-db-secret.yaml secret/ibm-baw-wfs-server-db-secret configured ******************************** END *************************************** **************************************************************************** -
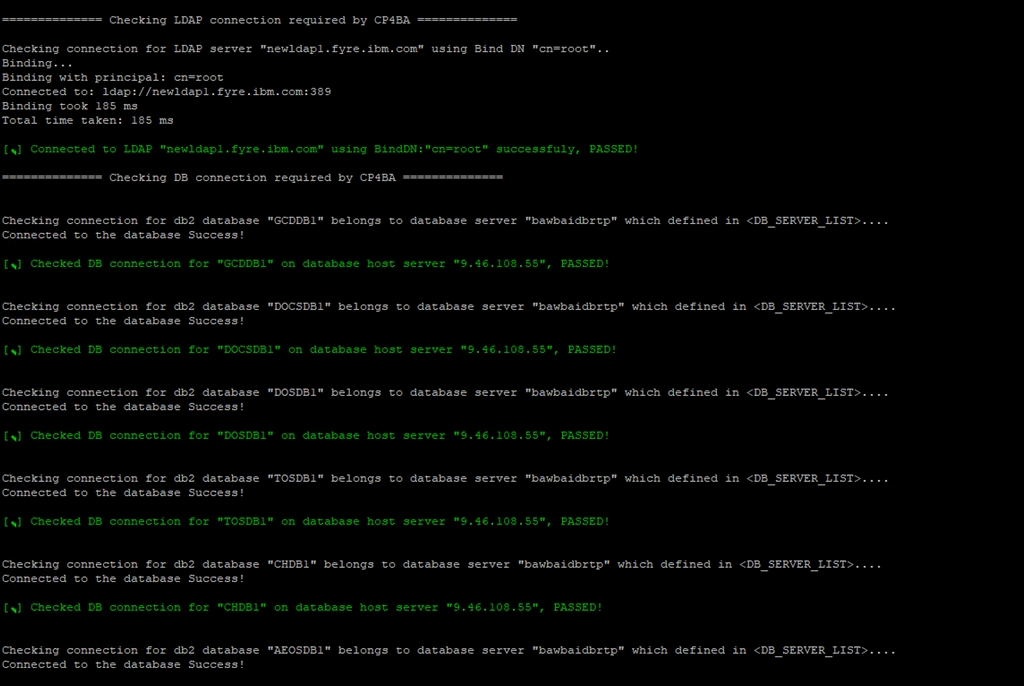
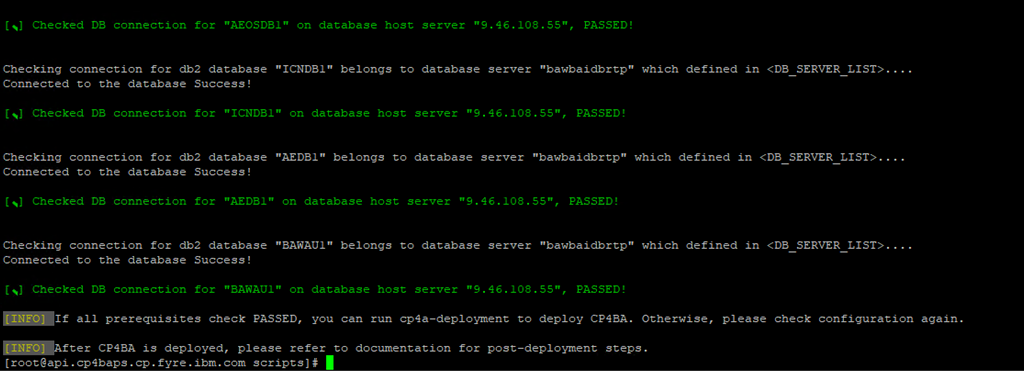
To verify the database test connection, run the ./cp4a-prerequistes.sh -m validate command.
-
From the /scripts folder, run the ./cp4a-deployment.sh command.
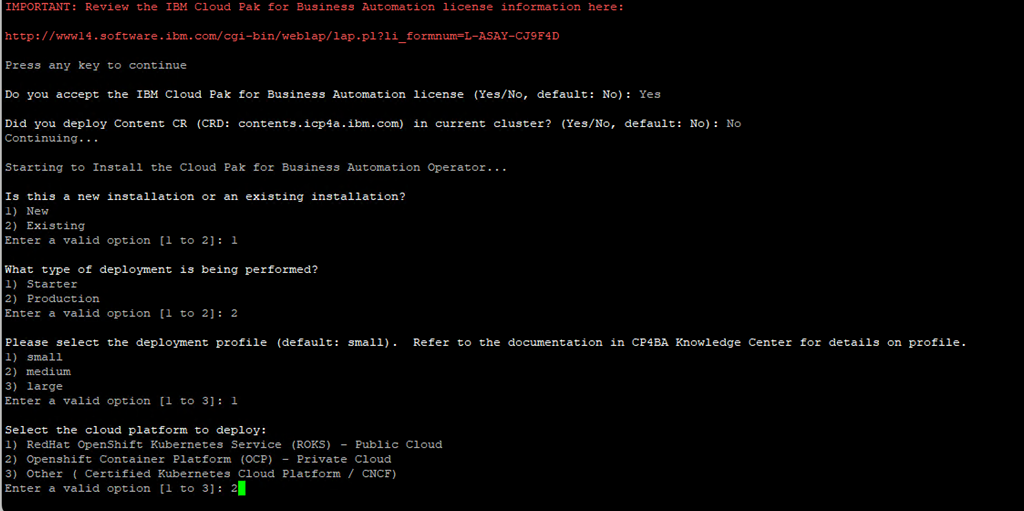
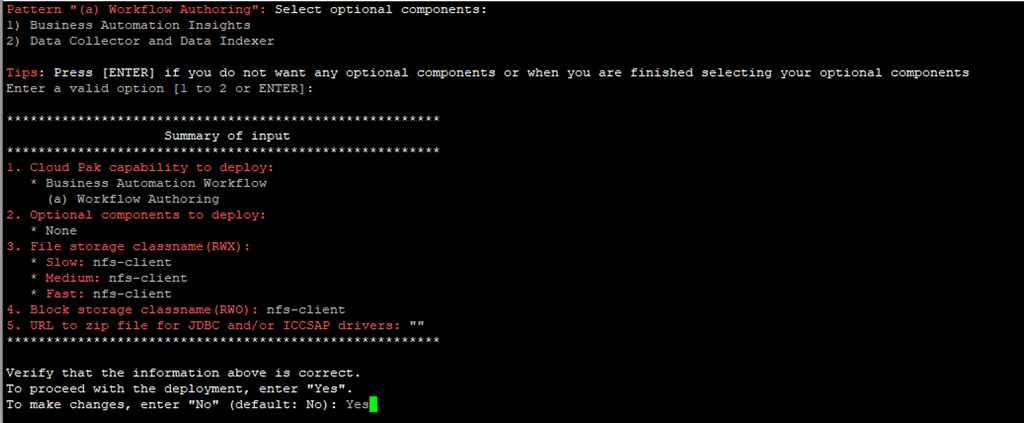
- Select the capabilities to install.
Select the Cloud Pak for Business Automation capability to install: 1) FileNet Content Manager 2) Operational Decision Manager 3) Automation Decision Services 4) Business Automation Application 5) Business Automation Workflow (Selected) (a) Workflow Authoring (Selected) (b) Workflow Runtime 6) Automation Workstream Services 7) IBM Automation Document Processing (a) Development Environment (b) Runtime Environment 8) Workflow Process Service Authoring Info: Note that Business Automation Workflow Authoring (5a) cannot be installed together with Automation Workstream Services (6). However, Business Automation Workflow Runtime (5b) can be installed together with Automation Workstream Services (6). Info: Business Automation Navigator will be automatically installed in the environment as it is part of the Cloud Pak for Business Automation foundation platform. Tips: After you make your first selection you will be able to make additional selections since you can combine multiple selections. ATTENTION: IBM Automation Document Processing (7a/7b) does NOT support a cluster running a Linux on Z (s390x)/Power architecture. Tips: Press [ENTER] when you are done Enter a valid option: [1 to 4, 5a, 5b, 6, 7a, 7b, 8]:- For an IBM Case Manager development environment, enter 5a. This option installs Business Automation Workflow Authoring.
- For an IBM Case Manager production environment, select 5b. This option installs Business Automation Workflow Runtime.
 This selection generates the CR file:
/cert-kubernetes-master/scripts/generated-cr/ibm_cp4a_cr_final.yaml
Modify the following fields in the CR based on the on-premises data for migration.
-
The Content Initialization flag must be set to false.
shared_configuration: sc_content_initialization: false -
The ICN Datasource name must be the same as in the on-premises environment.
datasource_configuration: dc_icn_datasource dc_common_icn_datasource_name: "ECMClientDS" -
The GCD Datasource name must be the same as in the on-premises environment.
datasource_configuration: dc_gcd_datasource dc_common_gcd_datasource_name: "FNGCDDS" dc_common_gcd_xa_datasource_name: "FNGCDDSXA" -
The DOCS Object store datasource must be the same as in the on-premises environment.
dc_os_datasources: dc_os_label: "docs" dc_common_os_datasource_name: "FNDOCSDS" dc_common_os_xa_datasource_name: "FNDOCSDSXA" -
The DOS Object store datasource must be the same as in the on-premises environment.
dc_os_datasources: dc_os_label: "dos" dc_common_os_datasource_name: "FNDOSDS" dc_common_os_xa_datasource_name: "FNDOSDSXA" -
The TOS Object store datasource must be the same as in the on-premises environment.
dc_os_datasources: dc_os_label: "tos" dc_common_os_datasource_name: "FNTOSDS" dc_common_os_xa_datasource_name: "FNTOSDSXA" -
The Case History Datasource and Connection name must be the same as in the on-premises environment.
dc_cpe_datasources: dc_database_type: "db2" dc_os_label: "ch" dc_common_cpe_xa_datasource_name: "FNCHDSXA" dc_common_cpe_datasource_name: "FNCHDS" database_servername: "icmsuser1.fyre.ibm.com" database_port: "50000" dc_common_conn_name: "CHDB_connection" -
The navigator configuration section must be filled in with the on-premises schema and tablespace names.
navigator_configuration: icn_production_setting: timezone: Etc/UTC icn_db_type: oracle icn_jndids_name: ECMClientDS1 icn_schema: ECMDB #As on-prem icn_table_space: ECMDB #As on-prem icn-admin: P8Admin license: accept -
The content integration section must be filled in with the same object store names as in the on-premises environment.
content_integration: ## Domain name for content integration. The value must be the same as initialize_configuration.ic_domain_creation.domain_name. domain_name: "<Filenet P8 Domain name as used on onprem>" # Object Store name for content integration. # The value must be an existing object store in Content Platform Engine. # If use initialize_configuration for the object store initialization, the value must be one of initialize_configuration.ic_obj_store_creation.object_stores. object_store_name: "<DOCS Object store name>" ##The configuration for case -
The case integration section must be filled in with the same object store names as in the on-premises environment.
case: ## Domain name for CASE. The value must be the same as initialize_configuration.ic_domain_creation.domain_name. domain name: "P8 Domain as used for onprem>" ## Design Object Store name of CASE. ## The value must be the same as the oc_cpe_obj_store_symb_name value of one of the object stores defined in initialize_configuration.ic_obj_store_creation.object_stores. object_store_name_dos: "<Display Name or Symbolic Name of Design object store name as on on prem >" ## Target Object Store name of CASE. ## The value must be the same as the oc_cpe_obj_store_symb_name value of one of the object stores defined in initialize_configuration.ic_obj_store_creation.object_stores. object_store_name_tos: "<Display Name or Symbolic Name of Design object store name as on on prem>" connection_point_name_tos: "<TOS connection point as on onprem>" -
Remove the initialize_configuration section from the CR .
This section is not needed because you are reusing the existing FileNet domain, Object stores, and LDAP. -
Optional: tune WebSphere Liberty server timeouts on the CPE pod temporarily for these steps:
Deploy the CR
Perform required post-migration steps
Recommended tuning: create a file calledzz_caseinit.xmlin the/opt/ibm/wlp/usr/servers/defaultServer/configDropins/overridesdirectory on the CPE pod with the following content<server> <httpEndpoint id="defaultHttpEndpoint" readTimeout="15000s" host="*" httpPort="9080" httpsPort="9443" protocolVersion="http/1.1"> <httpOptions PurgeDataDuringClose="true" /> </httpEndpoint> <transaction clientInactivityTimeout="15000s" propogatedOrBMTTranLifetimeTimeout="15000s" totalTranLifetimeTimeout="15000s"/> </server>
Notes:-
This tuning is recommended when the CPE databases have very large tables or you see databases locking issues or suspended tables during the migration process.
-
This tuning prevents some potential timeout scenarios, but it is not guaranteed to resolve all scenarios. Further troubleshooting might be necessary with this tuning already in place when there is unexpected behavior, such as case-init job failures.
-
After the migration is complete, delete the
zz_caseinit.xmlfile to restore the normal WebSphere Liberty timeout settings. -
It is not necessary to restart the CPE pod when adding or deleting the
zz_caseinit.xmlfile. WebSphere Liberty dynamically picks up that configuration change in a few seconds.
-
You must validate your CR file before you apply it or save it in the YAML view. It is likely that you edited the file multiple times, and possibly introduced errors or missed values during your customizations. For more information, see "Validating the YAML in your custom resource file."
For 22.0.2
For 23.0.1
Apply the upgraded CR to the operator. For more information, see "Applying the upgraded custom resource."
For 22.0.2
For 23.0.1
You must perform post installation steps for working with file storage Target Object Stores or multiple Target Object Stores.
If you use a file storage Target Object Store: Log in to ACCE. After you log in, update the path in the TOSStorage, Properties tab of the file storage device to point to the location in the Content Platform Engine physical volume. The file storage backup is now copied to the Content Platform Engine physical volume.
If you use more than one Target Object Store: Perform the following mandatory steps.
If there are any file storage target areas, update the path in the TOSStorage, Properties tab and then run the case initjob. In a multiple Target Object Store environment, the case initjob must be run for all the target areas as described in the following steps:
- Export the case initJob.json file.
- Save the name of the case-init job into a variable:
caseinitjobname=$(oc get job | grep case-init | awk '{print $1}') - Export the case-init job json file:
oc get job ${caseinitjobname} -o json > initJob.json
- Save the name of the case-init job into a variable:
-
Edit the initJob.json file. Remove any lines that contain a controller-uid string.
The controller-uid is used internally by Kubernetes to track and manage the controller state and to handle reconciliation processes efficiently. Without removing the controller-uid from exported json file, you cannot run the case-init.job successfully with the changes. - Update the following environment variables in env: array or container.env: array:
{ "name": "TOS_OBJECTSTORE_NAME", "value": "<TOS_name>" }, { "name": "CONN_POINT_NAME", "value": "<connection_point_name>" }, { "name": "TARGET_ENV_NAME", "value": "<target_environment_name>" }, - If the environment is a Workflow Authoring environment, set the ADD_OS_ADMINS_IN_DEFAULT_PA value to false.
- Save your updates.
- Delete the config.ok file for the case-init job. It is located in the pluginstore persistent volume for Business Automation Navigator.
- Save the name of the Business Automation Navigator deployment into a variable:
navigatordeploymentname=$(oc get deploy | grep navigator-deploy | awk '{print $1}') - Delete the config.ok file:
oc exec deploy/$navigatordeploymentname -c icp4adeploy-navigator-deploy -- rm -f /opt/ibm/plugins/properties/config.ok
- Alternatively, you can delete the config.ok file directly in the file system. For example:
In 22.0.2, delete the config.ok file from the following directory: /nfsdata/icn/pluginstore/properties
In 23.0.1, delete the config.ok file from the following directory: /opt/ibm/plugins/properties directory on the Business Automation Navigator (BAN) pod.
- Save the name of the Business Automation Navigator deployment into a variable:
- Run the following command:
oc replace --force -f initJob.json - Configure a new Business Automation Navigator desktop.
The case-init job automatically configures the project area or target environment for the additional target object store to the default case client desktop (desktop=baw). To change the desktop for the project area or target environment, run Register Project Area or Register Target Environment in the case administration client for each additional target object store.
To configure a new Business Automation Navigator desktop for an additional project area:- Log in to the Business Automation Navigator admin desktop.
- Copy the out-of-the-box desktop Business Automation Workflow.
- Edit the new desktop. On the General tab, specify the Name and ID.
- On the Connections tab, add the new target object store and remove the out-of-the-box target object store.
- Log in to the bawadmin desktop.
- Navigate to the design object store.
- Right-click the connection definition for the new project area and click Register.
- In the next dialog, enter the configuration parameters for the new project area.
- Name of the associated Business Automation Navigator desktop
- Case operations username
- Password - Click Next. In the next dialog, enter the configuration parameters for the Business Automation Workflow server and context roots.
Optional post-migration steps
Work with custom plug-ins and custom extensions
With custom plug-ins and custom extensions in the production environment, you must copy the plug-ins to /<icn pv directory>/<icn-pluginstore>. Add lines similar to the following example lines in the CR file under case configuration and deploy the CR file.
custom_package_names: "ICMCustomWidgets.zip"
custom_extension_names: "CustomEditors.zip"
For more details about custom packages and custom extensions, see "Configuring custom case widgets for a container environment".
For 22.0.2
For 23.0.1
Enable the case analyzer and case history stores in the ACCE
- In the Administrative Console for Content Platform Engine, go to FileNet P8 domain > Workflow Subsystem.
- Select Case History enabled and Case Analyzer enabled.
- Restart the Content Platform Engine pod to reflect the changes.
Configure the emitter
For the Case event emitter configuration parameters, see "IBM Business Automation Workflow Runtime and Workstream Services parameters."
For 22.0.2
For 23.0.1
The case management tools provide support for indexing case instances in the Elasticsearch index. Full re-indexing and live index updates are supported. For more information, see Indexing case instances.
Verify your installation and migration
For 22.0.2
For 23.0.1
Additional Information
- IBM Business Automation Workflow 22.0.2
- IBM Business Automation Workflow 23.0.1
- IBM Cloud Pak for Business Automation 22.0.2
- IBM Cloud Pak for Business Automation 23.0.1
For 22.0.2
For 23.0.1
For migrating additional Content Platform Engine assets, see the following documentation.
Trademarks and service marks
Product Synonym
IBM BAW, Business Automation Workflow
Was this topic helpful?
Document Information
Modified date:
12 February 2024
UID
ibm17006859