Question & Answer
Question
Cause
- Currently IBM recommends customers to use VIOS versions the latest version in the market 3.1.4.31
- For more information and check for cross-product compatibility firmware/software and fix recommendations, refer to our FLRT tool: https://www14.software.ibm.com/webapp/set2/flrt/power
-
Warning :- VIOS Level 3.1.4.x is only supported on Power8, Power9 and Power10. We have seen issues with customer updating VIOS on any lower level of hardware to 3.1.4.x, where they have lost the entire Virtual Fibre Channel Config. Make sure to check the compatibility of your hardware before planning for upgrade to 3.1.4.31 using the below link.
System to VIOS maps
Answer
Procedure to upgrade your system from VIOS version 2.2.6.65 to 3.x (VIOS Version 3.1.4.31)
The upgrade process is managed by viosupgrade tool.
> Before you proceed with the upgrade procedure, have a look at the Technical documentation for more details on the entire upgrade process:
- VIOS upgrade: https://www.ibm.com/support/pages/upgrading-vios-31
- viosupgrade process-step by step: https://www.ibm.com/support/pages/vios-31-viosupgrade-process
1. Download the Required packages for obtaining fixes throughout the upgrade.
Note: The upgrade to 3.x version is basically a new installation, for which you would need to download first a base ISO image. Then, after that you have to configure that cased ISO image to mksysb image, so you can use it later on with viosupgrade tool.
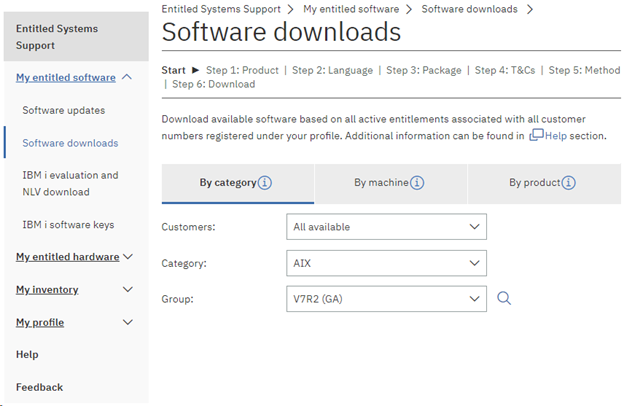
1.1. Download iso images for 3.1.4.31 from ESS web portal: IBM's Entitled Systems Support - Software downloads
Note: You have to register with your machine serial number and then look for the images
Steps for obtaining the packages:
> Go to: Entitled Systems Support > My entitled software > Software downloads
Example:
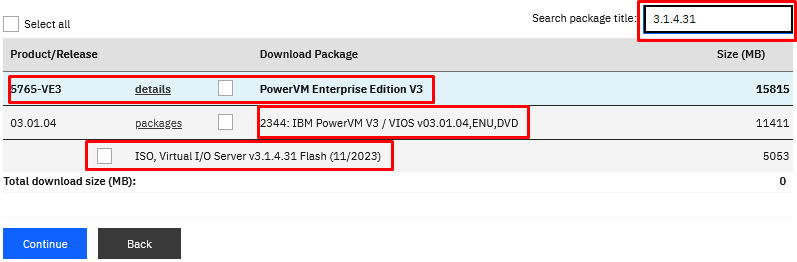
Click Search(![]() ) and then > Select:
) and then > Select:
Example:
2. Backup the system by using backupios and viosbr:
2.1. backupios command example:
- Example of how to generate a backup to the optical device named /dev/cd1, type:
backupios -cd /dev/cd1 -cdformat
- Example of how to generate a system backup to a tape device named /dev/rmt0, type:
backupios -tape /dev/rmt0
For more information about backupios command, refer to the following Documentation:
https://www.ibm.com/docs/en/power8?topic=commands-backupios-command
2.2. viosbr command example:
- To back up all the device attributes and logical and virtual device mappings on the VIOS file called /tmp/myserverbackup, type the following command:
viosbr -backup -file /tmp/myserverbackup
- To restore all the possible devices and display a summary of deployed and non-deployed devices, type the following command:
viosbr -restore -file /home/padmin/cfgbackups/myserverbackup.002.tar.gz
For more information about the viosbr command, refer to the following Documentation:
https://www.ibm.com/docs/en/power7?topic=commands-viosbr-command
3. Create mksysb:
- Later on, for executing the viosupgrade tool you will need mksysb image, created from the downloaded ISO from ESS.
> For more information about the steps, refer to the following document for creating mksysb: https://www-01.ibm.com/support/docview.wss?uid=ibm10795288& - Commands to extract mksysb from iso:
total 1816851
dr-xr-xr-x 2 root system 2048 Oct 25 2023 installp
-r--r--r-- 1 root system 3720908800 Oct 25 2023 mksysb_image
4. Use viosupgrade tool to proceed with the upgrade:
> Verify that you have free disk by running:
$ lspv –free

5. Once you know, you have a disk available you can use viosupgrade command.
This is the command structure:
$ viosupgrade -l -i image_file -a mksysb_install_disk [ -c ] [-g filename_files_to_restore ]
> For more information about the upgrade tool and command structure, you can refer to the following Documentations:
https://www.ibm.com/support/knowledgecenter/en/9009-42A/p9hcg/p9hcg_viosupgrade.htm
https://www.ibm.com/support/pages/vios-31-viosupgrade-process
> More information on the –g flag: https://www.ibm.com/support/knowledgecenter/9009-41A/p9hcg/p9hcg_viosupgrade.htm#p9hcg_viosupgrade__viosupgrade_g_flag
Note: The -g flag is useful for collecting files from padmin. All other basic configuration files are being taken from rootvg, into the alt_disk, created during the upgrade.
Example:
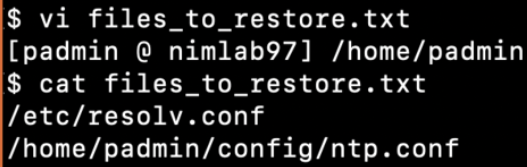
$ viosupgrade -l -i 31431_vios.mksysb -a hdisk1 -g files_to_restore.txt
• Verify whether the upgrade is completed by running the following command:
$ viosupgrade –l –q

• Verify the VIOS version:
$ ioslevel (should display 3.1.4.31)
6. Changing time zone and Date and setup NTP after upgrade:
>After upgrade you need to change your time zone to CET. You can use "smit chtz_user" to achieve the same(need a reboot)
- Change the date and time to be latest by using "smitty date"
- If you have an NTP server in your environment, configure the NTP.
Hint: Either copy the old ntp.conf to new location or copy the servers and add it in 3.1 ntp.conf
Example:
# chrctcp -S -a xntpd
# refresh -s xntpd
For more information about the steps refer to the following Documentation:
Related Information
Was this topic helpful?
Document Information
Modified date:
02 May 2024
UID
ibm16569541