How To
Summary
This document is focused configuring the RAD ( Rational application developer) with WAS (WebSphere application Server) and Db2 database against the MDM development environment form the MDM hosted development environment. The key focus will be on
• RAD connecting to WAS BE installed on the MDM development instance
• RAD connection to SSL Enabled db2 database on MDM development instance.
As part of the MDM Cloud environment setup , every client is sent a welcome letter. This letter contains the key hostnames, ip-address , username and the password for all the environments they have access to. Having access to the details on this letter is essential for this setup.
Objective
From the welcome letter gather the following information,
MDM Development Environment
- Host Name of the MDM environment.
- Username and password for logging into the environment from the command line.
WAS
- URL of the WAS instance.
- Username and password for WAS administrator user.
- Name of the application server, usually this is “server 1”. Validate by logging into the WAS admin console.
Db2 Database
- Host Name of the MDM database.
- SSL Port Number(default 50602).
- Database Name( default MDMDB).
- Username and password for MDM database user.
- Access to the SSL Certificate ( this will be a file with extension .jks )
Development Environment( Windows VM )
- Host name and port number
- Username and password for MDM custadmin/custadmin2 user.
Local Machine
- Putty.
Logging into the MDM Development Machine
The MDM development environment is hosted on a windows platform. In order to access this instance, a remote desktop connection is required. For performing the remote logging in , use the hostname, port, username and password from the welcome letter.
Username(default): custadmin/custadmin2 ( Recommendation : Open ticket with support to create named usernames instead of custadmin/custadmin2)
Host Name: Refer to the welcome email for MDM Windows Client 1/ MDM Windows Client 2 hostnames
Port: 3389
Password: As mentioned in the welcome letter
The following screen shot depicts how the information is provided on the remote desktop console.
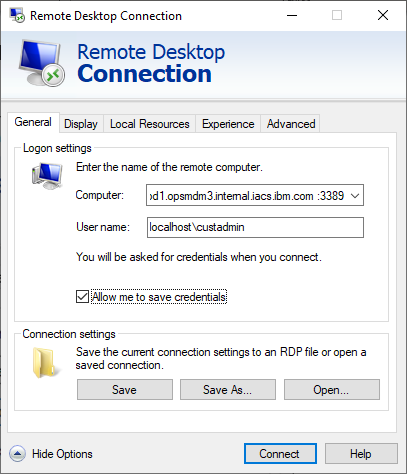
It’s is recommended to use the hostname of the development machine instead of the ip-address.
Note: The number of default users and concurrent max supported users varies between types of environments ( Small / Medium / Large / X-Large).
It is recommended to use named users instead of generic users. To create named users , open support ticket.
Establish FTP Connection to MDM Host
Once logged in to the MDM development box, invoke FileZilla to establish the connection to MDM development host. The configuration for the connection is as shown on the screenshot below
Username: sftpmdm
Password: As specified in the welcome letter.
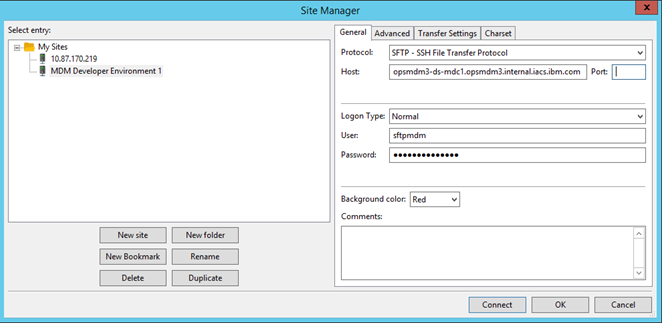
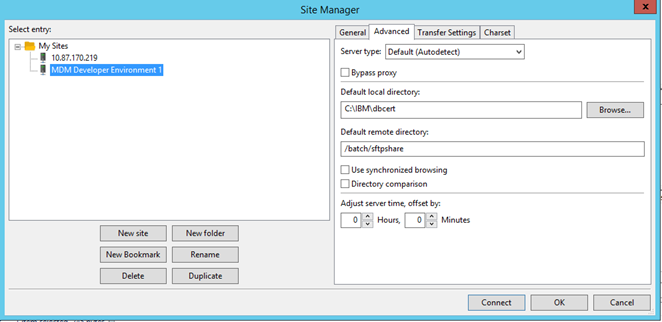
Download the *.jks SSL certificate form the sftpshare directory to MDM development box. This will be used for establishing the database connection at a later stage in the document.
Establish WAS Connection from RAD
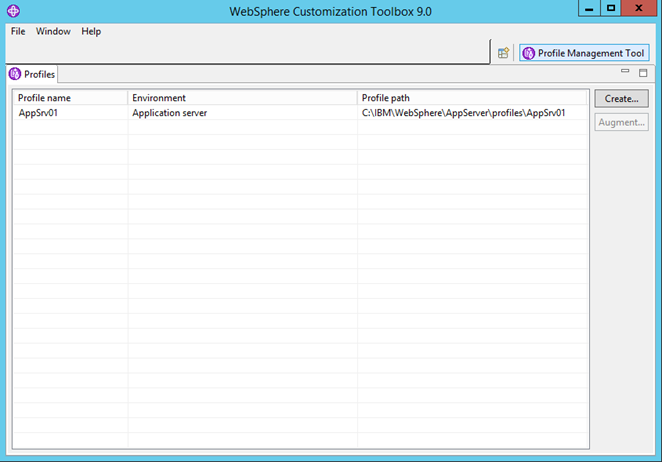
Invoke the Profile management tool on the windows developer machine and create an Application Server profile. Use advance profile creation option and provide the necessary parameters. This profile will be used to establish connection to MDM server.
Invoke the RAD application and change the prospective to MDM Developer. Form the server tab on the bottom half of the screen, create a new server.
Create a new server , use the following screen shot to configure the necessary parameter. Key pieces of information are
Host Name : Host Name of , MDM Developer Environment 1.
Application Server Name : server1 or as applicable.
Port Numbers: Validate the port numbers for SOAP and RMI ports as shown on the screen and change if necessary. The valid port numbers of the MDM Development Server instance can be validated , by reading the “About Profile” information under the $WAS_HOME/profiles/<<ProfileName>>/logs/AboutThisProfile.txt file in the MDM Developer Environment.
Publishing: Never publish automatically.
Security : WAS administrator user id and password.
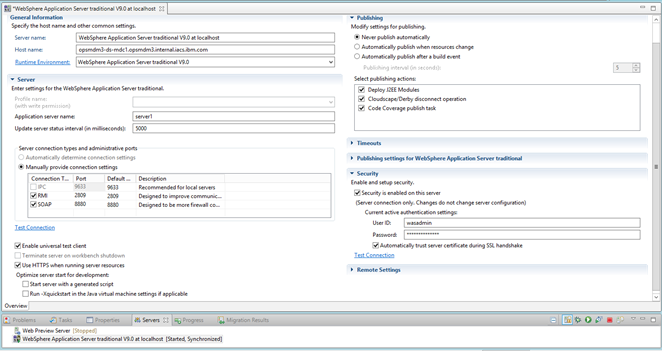
Once the above information is configured into the profile, save the profile and click on the test connection. The connection should be successful.
Establish Database connection from RAD
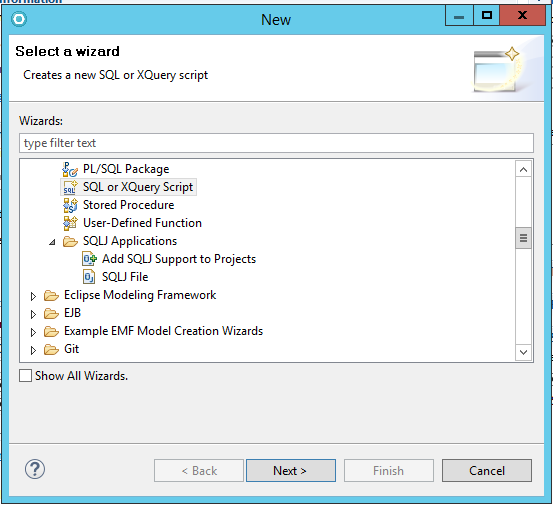
From the MDM Developer , prospective, create a new Java project( Name SQL ). Once the project is created , create a new file in the project, select the type a SQL or XQuery Script. For more details, check the screen shot below
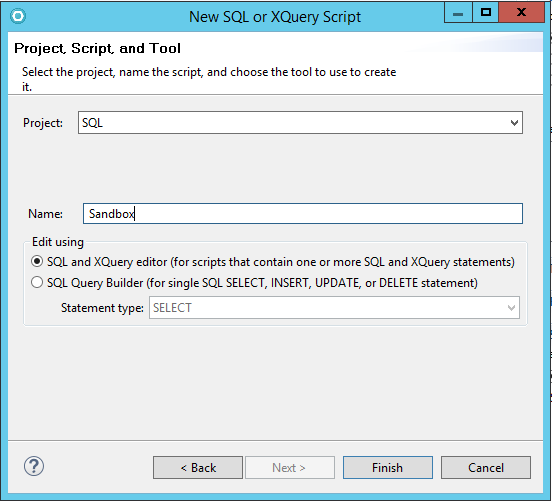
On clicking finish , a popup will ask for select the database. Select the default database and complete the process for now.
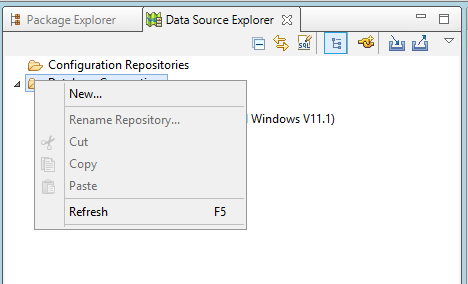
Switch to the data source explorer tab and right click on database connection and select new . This will create a new pop-up connection window. Select DB2 LUW as the database and specify the required parameters.

In the optional tab specify the SSL parameters as the database is SSL enabled. While providing the path to sslTrustStoreLocation, specify the path to previously downloaded *.jks file.
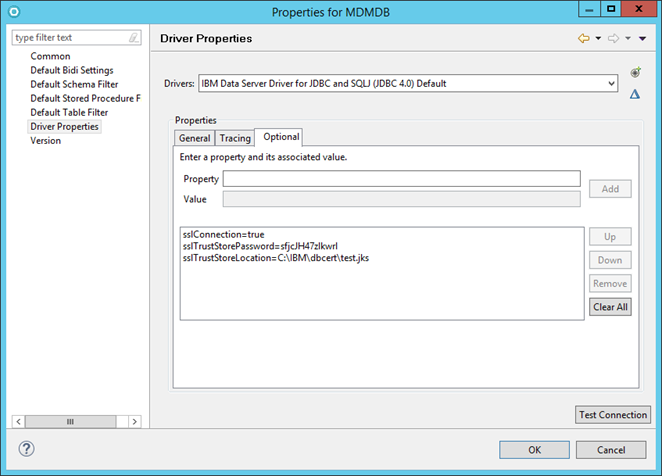
sslConnection: true
sslTrustStoreLocation : D:\ibm\dbcert\test.jks ( Change the path as necessary)
sslTrustStorePassword : sfjcJH47zlkwrl ( Specify the actual password as provided by IBM)
Once the above parameters are specified, click on test connection and it should be successful.

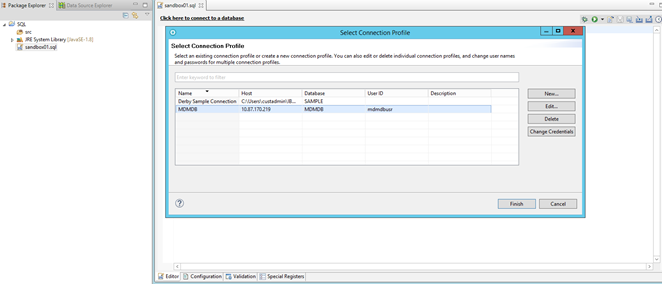
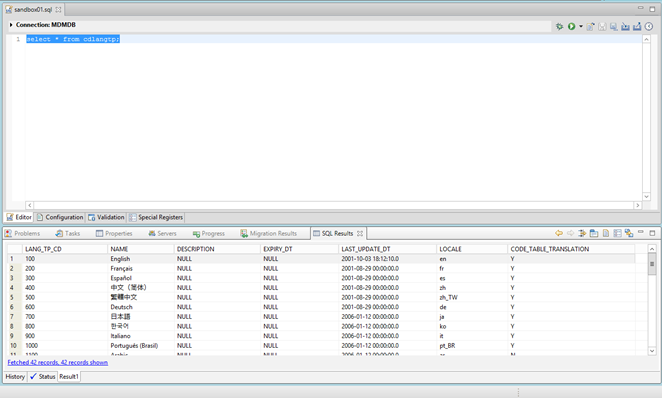
Click on the package explorer and open the sandbox.sql file. On the top of the file, click on the connect to a database hyper link and select the MDMDB database.
Once connected to the database, run any of the sql commands against the MDM DB.
Document Location
Worldwide
Was this topic helpful?
Document Information
Modified date:
13 July 2020
UID
ibm16246147