How To
Summary
Genealogy sites such as ancestry.com use a file type known as GEDCOM in order to exchange genealogical data. The format of this data cannot be understood by i2 Analyst's Notebook, so data manipulation is necessary in order to create a proper and useful chart of the information.
Objective
Create a genealogy chart from a GEDCOM file in i2 Analyst's Notebook.
Environment
i2 Analyst's Notebook
Steps
Data in the following example is publicly available data of the U.S. presidential families that can be found at: FAMOUS GEDCOMS
1. Download the GEDCOM file from the genealogy site you are using
2. Convert the .GED file to a CSV file. There are multiple suitable vendor tools that can be used to complete this step.
.GED files are formatted in the following way (snapshot of example .ged file):
-----HEADER Information-----
0 @I5@ INDI -------------------------Start of individual I5
1 NAME Raul /GIOVINCO/ -------------------Name of individual I5 is Raul Marita
1 SEX M --------------------------Sex of individual I5 is male
1 BIRT ---------------------------Birth of individual I5
2 DATE 25 JUL 1909 --------------Date is July 1909
1 DEAT ----------------------Death of individual I5
2 DATE NOV 1967 -----------------Dat is Nov 1967
1 FAMS @F5@ -----------------Individual I5 belongs to Family F5
0 @I6@ INDI ---------------------Start of individual I6
1 NAME David /JAMES/ ---------------------Name of individual I6 is David JAMES
1 SEX M --------------------------Sex of individual I6 is Male
1 FAMS @F6@ -------------------Individual I6 belongs to Family F6
0 @I7@ INDI -------------------Start of individual I7
-----TRAILER Information-----
i2 Analyst's Notebook cannot import this data and make sense of it because it needs to be formatted in the following way:
| NAME. | SEX. | BIRT. | DEAT. | FAM. |
| Raul GIOVINCO | M | Jul-09 | Nov-67 | F5 |
| David JAMES | M | N/A | N/A | F6 |
3. The csv file will then contain all the information from the GEDCOM file. Columns of information that you do not want can then be deleted for simplicity. For this example, we only want to link Children with their Parents and ignore Date of Birth, Date of Death, Location of Birth etc.
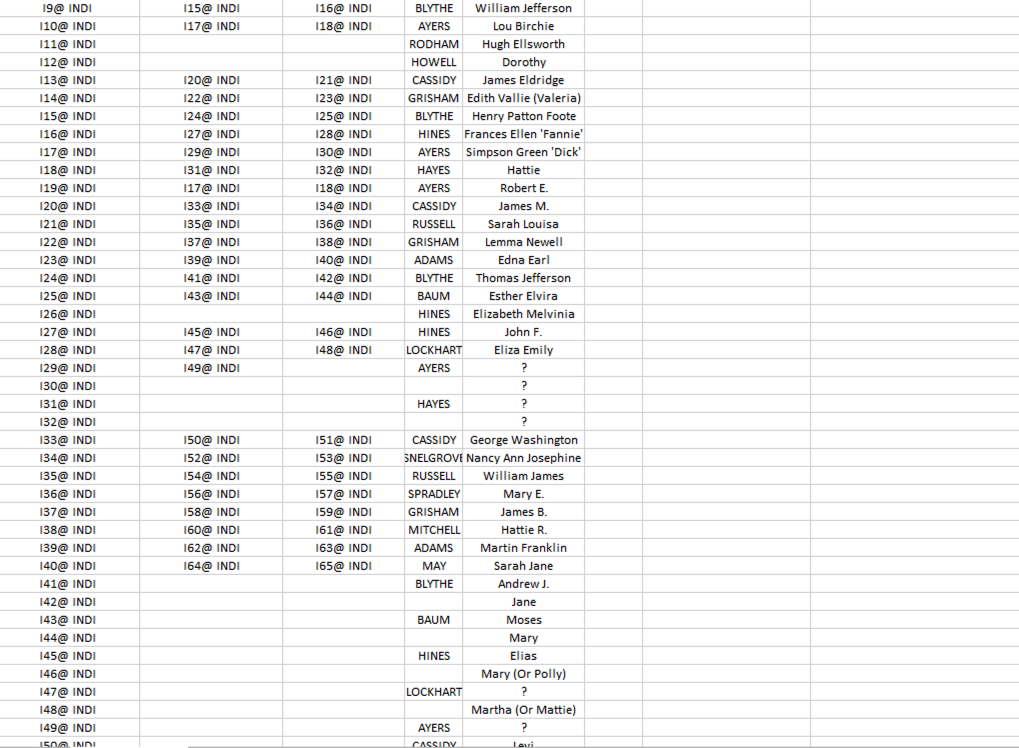
The original csv file:

The CSV file stripped of the information we do not need:
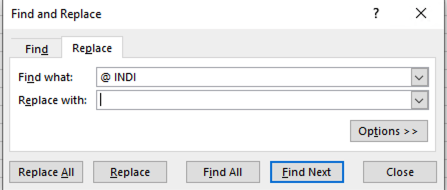
4. We want to remove that "@ INDI" so that working with the data is cleaner. This can be done with Excel's Find and Replace Tool.
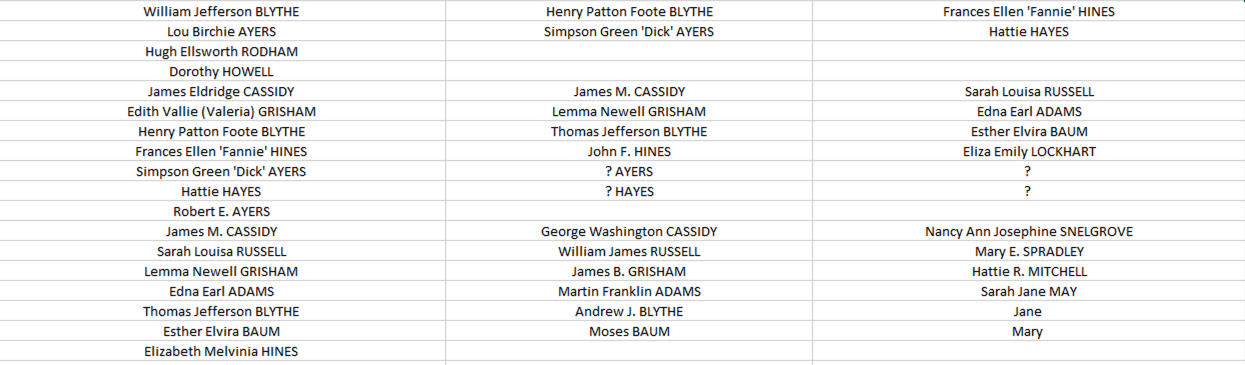
5. Next, merge the first name and the last name in excel. We can do this using the concatenate function:
=CONCATENATE(E4," ",D4)
This will concatenate the data from the field E4 with D4 and leave a space between them. We can apply this to the entire column to obtain:

6. We want to add Column titles at the top to represent our data. The column headers I used are the following:
ENTITY, FATHER ENTITY, MOTHER ENTITY, LAST NAME, FIRST NAME, FULL NAME, FATHER NAME, MOTHER NAME
7. Next, we want to link the names of the parents to their entity tags and have those names populate the FATHER NAME and MOTHER NAME columns. We can do this using VLOOKUP command in Excel. Format of the VLOOKUP command is:
=VLOOKUP(lookup value, range containing the lookup value, the column number in the range containing the return value, Approximate match (TRUE) or Exact match (FALSE))
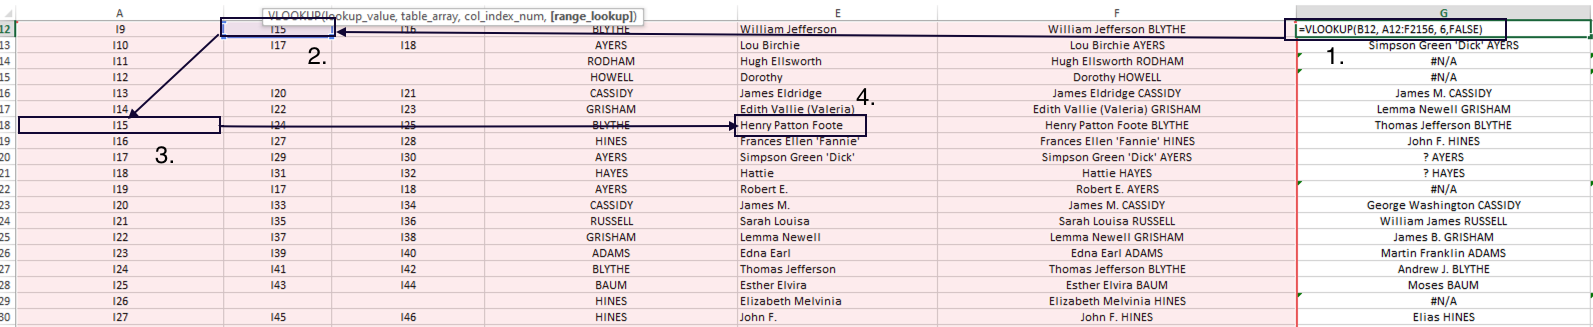
The following VLOOKUP command:
=VLOOKUP(B12, A12:F2156, 6,FALSE)
will look at field B12, search the data in the table A12:F2156, and return the value of the 6th column in the row that matches the value at B12. Our B12 value is I15, so the VLOOKUP will return the value "Henry Patton Foote BLYTHE" and put it in the FATHER NAME column that we had created.
8. We want to repeat the same process for the mother. Then we can copy the 3 columns FULL NAME, FATHER NAME, MOTHER NAME into a brand new excel spreadsheet and strip out all the #N/A data that does not exist by doing another Find & Replace. Our data is now ready to be imported into Analyst Notebook.
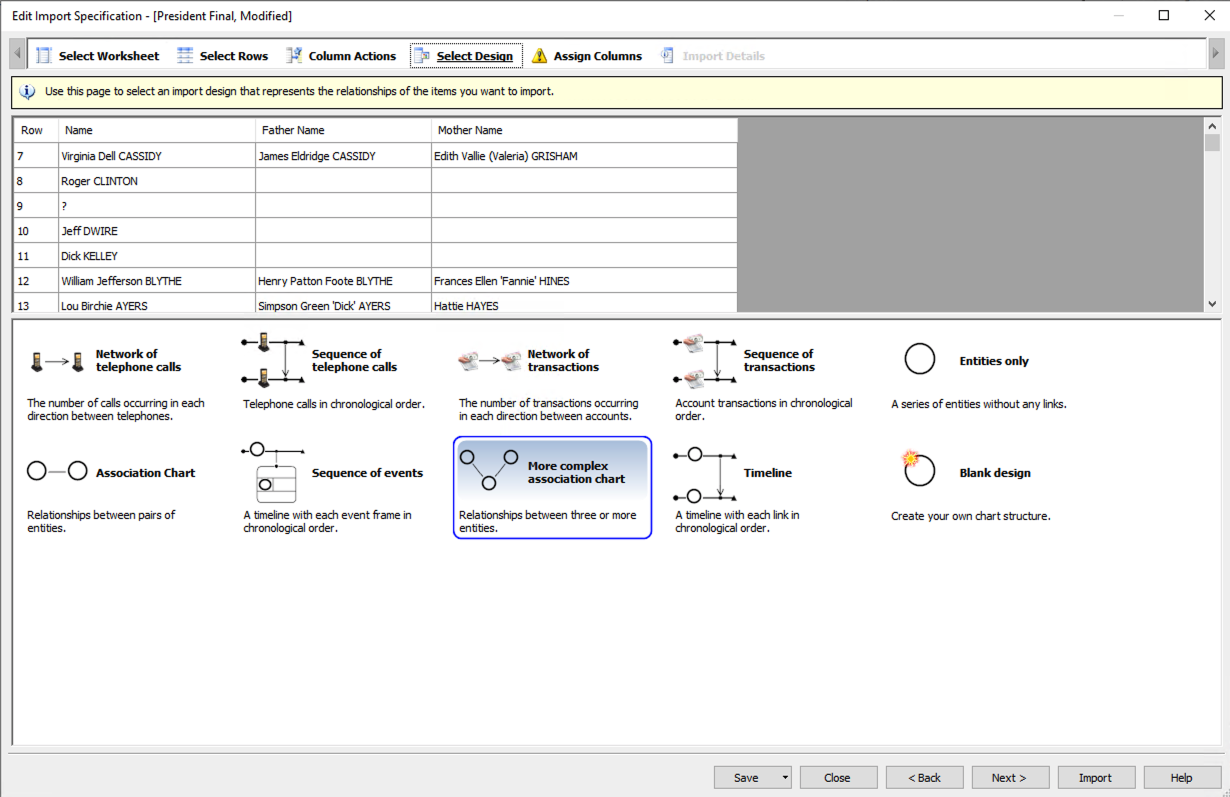
9. Open up i2 Analyst's Notebook and Import from the file you had just created.
9a) Create a new specification
9b) Select "extract column header from row 1"
9c) In the "Select Design" pane, select "More Complex association chart"
9d) The design will appear as follows because the Identities/Labels of the Entities need to be set.
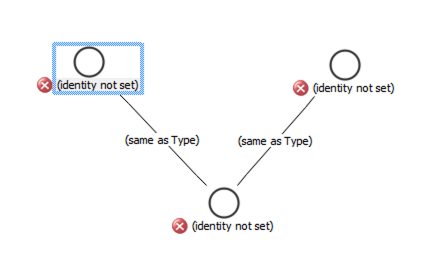
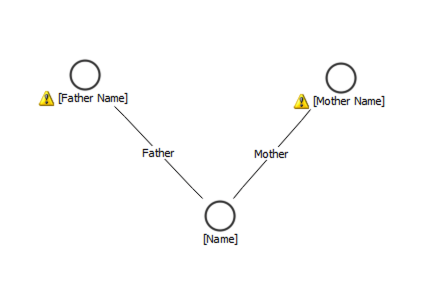
Drag the Full Name column onto the bottom entity (the child). Then drag the Mother column onto one of the other entities and the Father column on the last remaining entity. For clarity, rename your links. The completed diagram will look as follows. The yellow warning signs appear because there are blank values. Under the "Identity" column, you may select how you want to deal with blank values. For this example, the selected option is "Do not create the entity".
You may also choose the icon representations as female for the mother and male for the father to make your chart more readable.
10. You can now save your specification and click "Import". The recommended Arrangement for genealogy data is the Organization Layout. Some further adjustments might be needed to make the chart clearer. The final result appears as follows:

Additional Information
Additional Information about GEDCOM files can be found here:
Document Location
Worldwide
[{"Business Unit":{"code":"BU059","label":"IBM Software w\/o TPS"},"Product":{"code":"SSXUXD","label":"i2 Analyst's Notebook"},"Component":"","Platform":[{"code":"PF033","label":"Windows"}],"Version":"All Versions","Edition":"","Line of Business":{"code":"LOB24","label":"Security Software"}}]
Was this topic helpful?
Document Information
Modified date:
28 January 2021
UID
ibm11072054