How To
Summary
You can use resource monitoring to capture data, such as processor or memory usage, while running a test schedule.
Resource monitoring can provide a comprehensive view of a system under test, to aid in problem determination. The system under test can be in the cloud or on-premise.
SNMP or Simple Network Management Protocol is one of the supported resources. However, if SNMP itself isn't configured correctly then it can't be added as a resource monitoring source.
Objective
This will show the steps needed to configure SNMP on a RHEL 7 machine so it can be used as a monitoring source in Rational Performance Tester (RPT).
SNMP will be configured on a Red Hat Enterprise Linux Server release 7.3 machine.
We will use UCD SNMP MIB since it contains the most system performance data On the Linux machine it's located in
the /usr/share/snmp/mibs directory.
Steps
On the Linux machine
1. cd /etc/snmpd
2. Make a backup of the original snmpd.conf file:
cp snmpd.conf snmpd.conf.backup
3. Edit the snmpd.conf file. At the bottom add these 3 lines but use your own syslocation and syscontact information:
rocommunity public default
syslocation "HCL"
syscontact first.last@xxx.com
syslocation "HCL"
syscontact first.last@xxx.com

5. In the same file, add this single line to expose more data resources:
view systemview included .1.3.6

6. Start or Restart the snmpd service:
[root@COMP-2853-1 snmp]# service snmpd start
Redirecting to /bin/systemctl start snmpd.service
Redirecting to /bin/systemctl start snmpd.service
[root@COMP-2853-1 snmp]#
or
[root@COMP-853-1 snmp]# service snmpd reload
Redirecting to /bin/systemctl reload snmpd.service
[root@COMP-853-1 snmp]#
Redirecting to /bin/systemctl reload snmpd.service
[root@COMP-853-1 snmp]#
7. Do a snmpwalk to confirm the UCD-SNMP-MIB counters are exposed as output:
snmpwalk -v2c -c public localhost UCD-SNMP-MIB::systemStats
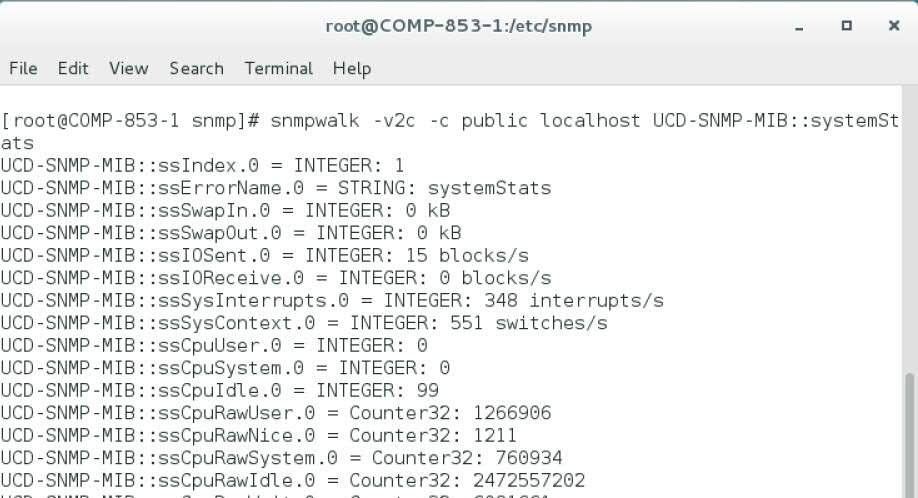
Configuration of snmp on the Linux machine is now complete
On the RPT machine:
1. Copy these two files from the Linux machine to the RPT workbench machine:
UCD-SNMP-MIB.txt
SNMPv2-TC.txt
The latter file is a dependency for the first one.
For example, put these files in:
c:\temp\mib
2. Rename the two files to have an extension of ".mib" instead of ".txt"

3. Bring up a schedule in RPT
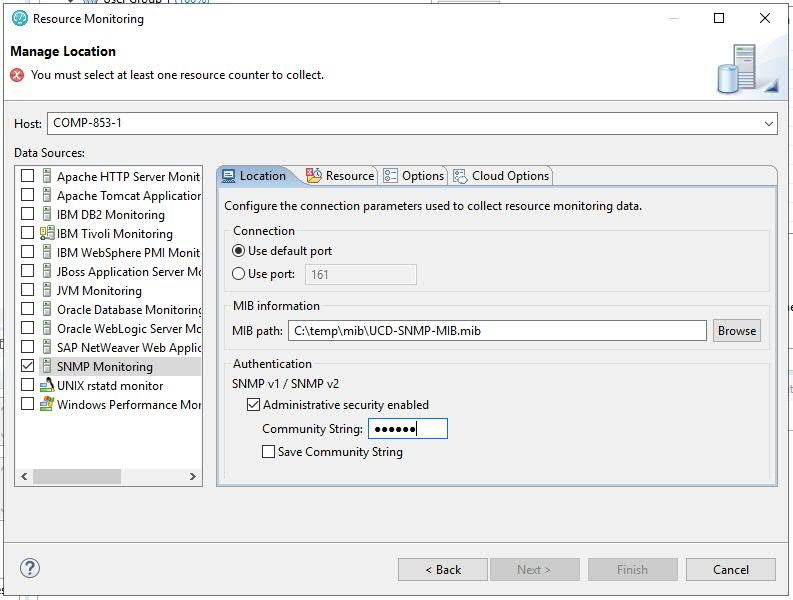
4. Select Resource Monitoring the Add... to create a new location

5. Fill in the dialog as shown below. We need:
- hostname of the Linux machine
- default port
- SNMP as a Data Source
- MIB path
- Community string of "public"
6. Click on the Resource tab and choose which counters to monitor. Memory is a good one to start with.

7. Run your schedule and you'll see the resources under the Resources tab on the left.

Additional Information
Monitoring Performance with Net-SNMP:
Monitoring Resource data:
Related Information
Document Location
Worldwide
[{"Business Unit":{"code":"BU053","label":"Cloud & Data Platform"},"Product":{"code":"SSMMM5","label":"IBM Rational Performance Tester"},"Component":"monitoring","Platform":[{"code":"PF043","label":"Red Hat"}],"Version":"9.5","Edition":"","Line of Business":{"code":"LOB45","label":"Automation"}}]
Product Synonym
RPT
Was this topic helpful?
Document Information
Modified date:
07 January 2021
UID
ibm10883172