Technical Blog Post
Abstract
How to configure Single Sign On (SSO) Authentication with IBM® Maximo® 7.6.x
Body
For testing purposes, you can set up IBM® Maximo® 7.6.x with SSO configuration.
There are 3 parts to configure SSO.
Part 1: Install Domain Name System (DNS) and Microsoft Active Directory (AD) Services on Microsoft Windows Server
Part 2: Install IBM® Maximo® Asset Management and Middleware
Part 3: Configure SSO for Simple and Protected GSSAPI Negotiation Mechanism (SPNEGO)
Part 1: Install DNS Server and Active Directory.
- Prepare two physical machines (you can use 2 VM instances) with Microsoft Windows Server 2012, 2016, or 2019. The first server is for the Windows Server. On the first server DNS Server, MSAD, and Maximo Asset Management are installed. The other server is for client machine, which belongs to the same domain. Important: Both the DNS Server and Client machines must have static IP addresses.
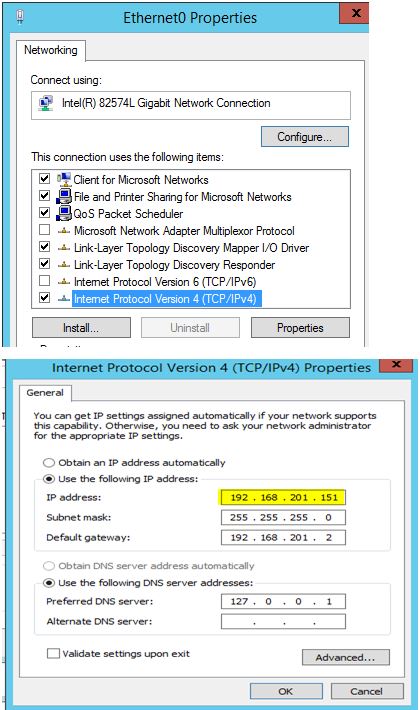
- Configuring IP setting for two servers.
- DNS Server
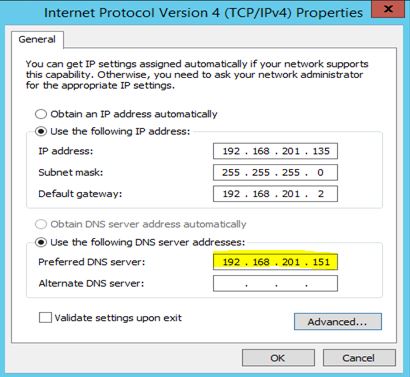
- IP setting for Client Server - the preferred DNS Server is the DNS Server's IP address
- Install DNS and MSAD Services on the DNS Server machine.
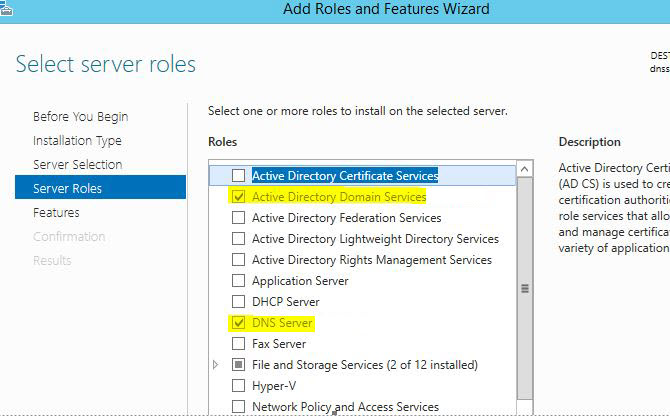
- Open Add Roles and Features

- Click Role-based or feature-based installation

- Select Active Directory Domain Services and DNS Server
After the Services are installed, Post-deployment Configuration for Active Directory Domain Services.

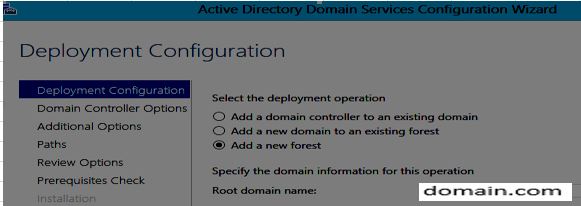
- Click Post-deployment Configuration
- Click Add a new forest. Set the Root domain name, for example, domain.com
- Enter a password for the Directory Services Restore Mode password, for example Maximo01
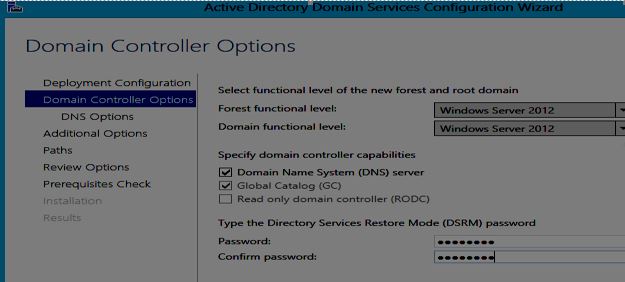
- Set the NetBIOS domain name, which is the DOMAIN from the Root domain name, for example, domain.com.
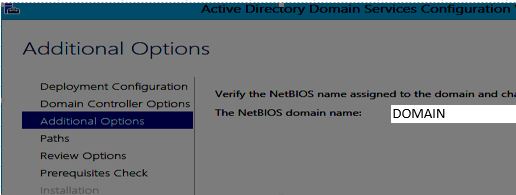
- Click Finish. Restart the server.
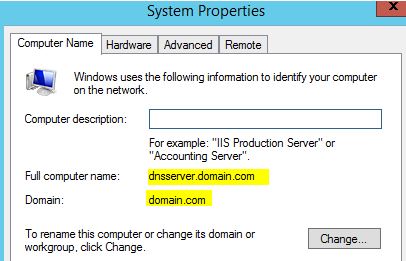
After restart, the machine now belongs to domain.com.
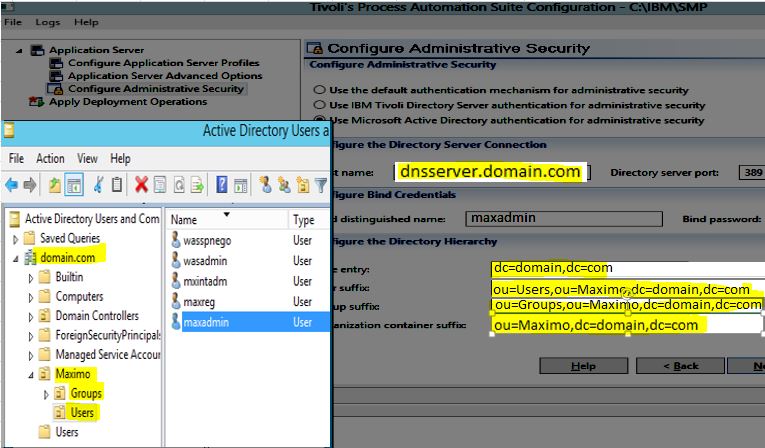
- Configure Active Directory structure.
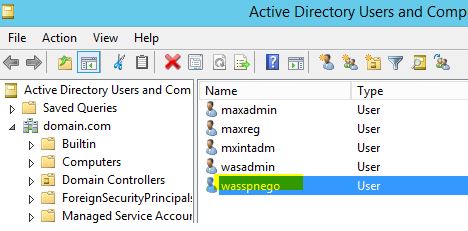
- Open Active Directory Users and Computers. Right-click the domain. Select New → Organizational Unit
- Create the Maximo, Groups, and Users OU, for example:

- In Groups OU, create two groups: maximousers and maximononusers
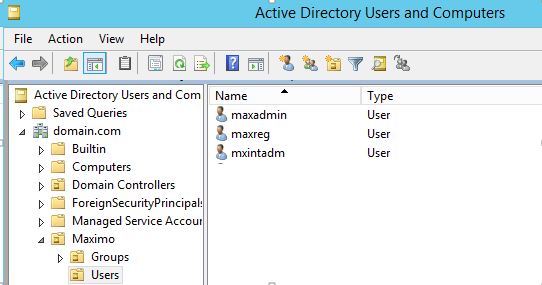
- In Users OU, create 3 users: maxadmin, maxreg, and mxintadm. Add them to the Domain Users and maximousers groups.
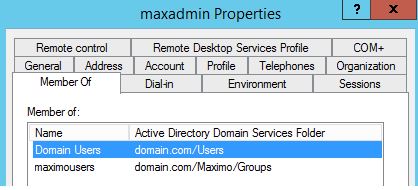
Doing these tasks allows three users (maxadmin, maxreg, and mxintadm) to log in to the computer that belongs to the domain (DOMAIN).
DNS Server and Active Directory configuration is completed.
- Configure the client machine in order to make it belong to the same domain (domain.com)
- Log in to the client machine.
- Open Computer->Properties->System properties.
- Click Change. Change Member of Domain to domain.com. Restart this client machine.
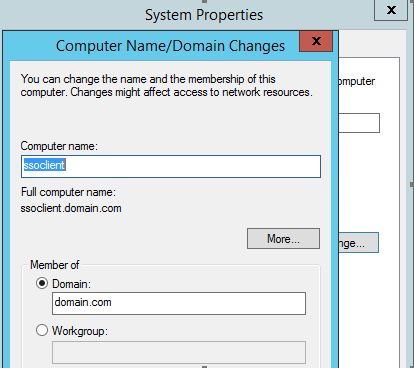
Now, DNS Server and Client machine was configured. They are in the same domain.
- DNS Server (AD): dnsserver.domain.com
- Client: ssoclient.domain.com
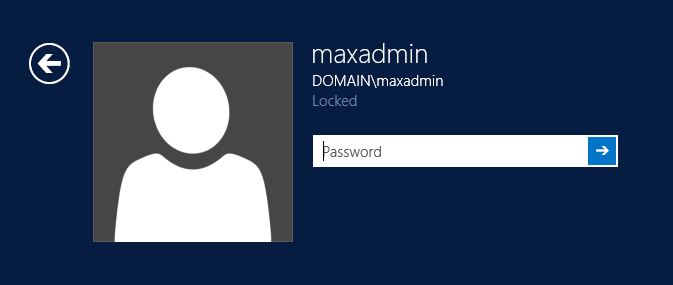
Domain users (maxadmin, mxintadm, maxreg) can log in to this client machine (ssoclient.domain.com) like below screen capture.
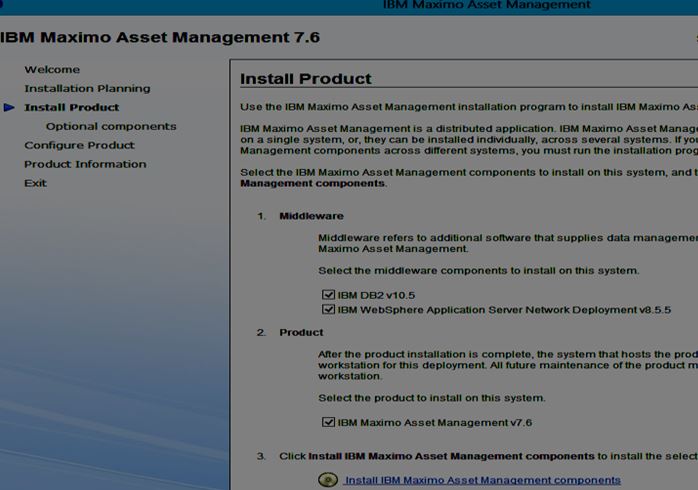
Part 2: Install Maximo 7.6 with middleware (WebSphere and DB2 in this example) on the server machine where DNS Server and AD are installed.
- Run launchpad64 - Select DB2, WebSphere, and IBM Maximo Asset Management 7.6.
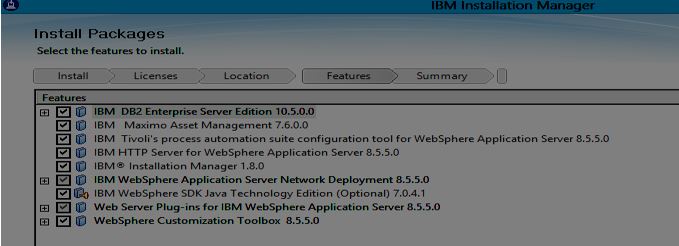
- Accept the license agreements.
- Confirm parameter and packages.
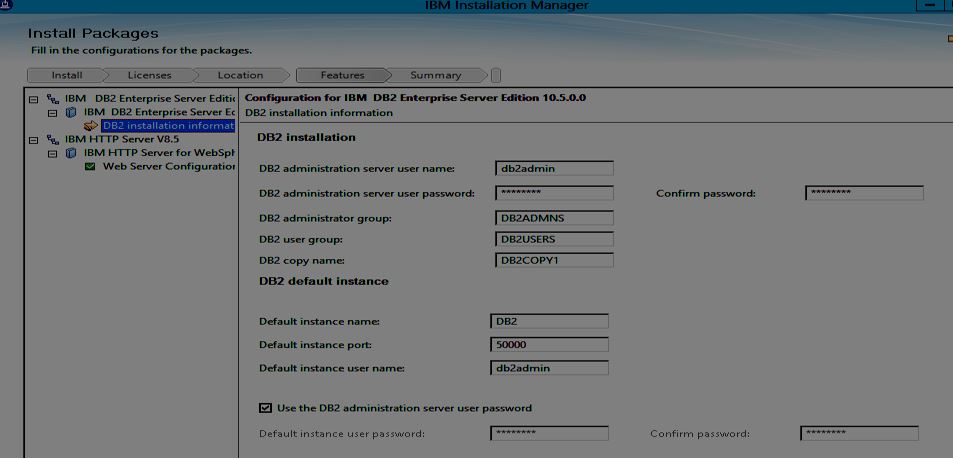
- Enter DB2 Installation Information.
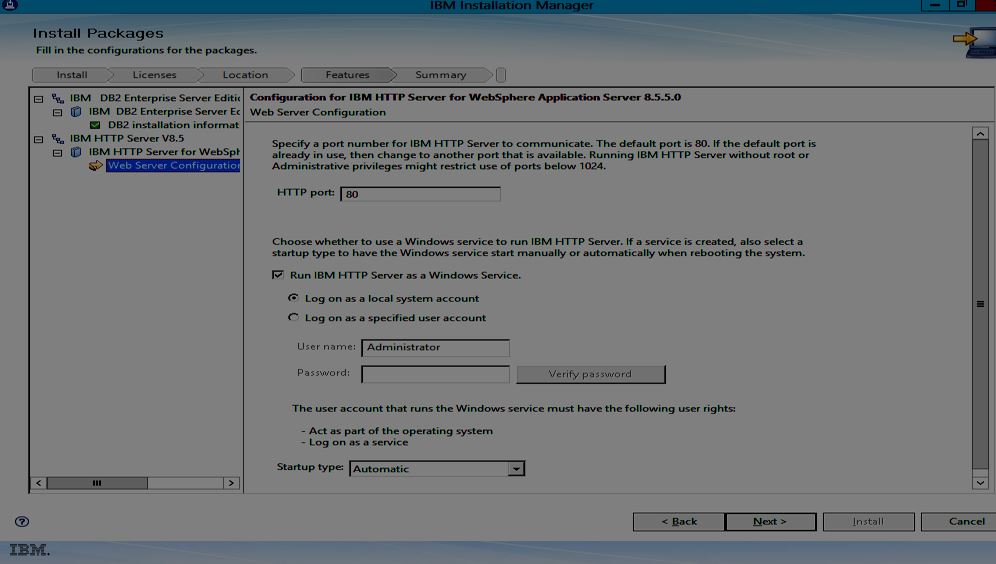
- Enter Web Server Configuration Information.
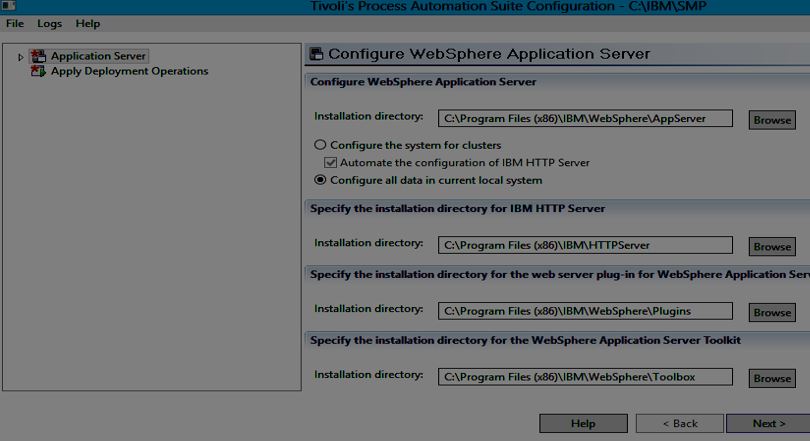
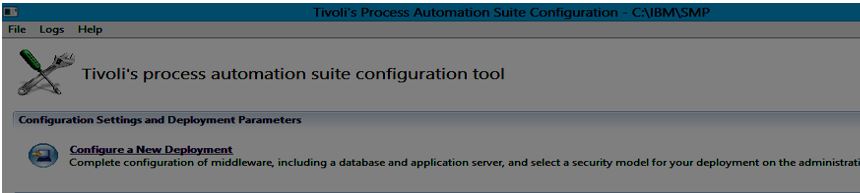
- Once Installation completed, Tivoli's process automation suite configuration tool screen is opened.

- Click 'Prepare WebSphere Application Server for Configuration'.
- Configure WebSphere Application Server
- Configure Application Server Profiles
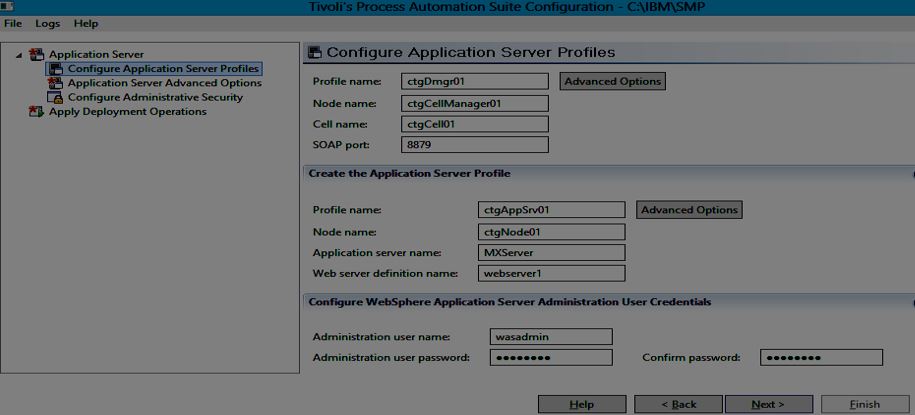
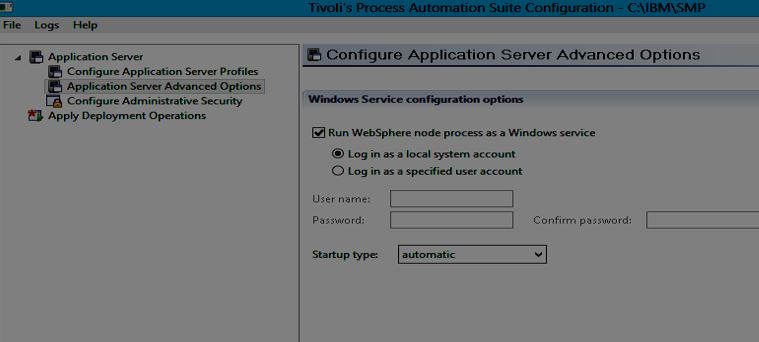
- Application Server Advanced Options
- Configure Administrative Security
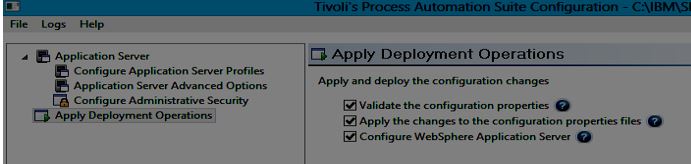
- Apply Deployment Operations.
- Click Configure a New Deployment.
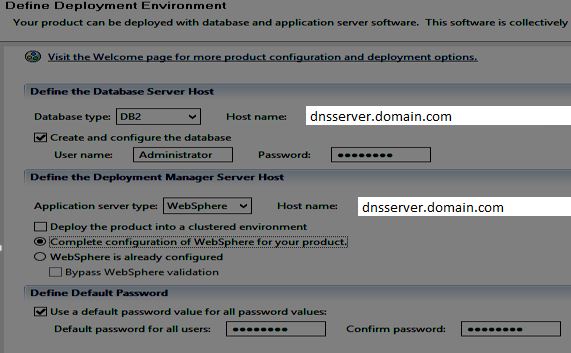
- Define Deployment Environment
- Check Create and Configure the database
- Check Complete configuration of WebSphere for your product
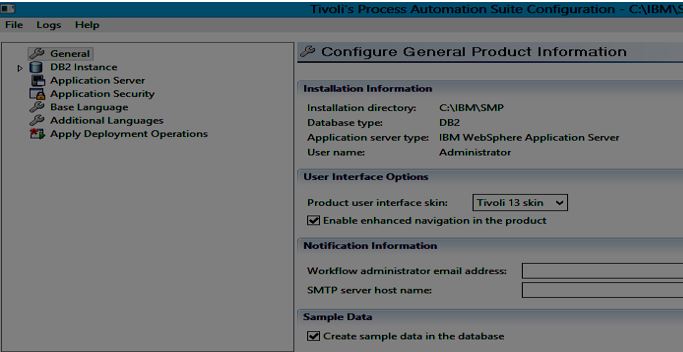
- Configure General Product Information
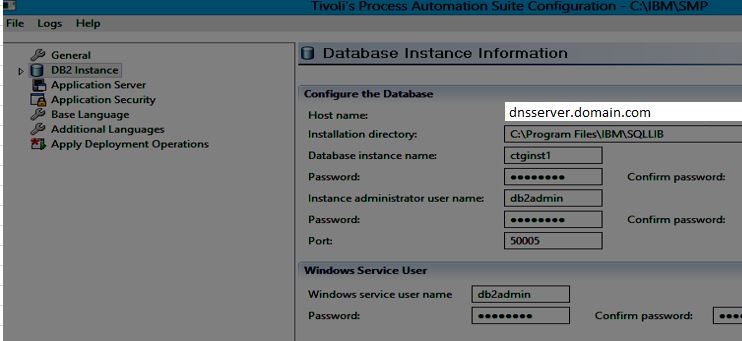
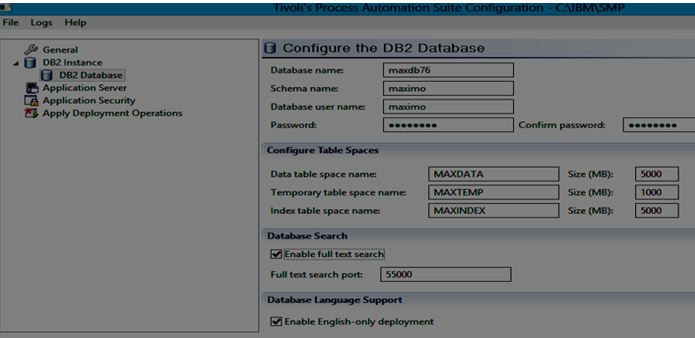
- Database Instance Information - Configure the DB2 Database
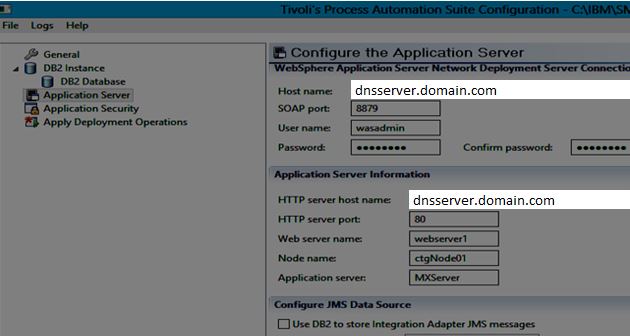
- Configure the Application Server
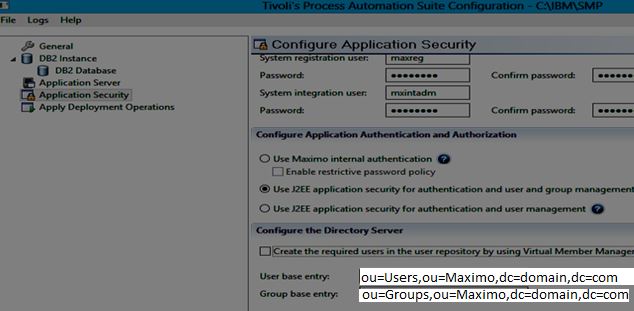
- Configure Application Security.
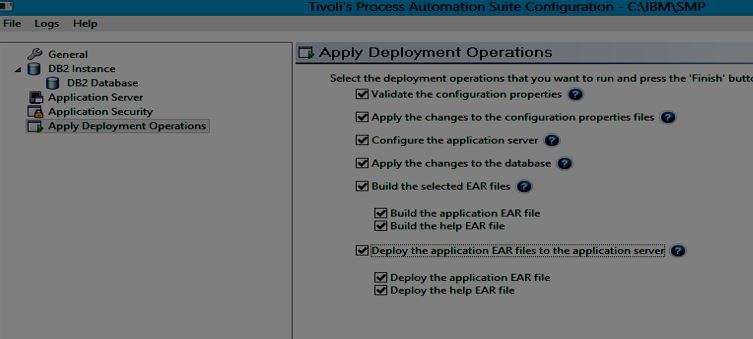
- Apply Deployment Operations.
Part 3: Single Sign On (SSO) configuration that uses SPNEGO
Simple and Protected GSSAPI Negotiation Mechanism (SPNEGO)enables a straightforward single sign-on (SSO) mechanism for WebSphere in Kerberos environments.
The Windows client must be in the same Active Directory (AD) domain. When you configure SPNEGO on a Windows system, you still need a separate Windows client to surf from.
Note: SPNEGO does not work locally on a system.
- Create a User ID for the Application Server.
- The ID you create here is not the same, and cannot be the same as the WebSphere administration ID that you use when you enable WebSphere Security (usually wasadmin in test environments).
- The ID that is created is the ID that the instance of WebSphere itself uses to authenticate to Active Directory.
- Example: (wasspnego@domain.com/Maximo01)
- Set the password never to expire in your test environment. This saves you the need to regenerate keys (discussed next) because the password never needs changing.
- Remember if you change the password for the account, you also need to regenerate the keys.
- Assign the Service Principal Name and Create Key File
After the account is created, we need to map this account to the Kerberos Service Principal Name (SPN) and create a key file that WebSphere can use to log in to the domain with.
Note that SPNs and keytabs are only required for the WebSphere Application Server instance, and not the Windows client users who are logging in to the domain from the domain sign-on screen.
To create the key, run
ktpass -out <keyfile name> -princ HTTP/fully qualified hostname@AD DOMAIN NAME -mapuser <AD user> -pass <password> -ptype KRB5_NT_PRINCIPAL
for example
ktpass -out appserver1.keytab -princ HTTP/dnsserver.domain.com@DOMAIN.COM -mapuser wasspnego -pass Maximo01 -ptype KRB5_NT_PRINCIPAL
So for the latest version of Windows server run:
ktpass -princ HTTP/dnsserver.domain.com@DOMAIN.COM -ptype KRB5_NT_PRINCIPAL -mapUser wasspnego -mapOp set -pass Maximo01 -out C:\IBM\WebSphere\AppServer\etc\krb5\appserver1.keytab -crypto AES256-SHA1 +DumpSalt -kvno 0
- Case is important here. HTTP must be all in capital letters as well as the AD domain name. If you get the case wrong, authentication does not work.
If it runs successfully, appserver1.keytab file is created and the Service Principal Name (SPN) is mapped to the AD user wasspnego.
The keytab file gets shipped to WebSphere server, which uses this key to authenticate itself in the AD domain as wasspnego.
Note the User logon name field for wasspnego user . It now contains the Service Principal Name (or SPN) of the ID.

- Set up Kerberos Configuration on the Application Server
- Copy appserver1.keytab to C:\IBM\WebSphere\AppServer\etc\krb5
- Start the wsadmin scripting tool:
C:\IBM\WebSphere\AppServer\bin>wsadmin -lang jython ( wasadmin/Maximo1) - Run the command:
$AdminTask createKrbConfigFile {-krbPath C:\IBM\WebSphere\AppServer\etc\krb5\krb5.conf -realm DOMAIN.COM -kdcHost dnsserver.domain.com -dns domain.com -keytabPath C:\IBM\WebSphere\AppServer\etc\krb5\appserver1.keytab}
Microsoft had an update in November 2022 where they disabled RC4 and Java also recently disabled it.
So for the latest version of Windows server run:
$AdminTask createKrbConfigFile {-krbPath C:\IBM\WebSphere\AppServer\etc\krb5\krb5.conf -realm DOMAIN.COM -kdcHost dnsserver.domain.com -dns domain.com -encryption aes256-cts-hmac-sha1-96 -keytabPath C:\IBM\WebSphere\AppServer\etc\krb5\appserver1.keytab}
Then, appserver1.keytab and krb5.conf file exist in C:\IBM\WebSphere\AppServer\etc\krb5 folder.
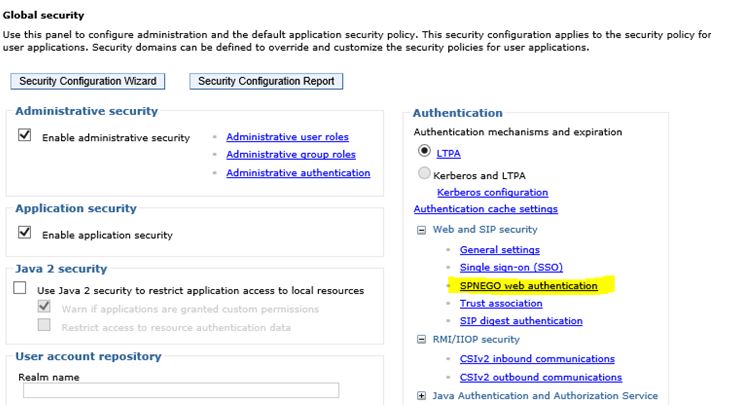
- Enable WebSphere Security when installing Maximo using J2EE Application Security, it was already enabled. Go to WebSphere Console. Click Security-->Global Security in the left panel.

- Enable SSO
- Go to WebSphere Console. Click Security-->Global Security in the left panel.
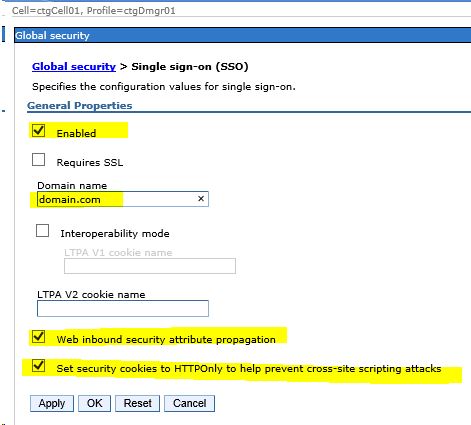
- Click Single Sign-On (SSO).
- Check Enabled and enter domain name as domain.com
- Check web inbound security attribute propagation and Set security cookies to HTTPOnly to help prevent cross-site scripting attacks.
- Enable SPNEGO in WebSphere
Go to WebSphere Console. Click Security-->Global Security in the left panel.
Click SPNEGO web authentication.
- Check Dynamically update SPNEGO and Enable SPNEGO checkboxes
- Enter Kerberos configuration file and keytab file name with full path (Reference step 3)
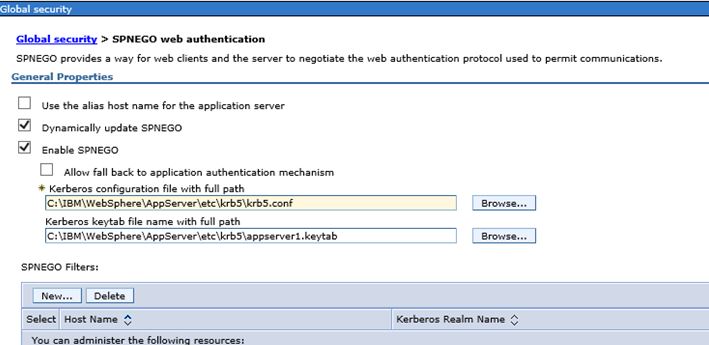
- -Click New to add a new SPNEGO Filter

- Apply Changes (Double check MXServer/Security Domain/SPNEGO web authentication)
- Restart WebSphere Server.
SPNEGO is now enabled on the server.
- Configure Browsers: Configure your browsers to send their Kerberos tokens to the server when challenged. Change a couple of settings to the browsers running on your Windows client machines.
- Log in to the client machine ssoclient.domain.com as maxadmin domain user.
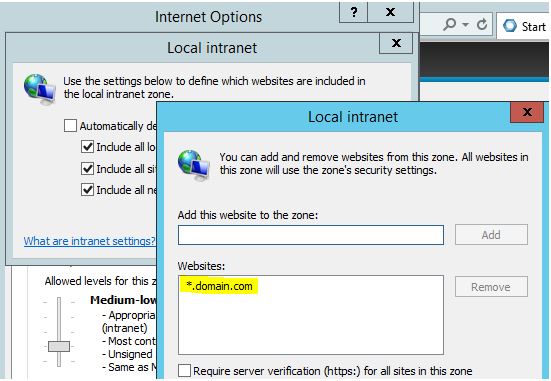
- Open browser (example here is Internet Explorer). Select Internet options -> Security Tab-> Local Intranet
- Add *.domain.com -> OK
- Click Advanced Tab
- Check Enable Integrated Windows Authentication
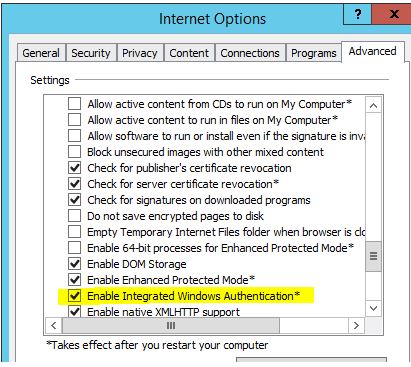
- Click OK
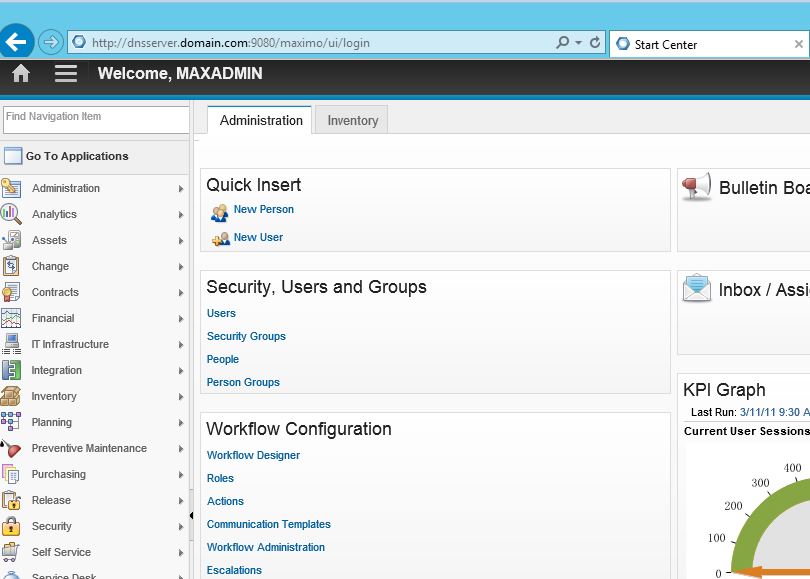
Now, in browser, Go to http://dnsserver.domain.com:9080/maximo
Maximo automatically logs in as maxadmin user.
UID
ibm11132167