Troubleshooting
Problem
Symptom
Resolving The Problem
In this document, the example given uses the DEFAULT CAMUSER certificate. The CAMUSER certificate is created when you secure your Cognos Dispatcher(s) by simply changing your configuration from HTTP to HTTPS. By default, IBM Cognos Analytics components use an internal certificate authority (CA) to establish the root of trust in the IBM Cognos security infrastructure.
If you want to use certificates that are managed by another service, see Configuring IBM Cognos components to use another certificate authority: https://www.ibm.com/support/knowledgecenter/SSEP7J_11.0.0/com.ibm.swg.ba.cognos.inst_cr_winux.doc/c_configuringreportnettouseathird-partycertificateauthority.html
UPDATE THE TM1S.CFG FILE PARAMETERS TO ALLOW FOR SSL SECURED CAM DISPATCHER
- Update the tm1s.cfg file(s) for your environment, to ensure that the following parameter is set:
CAMUseSSL=T - Save and close the file
DOWNLOAD THE COGNOS DISPATCHER CERTIFICATES
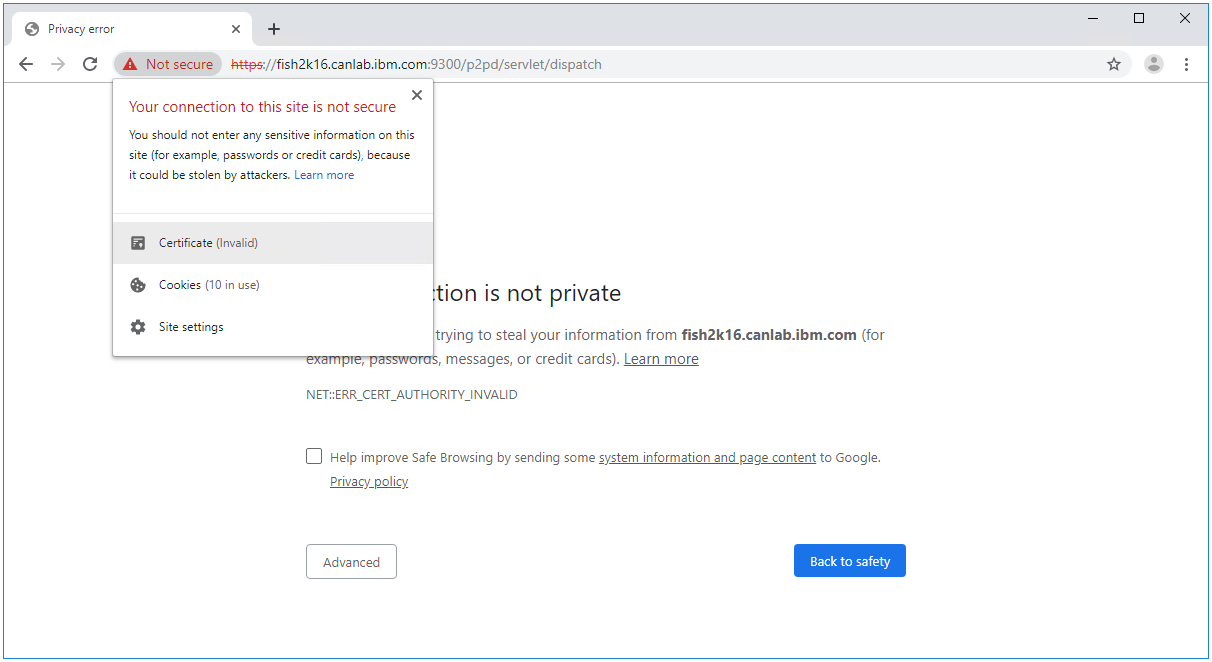
- In your web browser (this example will use Google Chrome, if using a different browser you will need to adjust accordingly), connect to your Cognos Dispatcher URL (example: https://servername.domain.com:9300/p2pd/servlet/dispatch/)
- Click the appropriate button(s) to expose the Certificate properties
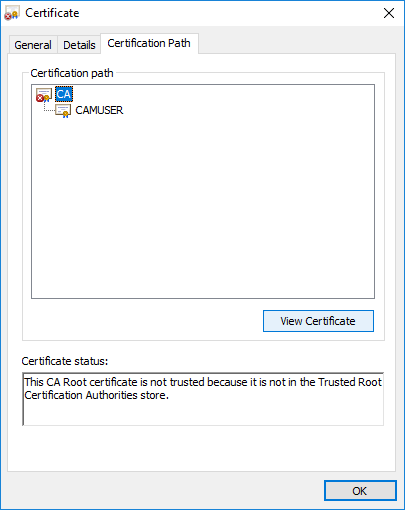
- Click the Certification Path tab to observe the chain of authority for your certificate. In this example, we see that there are two certificates securing the Cognos Dispatcher. You must select each certificate above the last certificate in the chain, and click View Certificate. In this example, there is only one certificate above the last certificate in the chain...if you have more than one in your implementation, you must repeat these steps for each one.
- After clicking View Certificate, click the Details tab of the new Certificate window. On the details tab click Copy to File...

- Follow the Certificate Export Wizard prompts. Export the certificate using the Base-64 encoded X.509 format. Then, export the certificate and save it to the <tm1 install dir>\bin64\ssl\ folder of your PA Install, and provide an appropriate name (in this example, we call the certificate caRoot.cer)

- Open the exported certificate in the <tm1 install dir>\bin64\ssl\ directory to confirm that the correct certificate had been obtained

IMPORT THE COGNOS DISPATCHER CERTIFICATE(S) TO THE PLANNING ANALYTICS KEYSTORES
- First, you must import the certificate(s) to the TM1 Server keystore to allow for authentication (as the TM1 Server must communicate with the Cognos Dispatcher URL during the authentication process). Open Command Prompt as an Administrator and navigate to the <tm1 install dir>\bin64\ directory.
- Execute the following command to import/trust the certificate (modify as required for path and filename): gsk8capicmd_64 -cert -add -db "C:\Program Files\ibm\cognos\tm1_64\bin64\ssl\ibmtm1.kdb" -stashed -label caRoot -file "C:\Program Files\ibm\cognos\tm1_64\bin64\ssl\caRoot.cer" -format ascii -trust enable

- We must also import/trust the certificate(s) to the CAMKeystore, used by TM1Web. Open Command Prompt as an Administrator and navigate to the <tm1 install dir>\bin64\ directory.
- Execute the following command to import/trust the certificate (modify as required for path and filename): gsk8capicmd_64 -cert -add -db "C:\Program Files\ibm\cognos\tm1_64\configuration\certs\CAMKeystore" -pw "NoPassWordSet" -label caRoot -file "C:\Program Files\ibm\cognos\tm1_64\bin64\ssl\caRoot.cer" -format ascii -trust enable

- Lastly, the JAVA Keystore used by PMPSVC. Open Command Prompt as an Administrator and navigate to the <tm1 install dir>\bin64\jre\bin\ directory.
- Execute the following command to import/trust the certificate (modify as required for path and filename): keytool.exe -import -trustcacerts -file "C:\Program Files\ibm\cognos\tm1_64\bin64\ssl\caRoot.cer" -keystore "C:\Program Files\ibm\cognos\tm1_64\bin64\ssl\tm1store" -alias caRoot -storepass applix
**When prompted, type yes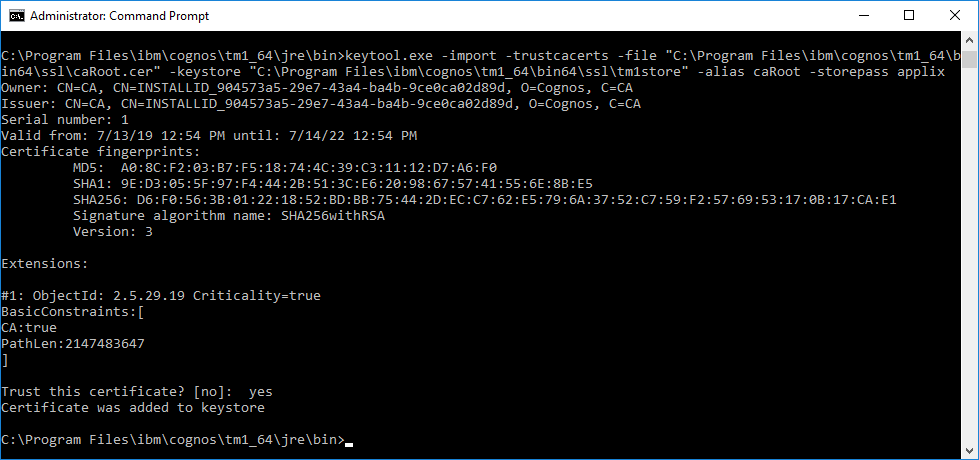
After correctly importing the certificates and when trying to log in inside Architect the users are presented with the error message 'SystemServerClientNotFound'.
Document Location
Worldwide
Was this topic helpful?
Document Information
Modified date:
06 December 2021
UID
ibm10959835