How To
Summary
IBM Spectrum Protect Plus offers user management using role-based access control (RBAC). RBAC allows you to define what permission and resource groups each user can access to. This document discusses how you can create and manage users with certain permission and resource group accesses throughout a simple example.
Objective
Like many of IT solutions, IBM Spectrum Protect Plus is usually operated by multiple agents. For example, it is reasonable to allow many agents to make and restore backup but only a handful administrators have permission to delete them. In this section, you will learn how to manage users, their roles which define assigned users’ permission types (e.g. create backup jobs, delete users) and resource types which define where those users can access to (e.g. Oracle Database).
Environment
This edition applies to version 10, release 1, modification 3 of IBM Spectrum Protect™ Plus and to all subsequent releases and modifications until otherwise indicated in new editions.
Steps
Plan users, roles and resource groups
Consider you are helping a small team with three members deploy IBM Spectrum Protect Plus. Jack (username: userTier1) is a new hire but he is knowledgeable about virtual machine management. Quin (username: userTier1Tier2) is a senior member and she is knowledgeable about databases. Kim (username: userSYSADMIN) is a team lead who is in charge of this project.
| Username | userTier1 | userTier1Tier2 | userSYSADMIN | admin |
|---|---|---|---|---|
| Password | userTier1 | userTier1Tier2 | userSYSADMIN | sp3ctrumLAB |
| Role | roleTier1 | roleTier1 roleTier2 | SYSADMIN | SUPERUSER |
| Resource Group | resourceVM | resourceDB | (All) | (All) |
Open IBM Spectrum Protect Plus Web UI from Google Chrome. Expand Accounts and browse each page under it: User, Role, Resource Group and Identity.

Create roles
First, create a new custom role. Go to Accounts > Role. You will see a list of all the existing roles here. To create a new custom role, click the Create Role button at top-right of this page.

The Create Role section will appear. For “I’d like to create a new role:”, select New. Name the new role “roleTier1”.
Users associated with this role should be only able to (1) start existing backup jobs and (2) run and view standard reports and custom reports.
Check the following items:
| View | Create/register | Edit | Delete/deregister | Options/run | |
|---|---|---|---|---|---|
| Job | x | x | |||
| Site | x | x | |||
| (Others) |
Take a closer look at the available check items in those permission groups and imagine you create roles for administrators, senior agents, regular agents, etc. Also note that you cannot specify which resources, such as particular VMware hypervisors and SQL Server databases users can use by defining their role; this is done by defining resource groups and we will see this in the "Create resource group" section.

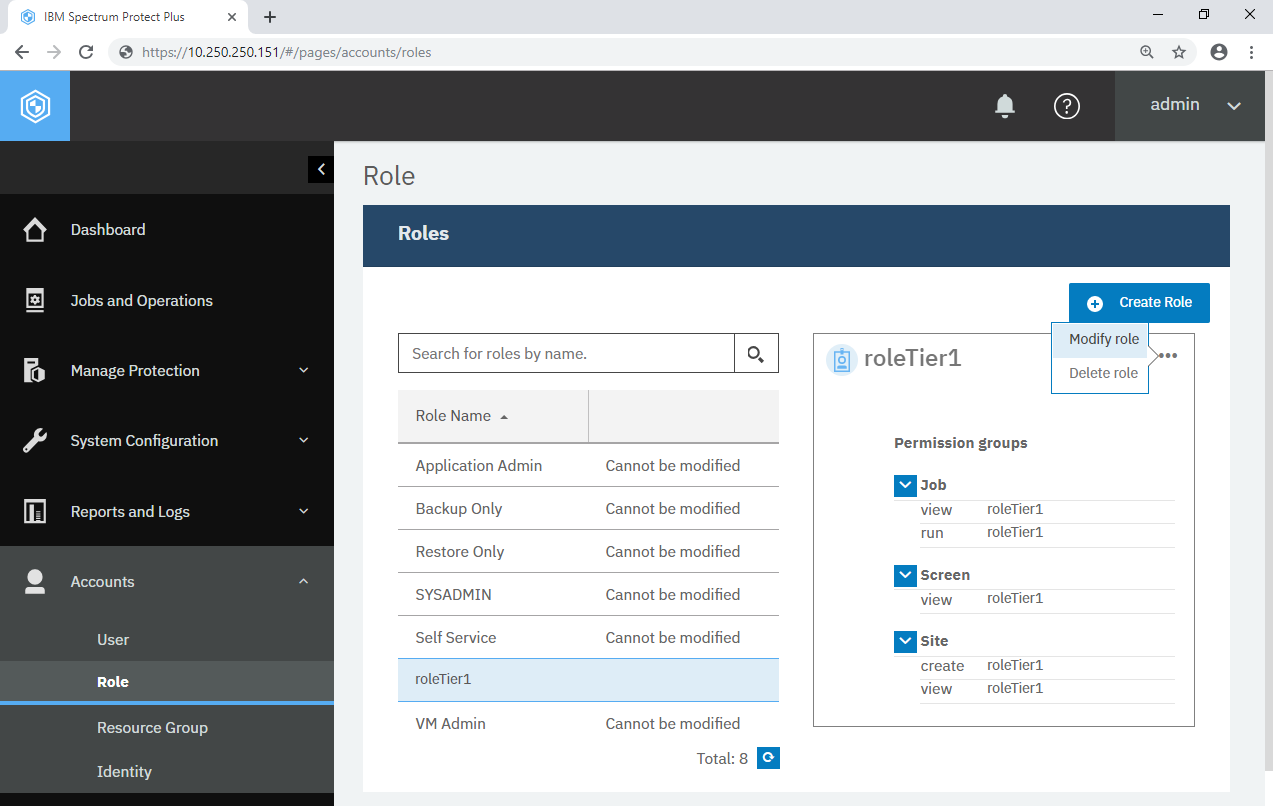
Click Create Role and you will see the list of roles again. Ensure the new role “roleTier1” is added. Click this role and see what permission items it has. Click the three dots (···) at top-right of the bordered box and see you can modify or delete this role.
Create users
In this step, you will create a new user using the role you created in the previous step: “roleTier1”. At this time, use “All Resources” which allows users to access to all the resources such as particular VMware hypervisors and SQL Server databases. Again, you will learn how to manage resources in the next step.
Go to Accounts > User and click the Add User button at top-right of the page.

You will see the Add User - User Information and Role section in the new page. Use the following settings:
| Select the type of user or group you want to add | Individual new user |
|---|---|
| Username | userTier1 |
| Password | userTier1 |
| Assign role | roleTier1 |
Ensure userTier1 has the right permission items. Click Continue >.
You will see the Add User - Assign Resources section. Check All Resources and click the Add resources button. Ensure the resource item “All Resources” has been added to the list in the right-hand side. Click the Create user button.
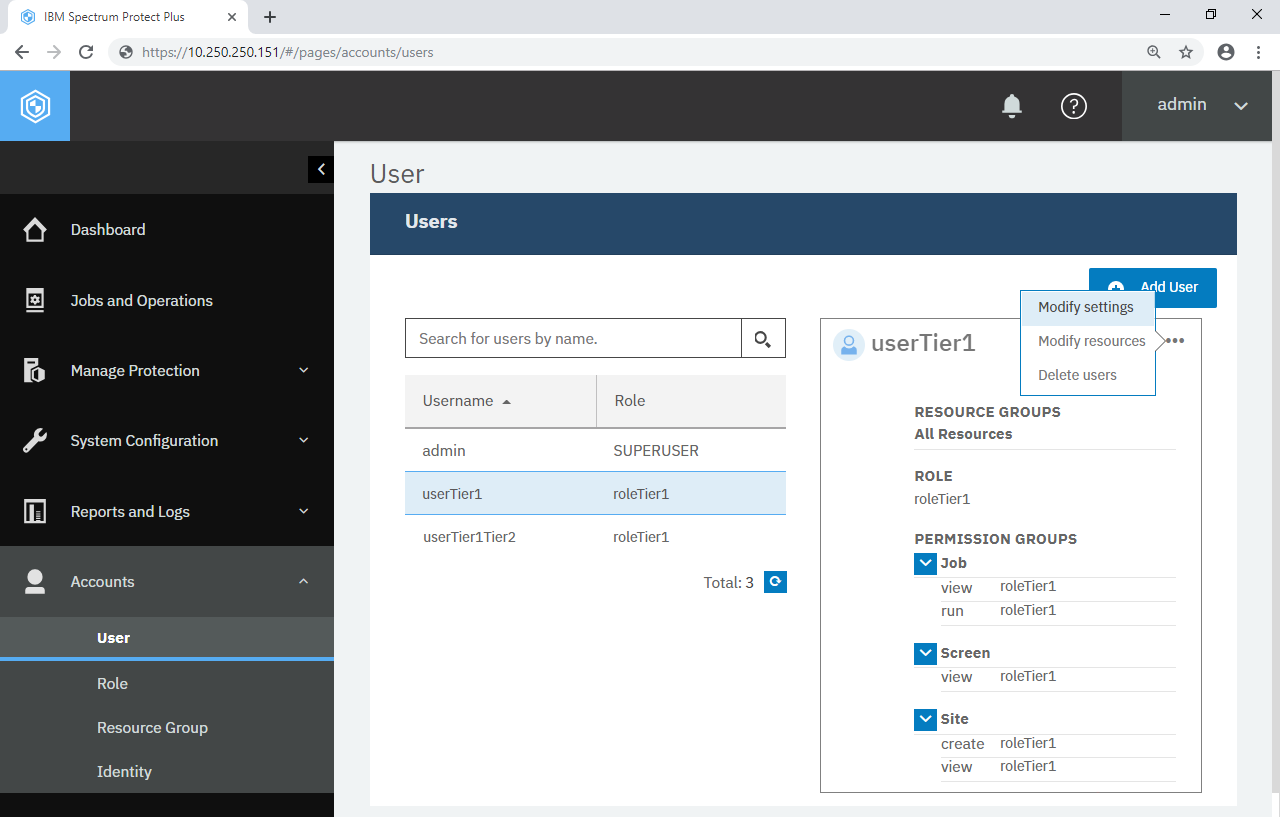
You will see the list of users again and there is userTier1 in it. Like roles in the previous step, you can click this user and see brief a brief description of his: what resource(s) he can access to, which role(s) he holds and which permission items he has. Click the three dots (···) at top-right of the bordered box and see you can modify the settings, modify the resources and delete this user.
Repeat this step to create userTier1Tier2 and see you can create multiple users with the same roles and same resource groups.
Click admin at top-right of the page and click Sign Out. Log back into the Web UI using the username userTier1 and the password userTier1.
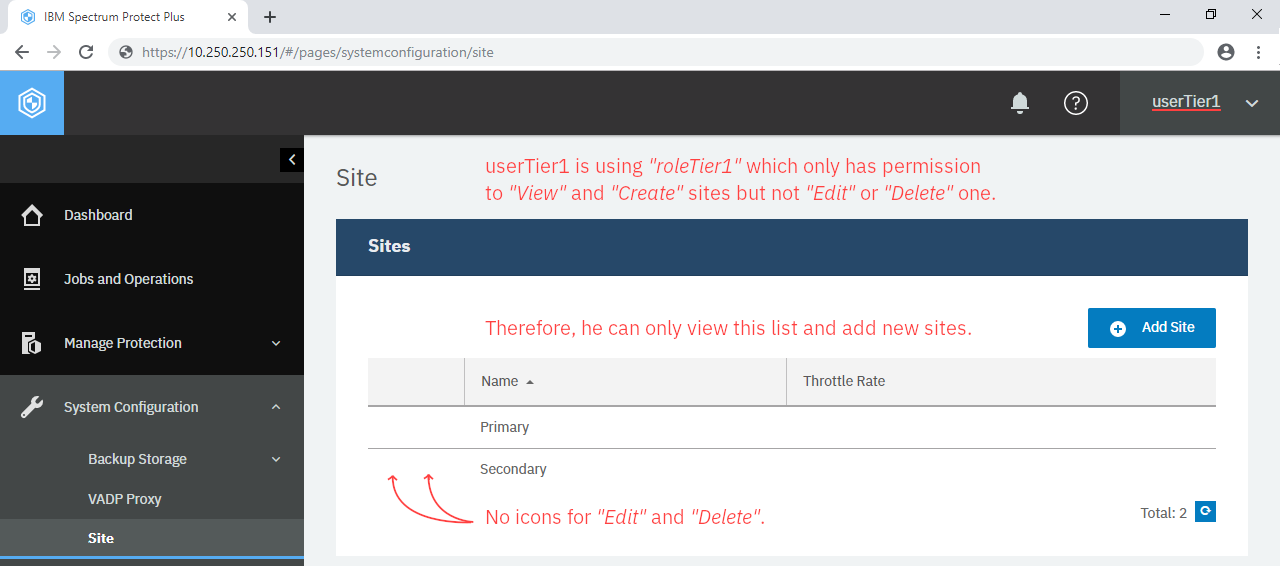
With the userTier1 account, you not be able to see most objects except those were allowed in his roleTier1. For example, go to System Configuration > Site and you will only see a list of sites and the +Add Site button to view and create them. You will not be able to edit or delete existing sites. Similarly, go to Jobs and Operations, open the Policy and Job List tab and you will see a list of SLA policies and an ability to start (and pause) any of them but it does not allow you to add, edit or delete jobs.
Create one more role “roleTier2” which is superior to “roleTier1”. Tier-2 Agent can do almost everything except anything about sites. That means roleTier2 is not a complete superset of roleTier1.
| View | Create/register | Edit | Delete/deregister | Options/run | |
|---|---|---|---|---|---|
| Site | |||||
| User | x | ||||
| (Others) | x | x | x | x | x |

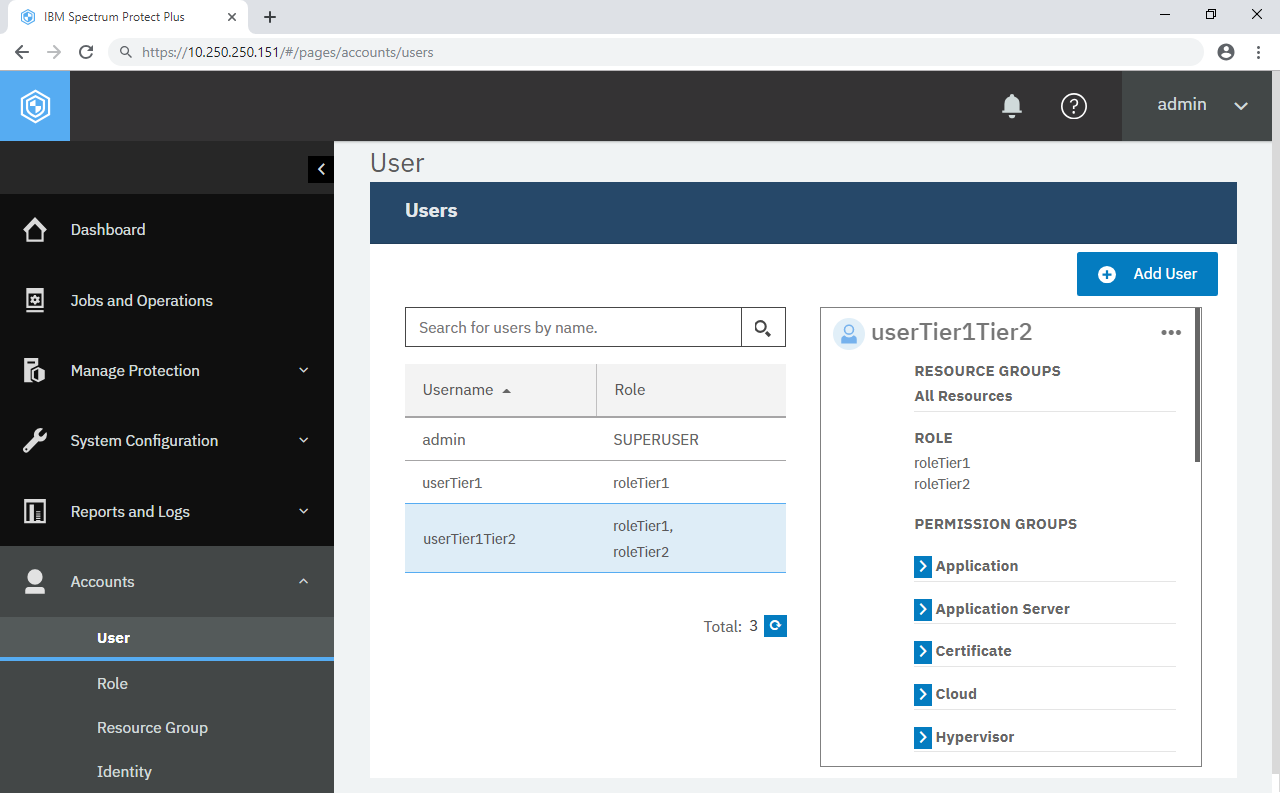
Consider userTier1Tier2 gets promoted to be a Tier-2 agent and you want to change her role from “roleTier1” into “roleTier2”. Log back into IBM Spectrum Protect Plus Web UI using the admin account, go back to User, click userTier1Tier2, and click the three dots (···) > Modify settings.
You can update the role of this user. In fact, you can select multiple roles; if you want to allow userTier1Tier2 to viewing and adding new sites as before, you can select both “roleTier1” and “roleTier2”. Again, two different roles do not need to have a superset-subset relationship.
| View | Create/register | Edit | Delete/deregister | Options/run | |
|---|---|---|---|---|---|
| Site | x | x | |||
| User | x | ||||
| (Others) | x | x | x | x | x |
There are six system-defined roles which are available out-of-box. These include SYSADMIN which has a very similar permission set as admin’s. Create a new user “userSYSADMIN” and give him the SYSADMIN role. Like the admin account, userSYSADMIN can now add and remove users, permission for their roles and resource groups which we you will see in the next step.
Create resource groups
Roles defines what type of tasks assigned users are allowed to perform, such as “creating users” and “deleting backup”. Resource groups defines which resources, such as Oracle Database, they can work with.
You have allowed everyone to access to All Resources. But userTier1 is only knowledgeable about virtual machines whereas userTier1Tier2, only databases. You want to limit their permission to access to the resources they are not knowledgeable about.
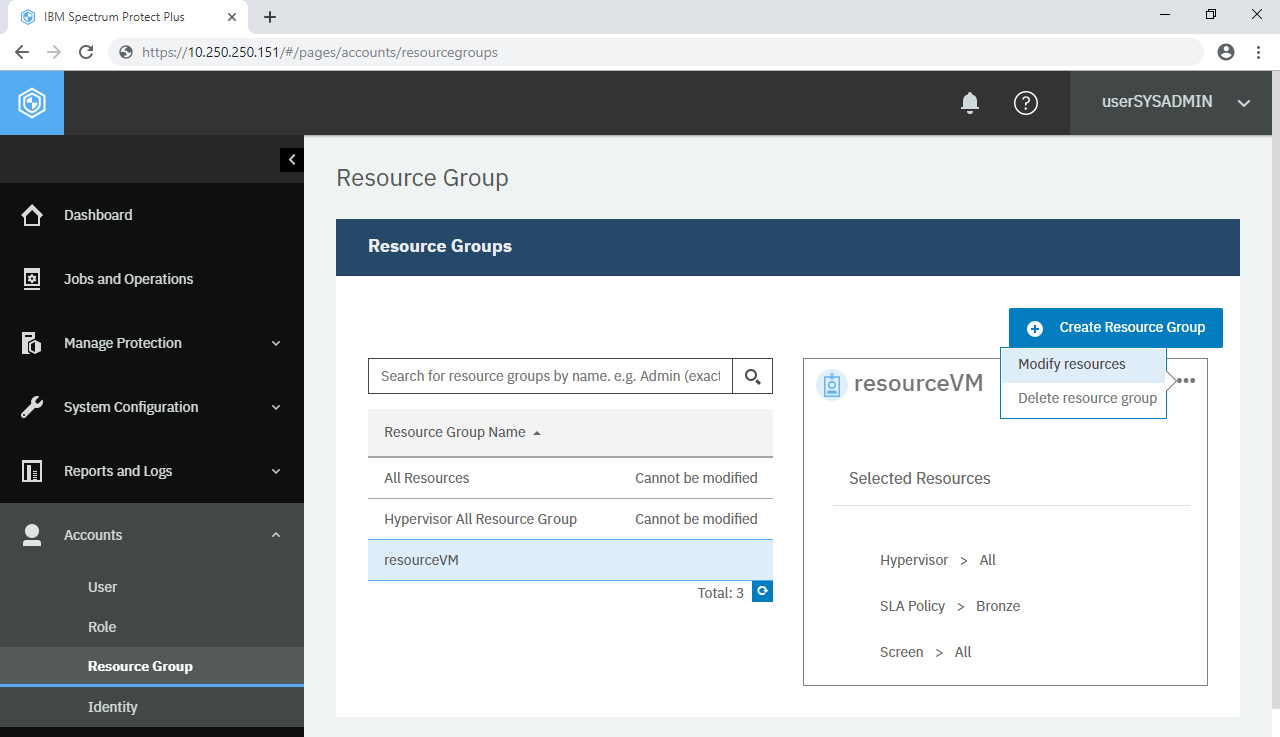
To manage resource groups, log into IBM Spectrum Protect Plus on Google Chrome using either admin or the “userSYSADMIN“ account. Then, from the navigation pane, go to Accounts > Resource Group and you will see a list of Resource Groups. Click +Create Resource Group at top-right of the page. Enter the following settings:
| Name of the new resource group | resourceVM |
|---|---|
| I would like to create a new resource group | New |
| Resource | Hypervisor > VMware > VCLAB TRAINING (All) Screen > All |
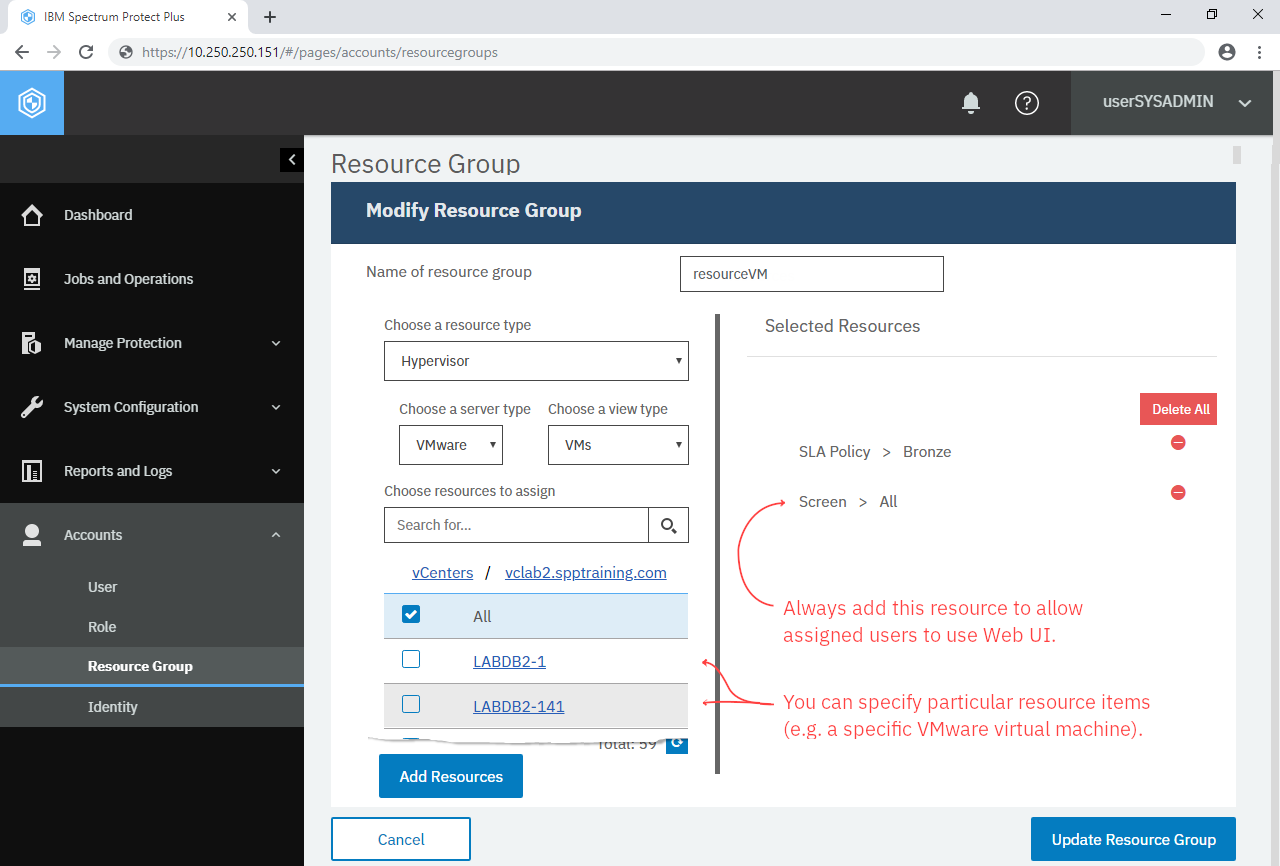
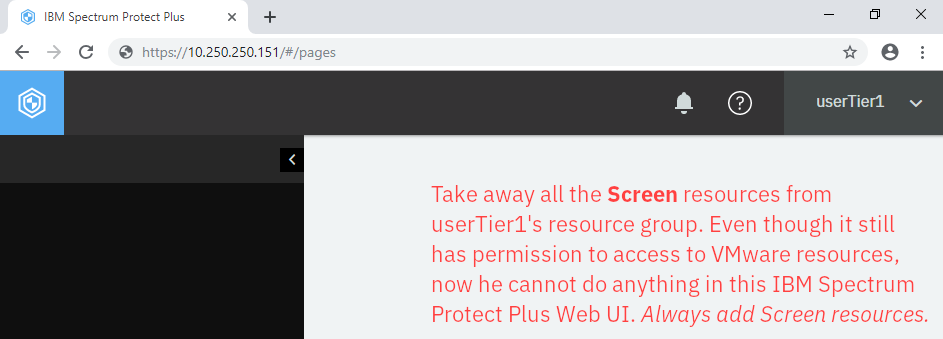
Caution! Screen allows assigned users to open the page of IBM Spectrum Protect Plus Web UI. Always make sure they have permission to open relevant pages; otherwise, they cannot do anything with given resources.
In this case, for example, you can select a specific virtual machine or the whole vCenter. You can also add various types of resources such as “VMware virtual machines and some SLA policies”. Click Add Resources and Create Resource Group. Ensure the new resource group “ResourceVM” is added in the list; click it. Like User and Role, you can see detailed information of the selected item. Click the three dots (···) and it gives you options to modify and delete it.
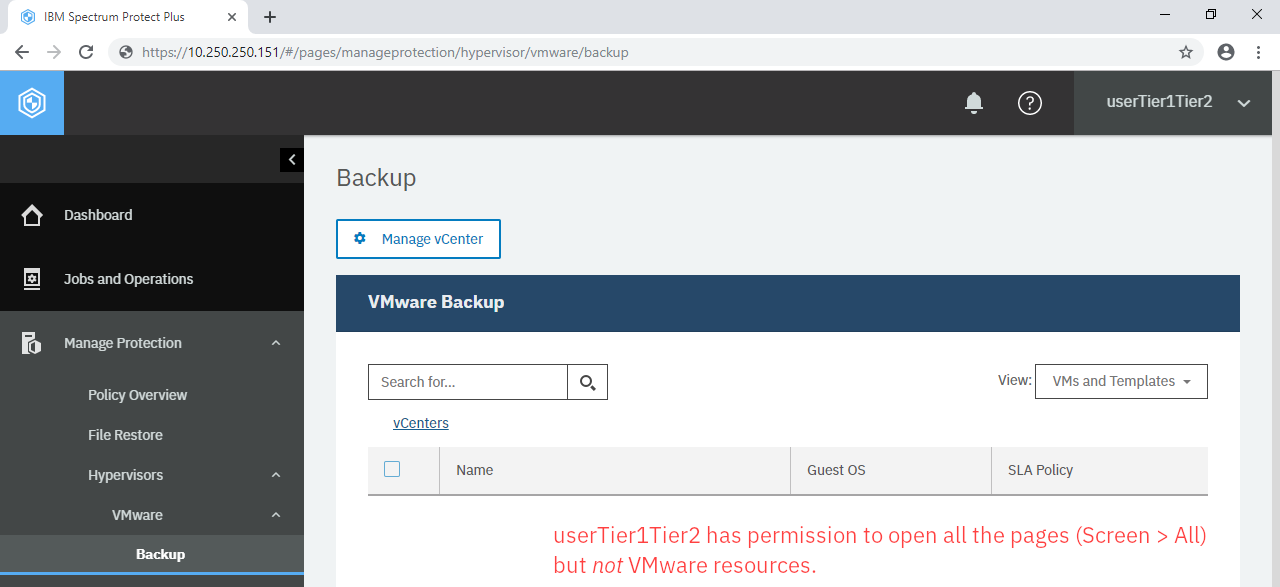
Go back to User. Click userTier1 > the three dots (···) > Modify resources. In the Assign Resources section, you will see “ResourceVM” in the list. Add this resource to him, remove “All Resources” and click Assign resources. Repeat this for userTier1Tier2 but do not allow her to access to any VMware resources. Log into IBM Spectrum Protect Plus Web UI using this account and check if you can see any VMware resources such as vCenters and virtual machines.
Document Location
Worldwide
Was this topic helpful?
Document Information
Modified date:
09 July 2019
UID
ibm10881548