Technical Blog Post
Abstract
Configuring Push Notifications for Maximo Anywhere 7.6.1
Body
Yesterday I wrote the first in a series of blog posts that I plan on creating regarding push notifications in Maximo Anywhere. That blog was on obtaining the proper Sender ID and API Key for Google Cloud Messaging which allows us to send notifications to the Android devices, that blog can be found here. As there are quite a few components involved with Maximo Anywhere as well as the push notification configuration for Maximo Anywhere , I was going to split up the blogs however it is likely best everything is in one spot for the configuration.
Before you proceed ensure your integration buses are configured, Maximo with 7.6.0.4 and the latest IFIX and higher is installed and Maximo Anywhere 7.6.1 is installed.
If you need assistance setting up the initial buses, queues etc please see the following document written by a colleague for the basic configuration steps : JMS Messaging - High availability, scalability and Maximo Integration Framework using a single Service Integration Bus
Now we that we the framework, lets get started on creating the queues required for our push notifications in WebSphere.
Configuring the notification queues in WebSphere.
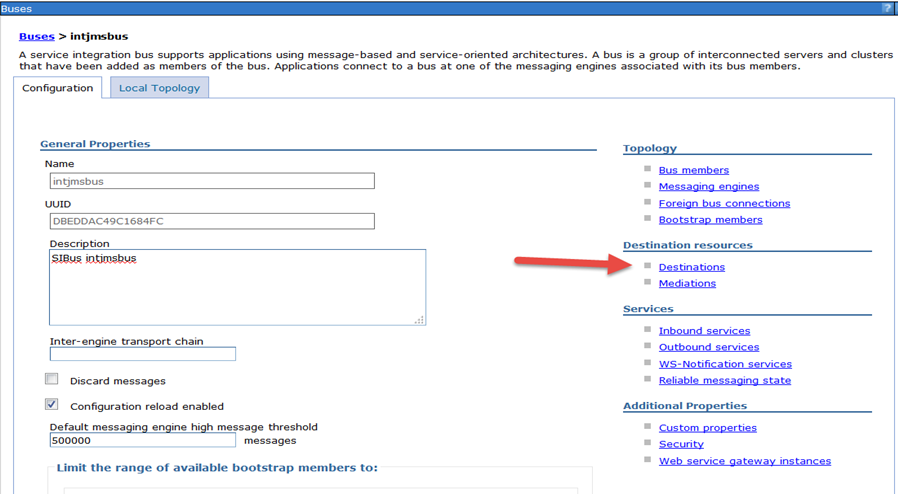
- From the WebSphere console expand Service Integration -> Buses -> click on intjmsbus or the bus that you will be adding the notification destinations to.
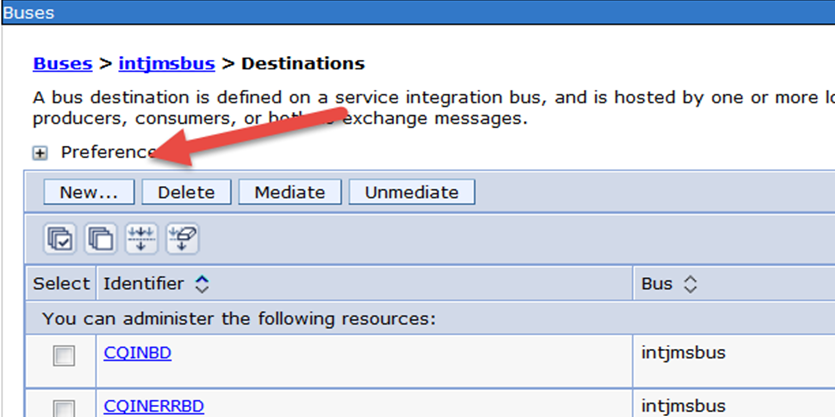
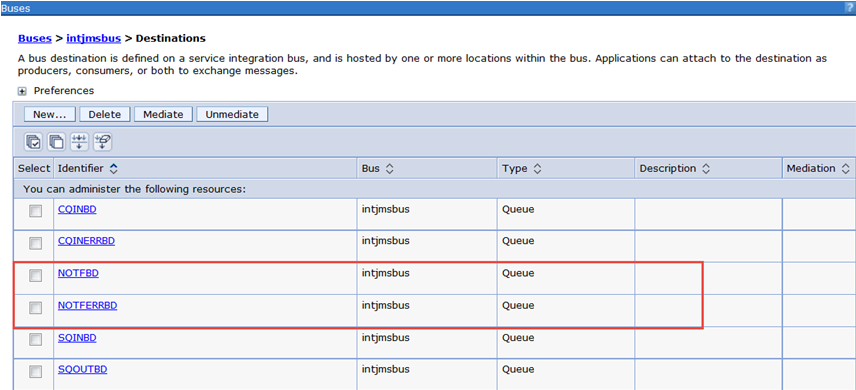
- Click on 'Destinations'
3. Click on 'New Destination'
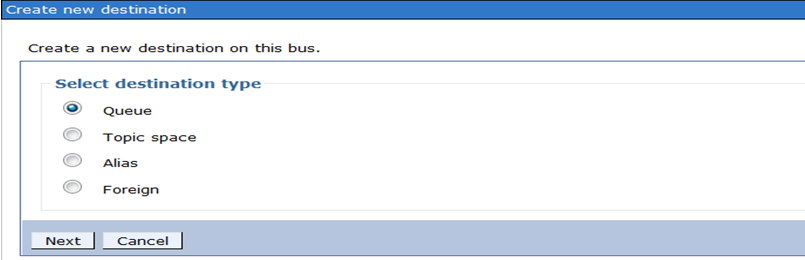
4. Choose 'Queue' as the destination type.
5. Call the new queue 'NOTFBD'
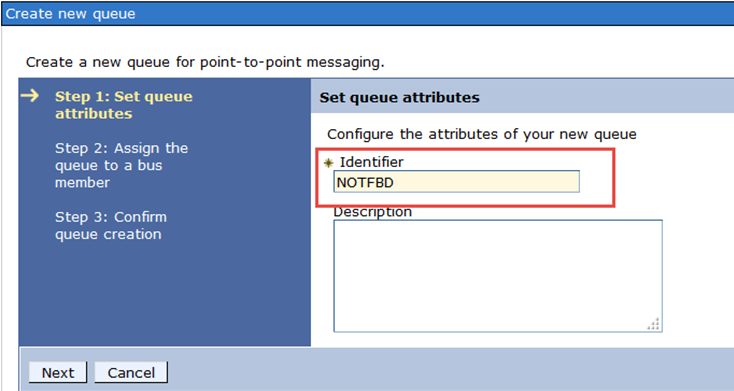
6. Assign the queue to the bus member that is running Maximo w/Maximo Anywhere core components installed then confirm and create your queue.

7. Repeat the above steps and create another queue called NOTFERRBD. If you do not want to create the error queue you can skip this step, your output should look similar to what you see below once complete.
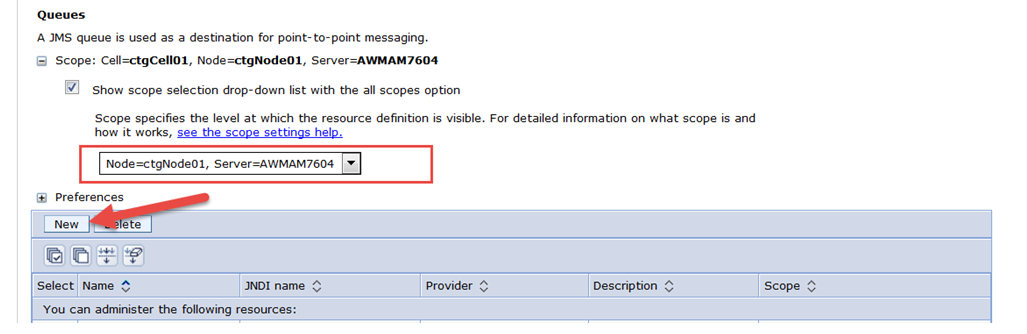
8. Now we want to expand Resources - > JMS –> then click on Queues.
9. Select the scope of your server that you want to set the notification queues access to and click on ‘New’. If your Maximo server is clustered ensure the scope includes the entire cluster
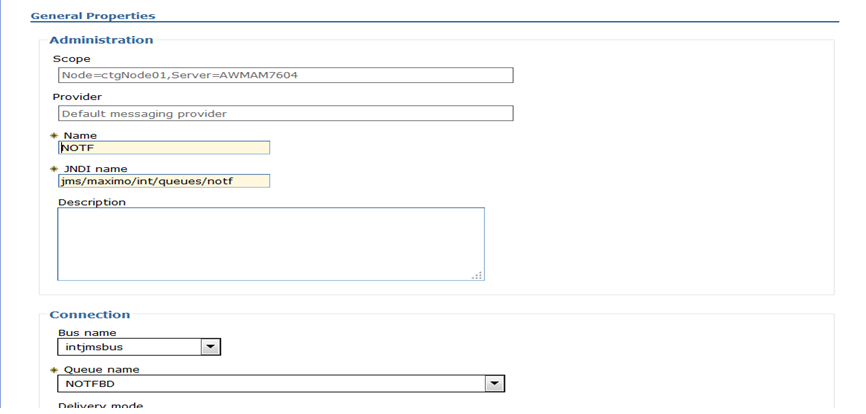
10. Fill in the following queue details
Name: NOTF
JNDI name : jms/maximo/int/queues/notf
Bus Name: Select the bus you want to set the destinations up on (intjmsbus)
Queue Name: NOTFBD
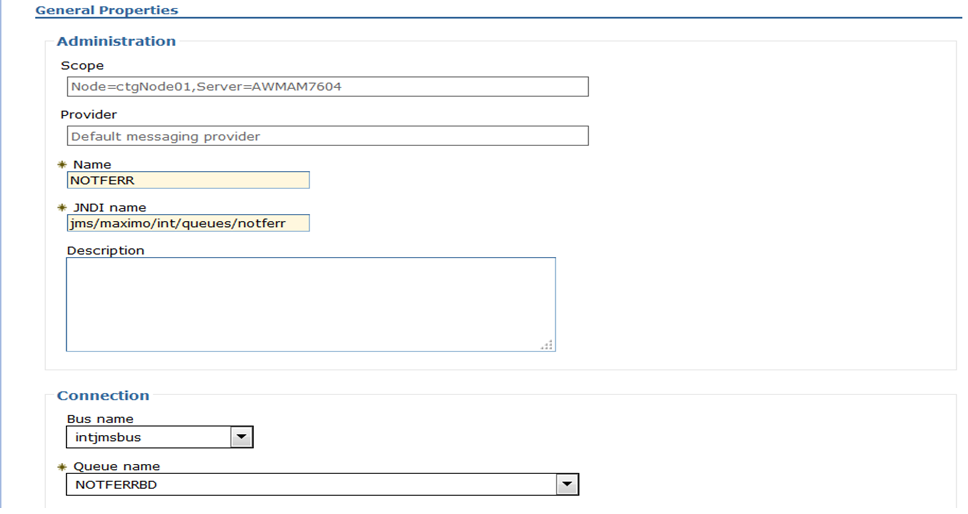
11. Repeat the steps 8 - 10 above for the error queue, entering the following details
Name: NOTFERR
JNDI name:jms/maximo/int/queues/notferr
Bus Name:Your integration bus name
Queue name: NOTFERRBD
12. Now we will create the notification activation specs. From the WebSphere console expand Resources -> JMS -> Activation Specifications then choose your scope and click on 'New'
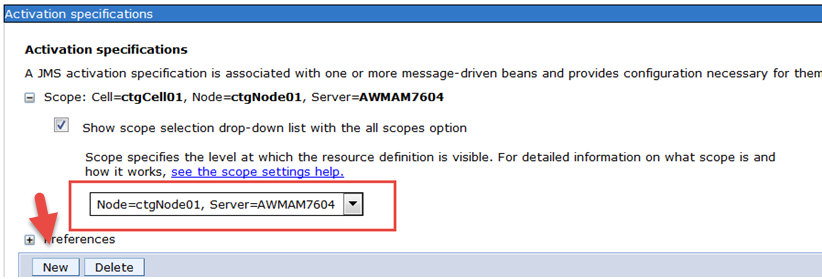
13. Enter the following information for your first activation specification
Name : notfact
JNDI Name : notfact
Destination type: queue
Destination JNDI name : jms/maximo/int/queues/notf
Bus Name: your JMS bus (intjmsbus)
Maximum batch size : 10
Maximum concurrent MDB invocations per endpoint : 5

14. Repeat steps 12 and 13 if you created and error queue for notifications
Name : notfacterr
JNDI Name: notfacterr
Destination type: Queue
Destination JNDI name : jms/maximo/int/queues/notferr
Bus Name: your JMS bus (intjmsbus)
Maximum batch size : 10
Maximum concurrent MDB invocations per endpoint : 5

This concludes the JMS portion of the push notification configuration, we will now move on to Configuring the Maximo Application.
Configuring Maximo to use the notification queues
Now that are queues are configured in WebSphere we need to update the Maximo MDBs to reference the activation specifications we created.
1. Go to IBM\SMP\maximo\applications\maximo\mboejb\ejbmodule\META-INF and in this folder you will see 4 files.
ejb-jar.xml
ejb-jar_notf.xml
ibm-ejb-jar-bnd.xmi
ibm-ejb-jar-bnd_notf.xmi
Back up ejb-jar.xml and ibm-ejb-jar-bnd.xmi to another folder then rename the _notf files.
Ibm-ejb-jar-bnd_notf.xml is renamed to ibm-ejb-jar-bnd.xmi
Ejb-jar_notf.xml is renamed to ejb-jar.xml
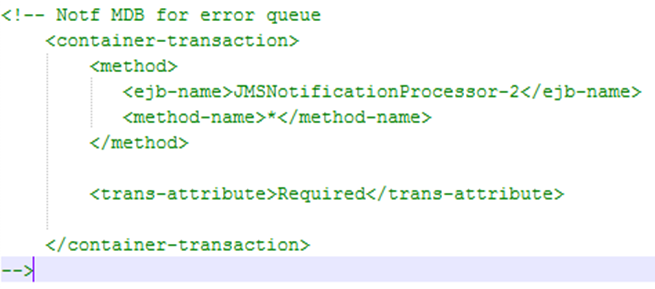
2. Open your newly renamed ejb-jar.xml and remove the comments for the MDB sections as seen in the screenshots below. If you did not create the NOTFERR queue then leave the MDB for it commented.

3. In the same file ensure the following sections have there comments removed.

Once you have removed the comments in the four sections you can save the file. As mentioned previously if you didn't create the error queue then leave the error queue sections commented similar to what you see below.
4. Now open the renamed ibm-ejb-jar-bnd.xmi file and remove the comments for it's NOTF sections as you see in the image below. Again leave the NOTF error queue commented if you did not created it.

5. Once complete save the file then rebuild and redeploy your Maximo.ear file. Maximo should now be able to interact with the notification queues in WebSphere.
Configuring Maximo Endpoints, Publish Channels and External Systems
1. Once the Maximo ear is deployed log in to the Maximo application, from the Go To Menu select Integration - > End Points and hit enter. You will see two new end points with Maximo Anywhere 7.6.1 and that is AW_IN_EM and AW_WE_EM, these are for the Work Execution and Inspection applications.
2. Click on AW_WE_EM and fill out the following properties
Username: The username used to log in to the MobileFirst console
Password: The MobileFirst users password
URL: URL of the MobileFirst server, replace localhost with the server name and if your runtime was re-named replace MaximoAnywhere with the runtime name
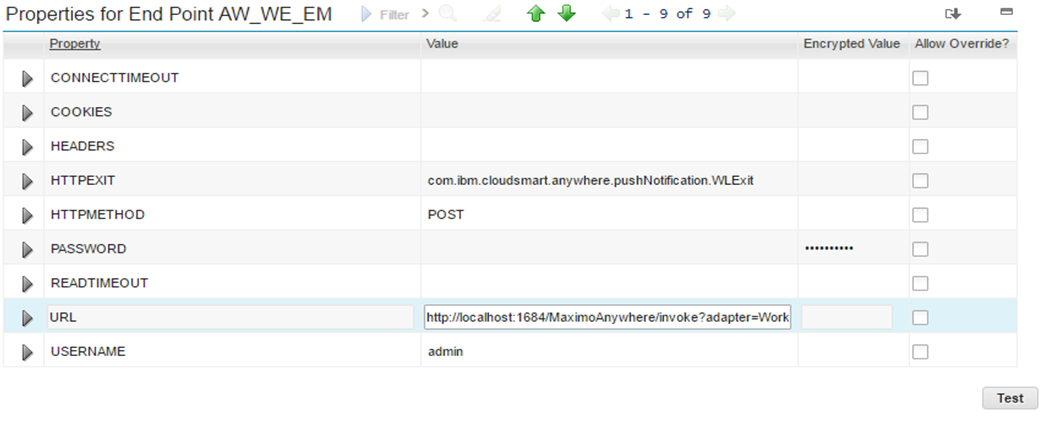
3. Repeat the above steps for the AW_IN_EM inspections end point.
4. From the Go To menu choose Integration - > Publish Channels and search for MXNOTIFICATIONInterface and open the Publish Channel
5. From the Select Action menu click on ‘Enable Event Listener’ then save the record. This will tell our publish channel to listen for specific events that trigger our outbound message to the notification queue.

6. Our last step is to ensure the External System for notification is active and pointing to our queue. From Integration - > External Systems search for and select NOTIFICATION. Ensure the Outbound Sequential Queue reference the notf queue and enabled is checked.

The publish channel tab should have the NOTIFICATION publish channel reference your anywhere notification end points.
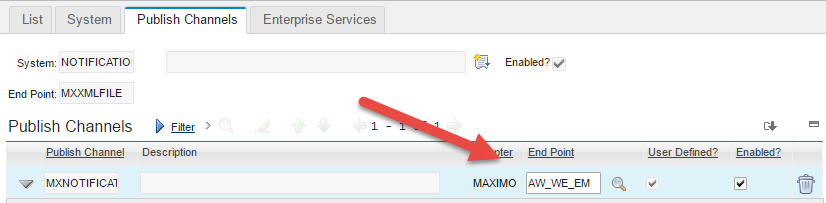
One thing to note is the Publish Channel on an external system must be unique, so if you want to ad the Inspections end point as well, you can create a new external system to reference another MXNOTIFICATION publish channel with the AW_IN_EM end point.
Now we will move on to Maximo Anywhere and MobileFirst
Configuring Maximo Anywhere / MobileFirst 7.1
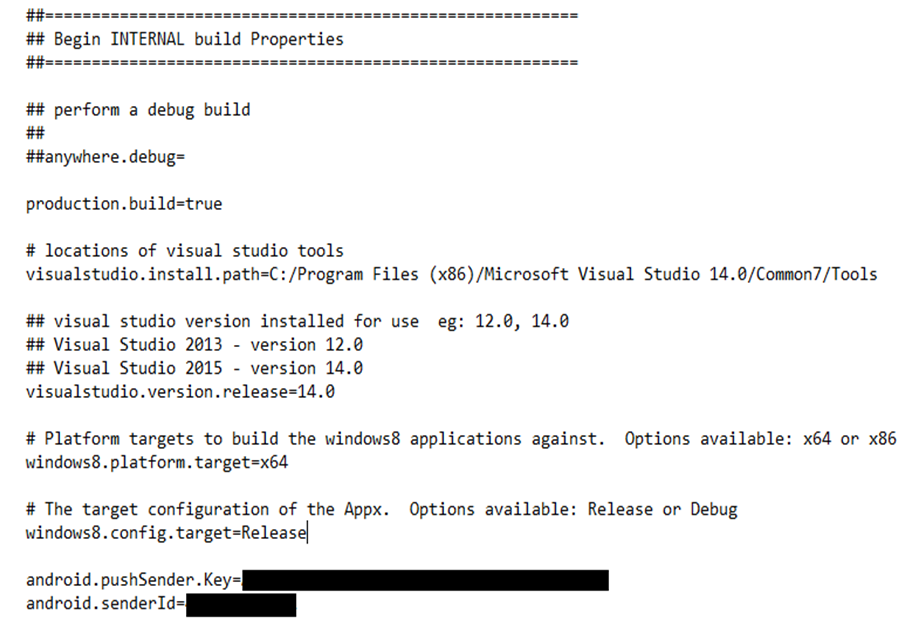
1. Now that Maximo and WebSphere are configured we need to enable the Maximo Anywhere application to use our push senderid for GCM and our API key. You will need to follow slightly different steps for this part if using iOS which I will note in another doc. The first thing we need to do for Android is add two properties to the build.properties file located in the following folder Ibm\Anywhere\MaximoAnywhere\build.properties.
The properties are
- android.pushSender.Key
- android.senderid
I noted where to get these properties in a previous blog : Maximo Anywhere 7.6.1 Push Notifications - Obtaining the GCM SenderID and API Key. Your updated file should look like the following, but with your id and key.
2. Save the file and run 'build all' in a command prompt from the IBM\Anywhere\MaximoAnywhere folder.
3. Once the build is finished you will need to redeploy the runtime using the MobileFirst Server Configuration tool which is located in the IBM\MobileFirst_Platform_Server\WorklightServer\ConfigurationTool folder. Choose the option to replace the project war file from the configuration panel.
4. Once the runtime is deployed and the server restarted log in to the MobileFirst console and click on the Push Notifications Tab at the top of the page.

5. Click on View More
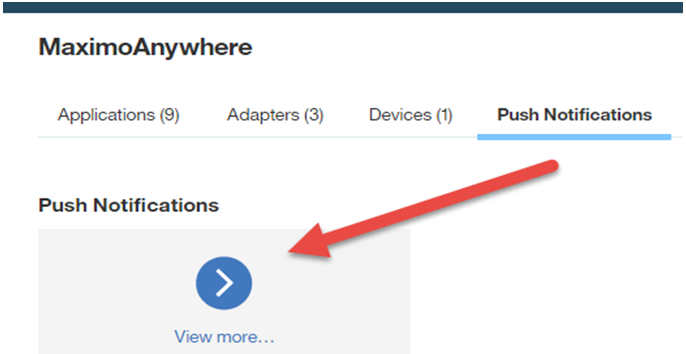
6. You should now see both your notification adapters and both applications that are registered with the API Key and Sender ID. Once you have download the updated APK and logged in to the application your device will show registered. You likely won’t have any messages at this point but once messages are sent through the queues and routed to MobileFirst you should see it's count on this screen

Testing notifications
Notifications can be configured in the Anywhere Administration application on the notification tab for the enabled Anywhere application, click on the WEEMERGENCYWORK event to see the out of the box configuration.

The Event Condition shows the attributes involved and the where clause defined. As we see below a notification will be sent when a Work Order is assigned to you that is an EM work type with a status of approved.

Once that condition is triggered you will see a notification on your device similar to below.

I hope this was informative and as it is quite detail there could be some things that were missed, so as always any questions comments or concerns post below.
UID
ibm11113765