How To
Summary
This document shows you how to restore select data saved to the cloud using BRMS.
Steps
First, be sure you have the latest BRMS PTFs and the latest Cloud Storage Solutions for i PTFs on your system:
Since the volumes are in the cloud, they need to be retrieved before data can be restored. This can be done as part of the restore, or prior to the restore. You can do a typical restore from WRKMEDIBRM or STRRCYBRM. BRMS will automatically retrieve the volumes needed before the restore starts. If your restore requires multiple volumes, It retrieves these volumes from the cloud one at a time, all volume(s) required for the restore need to be retrieved before the save starts. This can take significant time if you are retrieving several large volumes. Alternatively, you can use WRKMEDBRM to retrieve all of the volumes before starting the restore. This submits the copy from cloud requests to batch, so you can retrieve more than one at a time, reducing the total time needed to retrieve the volumes.
Tip: If you increase your TCP buffer sizes, the transfers may go considerably faster depending on your system, resources, and network. The default size is 65535, to see what your system has, prompt the CHGTCPA command, for TCP receive buffer size and TCP send buffer size, change them to 524288. You can try different sizes to find the size that works best for your environment.
Let's look at some examples:
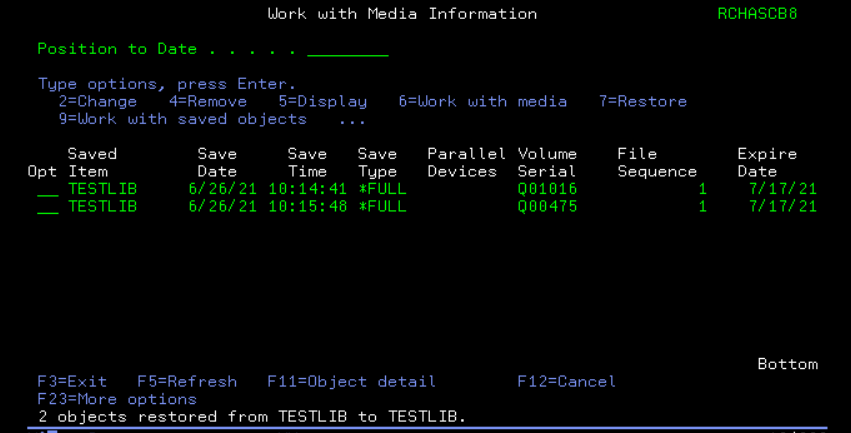
Example 1 - Restore 1 library from one volume using WRKMEDIBRM.
- Execute command WRKMEDIBRM LIB(xxxxxxxx) using the library you want to restore
- Locate the copy of the library you want to restore and use option 7 restore. The restore will not start yet:

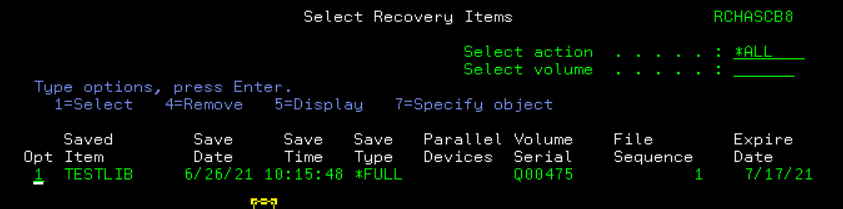
- This brings up the Select Recovery Items screen with option 1 preselected. Do not press enter yet, option 1 should only be used if you want to recover the entire library.
- Before restoring the library, press F9 to review the recovery defaults, make any desired changes (including the restore to library if you want to restore to a different library), and press enter. Back Work with Media Information screen, If you want to restore the entire library press enter. If you only want to restore select objects, use option 7 to specify object. This will prompt the RSTOBJ command, fill out parameters as desired (including the restore to library if you want to restore to a different library) and press enter.
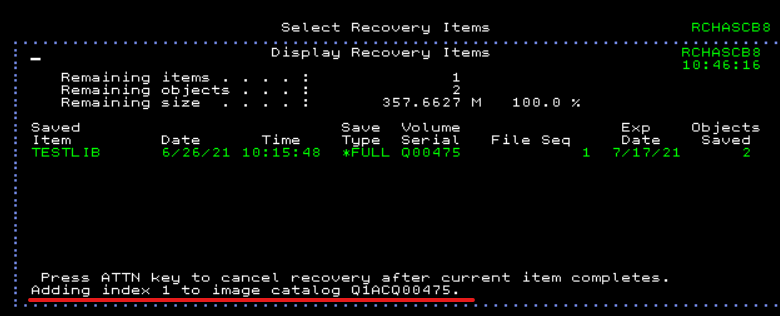
- For this example, we will use the preselected option 1 to restore the entire library. When you press enter, it will bring up the Select recovery items screen, you will see at the bottom of the screen 'Adding index 1 to image catalog', at this time it is retrieving the volume from the cloud (unless the volume has already been retrieved):
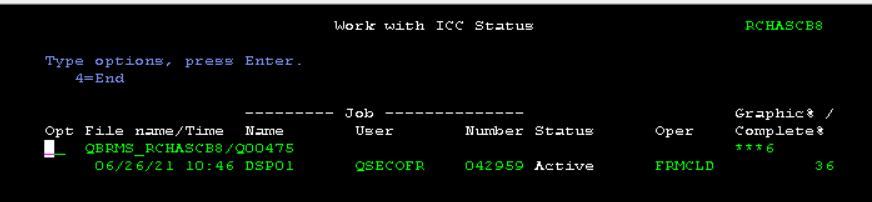
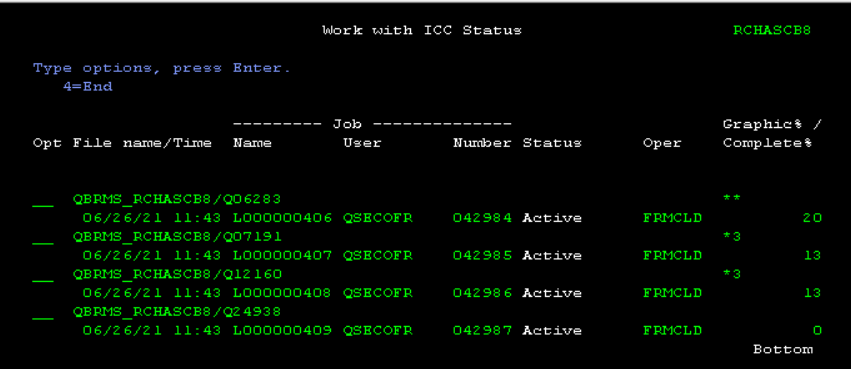
- If you were to do a WRKSTSICC *ALL *ALL from another session, you would see the volume being transferred. This could take a long time depending on the size of your volume:
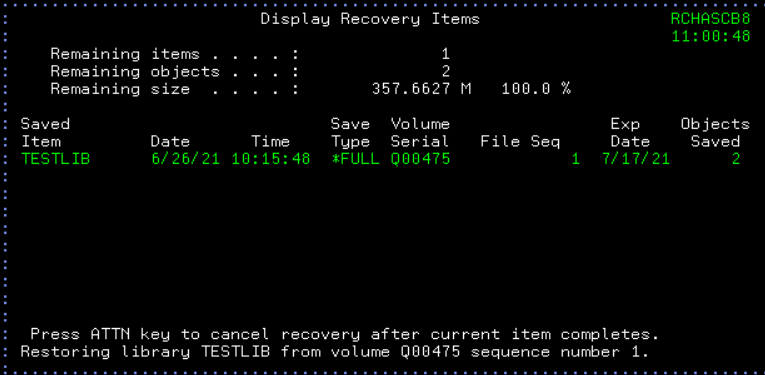
- After the transfer completes, you will see it restoring the library:
- When the restore completes, you see:
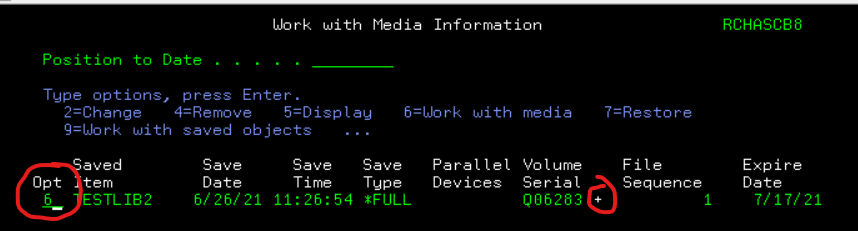
Example 2 - Retrieve multiple volumes using WRKMEDBRM then do the restore using WRKMEDIBRM
- Execute command WRKMEDIBRM LIB(xxxxxxxx) using the library you want to restore that is on multiple volumes. Notice the plus sign next to the volume number to indicate the library is on multiple volumes. Select option 6 to work with the volumes
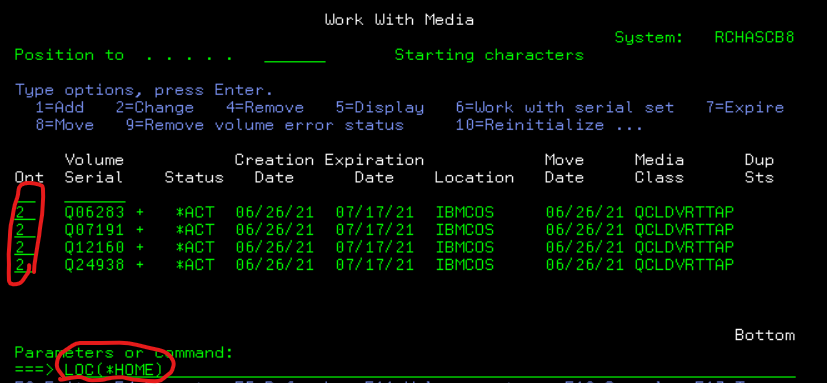
- All these volumes are needed before the restore can be performed. To retrieve the volumes from the cloud, from the Work with media screen, select option 2 on each volume, then on the command line type LOC(*HOME) and press enter:
- The volume location will change to *HOME, and the status will be *TRF:
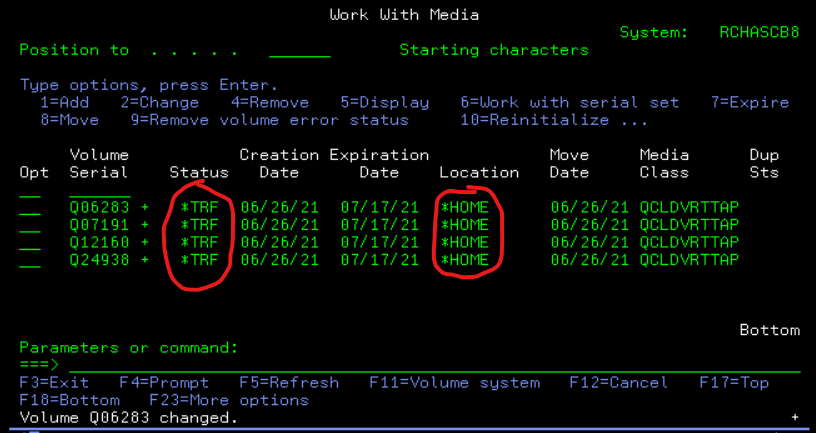
- You must wait until the volumes are in status *ACT to perform the restore. You can refresh the screen to check the status, or do WRKSTSICC *ALL *ALL to see the progress:
- When all the volumes have completed transfer, press F12 on the Work With Media screen to return to the Work with Media information screen. If you are no longer in it, again do the WRKMEDIBRM LIB(xxxxxxxx) using your library. You can now take option 7 to restore, then option 1 to restore the entire library or option 7 to restore selected objects. See Example 1 for steps if you are unfamiliar.
Note: When using smaller tape volume sizes, there are reporting limitations in BRMS if more than 50 volumes are used for the backup. If more the 50 volumes are used, the Media_Set_Info table function may be used to return the serial media set information.
- https://helpsystemswiki.atlassian.net/wiki/spaces/IWT/pages/195003161/Transfer+Media+From+the+Cloud
Document Location
Worldwide
[{"Type":"MASTER","Line of Business":{"code":"LOB57","label":"Power"},"Business Unit":{"code":"BU058","label":"IBM Infrastructure w\/TPS"},"Product":{"code":"SWG60","label":"IBM i"},"Platform":[{"code":"PF012","label":"IBM i"}],"Version":"7.3.0"}]
Was this topic helpful?
Document Information
Modified date:
21 February 2023
UID
ibm16467513