How To
Summary
To update the Cloud Extender Configuration tool to reflect the updated Exchange Server hostname.
Note: It is not required to have a Cloud Extender to push mail configuration. The Cloud Extender is used for syncing records to the IBM MaaS360 portal.
Environment
Migrating mailboxes in stages, large Exchange Environment, or Hybrid Environment additional Cloud Extender(s) required.
-Installing the Cloud Extender: https://www.ibm.com/docs/en/maas360?topic=guide-installing-cloud-extender
-Configuring the Cloud Extender: https://www.ibm.com/docs/en/maas360?topic=extender-configuring-cloud
-Exchange ActiveSync Module: https://www.ibm.com/docs/en/maas360?topic=modules-exchange-module
-Multiple Cloud Extenders for Exchange Integration: https://www.ibm.com/docs/en/maas360?topic=integration-multiple-cloud-extenders-exchange
Steps
Exchange 2010
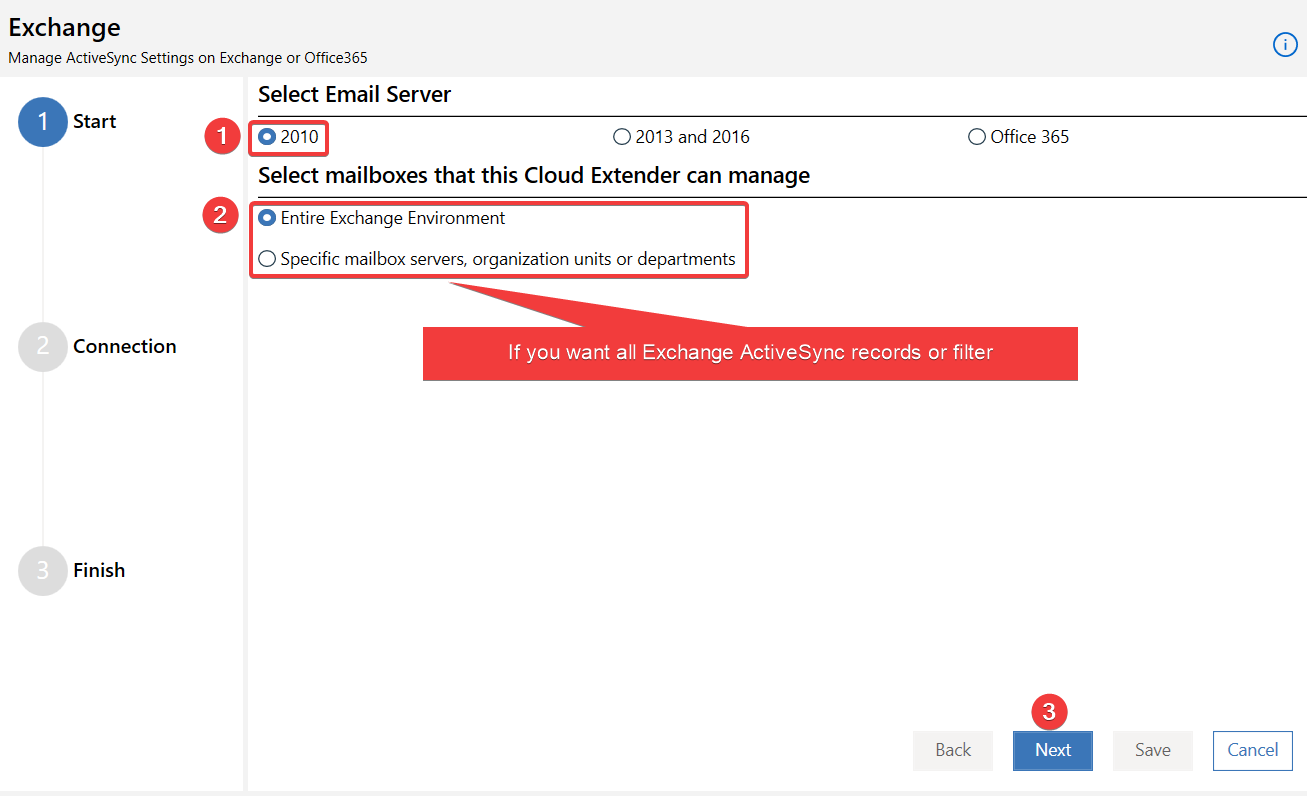
1. In the Cloud Extender Configuration Tool, select the Exchange tile.
2. Select 2010 -> Select mailboxes that this Cloud Extender can manage
3. Click Next
4. Enter the new server hostname. Select Use SSL to have the Remote PowerShell URL include https rather than http (might not be needed).
Ensure the service account has the correct permissions
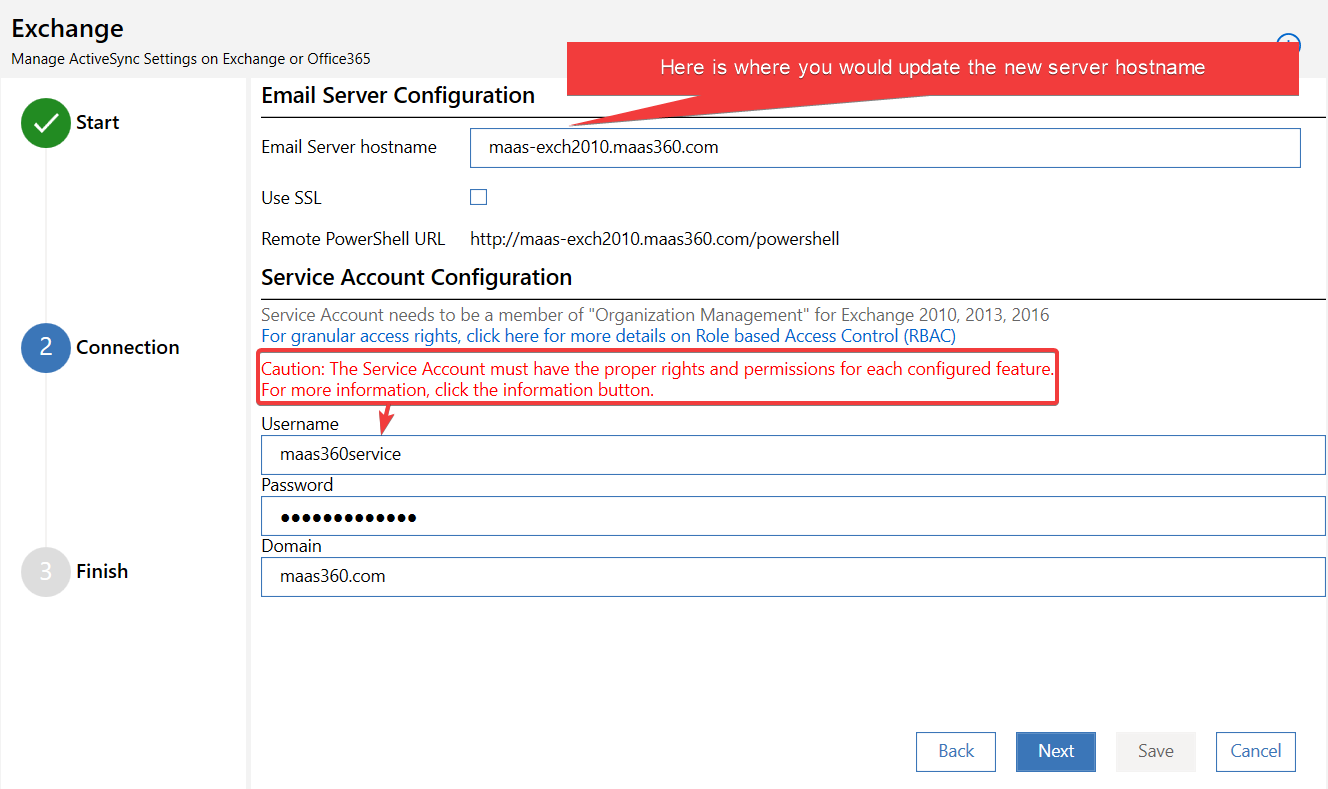
5. Click Next and Finish.
IMPORTANT: Email configuration in the policy needs to be updated: https://www.ibm.com/support/pages/node/6449700
Exchange 2013 and 2016
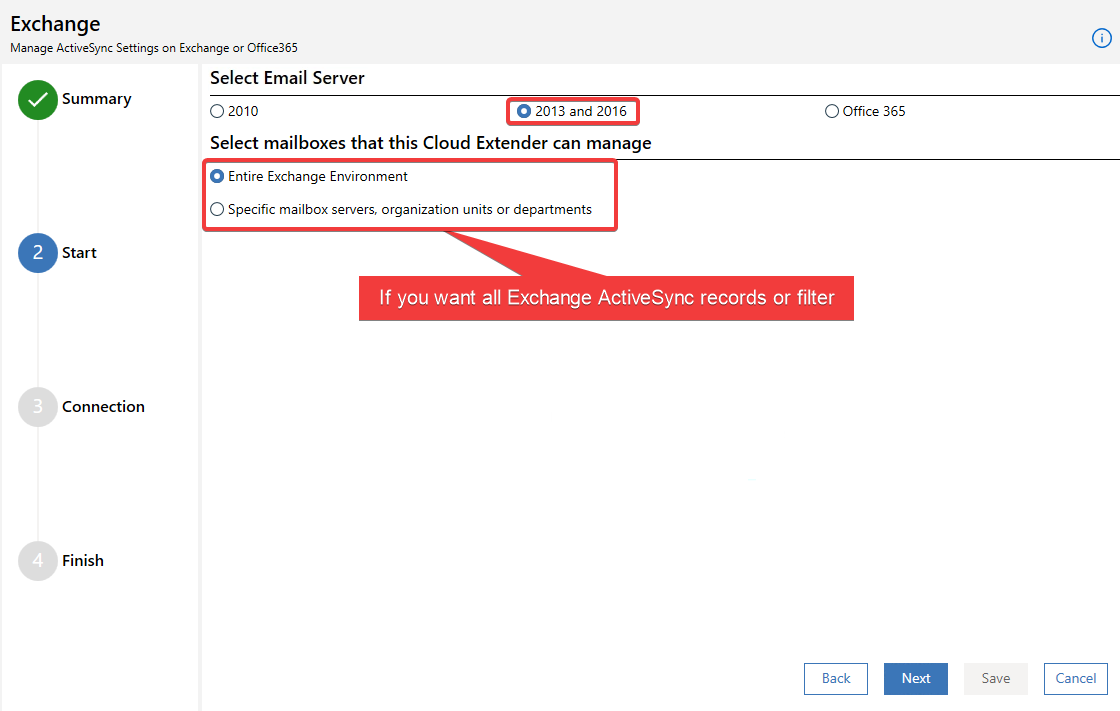
1. In the Cloud Extender Configuration Tool, select the Exchange tile.
2. Select 2013 and 2016 -> Select mailboxes that this Cloud Extender can manage
3. Click Next
4. Enter the new server hostname. Select Use SSL to have the Remote PowerShell URL include https rather than http (might not be needed).
Ensure the service account has the correct permissions
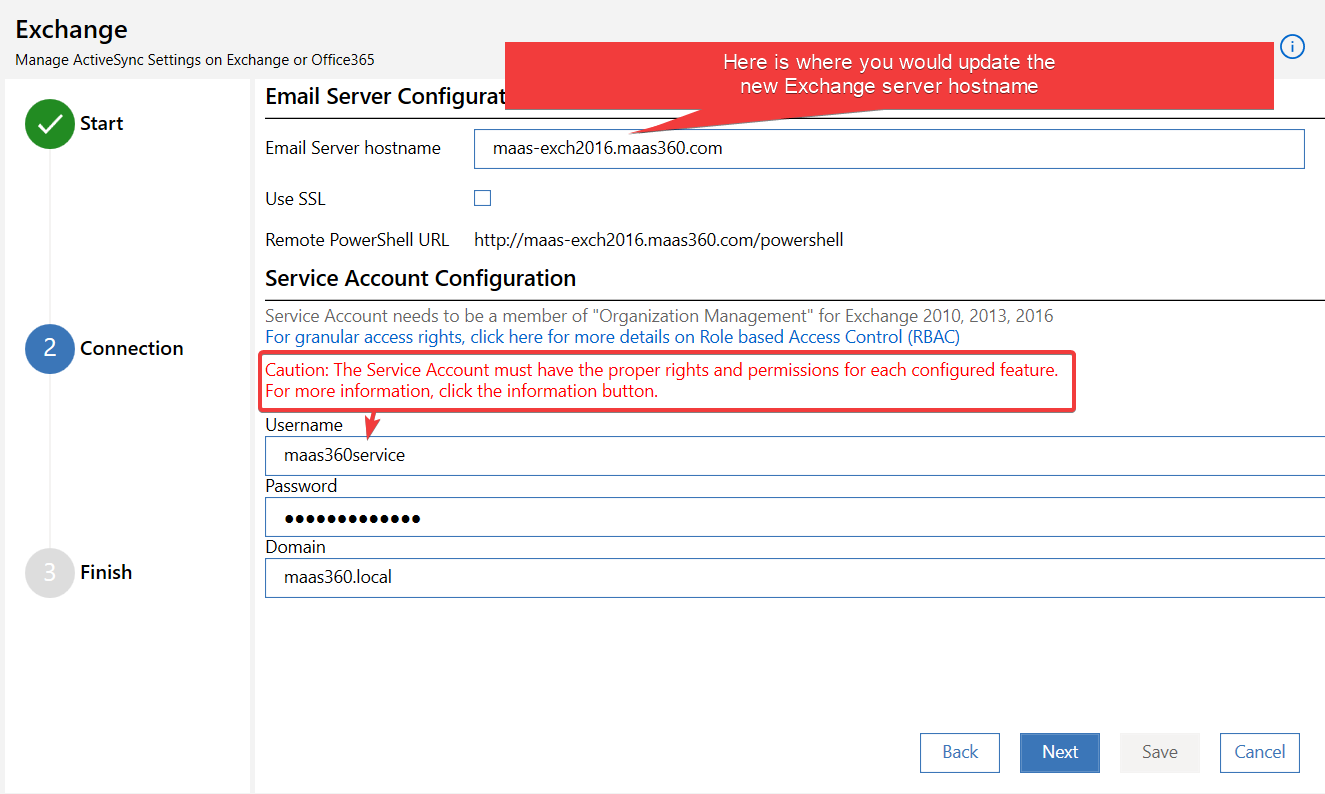
5. Click Next and Finish.
IMPORTANT: Email configuration in the policy needs to be updated: https://www.ibm.com/support/pages/node/6449700
Office 365
1. In the Cloud Extender Configuration Tool, select the Exchange tile.
2. Select Office 365 -> Next


4. Validate All Accounts
5. Click Next and Finish
IMPORTANT: Email configuration in the policy needs to be updated: https://www.ibm.com/support/pages/node/6449700
Document Location
Worldwide
Was this topic helpful?
Document Information
Modified date:
10 May 2021
UID
ibm16450871