IBM Support

Applying Customization Archive into IBM Maximo Manage

How To


Summary

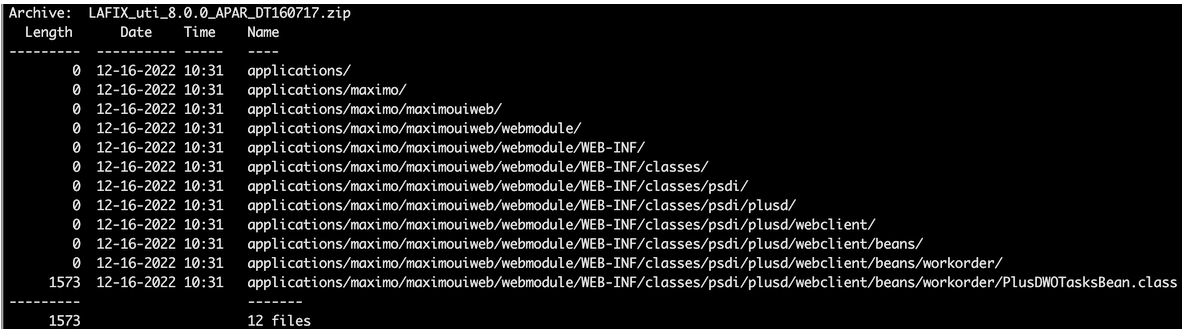
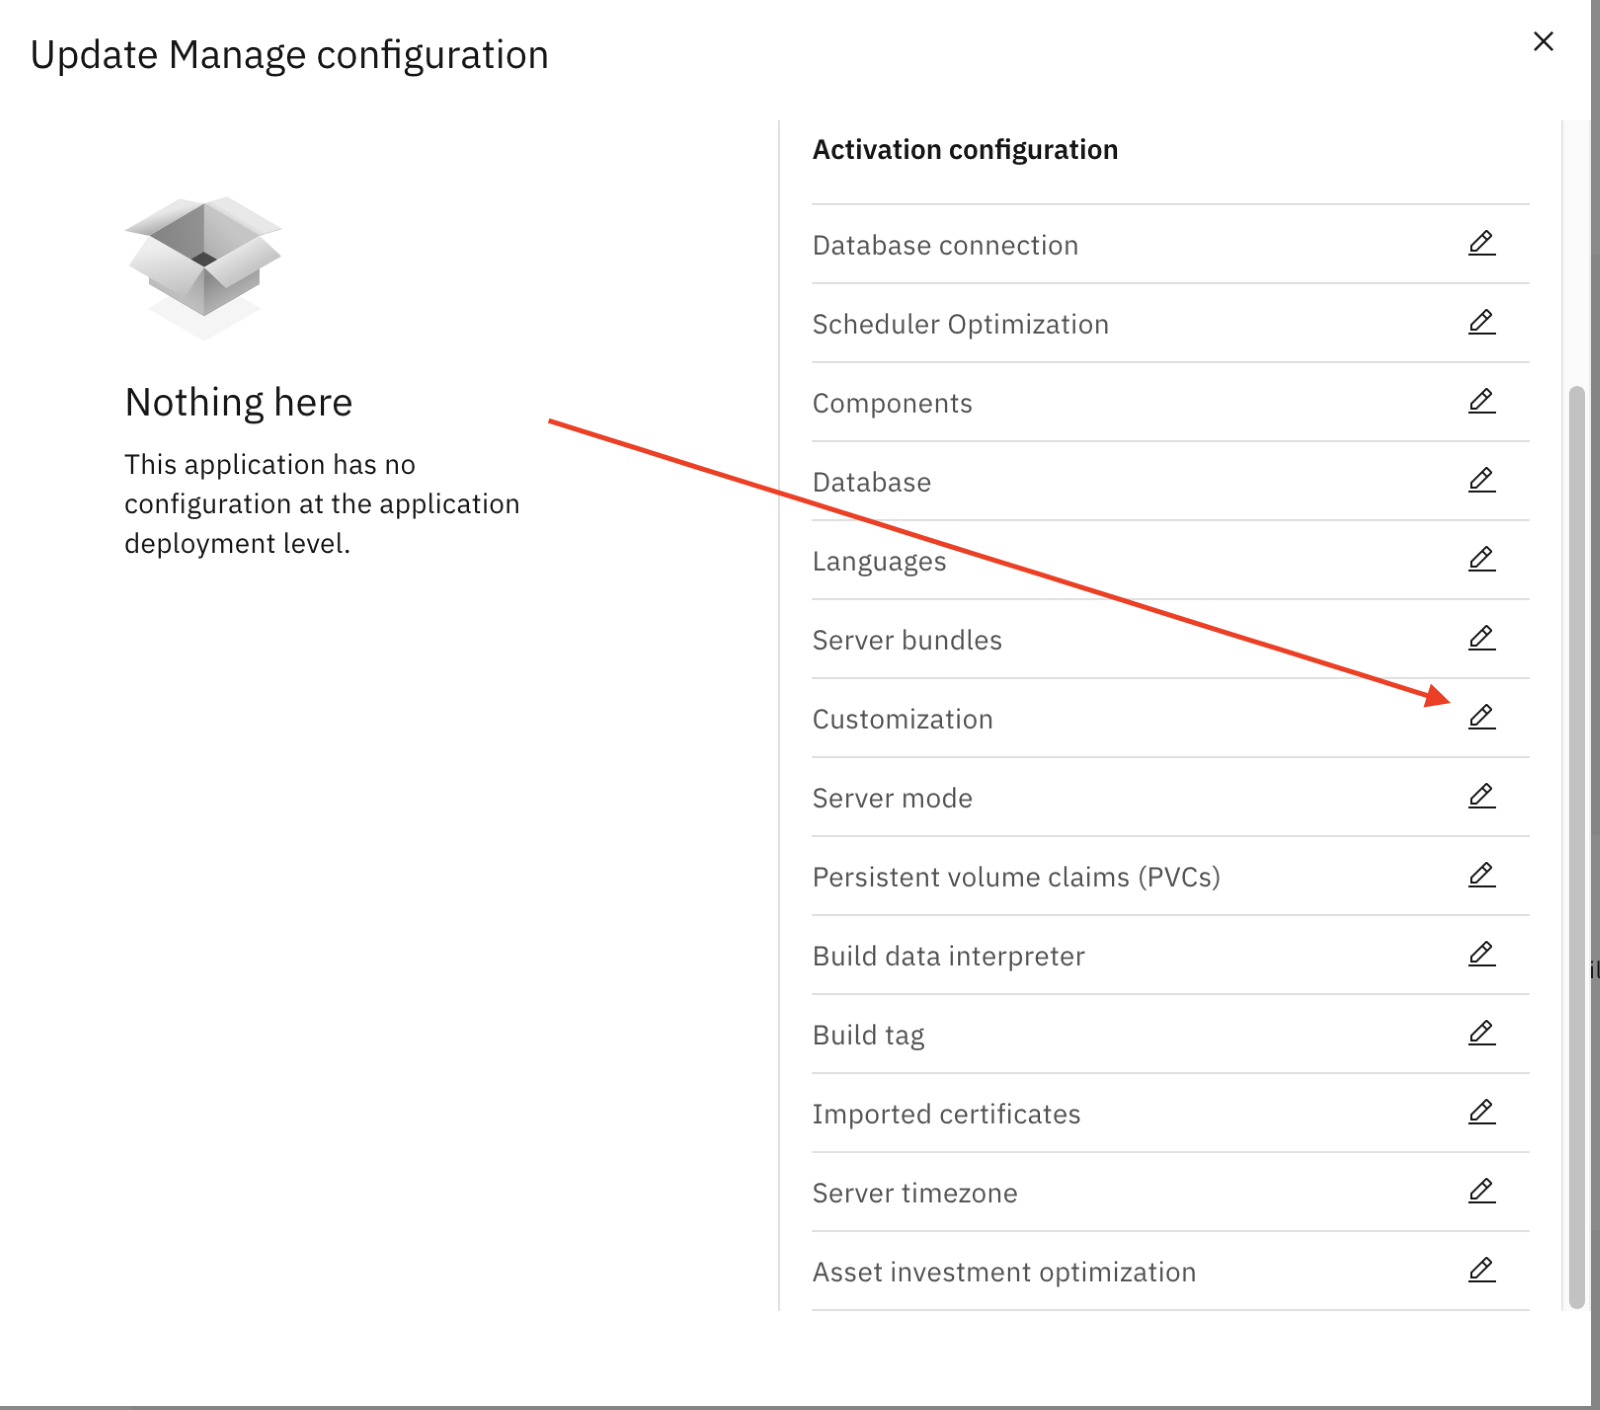
This document guides users to apply a customization archive to their IBM Maximo Manage instance. The same steps can be used to apply a LAFIX .zip file, provided by IBM support.

Objective

This document guides users to apply a customization archive to their IBM Maximo Manage instance via IBM Maximo Application Suite Admin Dashboard or directly in the Manage CR via RedHat OpenShift console.

Steps

A. Applying Customization Archive into IBM Maximo Manage via IBM Maximo Application Dashboard
Prepare your archive as usual for classic Maximo, keeping the folder structure from Maximo root folder perspective.
For example:
Archive name: LAFIX_uti_8.0.0_APAR_DT160717.zip (it could be any name)
Note: In this example there is only one class (PlusDWOTasksBean.class) inside the expected folder structure.
image-20231025174810-1
Upload it to Box (or whatever endpoint that could be downloaded without authentication by the OCP cluster). In Box, make sure to do the following:

image-20221216112514-1
image-20221216112729-1
image-20221216113420-1
image-20221216113528-2
image-20221216113615-3
Access the Admin UI in IBM Maximo Application Suite:
e.g.: https://admin.apps.<CLUSTER NAME>.ibm.com
1. Click Catalog -> Manage:
image-20231025171126-1
2. Click Actions -> Update Configuration:
image-20231025171310-2
3. Scroll down to Customization and click Edit:
image-20231025171401-3
4. Under Customization section, uncheck System Managed option then paste the URL to the customization archive: 
image-20231025171547-4
5. Scroll up and click Apply Changes:
image-20231025171747-5
6. In the OCP Console, head to Workloads -> Pods, then filter by the mas-<MAS NAME>-manage project. You should see a new pod called admin-build-config-x-build being created:
image-20231025171855-6
8. Click the build pod, then select Logs tab and watch it until it is Completed.
image-20231025172112-7
9.  It could take up to 2 hours to complete, but can be faster than that.

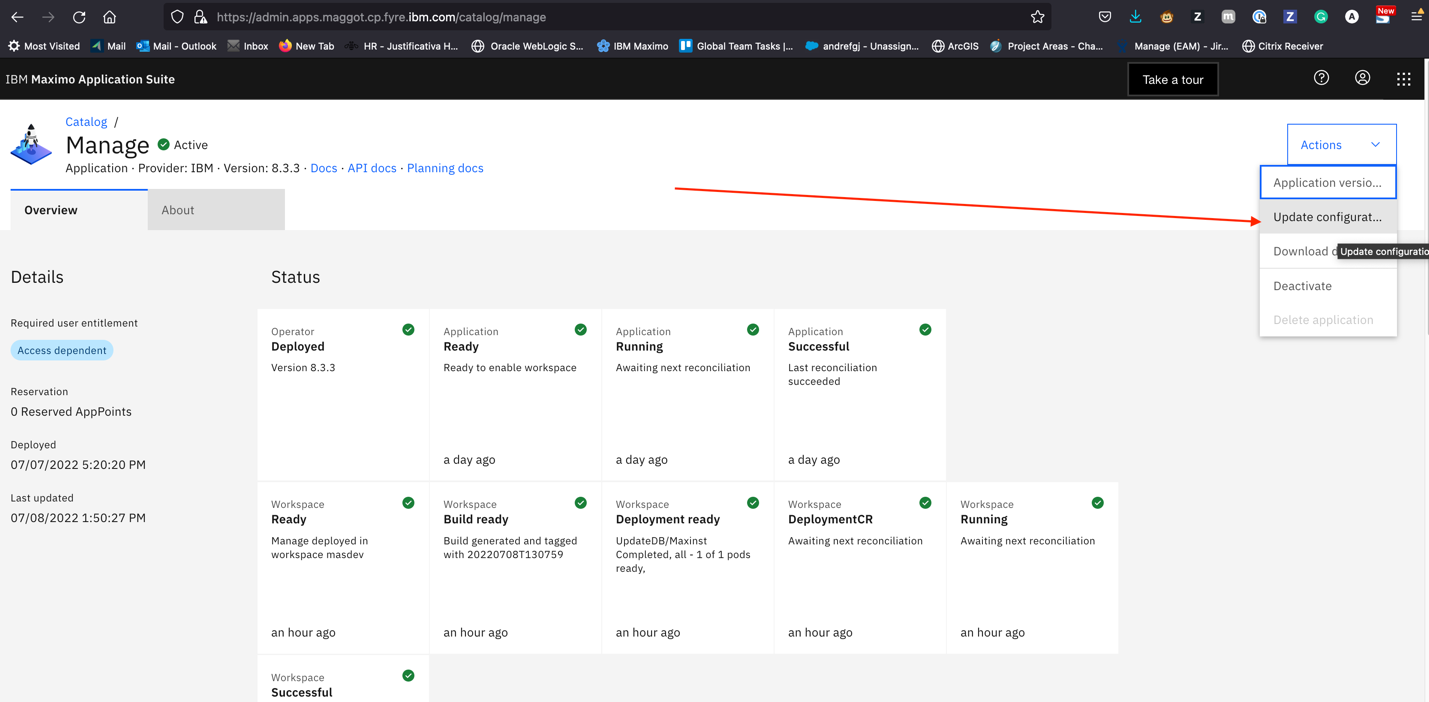
B. Steps to configure a customization archive file in Manage deployment via RedHat OpenShift console

The steps described will explain how to configure a customization archive directly in Manage Workspace instance, instead of using the MAS Admin UI console for that. A customization archive is generally used to customize Manage files to be included as part of Manage installation and deployment.
1.    Login to Openshift console, and go to Administration > CustomResourceDefinitions, then Search and select ManageWorkspace.

image-20231025172619-9

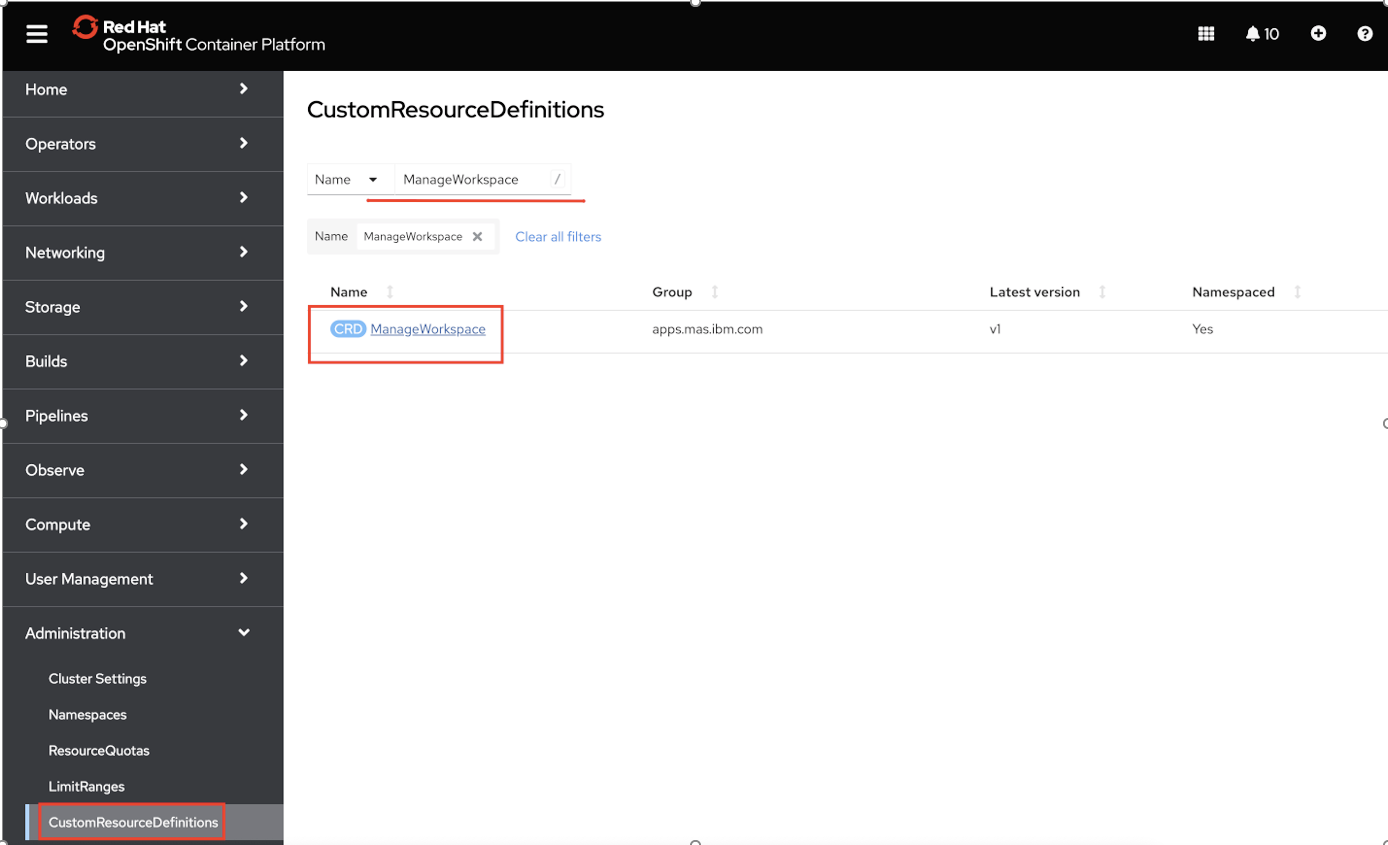
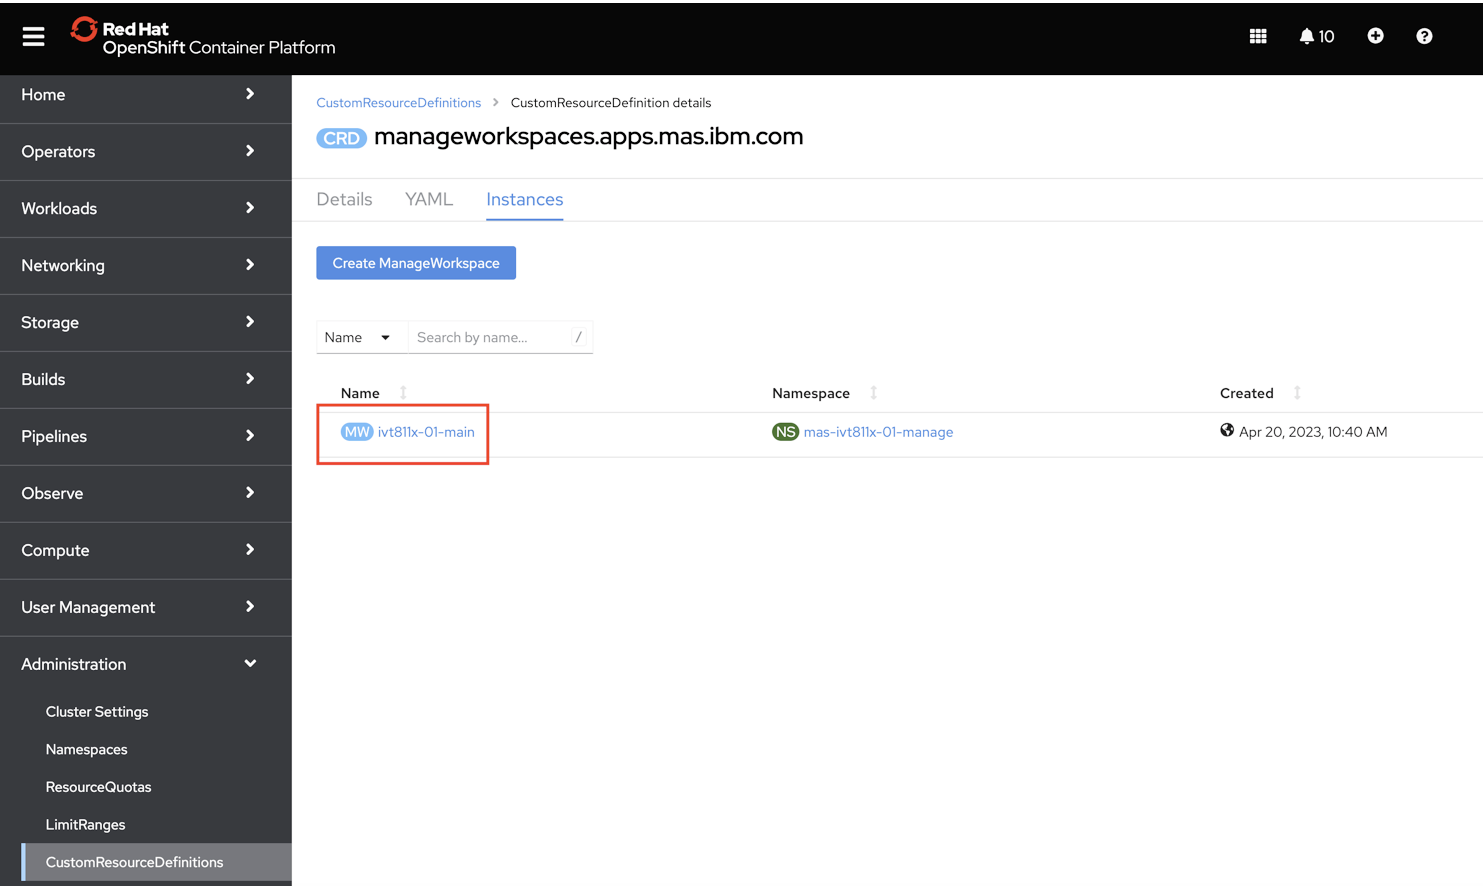
2.   Select the ManageWorkspace instance corresponding to your MAS instance.

image-20231025172739-10

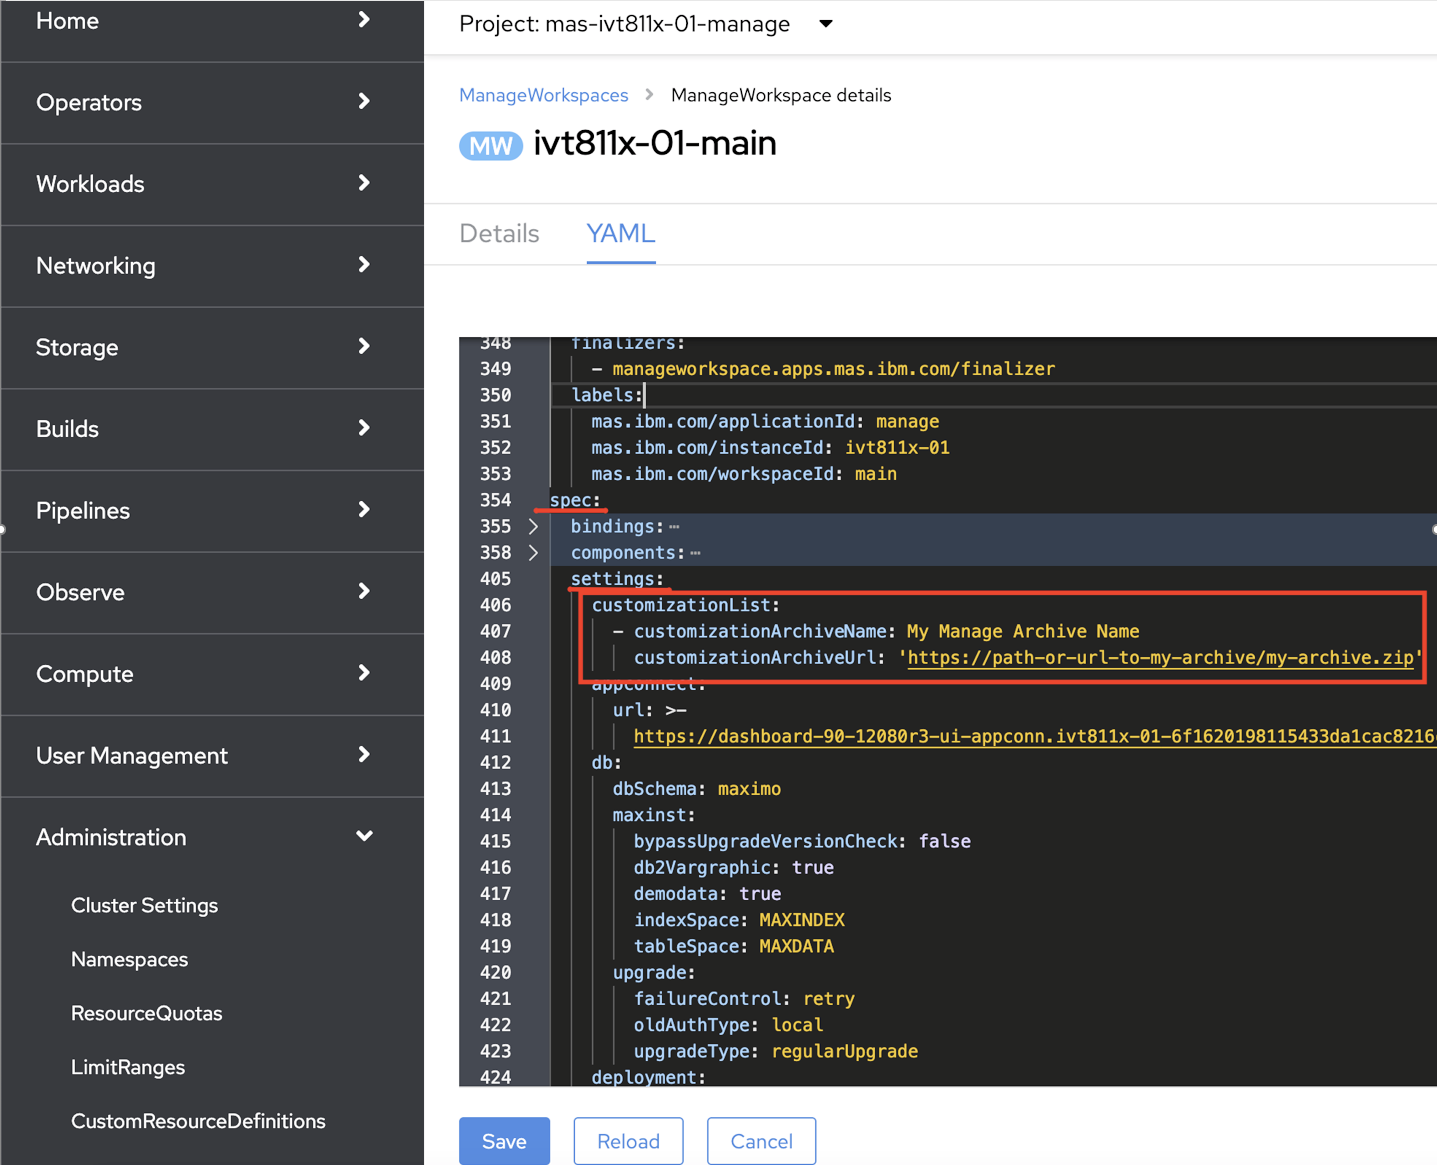
3.    Go to YAML tab, and append the CustomizationList property which will hold the customizationArchiveName property (any given name for your archive) and customizationArchiveUrl (the specific path or url for the archive file) under spec.settings property, as the example:

image-20231025172938-11

4.  Save the YAML file. At this point, Manage deployment process will be started to reconcile and apply the new custom archive. This process may take several minutes depending on the number of files that are included with your customization archive, but it is expected that the Manage application servers will be restarted during the update, so it is recommended to plan ahead for a potential downtime window.

Related Information

Document Location

Worldwide

[{"Type":"MASTER","Line of Business":{"code":"LOB59","label":"Sustainability Software"},"Business Unit":{"code":"BU059","label":"IBM Software w\/o TPS"},"Product":{"code":"SSRHPA","label":"IBM Maximo Application Suite"},"ARM Category":[{"code":"a8m3p0000006xL0AAI","label":"Maximo Application Suite-\u003EMAS Applications-\u003EManage-\u003EDeployment"}],"ARM Case Number":"","Platform":[{"code":"PF025","label":"Platform Independent"}],"Version":"All Versions"}]

Document Information

Modified date:
25 October 2023

UID

ibm17059848