Edit Data
Edit provides several ways to edit data in the Table Editor. You can edit one or more tables at the same time. After you edit data in a row, move the pointer to a different row to commit the data.
Editing Tools
In addition to overtyping column data in a grid cell, you can use shortcut menu commands to perform the following editing functions.
Replace
Use Replace to substitute one string or value for another.- Right-click in a grid column heading and select Replace from the shortcut menu to open the Replace dialog.
- On the Criteria tab,
- Specify the string or value you want to replace and the string or value to use as the replacement.
- Select a direction for the search (up or down).
- Select matching options, as needed (that is, whole word, case-sensitive).
- On the Columns tab, select the grid columns you want to search. The column in which you right-clicked is selected by default.
- Select Find Next to begin the search.
- Select Replace to replace items one at a time or select Replace All to replace all occurrences of the specified value.

Insert
Right-click a row and select Insert from the shortcut menu to insert a blank row following the row you right-clicked. The related primary key value is inserted automatically in the foreign key column for a database relationship or in the appropriate columns for an Optim™ relationship.Repeat
Right-click a row and select Repeat from the shortcut menu to insert an identical row immediately after the row you right-clicked. Modify the data in the unique index and primary key columns and, optionally other columns, to prepare the row for insertion into the database.Delete
Right-click a row and select Delete from the shortcut menu to delete the row. When you delete a row, Edit checks to ensure that deleting the row does not violate referential integrity rules. If a cascading delete or NULL results and the Warn on Cascade check box is selected, the Delete Confirmation dialog displays the names of tables affected by your action, including tables that are not part of the Edit Definition.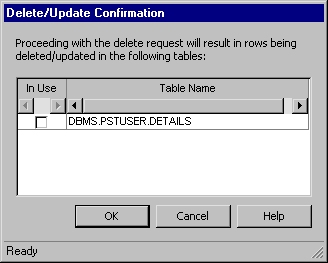
Retry
After you correct an error condition, you can right-click a row in Error status and select Retry to try to commit the row again.Change Case
Right-click a row and select Edit Cell then Lowercase or Uppercase from the shortcut menu to automatically change the case of text in a grid cell.- Lowercase
- Converts the column data in the cell to all lower-case letters.
- Uppercase
- Converts the column data in the cell to all upper-case letters.
Display Character
Right-click a cell and select Edit Cell, Display, Character from the shortcut menu to display the Column Data Display dialog. (For a CLOB, click the icon.) The Column Data Display dialog
displays data offset information and the character representation
of the data in the column. For more information, see Column Data Display.
icon.) The Column Data Display dialog
displays data offset information and the character representation
of the data in the column. For more information, see Column Data Display.Display Hexadecimal
Right-click a cell and select Display, Hex from the shortcut menu to display the character and hexadecimal representations of the column data. For a LOB, click the icon.
For more information, see Column Data Display.
icon.
For more information, see Column Data Display.The digits that make up the hexadecimal representation of each character are displayed on the lines below that character. For binary columns, the hexadecimal representation is displayed on two lines (the character line contains no data and is shaded). For CLOB columns, the hexadecimal representation includes all bytes, including carriage returns, line feeds, and the byte order mark (BOM).
For the hexadecimal display of character columns, the following applies:
- UTF-16 and Extract File or Archive File data will display the hexadecimal representation on four lines.
- UTF-8 or multi-byte data will display the character
over the first byte, and a period will be displayed over any additional
bytes. For example, the UTF-8 French character À is displayed as two
bytes:
À.
C8
30Note:- For data in multi-byte format (for example, Oracle JA16SJIS), the character and hexadecimal representations are each displayed in different fonts and may not be aligned.
- For release 5.3 or earlier Extract Files and Archive Files, the hexadecimal representation is displayed on two lines only.
- You cannot edit data in UTF-8 or JA16SJIS format.
Column Data Display
Use the Column Data Display dialog to display a character or hexadecimal representation of data.

Data Offset displays the location of data, in bytes, from the beginning of the column or file. You can modify any of the data by overtyping it. Click OK to update the original data and put the row in Pending(Update) status. For a hexadecimal display of data in UTF-8 or multi-byte format, the number of bytes per line is displayed in parentheses, and if the number of characters displayed is greater or less than the number of characters displayed per row (as determined by the Characters per Row option), the offset and bytes per line are displayed in italic type.
- Options Button

- Click the options button to display the following:
- Characters per Row
- Select the number of characters to display per row: 64, 128, 256, or 512.
- Clear Data
- Remove data from the row. Available when text can be modified only.
- File Type
- For CLOB data only. If the correct encoding scheme
for the CLOB file is not displayed, select the encoding scheme, UTF-8
or UTF-16. For UTF-8, the hexadecimal representation is displayed
on two lines. For UTF-16, the hexadecimal representation is displayed
on four lines.
If a file does not include a byte order mark, the default encoding scheme is based on the data type, CLOB (UTF-8) or NCLOB (UTF-16).
Export LOB
Right-click and select Edit Cell, LOB Data, Export to export LOB data to a file. Enter a name for the Export File. This option is valid for Native LOBS only (refer to Large Object (LOB) Columns).
Import LOB
Right-click and select Edit Cell, LOB Data, Import to import the contents of a LOB file. Enter a name for the file to import. This option is valid in Edit mode, for Native LOBS only (refer to Large Object (LOB) Columns).
Set Null
Right-click and select Edit Cell, LOB Data, Set Null to set the contents of a Native LOB or truncated Non-Native LOB to NULL.