Enabling User Data Services
User Data Services (UDS) is installed with IBM Cloud Pak foundational services. However, after you install foundational services, you need to perform additional steps.
You can use the IBM UDS operator to create and manage Analytics Proxy or Analytics Proxy with Submodule custom resource (CR).
To create an instance of the Analytics Proxy or Analytics Proxy With Submodule CR, complete the following actions.
Online scenario:
Offline scenario:
Note: Before you create an instance of the Analytics Proxy CR, you must have User Data Services installed with IBM Cloud Pak foundational services.
Prerequisites
IBM UDS operator requires certified-operators catalog source in READY state (for both online and offline installation) as it installs RedHat Certified Crunchy Postgres for Kubernetes as a dependency.
Optional steps
-
Log in to the OpenShift cluster and switch to the
ibm-common-servicesproject. Run the following commands:oc login --token=<token> --server=<server-url>oc project ibm-common-services -
Create a secret named
mtls-proxy-secret, which has the client key and certificate to connect to IBM Proxy service.oc create secret tls mtls-proxy-secret --key client-key.pem --cert client.pem -
Create a secret named
uds-cert-secretto store custom domain certificate for UDS. This secret needs to be created only iftls.uds_hostvalue is set with your custom domain.oc create secret tls uds-cert-secret --key domain.key --cert domain.crt -
Create a secret named
submodule-cert-secretto store custom domain certificate for Submodule. This secret needs to be created only iftls.submodule_hostvalue is set with your custom domain.oc create secret tls submodule-cert-secret --key domain.key --cert domain.crt -
Create a secret named
airgap-cert-secretto store custom domain certificate for airgap. This secret needs to be created only iftls.airgap_hostvalue is set with your custom domain andairgappeddeployment.enabledvalue is set totrue.oc create secret tls airgap-cert-secret --key domain.key --cert domain.crt -
Create a secret named
external-db-configto store EnterpriseDB credentials. You need to create this secret only if you setdb_typetopostgres/edb.oc create secret generic external-db-config \ --from-literal=db_host=<host> \ --from-literal=db_name=<dbname> \ --from-literal=db_port=<db-port> \ --from-literal=password=<db-password> \ --from-literal=submodule_db_name=<submodule-db-name> \ --from-literal=user=<username> -
Create a secret named
external-db-certsto store certificate for EnterpriseDB. You need to create this secret only if you setdb_typetopostgres/edb.oc create secret tls external-db-certs --key dbtls.key --cert dbtls.crt
Installing Analytics Proxy custom resource
Learn how to install Analytics Proxy.
Note: Analytics Proxy is supported on Linux® x86_64 and Linux® on Power® (ppc64le).
By using the console
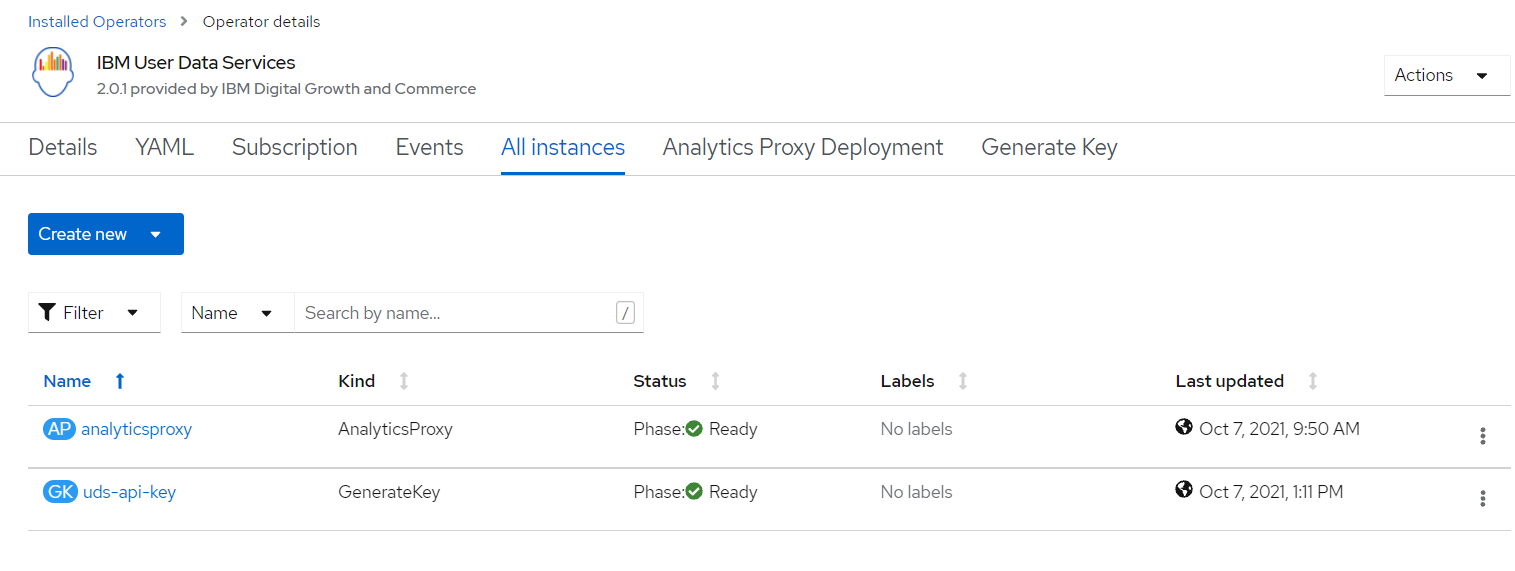
- From the navigation pane, click Operators > Installed Operators.
- Set the project to All Projects.
- Find and select IBM User Data Services.
- Click Create instance on the Analytics Proxy Deployment tile.
-
Select YAML View and update the YAML definition. To view a list of the parameters that you can configure in the
specsection, see List of configurable parameters.Following is an example of the YAML snapshot.
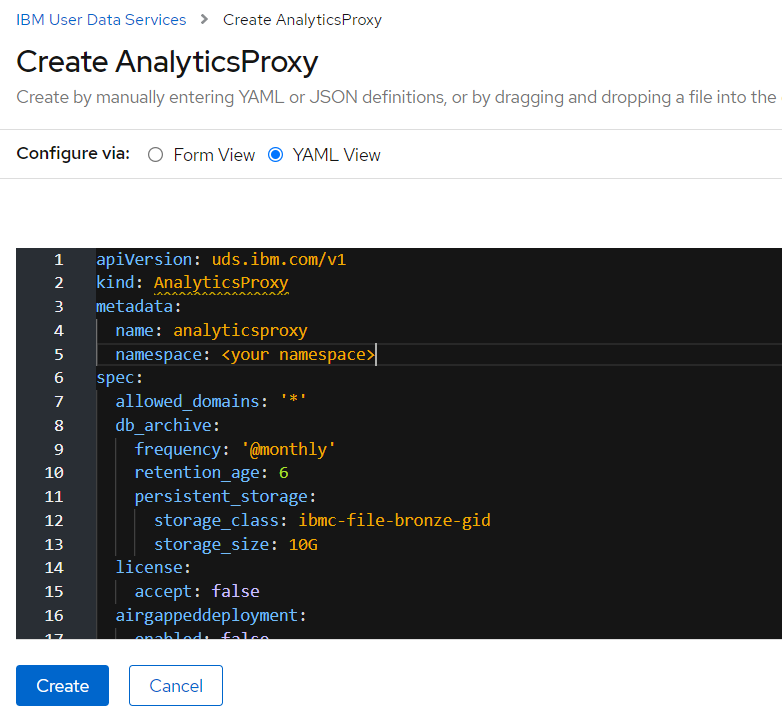
-
Click Create.
The deployment takes around 25 minutes. After that time, the deployment status changes to Ready.
By using the CLI
-
Log in to the cluster by using the oc login command.
-
Create a YAML file named
analyticsproxy.yamlwith the following definition:apiVersion: uds.ibm.com/v1 kind: AnalyticsProxy metadata: name: analyticsproxy namespace: ibm-common-services spec: license: accept: true db_archive: persistent_storage: storage_size: 10G kafka: storage_size: 5G zookeeper_storage_size: 5G zookeeper_tmpdirsizelimit: 10Mi entity_operator: topic_max_ram_percentage: 10 user_max_ram_percentage: 10 airgappeddeployment: enabled: false env_type: lite event_scheduler_frequency: '@hourly' storage_class: ibmc-block-bronze proxy_settings: http_proxy: '' https_proxy: '' no_proxy: '' ibmproxyurl: 'https://iaps.ibm.com' allowed_domains: '*' postgres: backup_frequency: '@daily' backup_type: incremental storage_size: 10G tls: airgap_host: '' uds_host: '' db_type: internal -
Create the analyticsproxy instance.
oc apply -f analyticsproxy.yaml -
Verify that the analyticsproxy instance is created.
oc get AnalyticsProxy.uds.ibm.com analyticsproxyThe deployment takes around 25 minutes. After that time, the deployment status changes to Ready.
-
To get the route for the User Data Services endpoint URL, go to Networking > Routes. Search for uds-endpoint to get the User Data Services endpoint URL.
Installing Analytics Proxy with Submodule custom resource
Learn how to install Analytics Proxy with Submodule.
Note: You need to create the entitled registry secret before creating an instance of AnalyticsProxyWithSubmodule custom resource. For more information, see Creating the entitled registry secret.
Note: Analytics Proxy with Submodule is not supported on Linux on Power (ppc64le).
By using the console
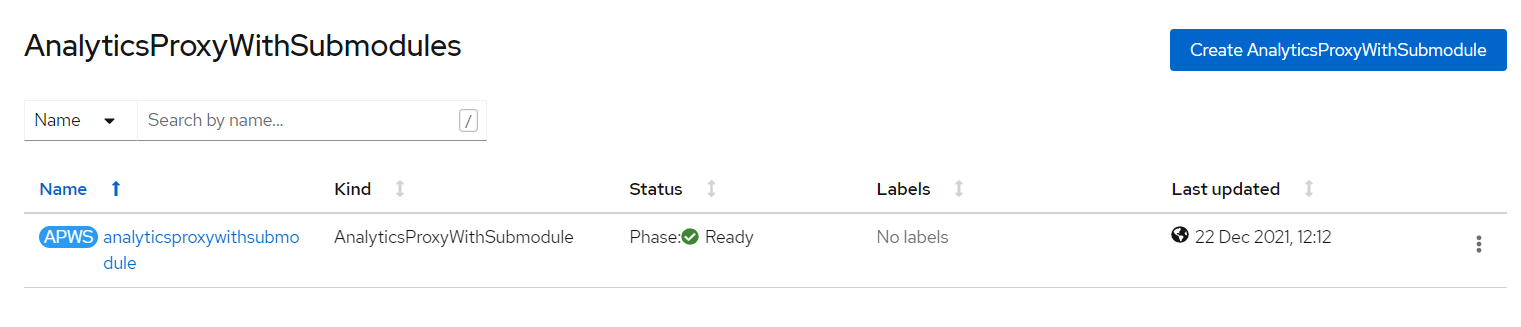
- From the navigation pane, click Operators > Installed Operators.
- Set the project to All Projects.
- Find and select IBM User Data Services.
- Click Create instance on the Analytics Proxy With Submodule Deployment tile.
-
Select YAML View and update the YAML definition. To view a list of the parameters that you can configure in the
specsection, see List of configurable parameters.Following is an example of the YAML snapshot.
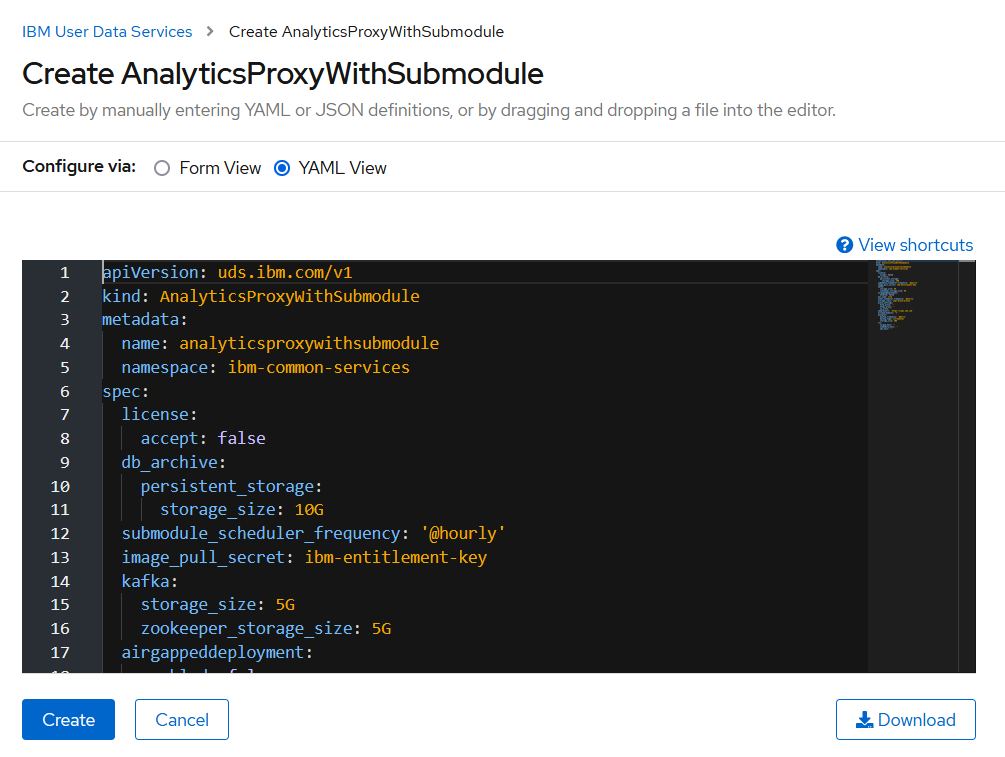
-
Click Create.
The deployment takes around 25 minutes. After that time, the deployment status changes to Ready.
By using the CLI
-
Log in to the cluster by using the oc login command.
-
Create a YAML file named
analyticsproxywithsubmodule.yamlwith the following definition:apiVersion: uds.ibm.com/v1 kind: AnalyticsProxyWithSubmodule metadata: name: analyticsproxywithsubmodule namespace: ibm-common-services spec: license: accept: true db_archive: persistent_storage: storage_size: 10G submodule_scheduler_frequency: '@hourly' image_pull_secret: ibm-entitlement-key kafka: storage_size: 5G zookeeper_storage_size: 5G zookeeper_tmpdirsizelimit: 10Mi entity_operator: topic_max_ram_percentage: 10 user_max_ram_percentage: 10 airgappeddeployment: enabled: false env_type: lite event_scheduler_frequency: '@hourly' storage_class: ibmc-block-bronze proxy_settings: http_proxy: '' https_proxy: '' no_proxy: '' ibmproxyurl: 'https://iaps.ibm.com' allowed_domains: '*' postgres: backup_frequency: '@daily' backup_type: incremental storage_size: 10G tls: airgap_host: '' submodule_host: '' uds_host: '' db_type: internal -
Create the analyticsproxywithsubmodule instance.
oc apply -f analyticsproxywithsubmodule.yaml -
Verify that the analyticsproxywithsubmodule instance is created.
oc get AnalyticsProxyWithSubmodule.uds.ibm.com analyticsproxieswithsubmodulesThe deployment takes around 25 minutes. After that time, the deployment status changes to Ready.
-
To get the route for the User Data Services endpoint URL, go to Networking > Routes. Search for uds-endpoint to get the User Data Services endpoint URL.
-
To get the route for the Submodule endpoint URL, go to Networking > Routes. Search for submodule-endpoint to get the Submodule endpoint URL.
List of configurable parameters
| Parameter | Description | Default Value |
|---|---|---|
license.accept |
Set this parameter to true to accept the license. You must accept the license agreement to deploy Analytics Proxy. For more information, see License Agreement. |
false |
ibmproxyurl |
The URL of IBM Proxy Service. | https://iaps.ibm.com |
storage_class |
Specify the storage class(block storage only) of ReadWriteOnce type. | No default value. Input required. |
postgres.size |
Specify the size of the storage to be attached to the Postgres database in Gigabytes. | 10G |
postgres.backup_frequency |
Frequency of job to take incremental database backup. | @daily |
postgres.backup_type |
Database backup type [ full/incremental ]. | incremental |
kafka.storage_size |
Specify the size of the storage to be attached to Kafka in Gigabytes. | 5G |
kafka.zookeeper_storage_size |
Specify the size of the storage to be attached to Zookeeper in Gigabytes. | 5G |
kafka.zookeeper_tmpdirsizelimit |
/tmp directory size limit for zookeeper pod |
10Mi |
kafka.entity_operator.topic_max_ram_percentage |
MaxRAMPercentage value of topic container of entityOperator pod | 10 |
kafka.entity_operator.user_max_ram_percentage |
MaxRAMPercentage value of user container of entityOperator pod | 10 |
airgappeddeployment.enabled |
Set the value to true to enable air-gapped setup. Otherwise, keep the default value. |
false |
event_scheduler_frequency |
Specify the frequency with which events are forwarded to proxy in Cron format. In case the internet connection is available on the cluster only during a certain time frame, specify time in UTC equivalent Cron format. | @hourly |
submodule_scheduler_frequency |
Specify the frequency of the Submodule Scheduler in Cron format. In case the internet connection is available on the cluster only during a certain time frame, specify time in UTC equivalent Cron format. | @hourly |
image_pull_secret |
Set the secret to pull container images from registry. | ibm-entitlement-key |
db_archive.persistent_storage.storage_size |
Specify the size of the storage to be attached for saving air-gapped files in Gigabytes. | 10G |
env_type |
Set the environment type to lite or prod. You can enable HA when you set the value to prod. |
lite |
allowed_domains |
Specify the domains, separated with comma, that are allowed by UDS. By default, all domains are allowed. | '*' |
tls.uds_host |
Specify the custom domain name for uds-endpoint if required. |
'' |
tls.submodule_host |
Specify the custom domain name for submodule-endpoint if required. |
'' |
tls.airgap_host |
Specify the custom domain name for airgap-endpoint if required. |
'' |
proxy_settings.https_proxy |
Https URL of the proxy server. Use only when configuring a proxy is required. | '' |
proxy_settings.http_proxy |
Http URL of the proxy server. Use only when configuring a proxy is required. | '' |
proxy_settings.no_proxy |
List of hosts that are reached directly, bypassing the proxy. Specify wildcard domain in the following format. Use comma as the delimiter. For example: localhost,.my.host.com,123.42.12.32. Use only when configuring a proxy is required. | '' |
db_type |
Type of database. Can be 'internal' (Crunchy Postgres), 'postgres/edb' (Enterprise DB-external, Postgres-external). | 'internal' |
Generating API Key
Learn how to generate api key.
Create Generate Key instance by using the console
Generate a Key for authenticating UDS endpoints.
- From the navigation pane, click Operators > Installed Operators.
- Set the project to All Projects.
- Find and select IBM User Data Services.
- Click Create instance on the Generate Key tile.
-
Select YAML View and update the YAML definition. Specify the value of the
nameparameter, and click Create.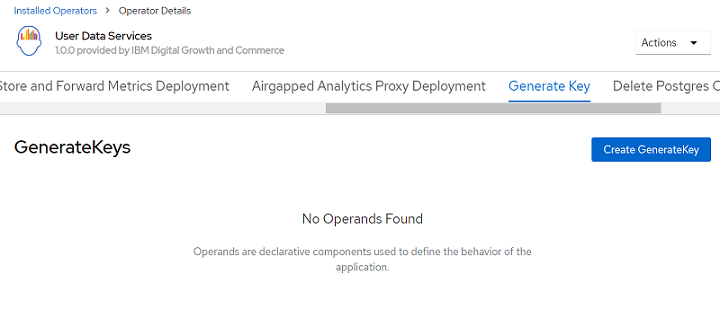
-
Change the
metadata.namevalue in the yaml, and then click Create.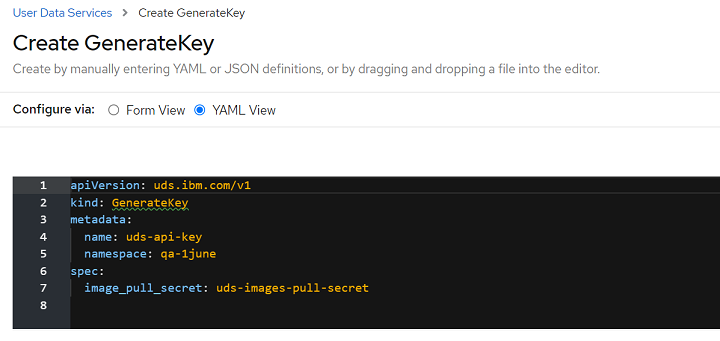
Create GenerateKey instance by using the CLI
-
Create a YAML file named
apikey.yamlwith the following definition:apiVersion: uds.ibm.com/v1 kind: GenerateKey metadata: name: uds-api-key namespace: ibm-common-services spec: image_pull_secret: ibm-entitlement-key -
Create the GenerateKey instance.
oc apply -f apikey.yaml -
Verify that the GenerateKey instance is created.
oc get GenerateKey.uds.ibm.com uds-api-key
Offline installation (airgap)
If you are installing UDS in an air-gapped environment, set the airgappeddeployment.enabled parameter value to true.
Note: You can download the data by using the Dockerized CLI which does not come out-of-box in air-gapped deployment.
Enable Http2 support for airgap service
To enable Http2 support for airgap service on OpenShift, execute following command.
oc -n openshift-ingress-operator annotate ingresscontrollers/default ingress.operator.openshift.io/default-enable-http2=true
Using the Dockerized client
To download the air-gapped Docker image on Bastion host, use the following command:
docker pull icr.io/cpopen/ibm-uds/dataexchange-cli:2.0.10
Obtaining the authentication token
Obtain the authentication token from your OpenShift console.
-
Navigate to User Management > Service Accounts > user-data-services-operator.
-
Click the user-data-services-operator.
-
Scroll down to the Secrets section and select the
user-data-services-operator-token-XXXXXsecret. -
Copy the value from token. Place it in a separate file on your machine with the name
token.
Creating the config.yaml with the token
Create the config.yaml file with the following contents:
address: hostname_of_service:port_of_service
insecure: false
token-path: /usr/local/app/token
Note: The token-path must have the prefix /usr/local/app/.
Commands
Following are the commands provided by the command-line tool.
Listing files
Run the following command to list files.
docker run -v "<drive_name>:<folder_created_on_host_machine>/":/usr/local/app icr.io/cpopen/ibm-uds/dataexchange-cli:2.0.10 list --config usr/local/app/config.yaml
For example:
docker run -v "D:/Airgap/":/usr/local/app icr.io/cpopen/ibm-uds/dataexchange-cli:2.0.10 list --config usr/local/app/config.yaml
Downloading files
Run the following command to download the files.
docker run -v "<drive_name>:<folder_created_on_host_machine>/":/usr/local/app icr.io/cpopen/ibm-uds/dataexchange-cli:2.0.10 download --file-name <filename_with_extension> -o usr/local/app/ --config usr/local/app/config.yaml
Generating backup
Run the following command to generate backup.
docker run -v "<drive_name>:<folder_created_on_host_machine>/":/usr/local/app icr.io/cpopen/ibm-uds/dataexchange-cli:2.0.10 backup --format csv --from-date 2020-01-01 --to-date 2021-01-01 --config usr/local/app/config.yaml --verbose
Using the Upload UI
The Upload UI is set up at the IBM network. Reach out to the Edge team for getting the required access.
Complete these steps to upload the file:
- Select the product.
- Click Add File to upload the file.
- Browse and select the file that you downloaded earlier.
- Click Upload to upload the file.
After the file successfully uploads, you see a message about it.