Configuring single sign-on using your product UI
From foundational services version 3.20 and later, you can configure single sign on (SSO) using SAML from your product UI.
Note: You can configure only one SAML connection.
You can configure the SAML connection by using any of the following methods:
- SAML with SCIM dependency
- SAML without any dependency
- SAML with LDAP dependency
Setting up the SAML connection
-
Log on to the console as an administrator.
-
From the navigation menu, click Administer > Identity and access.
-
Click Create Connection. Select SAML 2.0 as protocol type and click Next. The New SAML Connection page is displayed.
-
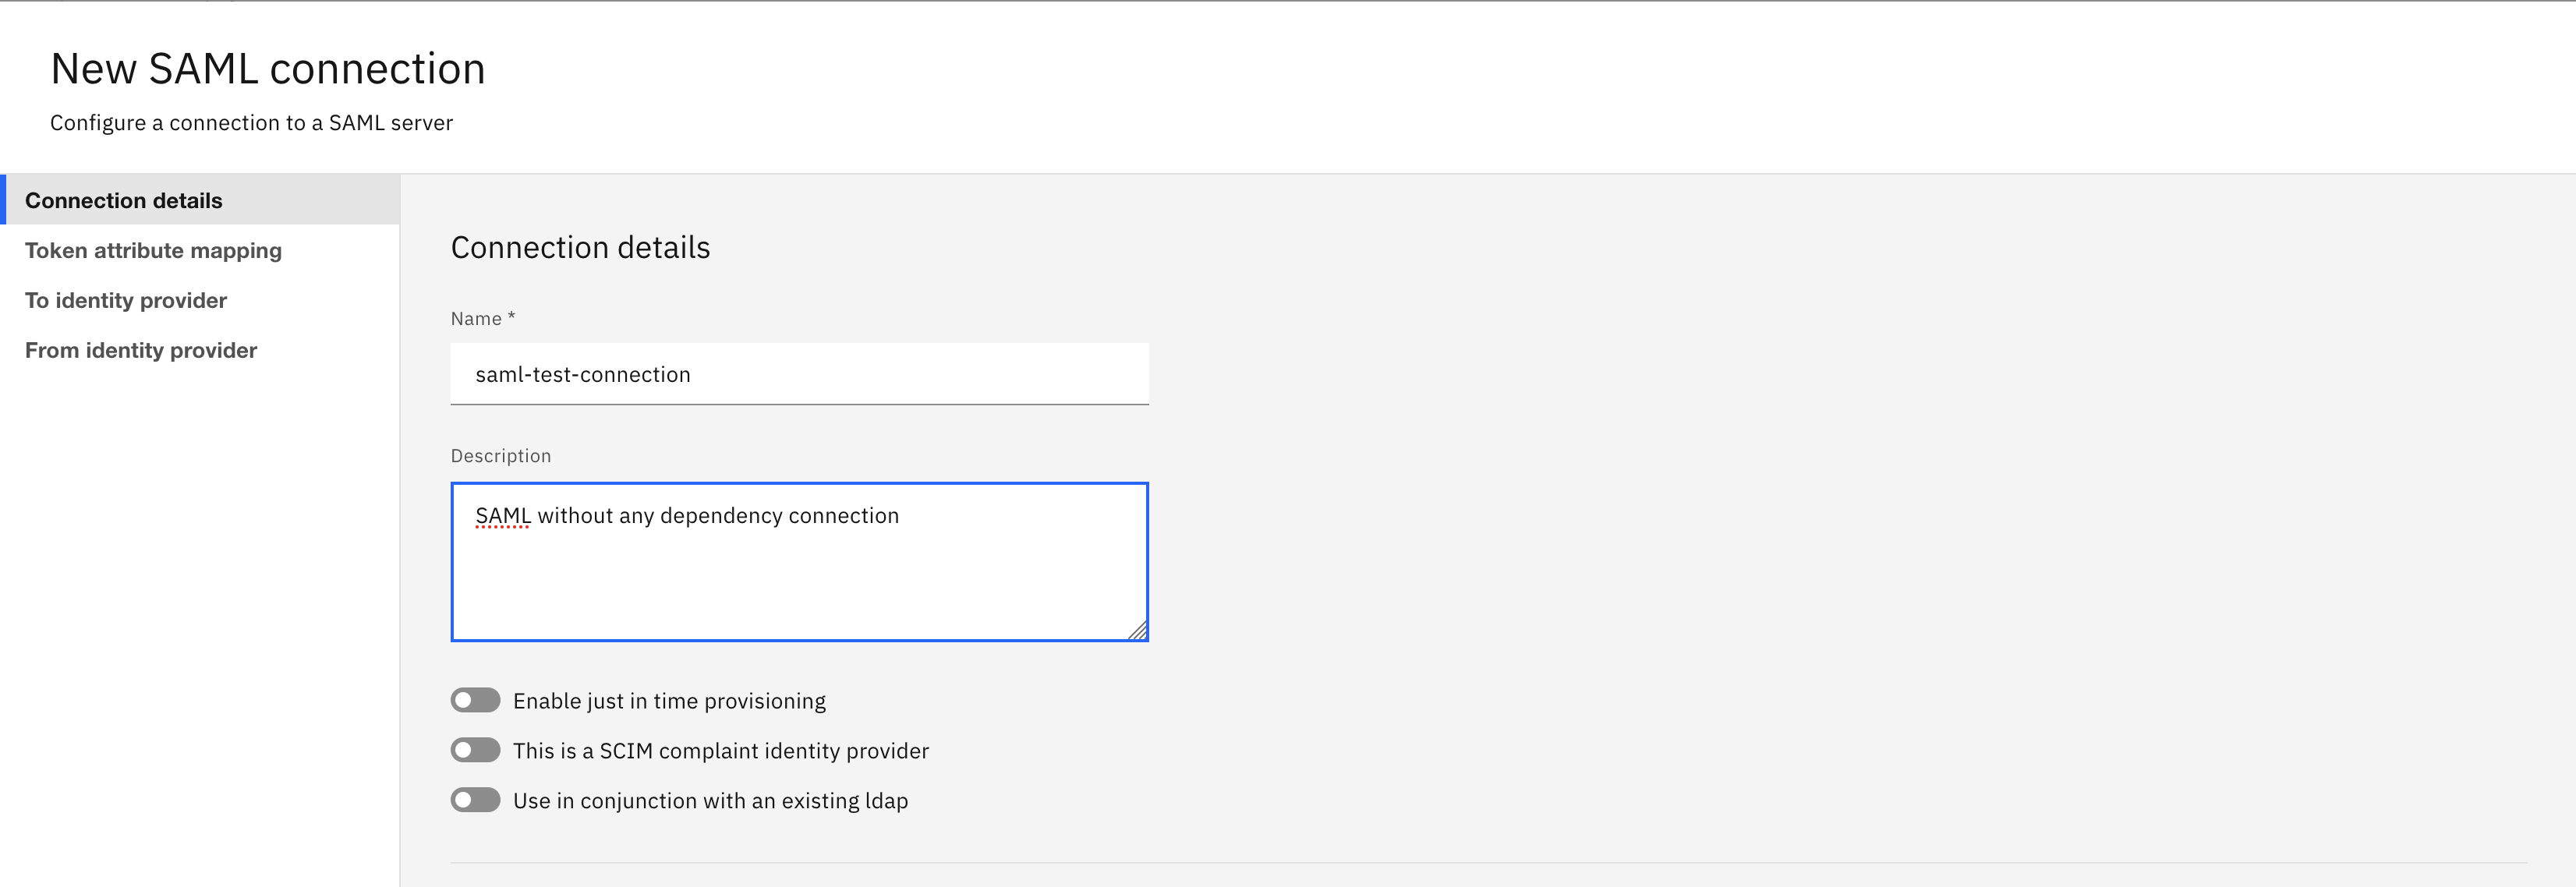
In the New SAML Connection page, select the Connection details tab. It contains the following options that you are required to fill:
-
Name: A name for the SAML connection. -
Description: Description of the SAML connection.
-
-
Choose the type of SAML that you want to configure:
- For the SAML without dependency, do not change the toggle options. By default, these toggle options are disabled.
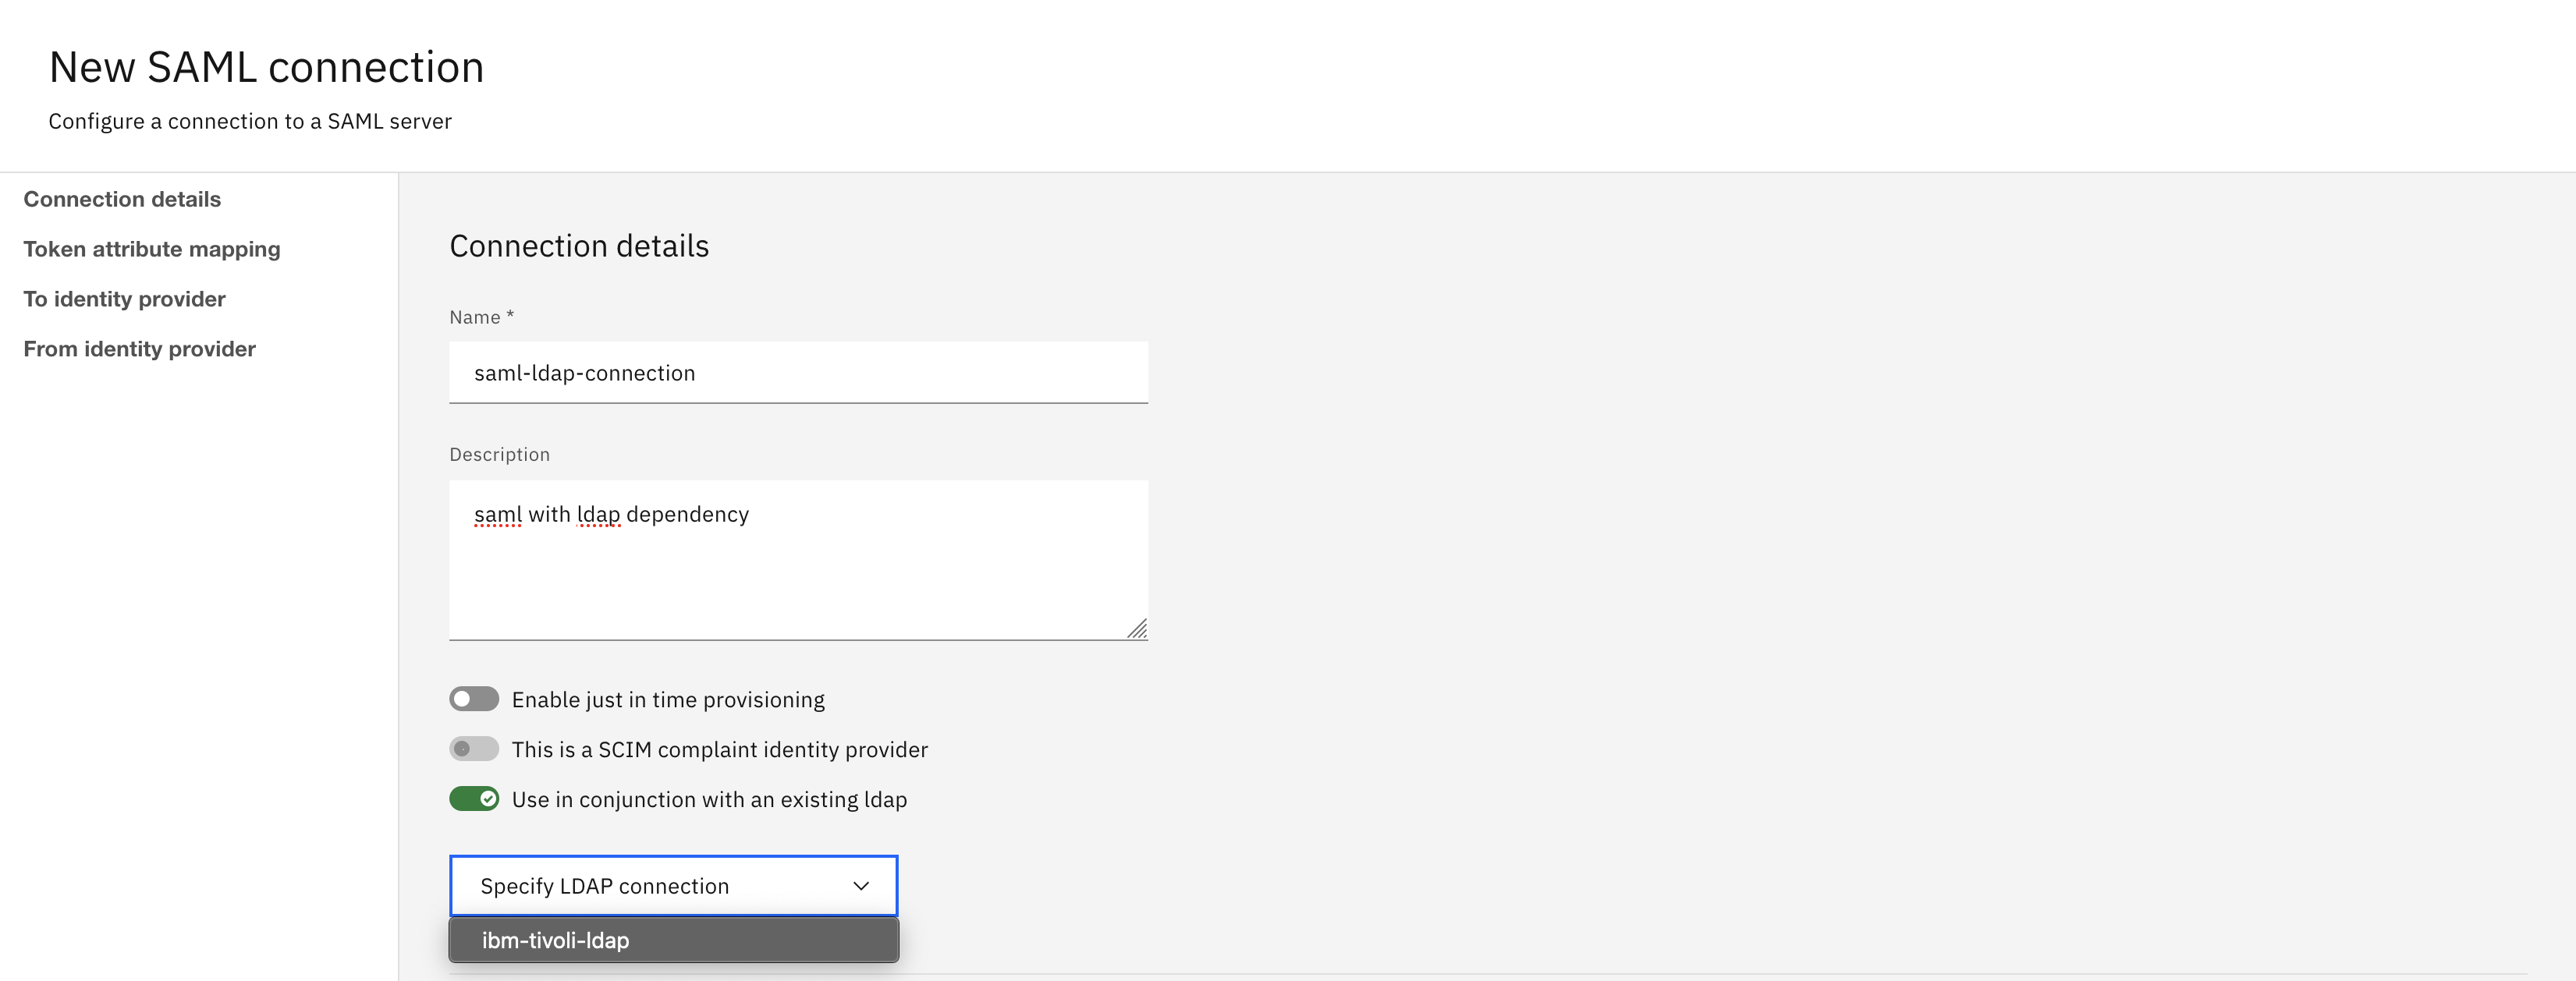
- For SAML with LDAP dependency, enable Use in conjunction with an existing ldap toggle option. From the Specify LDAP Connection drop-down list, choose the existing LDAP to integrate.
Note: You must configure the LDAP connection before configuring the SAML with LDAP dependency.
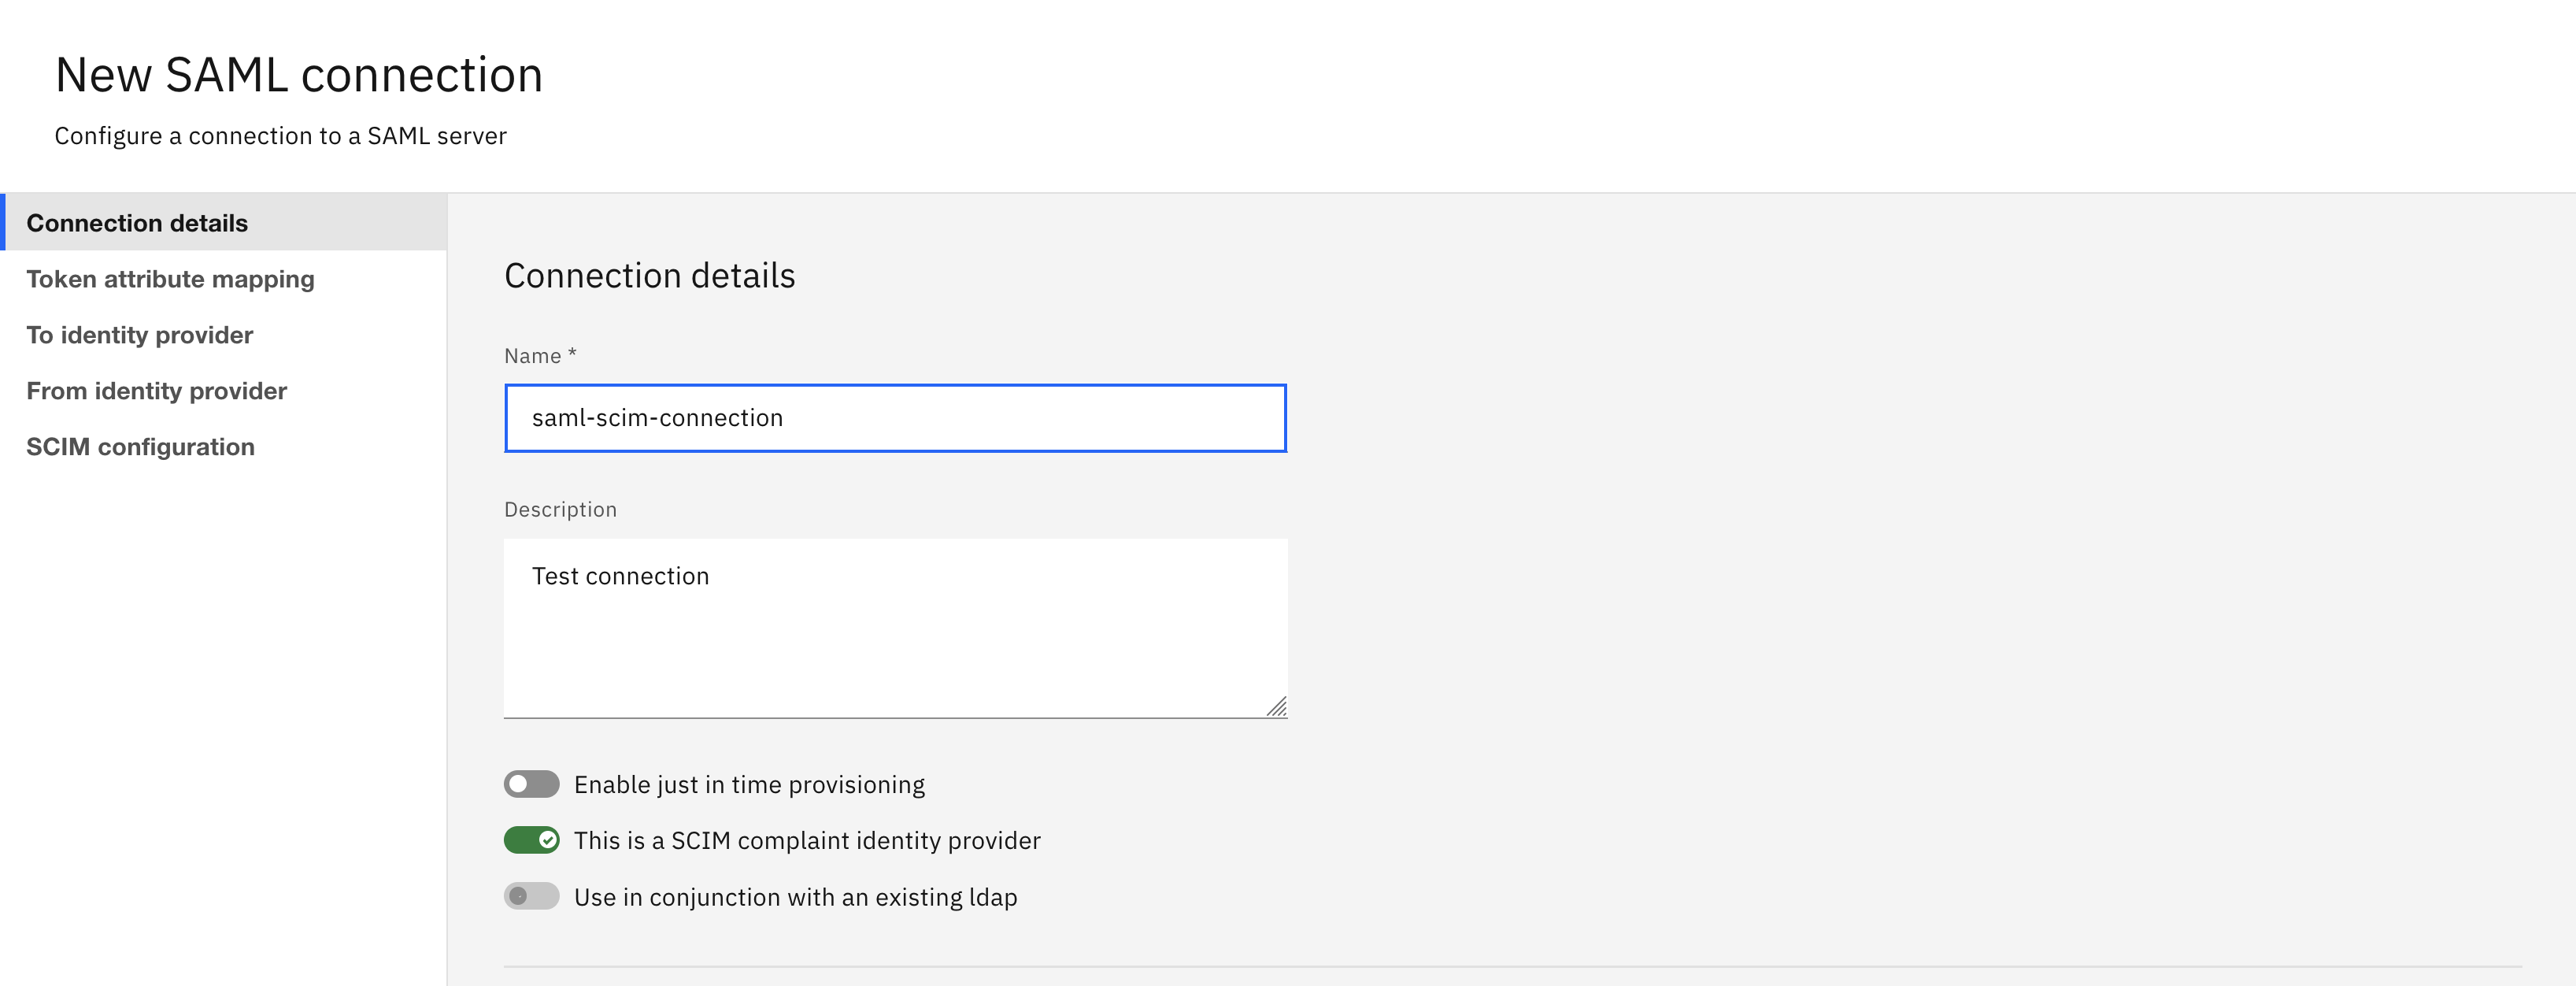
- For SAML with SCIM dependency, enable This is a SCIM compliant identity provider toggle option.
-
Select the Token attribute mapping tab. It contains the following options that you are required to fill:
SubjectGiven nameFamily nameGroupsEmail
Note:
-
By default, the Token attribute mapping values are pre-defined if you do not specify the mapping. It is recommended to modify the default values according to the SAML claim. The following default values are displayed if you do not specify the mapping values:
Subject: uidGiven name: firstNameFamily name: lastNameGroups: blueGroupsEmail: emailAddress
-
The
uniqueSecurityNameoption is not supported from the product UI. If theuniqueSecurityNameis required in Token attribute mapping, see Different schema elements for IdP V3.
-
Select To identity provider tab. Click Download metadata link to download the SAML 2.0 metadata. Once you download the metadata, you can upload that metadata to your identity provider to generate identity provider metadata.
-
Select From identity provider tab. Upload the identity provider metadata in
*.xmlfile that is supplied by your identity provider. -
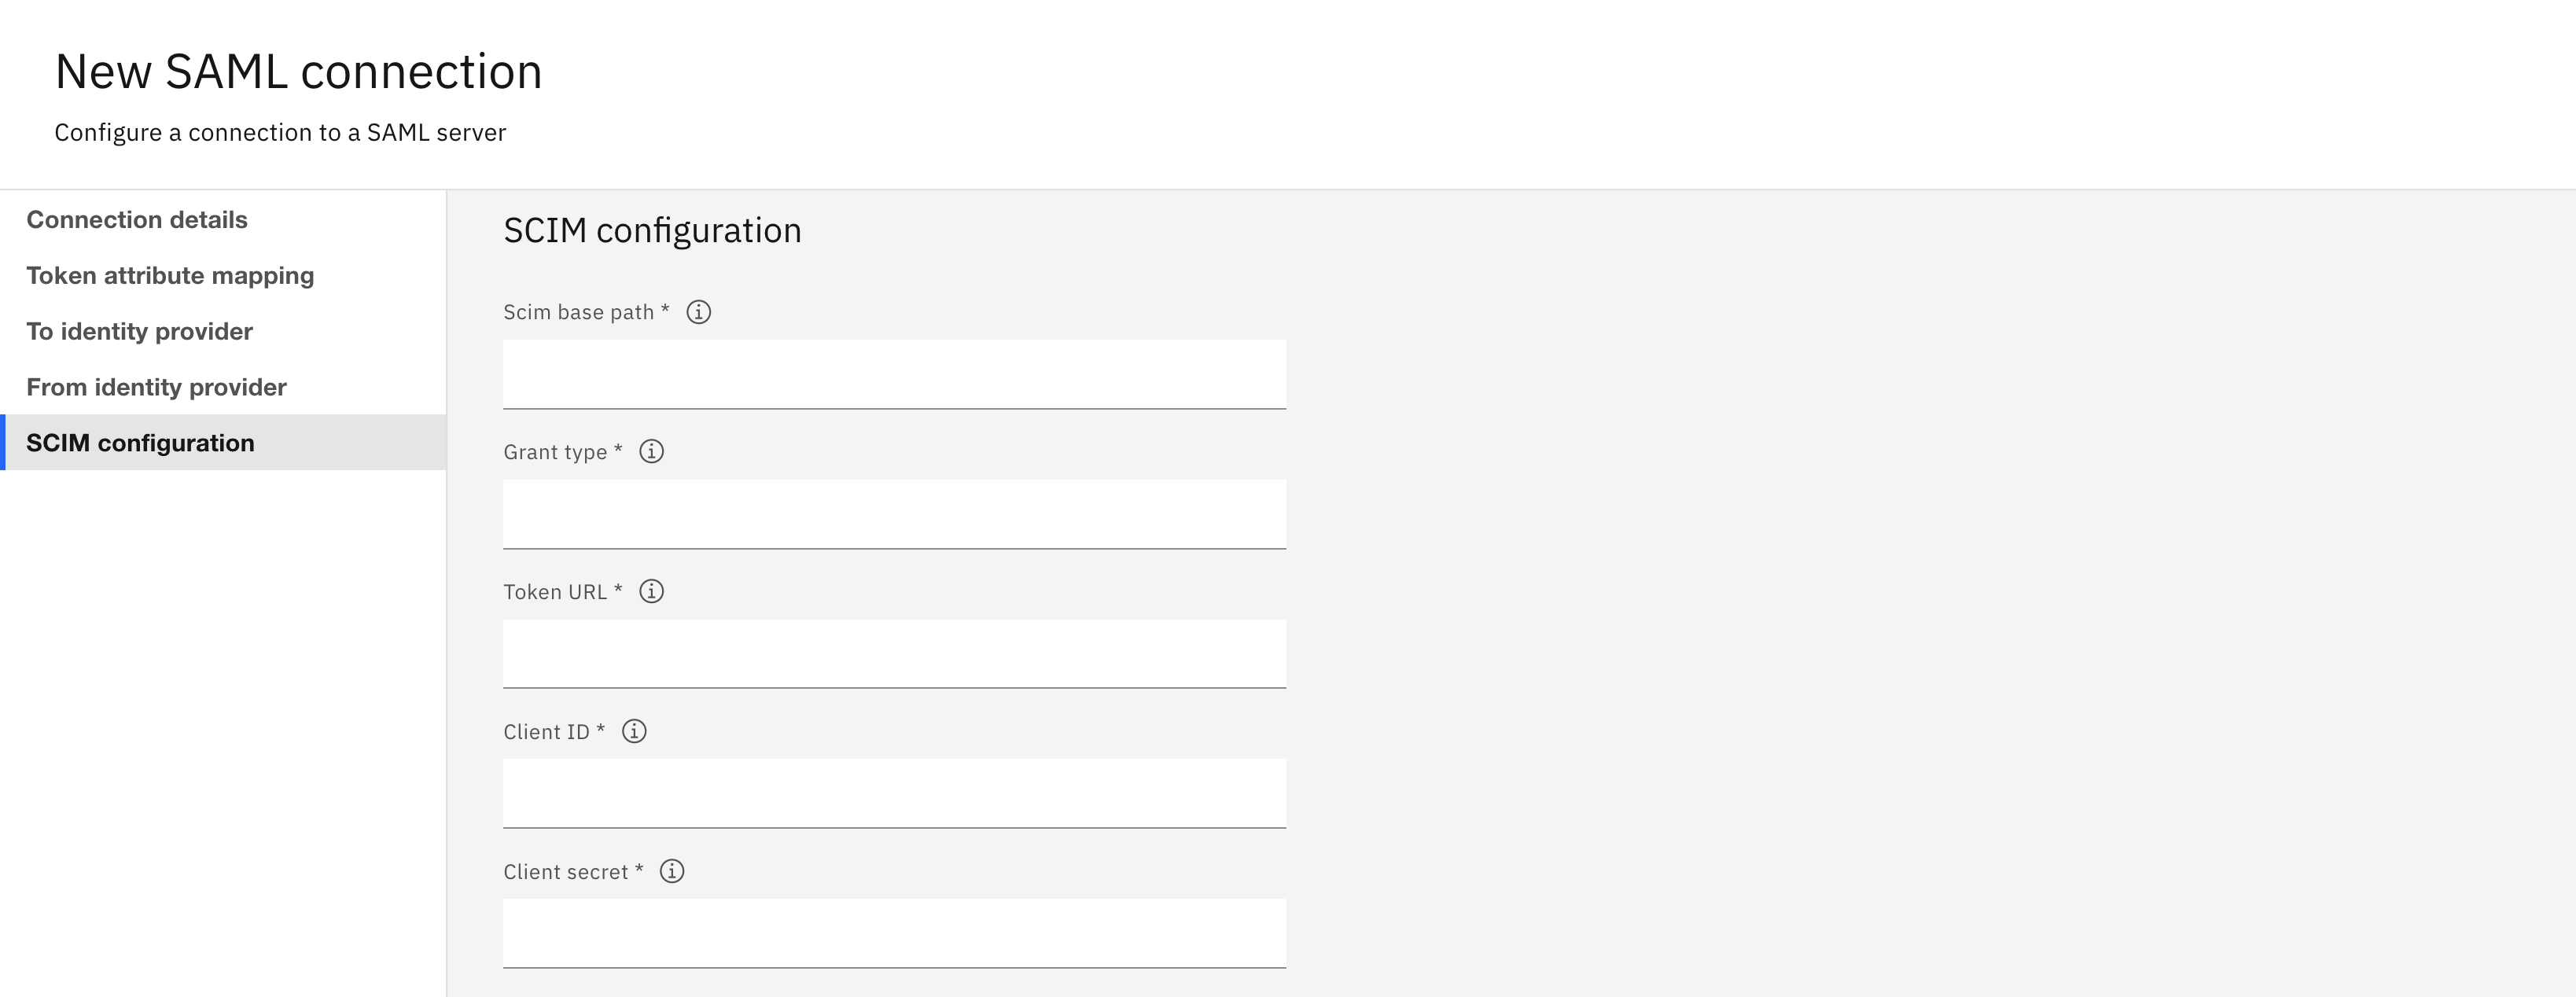
The SCIM configuration tab is enabled when you choose to configure SAML with SCIM dependency. It contains the following fields:
Scim base path: It is required for uniquely identifying the service instance.Grant type: It identifies the token generation flow.Token URL: It is the token endpoint of the IdP. It is used to request the token.Client ID: It is used for the client credentials flow.Client Secret: It is used for the client credentials flow.
Also, you need to configure the SCIM attribute mapping for the
userandgroupresources. By default, these fields are pre-defined as theprincipalNamein bothuserandgroupattributes. It is recommended to modify the values based on the SCIM IdP configuration.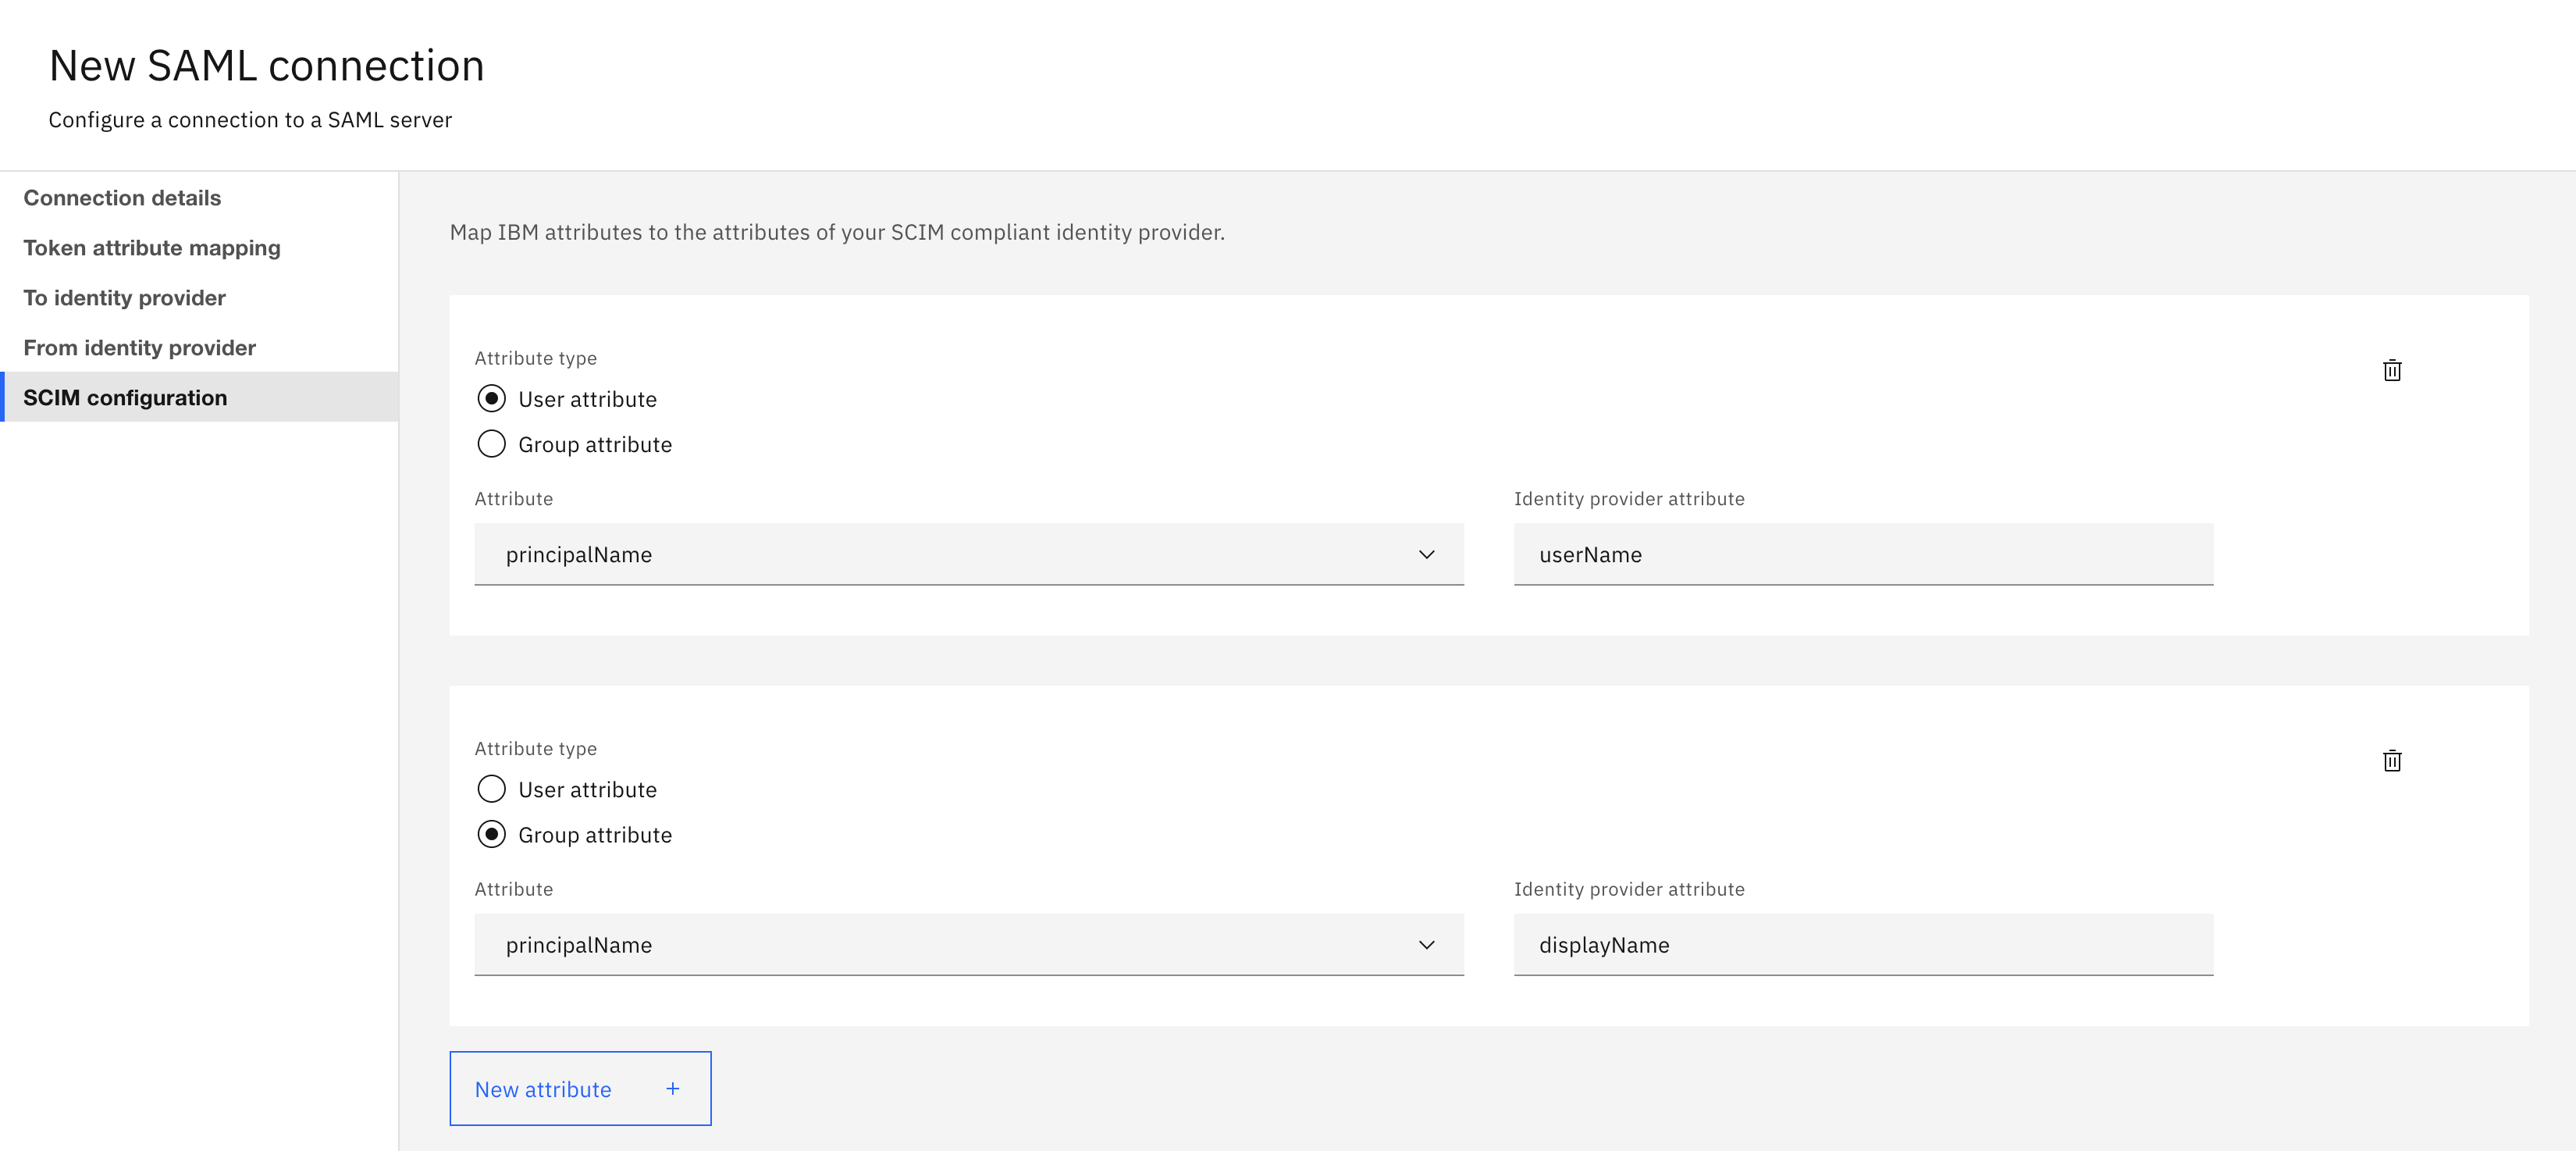
-
Click Create.