Question & Answer
Question
What guidelines are available to install IBM Rational ClearCase Remote Client (CCRC) for Eclipse in Eclipse 3.4 with Equinox Update / Installer (P2)?
Answer
This document provides a walk through of installing Rational ClearCase Remote Client 7.0.1 into an Eclipse 3.4 shell.
Overview:
- This example uses Eclipse 3.4 SDK.
- Eclipse as of build I20080305 (shortly before Eclipse 3.4/Ganymede M6 ), the Eclipse SDK contains a new provisioning system called Equinox p2.
- p2 replaces Update Manager as a mechanism for managing:
- The Eclipse install,
- Searching for updates, and
- Installing new functionality.
CCRC for Eclipse Installation in an Eclipse shell
Note: Refer to the CCRC 7.0.1 client update site to obtain CCRC updates.
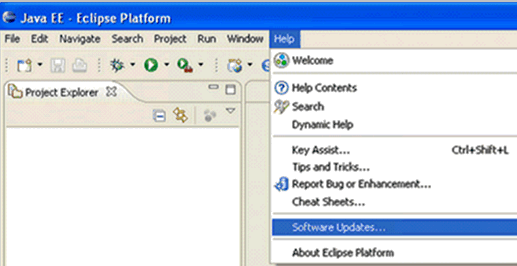
- To install a plug-in for Eclipse, open the workspace - Java EE - Eclipse Platform > go to Help > Software Updates…
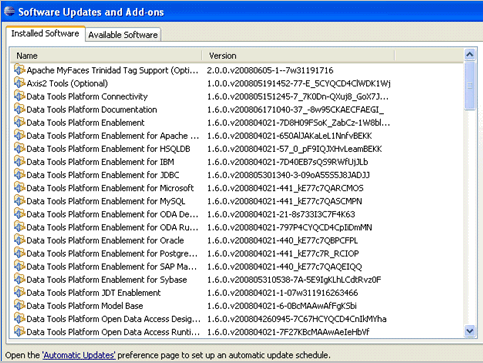
- The Software Updates and Add-ons has two tabs for Installed Software and Available Software, which contain Eclipse components and plug-ins already present and components that can be updated, respectively.
Note: The updater serves as the installer also.
- To install new software, select Available Software:
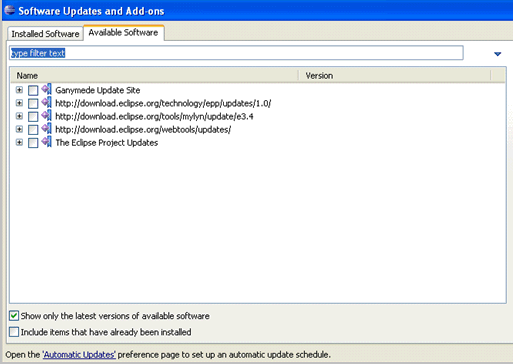
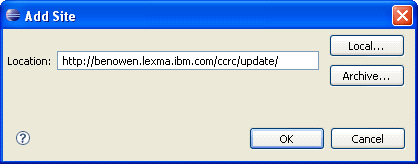
- If you do not see an update/install site in the list, you must add a new site using Add Site…, and enter the location of the plugin that you want to install, such as http://myhost.xyz.com/ccrc/update/ :
- After adding the site, it will expand, the p2 updater will automatically try to resolve any dependencies, then several more child items will be listed.
The p2 updater will also traverse the plugins definition for updates, which means that the remote client looks to the IBM.com Web site to automatically update itself.
The Red outline highlights the options you can specify to install a version from the update site.
The Green outline marks that the p2 updater has queried the IBM.com path (http://www3.software.ibm.com/ibmdl/pub/software/rationalsdp/clearcase/ccrc/701/update/) to see if a more recent version of the software is available.
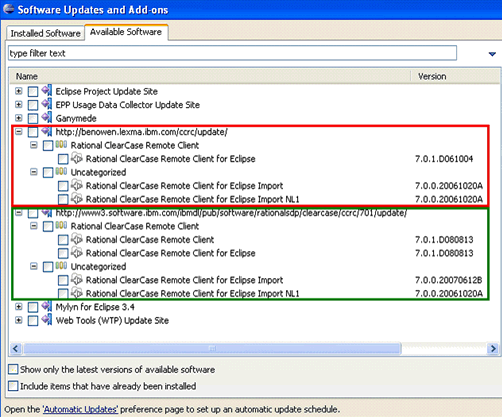
TIP: To view and install the most current version of the software, you can toggle, Show only the latest versions of available software, which narrows down the displayed choices. If you want to see the older version, this is dependent on your Eclipse configuration.

- IMPORTANT NOTE:
When installing into an existing Eclipse shell, you must select the proper client to install. For Eclipse users, this option is always ClearCase Remote Client for Eclipse:

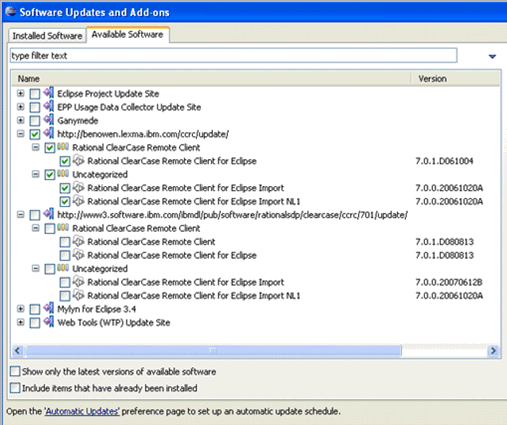
- Clicking Install. . . will open Unsupported Install dialogue with this message:
! A feature that you have selected uses install procedures that are not
compatible with the current installation support. This feature can only be
installed by the older Update Manager. Do you want to launch the older
Update Manager?
[Launch. . .] [Cancel]
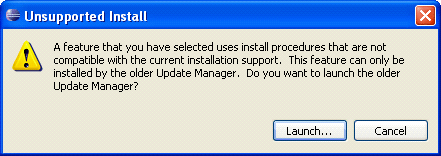
- Launch the previous Update Manager (as used in Eclipse 3.3 and earlier), and enter the update site information again.
IMPORTANT NOTE: From this section of the document onward, the screen captures show the required steps in the old Update Manager for installing a plugin. They are inserted here to illustrate the complete start to end experience.
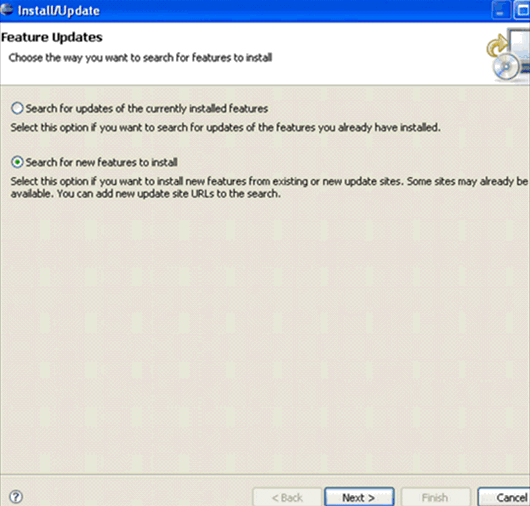
- Ensure that the desired update site is not already present, which is the same as previous, so the update site must be added manually using New Remote Site. . .
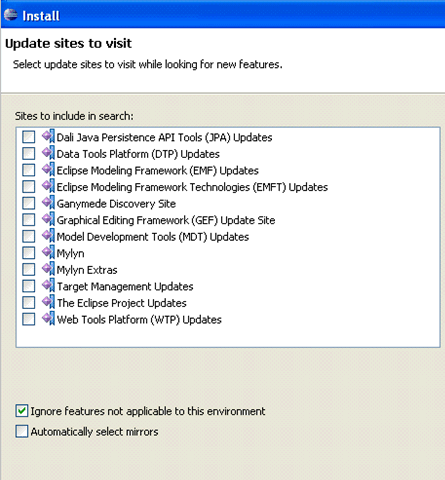
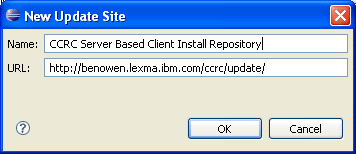
- Enter the location of the plugin that you want to install, such as http://myhost.xyz.com/ccrc/update/ , click OK to continue:
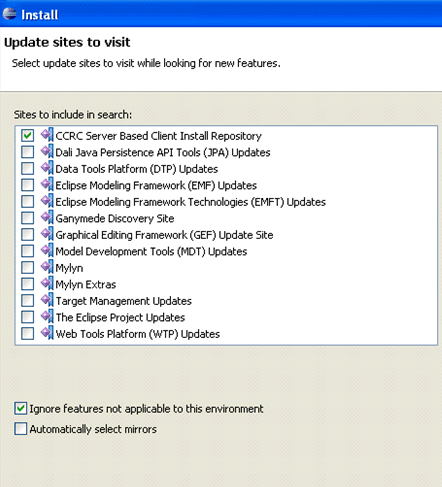
- It automatically selects the remote site that was specified, click Finish:
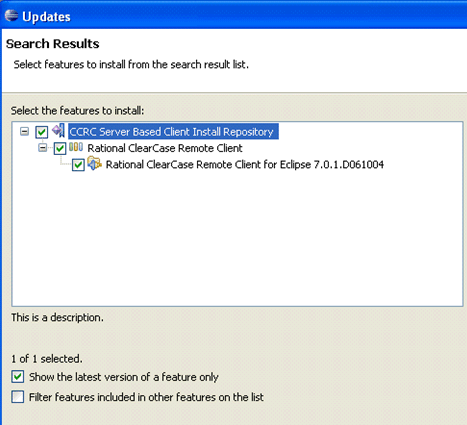
- Ensure that the client to install is Rational ClearCase Remote Client for Eclipse, like in this example, Rational ClearCase Remote Client for Eclipse 7.0.1.D061004:
- Select the radio option for I accept the terms in the license agreement, click Next
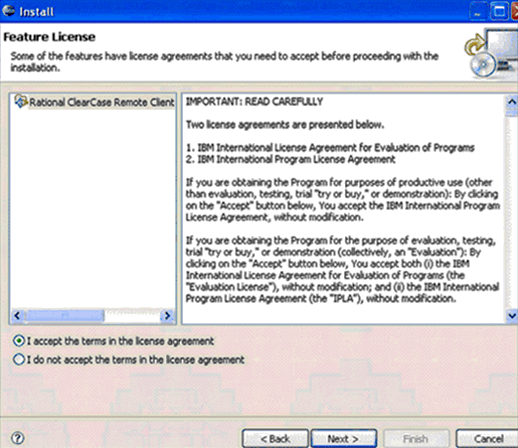
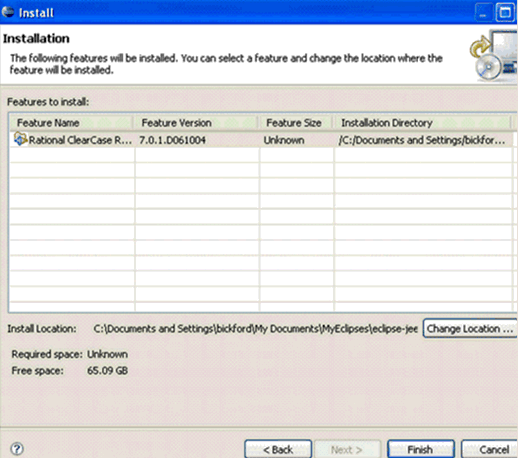
- Accept the default for Installation Location, this will be the location of where the Eclipse SDK is being launched from (such as C:\Eclipse or /opt/Eclipse)
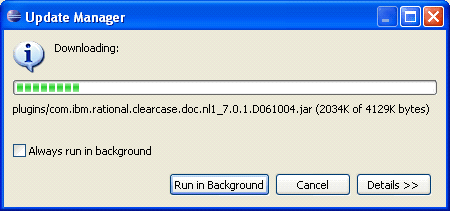
- You can dismiss the new Eclipse 3.4 update install window as it is not needed. In some instances, this 3.4 update window - that you originally started with - can obscure the update manager progress window (as shown here):
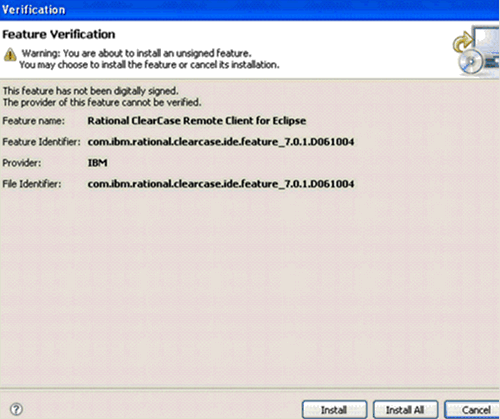
- Click Install All:
- You are prompted to Restart the workspace, this must always be done to ensure proper installation and initialization of the plug-in, for this reason, you need to click Yes, rather than Apply Changes:

[{"Product":{"code":"SSSH27","label":"Rational ClearCase"},"Business Unit":{"code":"BU053","label":"Cloud & Data Platform"},"Component":"ClearCase Remote Client","Platform":[{"code":"PF016","label":"Linux"},{"code":"PF033","label":"Windows"}],"Version":"7.0.1","Edition":"","Line of Business":{"code":"LOB45","label":"Automation"}}]
Was this topic helpful?
Document Information
Modified date:
16 June 2018
UID
swg21327758